Last Updated on November 26, 2025 by teamobn
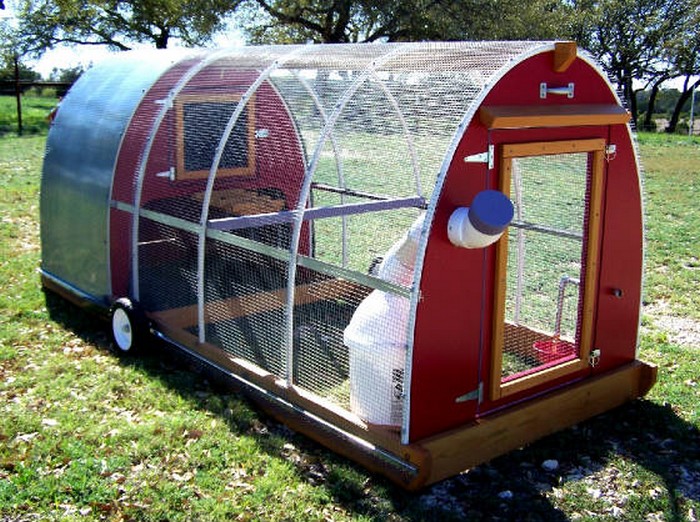
A DIY chicken tractor is a lightweight, mobile chicken coop that lets your hens graze on fresh grass while staying safe from predators.
This guide shows you how to build a 4×8 foot chicken tractor using basic lumber and electrical conduit. It’s ideal for:
- 4–6 standard laying hens (or up to 8 bantams)
- Small to medium backyards
- Owners who want daily fresh forage without a permanent coop
Contents
- 1 At a Glance: DIY Chicken Tractor Specs
- 2 What Is a Chicken Tractor?
- 3 Is a DIY Chicken Tractor Right for Your Backyard?
- 4 How Big Should a Chicken Tractor Be?
- 5 Building a DIY Chicken Tractor
- 5.1 What Are the Materials Needed to Build a DIY Chicken Tractor?
- 5.2 What Are the Tools Needed to Build a DIY Chicken Tractor?
- 5.3 How to Build Your Own DIY Chicken Tractor (Step-by-Step)
- 5.3.1 Step 1: Design Your Chicken Tractor
- 5.3.2 Step 2: Build the Wooden Base Frame
- 5.3.3 Step 3: Create the Hoop Structure
- 5.3.4 Step 4: Attach the Wire Mesh
- 5.3.5 Step 5: Add a Secure Door
- 5.3.6 Step 6: Create the Roof Panel
- 5.3.7 Step 7: Paint and Weatherproof
- 5.3.8 Step 8: Attach Wheels (Optional but Recommended)
- 5.3.9 Step 9: Secure Poultry Netting for Small Birds
- 5.3.10 Step 10: Final Safety Check and Finishing Touches
- 6 How Often Should You Move a Chicken Tractor?
- 7 Hatch Your Dream Coop!
At a Glance: DIY Chicken Tractor Specs
- Estimated build time: 4–6 hours for a beginner with basic tools
- Estimated cost: approximately $150–$250 (depending on local prices)
- Difficulty: Easy–Intermediate
- Key features: Lightweight frame, predator-resistant wire, optional wheels for daily moves
Backyard chickens can be accommodated in various housing setups, each with its unique set of pros and cons. If you’re just starting out, brush up on the chicken care essentials for new owners so your setup choices match your climate, flock size, and budget.
For those currently raising chickens or considering it, a chicken tractor could be the optimal choice, especially when dealing with limited backyard space. Follow the 10 steps below to build a sturdy, low-cost chicken tractor you can move around your yard with ease.
What Is a Chicken Tractor?
A chicken tractor is a mobile chicken coop without a fixed floor that you move regularly over grass or pasture.
Your chickens stay protected from predators while:
- Grazing on fresh grass
- Eating insects and weed seeds
- Fertilizing your lawn or garden as they go
Unlike a fixed coop, a chicken tractor:
- Reduces muddy, smelly spots
- Spreads manure evenly
- Is easier to clean and move
If your backyard is small or you don’t want a permanent structure, a chicken tractor is often the best option.
If you’re leaning toward a fixed structure with more headroom and easier daily access, consider a walk-in chicken coop for stationary setup.
Is a DIY Chicken Tractor Right for Your Backyard?
A DIY chicken tractor is a great fit if:
- You have limited backyard space
- You want to avoid a permanent, heavy structure
- You prefer low-cost, DIY solutions
- You like the idea of rotating your flock over fresh grass
A fixed walk-in chicken coop is better if you:
- Need lots of headroom and storage
- Expect harsh winters and want a well-insulated house
- Have a large flock that needs a bigger permanent structure
For a more stationary setup, you might consider a walk-in chicken coop, but for flexibility, fresh forage, and easy cleaning, a chicken tractor is hard to beat.
How Big Should a Chicken Tractor Be?
The size of your chicken tractor should match both:
- Your backyard space, and
- The number of chickens you plan to keep
Guidelines for this design:
- Tractor size in this plan: 4×8 feet = 32 square feet
- Best for: 4–6 standard hens (about 4–8 sq ft per bird when moved daily)
- For more birds: extend the length in 2-foot sections (for example, 4×10 or 4×12 feet)
If your backyard is small, keep it compact. If you have more land, you can safely go larger while still keeping the tractor light enough to move.
Key Design Principles for This DIY Chicken Tractor
When planning your DIY chicken tractor, focus on:
- A solid base
- Keeps the structure square, stable, and durable.
- Use a level surface and sturdy lumber.
- A strong, lightweight frame
- This design uses 2×3 studs and 3/4-inch electrical conduit for a hoop structure that’s strong yet easy to move.
- Predator protection and ventilation
- Welded wire and hardware cloth keep predators out while letting your birds enjoy sunshine and airflow.
- Easy movement
- Optional wheels or handles make daily moves quick and manageable.
- Weather protection
- A small plywood roof panel gives shade and shelter from rain and hot sun.

Building a DIY Chicken Tractor
In this guide, you’ll build a simple hoop-and-frame chicken tractor using inexpensive, lightweight materials. It’s perfect for backyard chicken keepers who want mobility, fresh forage, and easy cleaning without a permanent coop.
Gather your materials and tools, then follow the 10 steps.
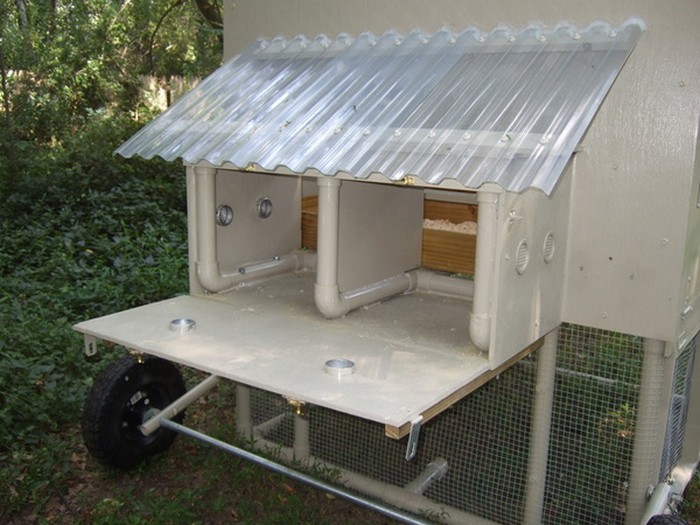
When selecting materials, weight and ease of handling matter just as much as durability. If you want a frame that’s easy to move daily without sacrificing stability, consider PVC as a primary structural component.
For inspiration, this PVC chicken tractor for lightweight construction showcases how simple conduit and fittings can create a sturdy, portable build that’s budget-friendly and beginner-friendly.
What Are the Materials Needed to Build a DIY Chicken Tractor?
- 4 2 x 3 x 8 Foot Studs
- 3 pieces 3/4×10-foot Schedule 40 electrical conduit
- 1 Roll 14 Gauge Welded Wire
- 1 small roll hardware cloth (½-inch recommended)
- 1 roll poultry netting (for small birds, optional)
- 1 box U-nails (staples)
- 2 Tee-Hinges
- 1 pack heavy-duty zip ties (around 75 lb rating)
- 1 barrel bolt (door latch)
- 1 piece 3/4×2 ft×4 ft pine plywood panel (for roof)
- Exterior Paint
- Wood Screws
What Are the Tools Needed to Build a DIY Chicken Tractor?
- Cordless Drill
- Square
- Jigsaw
- Measuring tape
- Pencil
- Safety gear (gloves, safety glasses)
Click on any image to start the lightbox display. Use your Esc key to close the lightbox. ![]()

How to Build Your Own DIY Chicken Tractor (Step-by-Step)
Here are the steps for making a DIY chicken tractor:
Step 1: Design Your Chicken Tractor
- Decide where the tractor will sit and how often you’ll move it.
- For most backyards, a 4×8 foot tractor is ideal.
- Plan for 4–6 hens of this size, moving them once per day for fresh grass.
- Mark out a level area in your yard where you’ll build or assemble it.
Step 2: Build the Wooden Base Frame
- Cut your 2×3×8 studs to create a rectangular base:
- Two 8-foot pieces for the long sides
- Two 4-foot pieces for the short sides
- Arrange the pieces in a rectangle (4×8 feet).
- Use wood screws to secure the corners, checking with a square to keep everything straight.
- This base is the foundation of your tractor; make sure it’s sturdy and level.
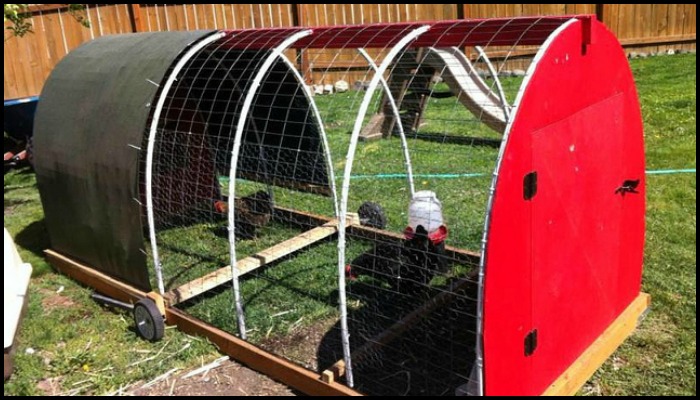
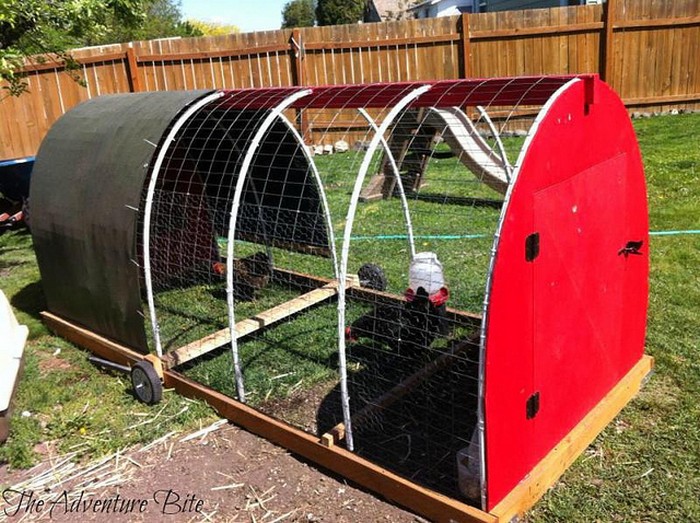
Step 3: Create the Hoop Structure
- Take the 3/4×10-foot Schedule 40 electrical conduit pieces. Carefully bend each piece into an arch (hoop). Attach each end of a conduit hoop to the long sides of the frame:
- Space the hoops evenly along the 8-foot length.
- You may drill pilot holes in the wood and use screws or clamps to secure the conduit.
- When done, you’ll have a simple hoop house shape over your base frame.
Step 4: Attach the Wire Mesh
- Cover the sides and top of the hoop structure with 14-gauge welded wire.
- Pull the wire tight and fasten it to both the wooden base and conduit hoops using U-nails and/or zip ties.
- Make sure there are no large gaps where predators could squeeze through.
- For extra safety, use ½-inch hardware cloth on the lower 24 inches around the tractor.
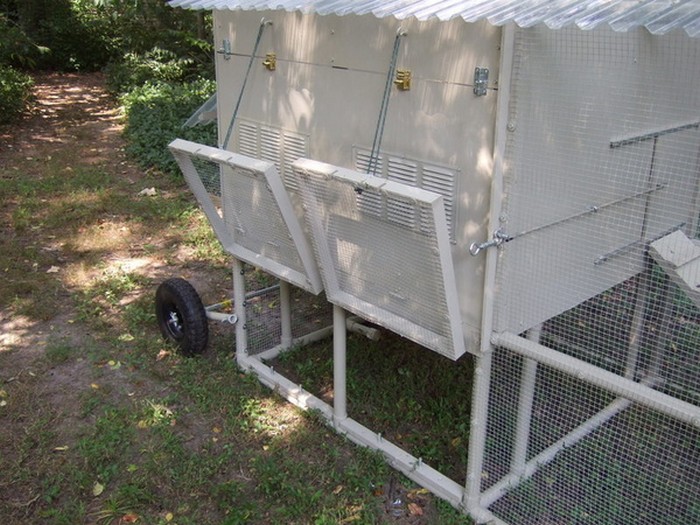
Step 5: Add a Secure Door
- Choose one of the shorter 4-foot sides as your door end.
- Cut an opening in the wire large enough for you to reach inside comfortably.
- Build a simple rectangular wooden door frame using scrap 2×3s or similar lumber.
- Attach hardware cloth to the door frame for security.
- Hang the door on the tractor frame using tee-hinges.
- Install a barrel bolt or similar latch so the door closes tightly and cannot be nudged open by predators.
Step 6: Create the Roof Panel
- Cut the 3/4×2 ft×4 ft pine plywood panel to fit securely across the top of the tractor:
- Position it to give your chickens shade and rain protection, usually over the door end.
- Attach the plywood to the frame using wood screws.
- You can slightly overhang it on one side for extra shelter if desired.
Step 7: Paint and Weatherproof
- Paint the exterior of the chicken tractor with exterior paint to protect it from the elements.
- Give it enough time for the paint to dry completely.
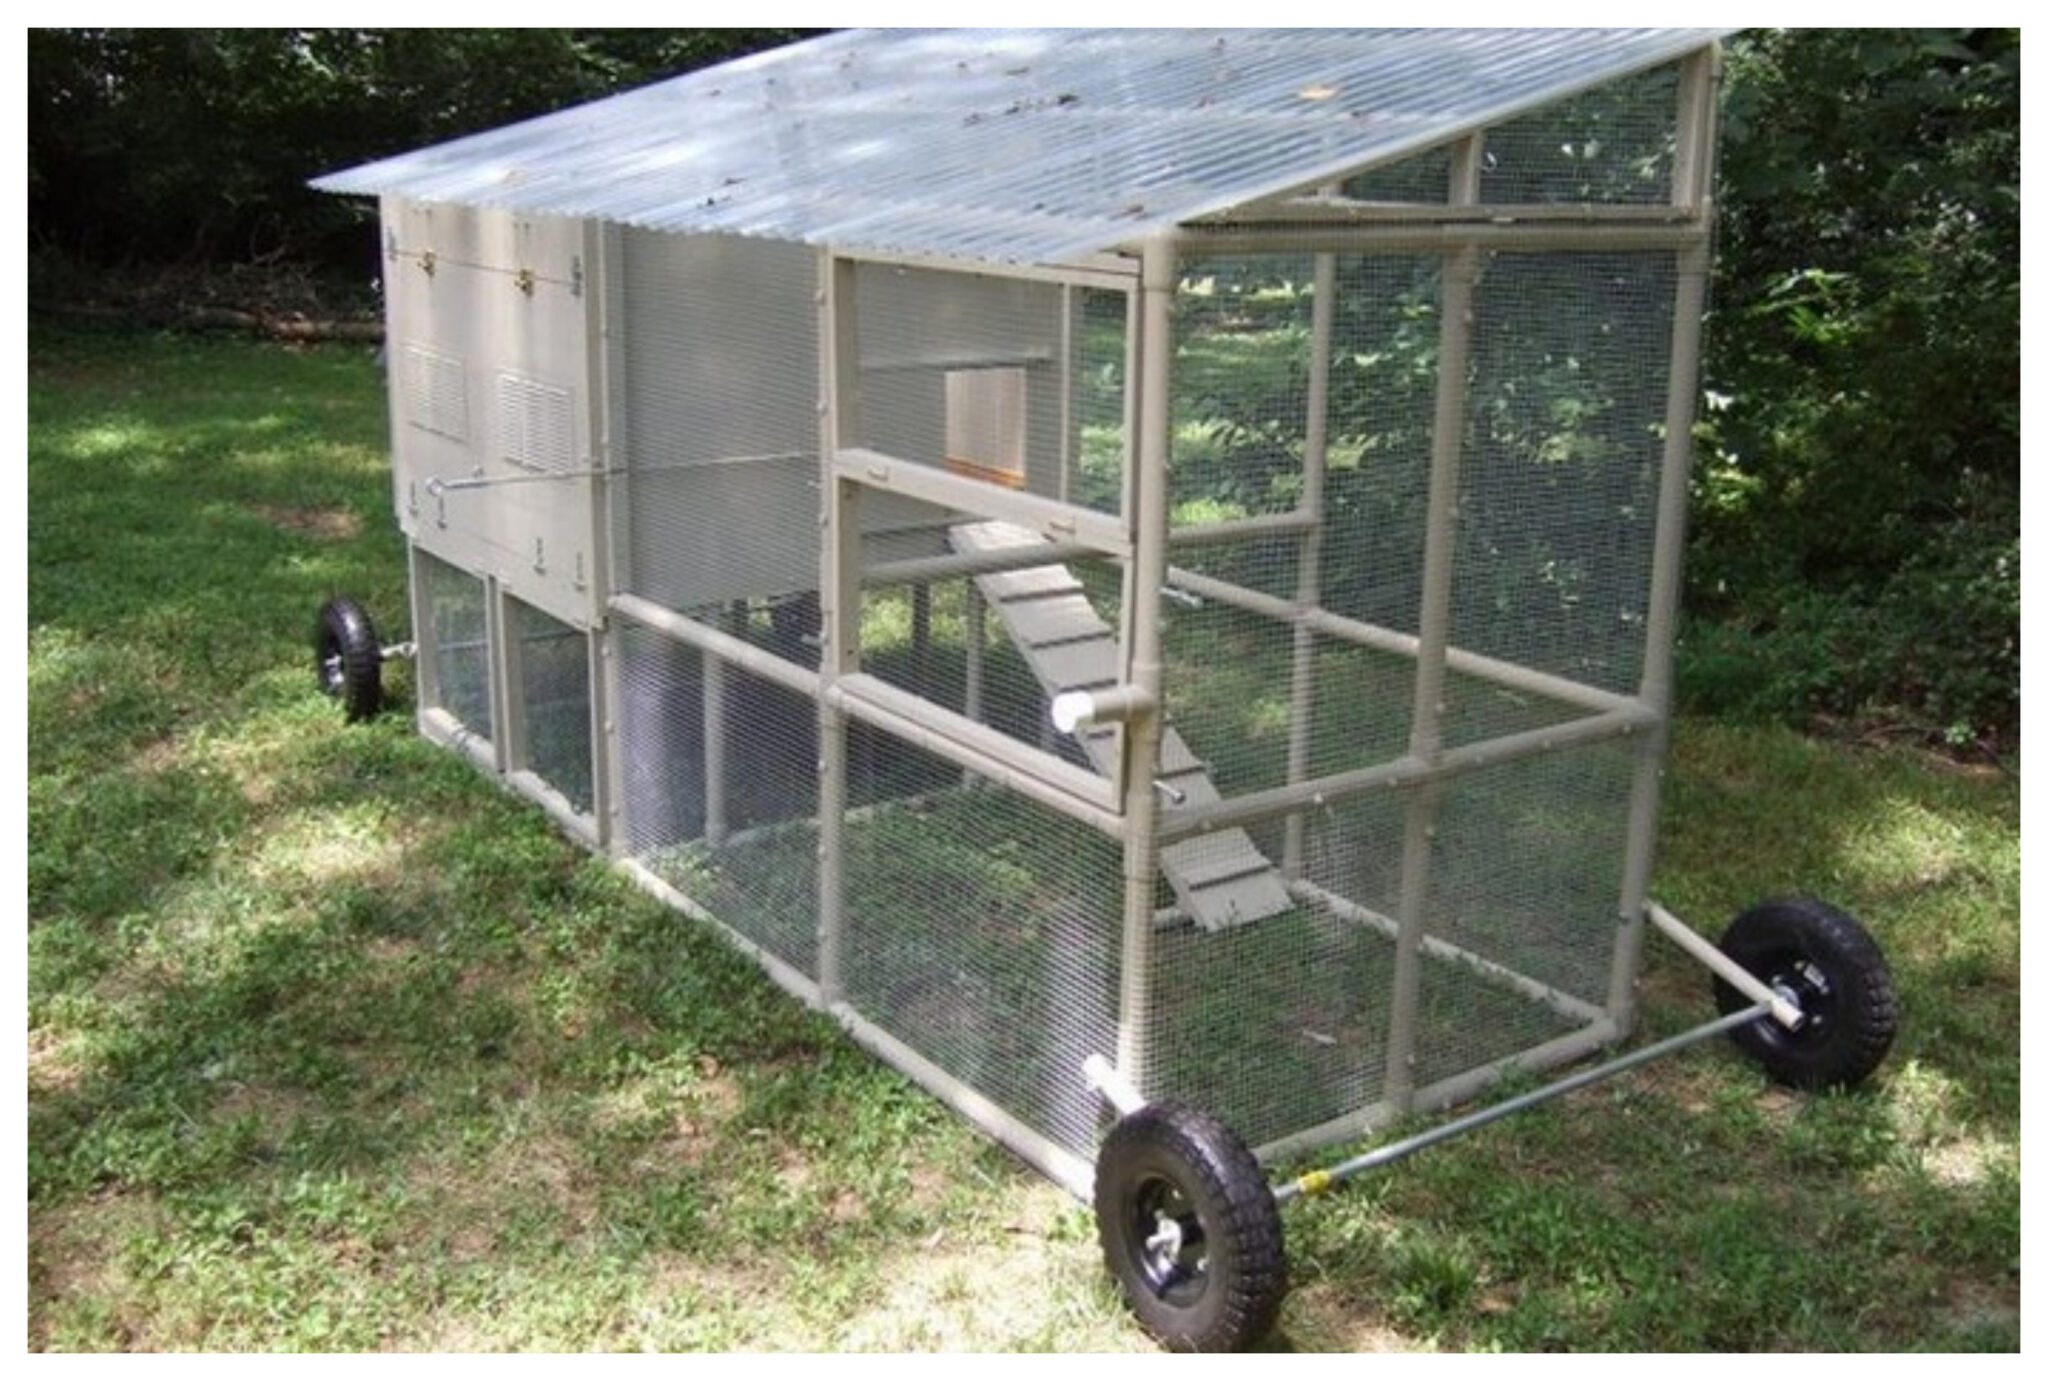
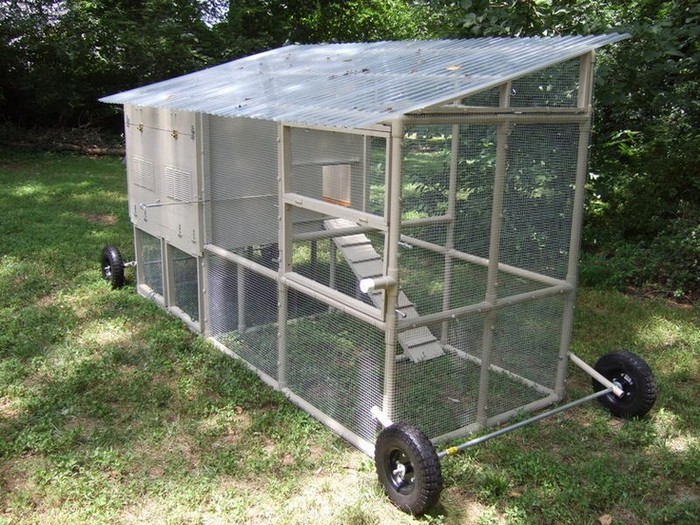
Step 8: Attach Wheels (Optional but Recommended)
- If you want easy daily movement, add wheels to one end of the tractor:
- Simple options include small cart wheels or heavy-duty casters.
- Attach the wheels securely to the base frame.
- To move the tractor, lift the opposite end and roll it forward to fresh grass.
Step 9: Secure Poultry Netting for Small Birds
- If you’re keeping small breeds or young birds, add poultry netting along the bottom perimeter:
- This helps prevent small birds from slipping out through the welded wire.
- Secure the netting with staples or zip ties, making sure there are no gaps.
Step 10: Final Safety Check and Finishing Touches
- Use zip ties to secure any loose wire ends or overlapping sections.
- Run your hands (carefully) around the frame to check for sharp points to bend down or cover.
- Confirm:
- The door closes and latches securely.
- There are no gaps larger than 1 inch near the base.
- The tractor is light enough for you to move comfortably.
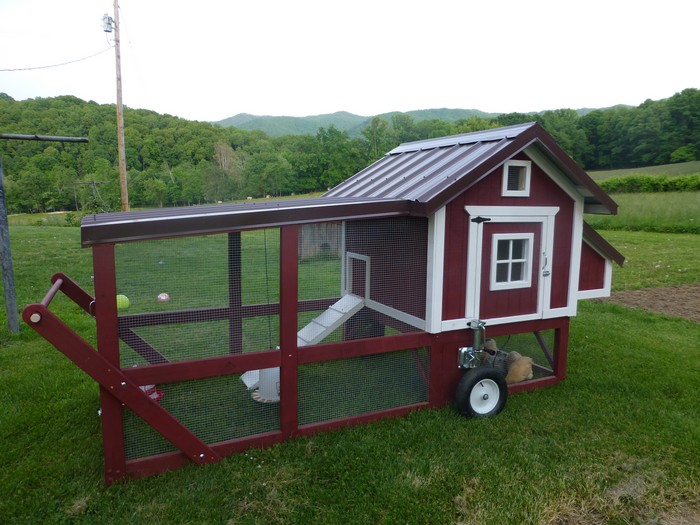
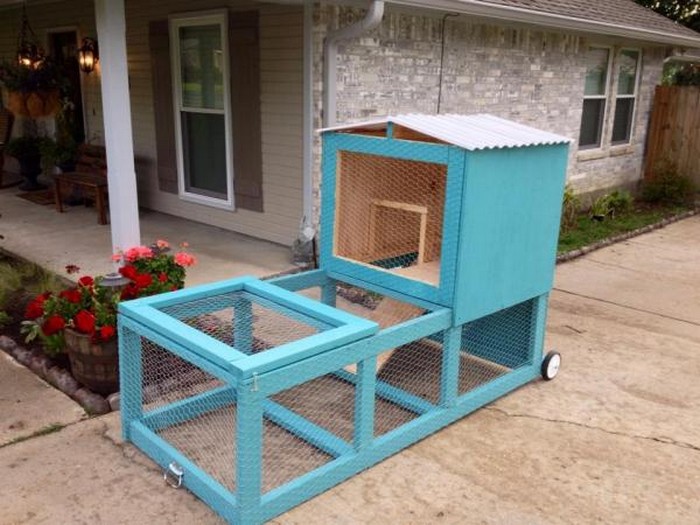
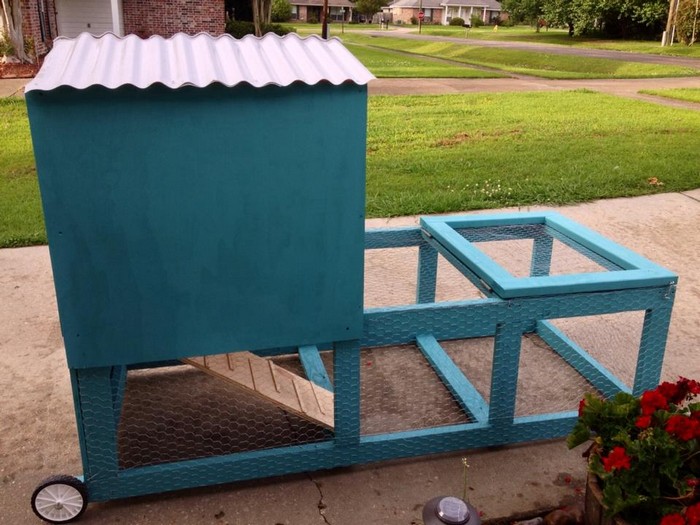
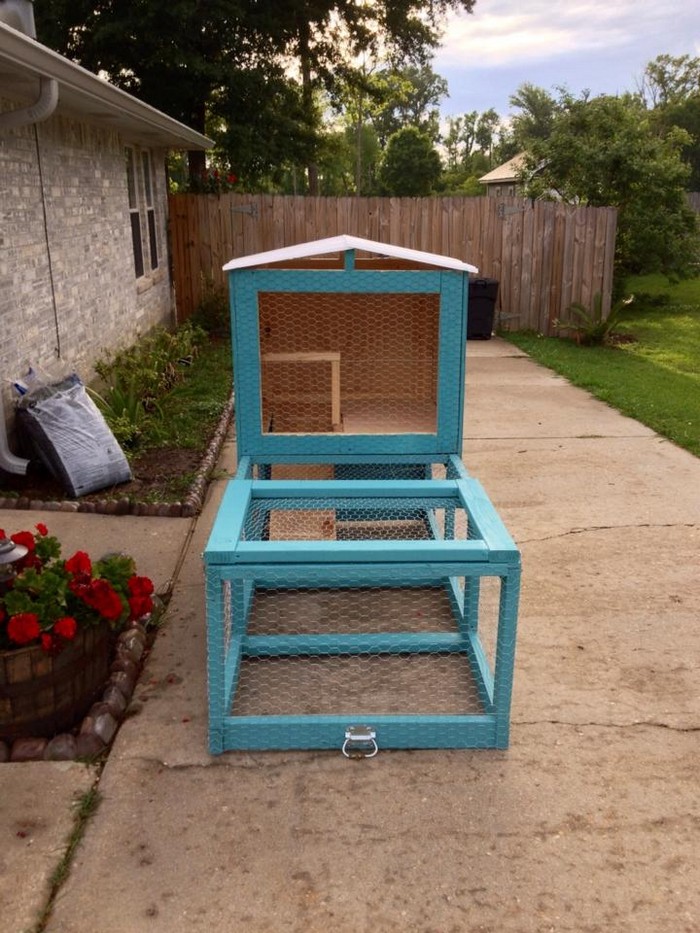
- Your DIY chicken tractor is now ready. Move it onto fresh grass, add bedding under the sheltered area if desired, and introduce your flock.
Your DIY chicken tractor is now complete and ready for use. You can move it around your property to give your chickens access to fresh forage while keeping them safe.
How Often Should You Move a Chicken Tractor?
Most backyard chicken keepers move their tractor:
- Once per day for 4–6 hens on decent grass
- More often if:
- The ground is getting muddy
- The grass is very short
- You see too much manure in one spot
Regular movement gives your hens fresh forage and prevents bare, muddy patches from forming.
Predator-Proofing Tips for Your Tractor
To keep your hens safe, especially at night:
- Use 14-gauge welded wire for the overall structure
- Add ½-inch hardware cloth:
- Around the door
- Along the lower 24 inches of the sides
- Use a solid latch (like a barrel bolt) that can’t easily be nudged open
- In high-predator areas, add a hardware cloth apron:
- A 12–18 inch strip of hardware cloth laid flat on the ground around the base, secured with landscape stakes, to deter digging predators
Adapting This Chicken Tractor for Different Climates
- Hot climates
- Increase the shaded roof area with a larger plywood panel or tarp.
- Position the tractor so birds get morning sun and afternoon shade.
- Cold or windy climates
- Add a removable tarp or solid panel along the windward side.
- Provide extra bedding under the sheltered area for warmth.
- Very wet areas
- Move the tractor more frequently.
- Choose well-drained spots to avoid mud and standing water.
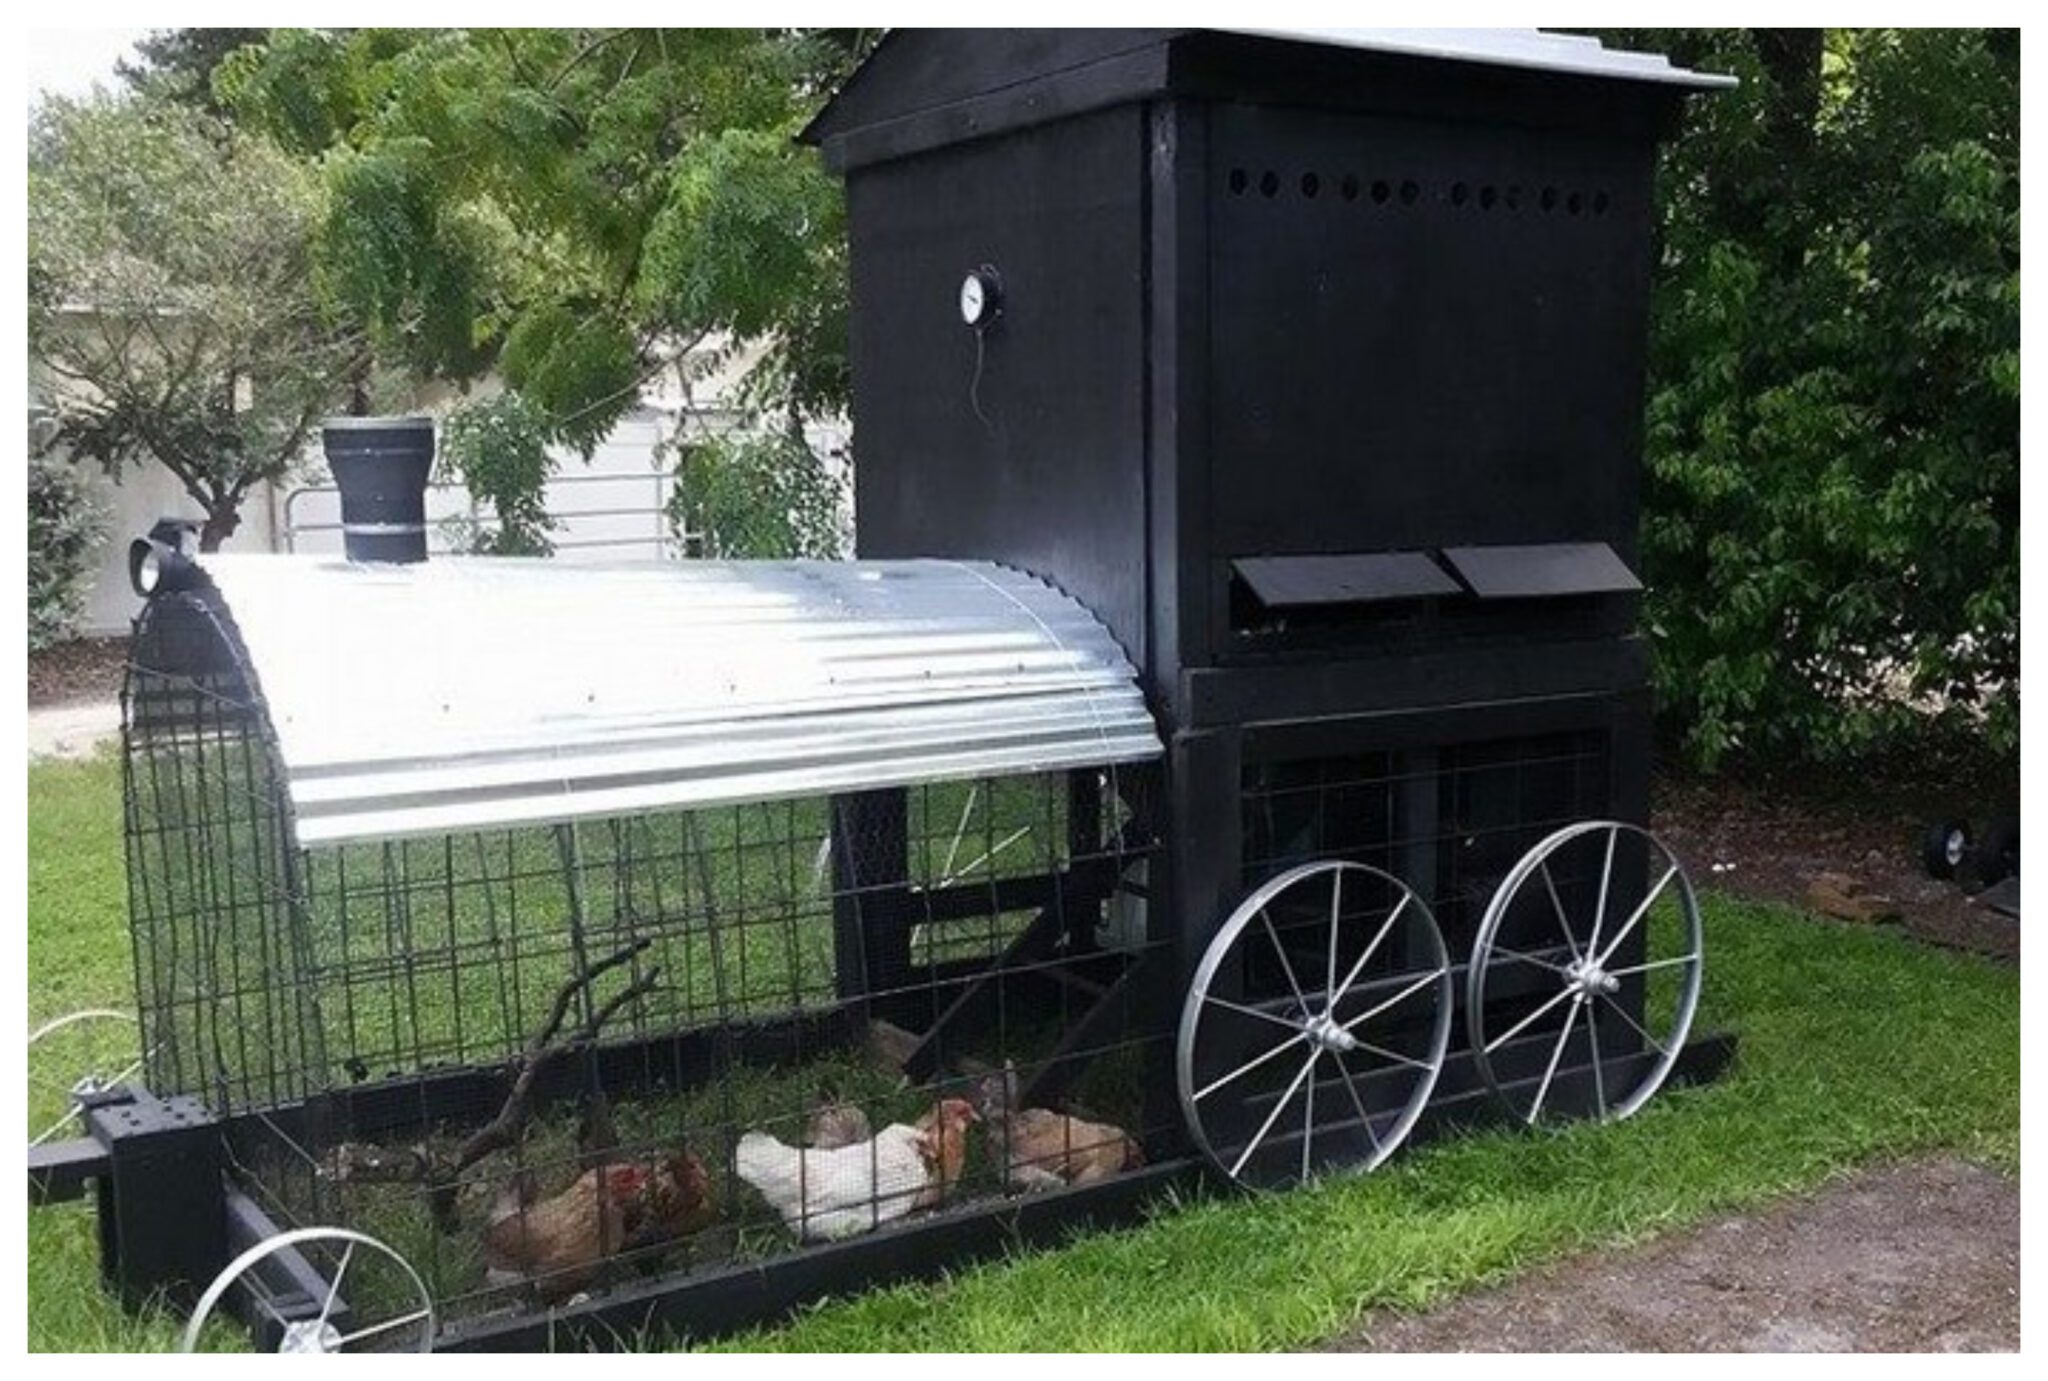
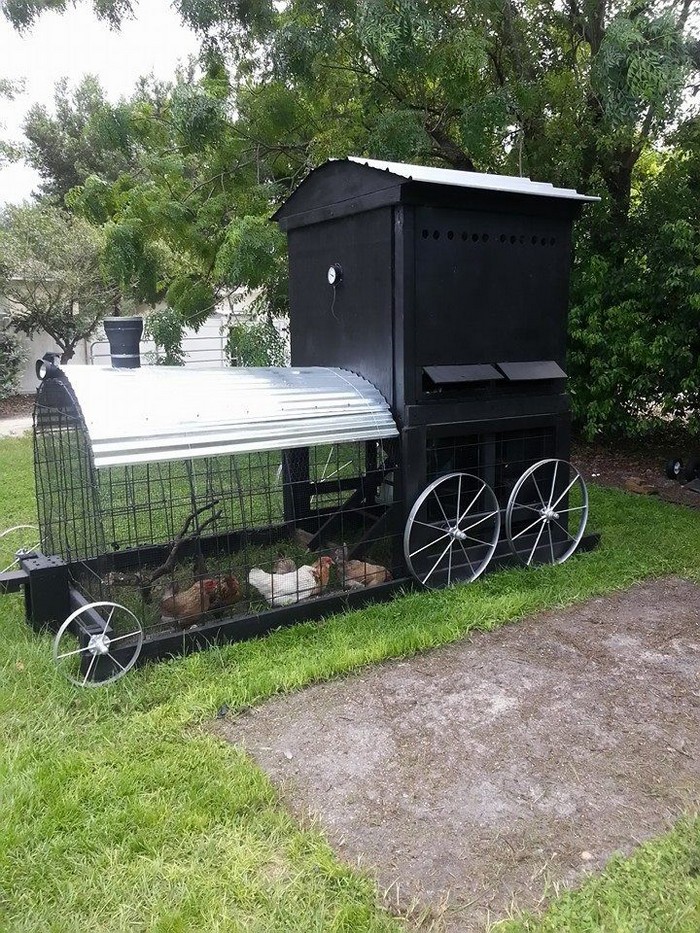
Alternative DIY Chicken Tractor Designs
If you like the idea of a mobile coop but want a different look or structure, you can explore:
- PVC chicken tractor designs – Ultra-lightweight and easy to move daily, especially for smaller flocks.
- Geodesic chicken tractors – A faceted, dome-like structure that spreads weight efficiently and offers excellent strength and ventilation.
- Mobile coops with integrated wheels and handles – For maximum maneuverability and easy roll-and-park rotations around the yard.
Each design has its pros and cons, but the simple hoop-and-frame tractor in this guide is a great starting point for most backyard keepers.
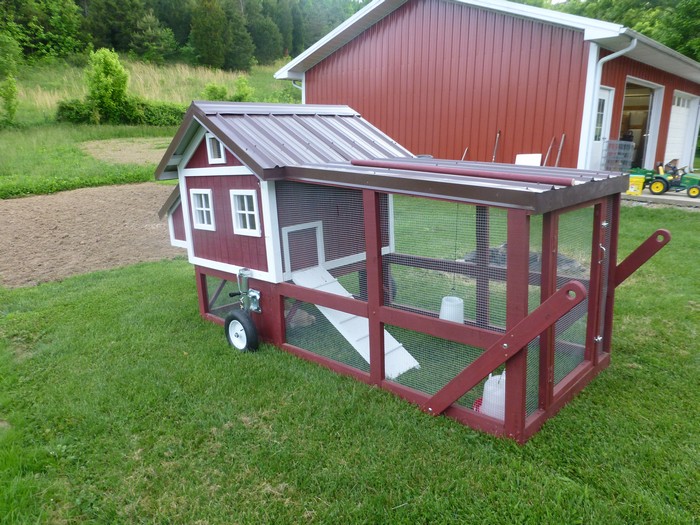
Thanks, Adventure Bite for sharing this wonderful DIY chicken tractor project… This is a perfect solution for those who want to raise their own chickens but don’t have a lot of space or want to keep them confined to one area.
DIY Chicken Tractor FAQs
- How many chickens can this 4×8 chicken tractor hold?
- This 4×8 foot tractor (32 square feet) is ideal for 4–6 standard laying hens when moved daily, or up to 8 bantam chickens. If you want to keep more birds, extend the length or build a second tractor.
- How much does it cost to build this DIY chicken tractor?
- Most people spend around $150–$250, depending on local prices for lumber, conduit, wire, and hardware. Reusing or recycling materials—like pallets or leftover paint—can reduce costs significantly.
- How long does it take to build?
- Set aside about 4–6 hours for a first-time build with basic tools. If you’re very new to DIY projects, you might spread it over a weekend.
- Is this chicken tractor safe from predators at night?
- Yes, if you use strong welded wire, add ½-inch hardware cloth where predators might reach through, and secure the door with a solid latch. In heavy predator areas, add a hardware cloth skirt around the base to discourage digging.
- How often should I move the tractor?
- Plan to move it once a day for 4–6 hens. In lush grass, you may get away with every 1–2 days, but daily moves provide the best balance of fresh forage and lawn health.
- Can I build this without power tools?
- It’s easier and faster with a cordless drill and jigsaw, but you can use a hand saw and screwdriver if needed, just allow extra time and effort.
Hatch Your Dream Coop!
Unlock the world of poultry farming with ease! In ten simple steps, you can build a cost-effective and efficient chicken coop on your terms.
Whether you’re a seasoned farmer or just starting out, this guide provides the perfect blueprint to create a safe, mobile coop for your feathered friends. Say goodbye to expensive pre-made tractors and hello to your custom, wallet-friendly solution!
Are you looking forward to doing this DIY chicken tractor project?