Last Updated on December 2, 2025 by teamobn
Do you love the look of a bench wrapped around a tree but hate the price tag? Store bought tree benches can easily cost 250 dollars or more. With a bit of creativity, you can build your own for under 100 dollars using old kitchen chairs.
In this guide, you will see how Heather turned a second hand dining set into a sturdy, upcycled bench around her backyard tree. With basic tools, some paint, and a weekend of work, you can create the same cozy seating area in your own yard.
Contents
- 1 Quick Answer: How to Build a Bench Around a Tree With Old Kitchen Chairs
- 2 Heather’s Upcycled Tree Bench Story
- 3 Building a Bench Around a Tree Fixture
- 3.1 What Are the Materials Needed to Build a Bench Around a Tree?
- 3.2 What Are the Tools Needed to Build a Bench Around a Tree?
- 3.3 How to Build a Bench Around a Tree With Old Kitchen Chairs: Step-by-Step instructions
- 3.3.1 Step 1: Prepare the Chairs:
- 3.3.2 Step 2: Paint the Chairs:
- 3.3.3 Step 3: Paint or Stain for Outdoor Use
- 3.3.4 Step 4: Plan Your Bench Shape
- 3.3.5 Step 5: Level the Ground
- 3.3.6 Step 6: Arrange the Chairs Around the Tree
- 3.3.7 Step 7: Measure and Cut the Timber Planks
- 3.3.8 Step 8: Join the Chairs With Planks
- 3.3.9 Step 9: Add Extra Supports if Needed
- 3.3.10 Step 10: Sand and Finish
- 3.3.11 Add Cushions and Enjoy (Optional)
- 4 Design Variations for Tree Benches
- 5 Budget and Sourcing Tips for a Tree Bench
- 6 Conclusion
Quick Answer: How to Build a Bench Around a Tree With Old Kitchen Chairs
To build a bench around a tree using old kitchen chairs, clean and paint the chairs for outdoor use, then arrange them evenly around the tree, leaving a few inches of space so the trunk can grow. Level the ground under each chair and join the seats together with timber planks using exterior wood screws.
Add extra supports between the chair legs if the chairs feel weak, sand any rough edges, and finish with paint or sealant. The total cost can be around 75 to 150 dollars if you use second-hand chairs.
Heather’s Upcycled Tree Bench Story
Heather had been eyeing an old tree in her backyard and dreamed of a bench wrapped around it. When she checked prices, she found that a store bought tree bench would cost around 250 dollars.
Instead of giving up, she looked for a cheaper and more creative solution. She bought an old set of kitchen chairs and a table for only 75 dollars. With a few extra pieces of timber and some exterior paint, her total project cost was about 100 dollars.
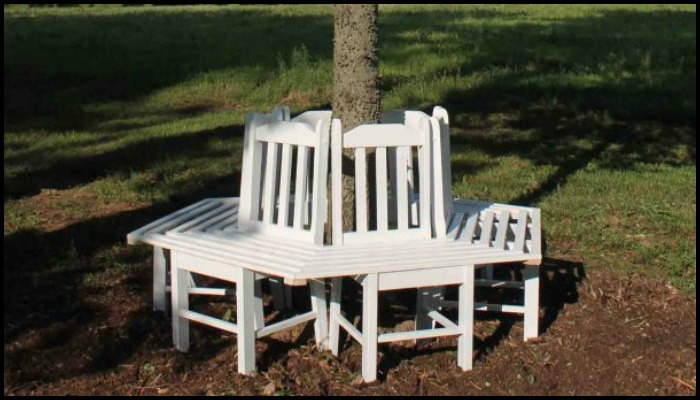
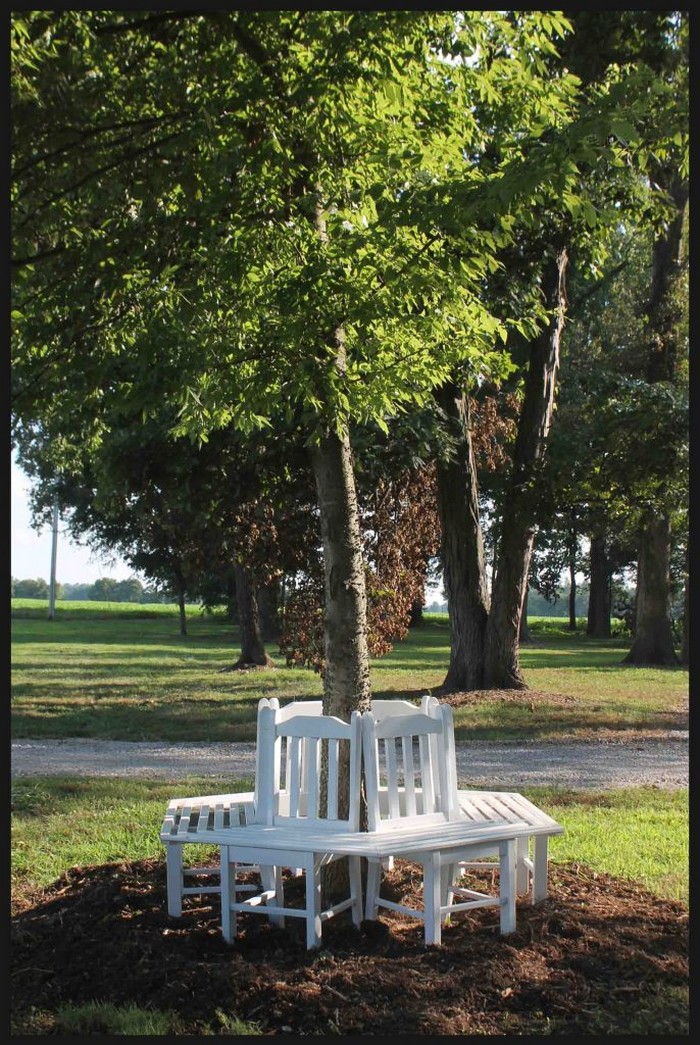
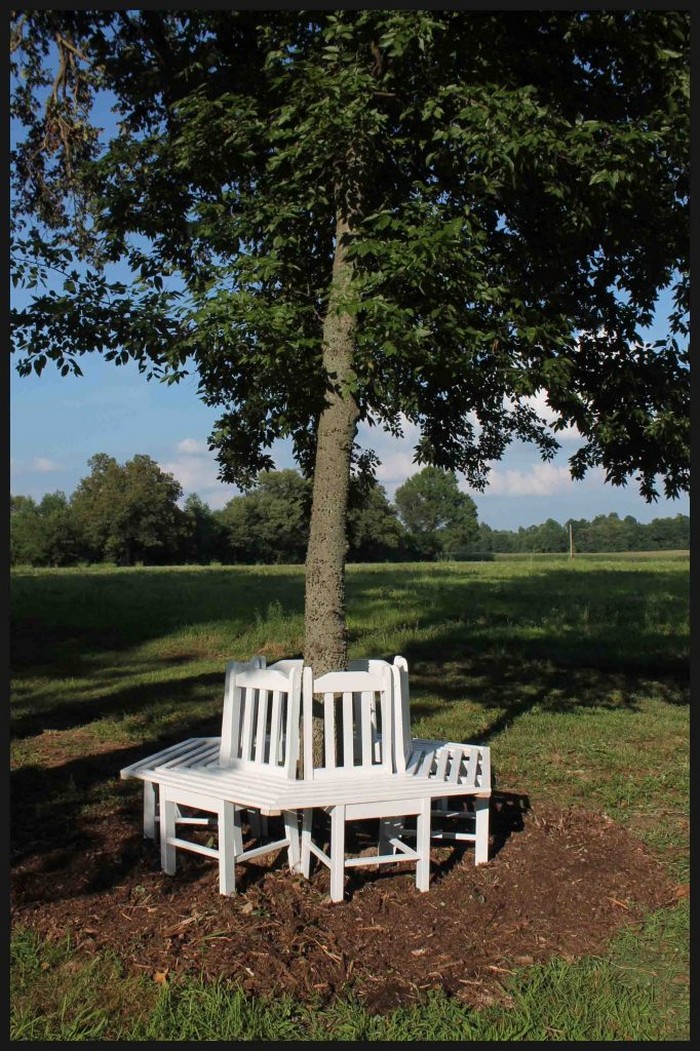
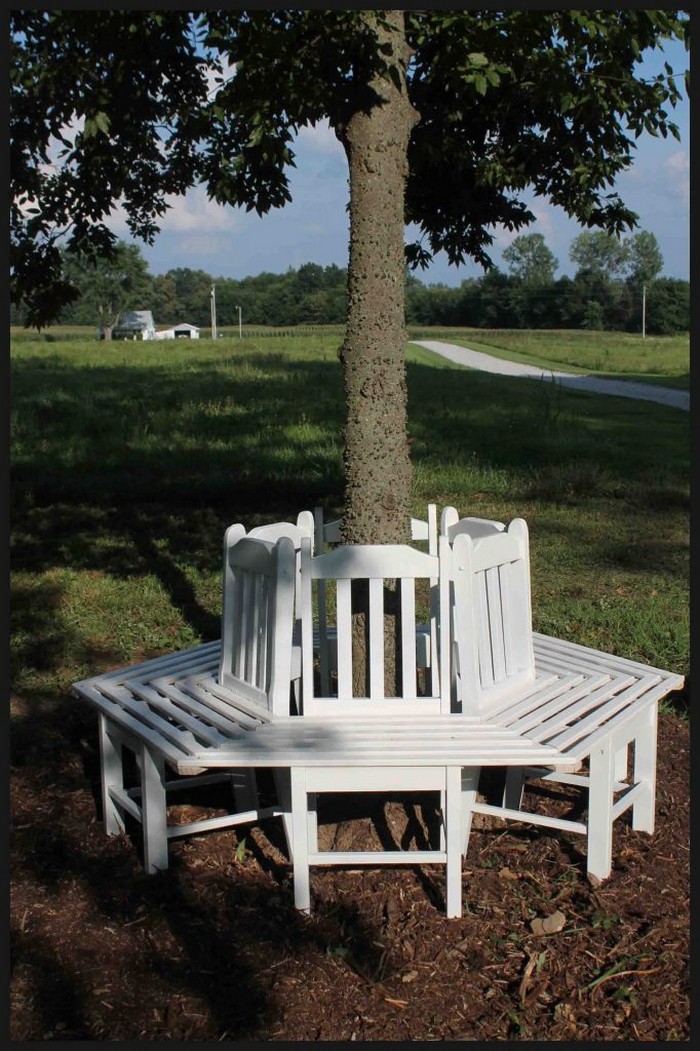
By cleaning, painting, and joining the chairs together, she created a bright and inviting bench that hugged the tree. It turned a plain corner of her yard into a favorite gathering spot for family and friends.
Building a Bench Around a Tree Fixture
Estimated time: 1 to 2 days
Difficulty: Beginner to intermediate
Approximate cost: 75 to 150 dollars
What Are the Materials Needed to Build a Bench Around a Tree?
- 4 to 6 old kitchen chairs, depending on the size of your tree
- Trisodium phosphate cleaner (TSP) or another strong cleaner
- Rubber gloves
- Exterior paint or outdoor wood stain
- Wood screws suitable for exterior use
- Nails, if needed
- Timber planks for the bench surface and supports
- Outdoor wood filler (optional, for repairs)
- Clear outdoor sealant (optional)
[adinserter block=”11″]
What Are the Tools Needed to Build a Bench Around a Tree?
Tools
- Measuring tape
- Drill and drill bits
- Screwdriver or drill driver
- Brad nailer or hammer (optional)
- Shovel
- Sandpaper or a power sander
- Saw for cutting timber planks
- Paintbrushes or rollers
How to Build a Bench Around a Tree With Old Kitchen Chairs: Step-by-Step instructions
Step 1: Prepare the Chairs:
- Mix Trisodium Phosphate (TSP) with water according to the instructions on the package.
- Put on rubber gloves and scrub each chair to remove grease, dirt, and old grime.
- Rinse the chairs with clean water and allow them to dry completely.
- Clean wood accepts paint and sealant much better.
Step 2: Paint the Chairs:
- Look over each chair for loose joints, cracks, or missing screws.
- Tighten any loose screws and use wood glue or filler where needed.
- Fixing problems now will make your bench safer and more solid.
Step 3: Paint or Stain for Outdoor Use
- Choose an exterior paint or an outdoor wood stain.
- Apply a coat to all sides of each chair, including the legs and undersides where possible.
- Let the first coat dry, then add a second coat if needed.
- This protects the wood from the sun, rain, and temperature changes.
Step 4: Plan Your Bench Shape
- Decide what shape will work best around your tree.
- A circle, a hexagon, or a square are all good choices.
- Measure the distance around the tree at chair seat height.
- Mark where each chair will sit so that they are spaced evenly.
- Leave a small gap between the tree trunk and the inside edges of the chairs so the tree can grow.
Step 5: Level the Ground
- Use a shovel to level the soil under each chair position.
- Remove rocks and high spots so the chairs will sit flat.
- Stable chairs are safer and make your bench feel more solid and comfortable.
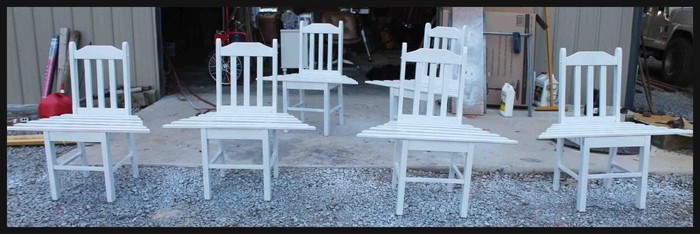
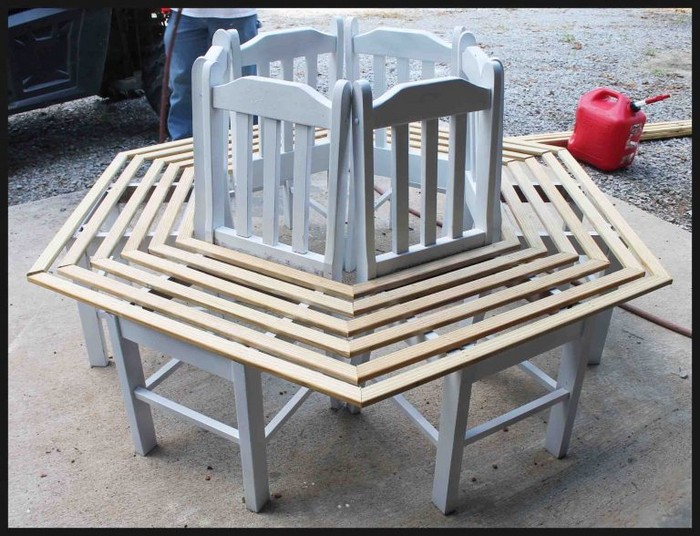
Step 6: Arrange the Chairs Around the Tree
- Place the chairs around the tree following your plan.
- Adjust their positions until the seats line up as closely as possible.
- Check that the gap between the tree and the chair backs or inner edges is even all the way around.
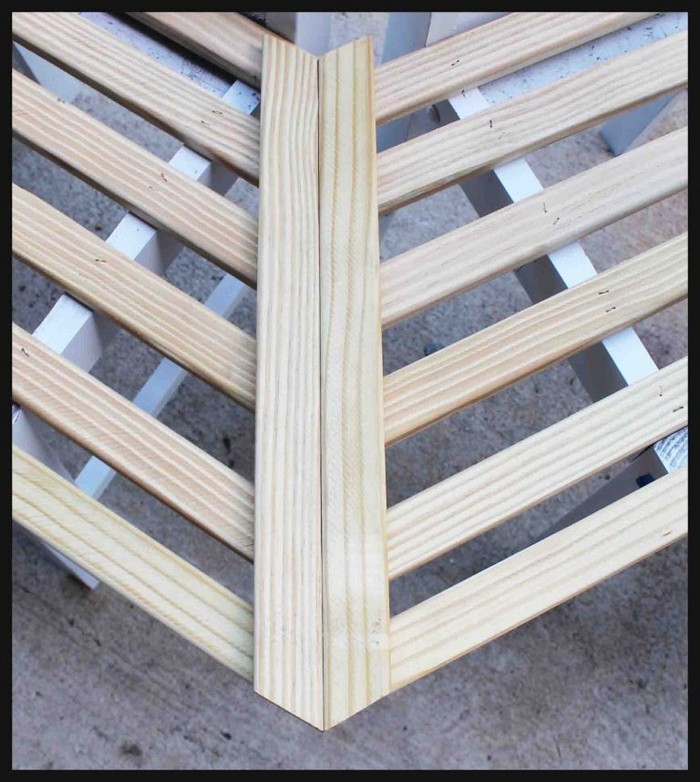
Step 7: Measure and Cut the Timber Planks
- Measure the gaps between the chairs where you want the bench surface to be continuous.
- Cut timber planks to fit these spaces.
- For a solid bench, you may want several planks side by side on top of the seats or frames.
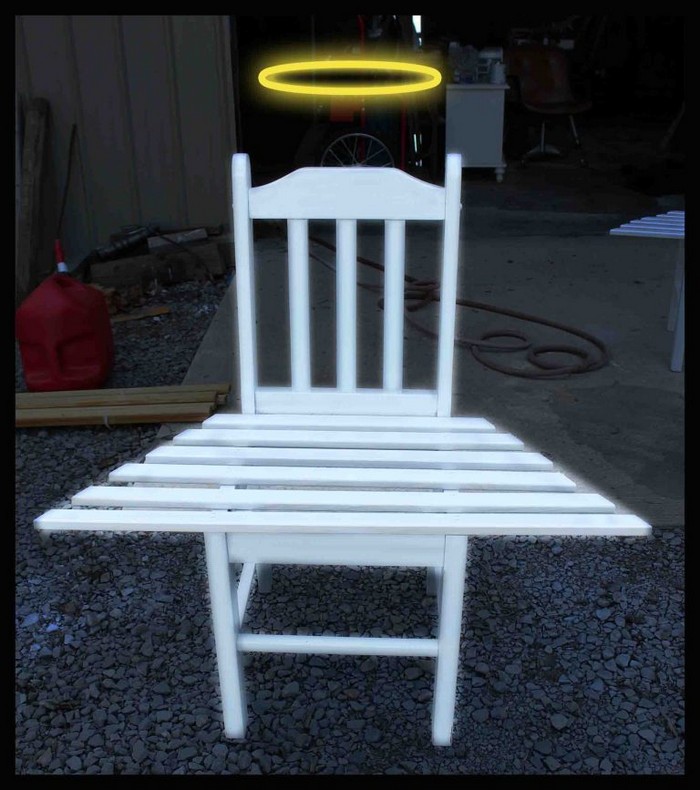
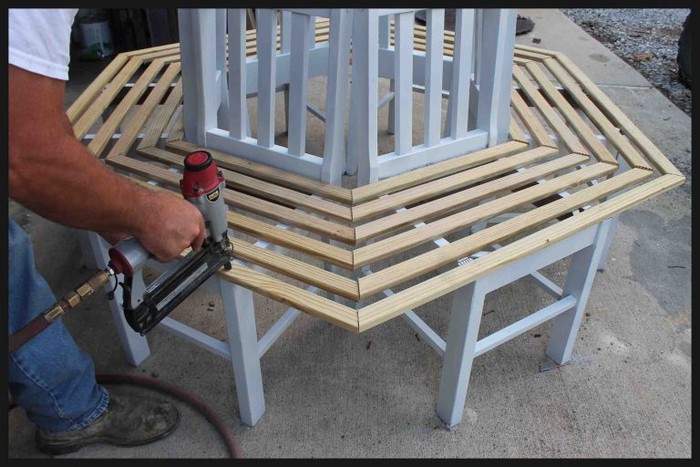
Step 8: Join the Chairs With Planks
- Position your cut planks across the chair seats or frames so that they connect one chair to the next.
- Pre drill pilot holes to prevent the wood from splitting.
- Then use exterior wood screws to fix the planks to the chair seats or frames.
- Work your way around the tree until you have one connected bench surface.
Step 9: Add Extra Supports if Needed
- If some chairs feel weak or wobbly, add support planks between the legs of neighboring chairs.
- Cut short lengths of timber to run from one chair leg to the next and attach them with screws or a brad nailer.
- These braces help share the weight and prevent wobbling when people sit down.
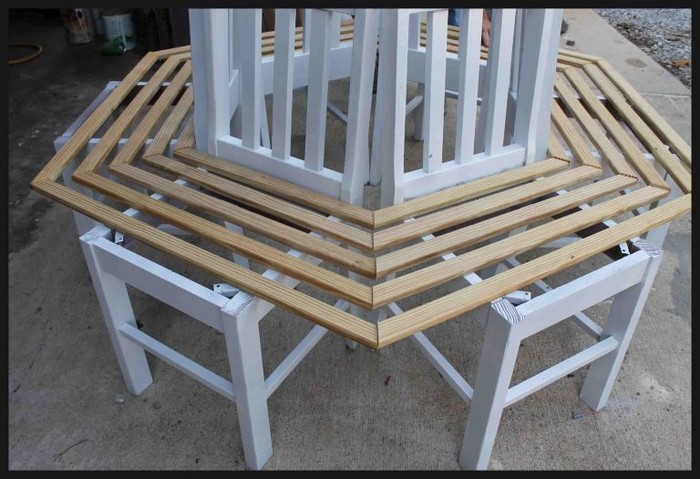
Step 10: Sand and Finish
- Run your hand over the bench surface and edges to find any rough spots or sharp corners.
- Sand them smooth with sandpaper or a sander.
- Check that no screw heads stick up.
- Add a final coat of paint or a clear outdoor sealant for extra protection and a finished look.
Add Cushions and Enjoy (Optional)
- Once everything is dry, place outdoor cushions or pillows on the bench for comfort.
- Your new tree bench is now ready to use for reading, relaxing, or gathering with friends and family.
Design Variations for Tree Benches
A bench around a tree can fit many garden styles. Here are a few common shapes and how they work.
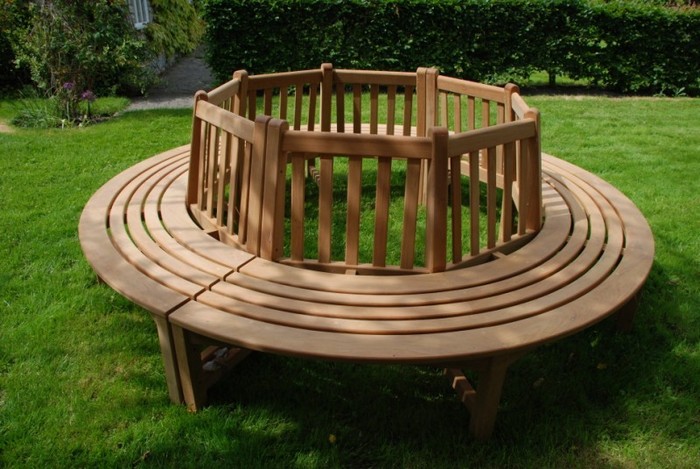
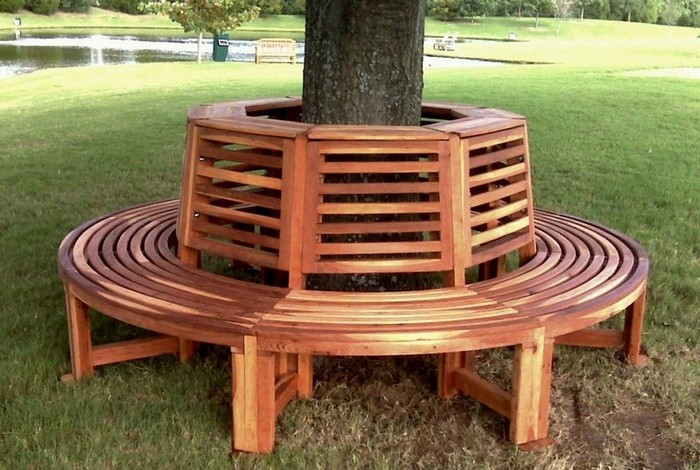
- Circular bench around a tree
- A circular bench wraps evenly around the trunk and creates a smooth, flowing shape. It gives you 360 degree seating so people can sit facing any direction. Circular benches work well around larger trees with enough space at the base.
- Hexagonal bench around a tree
- A hexagonal bench has six sides of equal length. It provides a neat, geometric look that still feels soft and inviting. This shape is a good choice if you like a balanced design and want sections of seating that feel naturally divided.
- Square tree bench
- A square bench around a tree has four strong, straight sides. It suits more modern or minimalist gardens. Each side offers wide, flat seating, which is helpful if you often have several people sitting at once.
- Semi circular tree bench
- A semi circular bench is perfect if your tree is near a fence, wall, or corner and you do not have room to wrap the whole way around. You still get a curved seat that hugs the tree on one side while keeping space clear on the other.
- Integrated planter bench around a tree
- In this design, planter boxes are built into or attached to the bench. Flowers and small plants grow right next to the seats. This style adds color, scent, and a lush feeling to your seating area.
Bench Around Tree Furniture Gallery
Below you can see examples of tree benches made from old chairs and reclaimed wood. Click on any image to open the lightbox and view the full sized photo. Notice how different paint colors, shapes, and cushion choices change the style of the bench.
Click on any image to start the lightbox display. Use your Esc key to close the lightbox.![]()

Budget and Sourcing Tips for a Tree Bench
Building a bench around a tree does not have to be expensive. With smart planning, you can keep costs low and still get a beautiful result.
Use reclaimed and second hand materials
- Look for old kitchen chairs at thrift stores, garage sales, or online marketplaces. Sets with cosmetic damage often cost much less.
- Reuse timber from pallets, old furniture, or leftover building projects as long as it is solid and free from rot and pests.
Shop smart for finishes and hardware
- Watch for sales on exterior paint, stain, and sealant at local hardware stores.
- Consider store brands for screws, paint, and brushes. Many work just as well as premium brands.
Borrow or rent tools
- If you do not own a drill, sander, or saw, ask friends or family if you can borrow one for the weekend.
- Many hardware stores rent tools by the day, which can be cheaper than buying a tool you will only use once.
Plan before you buy
- Measure your tree and sketch a simple design before you purchase timber.
- Count how many planks and supports you will need. Careful planning helps you avoid buying more material than you really need.
Frequently asked questions
- Can I build a bench around a small or young tree?
- Yes, but you must leave extra space for future growth. If the tree is very young or thin, it may be better to wait a few years so you can judge its mature size and avoid rebuilding the bench later.
- How many chairs do I need for a tree bench?
- Most people use 4 to 6 chairs. A small tree or tight space might only need four chairs. A thicker trunk or a wide circle may need six or more. Space the chairs so that people can sit comfortably without feeling squeezed.
- What kind of paint should I use on the chairs?
- Use exterior paint or outdoor wood stain and a clear topcoat if needed. These products are made to resist moisture, UV light, and temperature changes. Indoor paint will not last long outside.
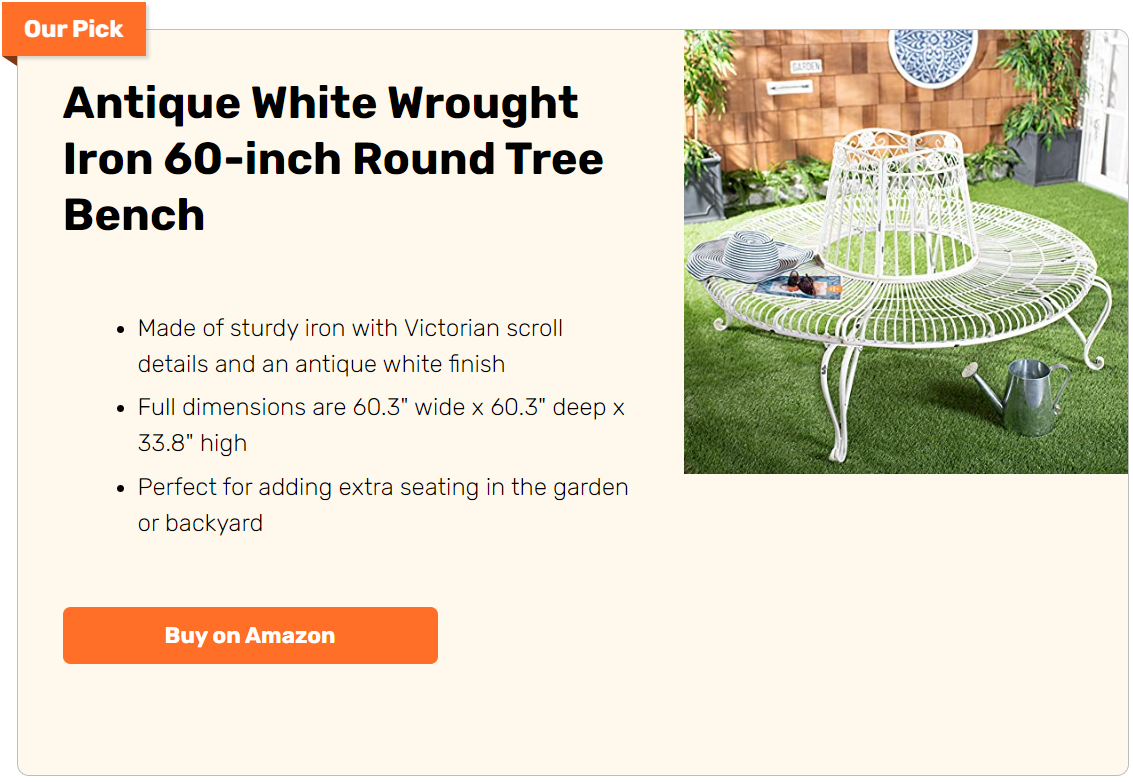
- Can I use metal chairs instead of wooden ones?
- Yes, you can use metal chairs. Check that the metal is strong and not badly rusted. You might need special drill bits and screws designed for metal. It also helps to coat the metal with a rust proof primer and paint.
- How long will a tree bench like this last?
- With good paint or sealant and simple care, a wooden tree bench can last many years. Check it each spring for loose screws, peeling paint, or damaged wood. Repaint or reseal every few seasons to keep it protected.
Conclusion
Constructing a bench around a tree is a simple way to add comfort and charm to your outdoor space. By reusing old kitchen chairs and a small amount of timber, you can build a unique piece of furniture that fits your yard perfectly.
Careful cleaning, painting, and assembly will give you a sturdy bench that highlights the natural beauty of your tree. Whether you choose a circular, hexagonal, or square design, this upcycled project proves that you do not have to spend a lot of money to create a welcoming place to sit and enjoy your garden.
For more upcycled outdoor furniture ideas, check out our cable spool bench project!


