Last Updated on November 10, 2025 by teamobn
Contents
- 1 What Can You Make with Old Horseshoes?
- 2 Picking Your First Project
- 3 Safety Essentials for Every Project
- 4 Frequently Asked Questions
- 5 The Wrap Up — Unleash Your Creativity
What Can You Make with Old Horseshoes?
Old horseshoes can be turned into durable, rustic décor and useful storage pieces — even without welding. Popular DIY ideas include a wine rack, wreath, boot rack, pumpkin, wind chime, and garden butterfly art. Each project takes 30–120 minutes and reuses scrap metal in eco‑friendly ways.
At a Glance — DIY Horseshoe Crafts
- Skill Level: Beginner to Intermediate — great for first‑time metal crafters and experienced DIYers
- Average Time per Project: 45 to 120 minutes (depending on design complexity)
- Materials Needed: Recycled horseshoes, steel epoxy or welder, metal primer, spray paint or sealant, optional wood base or hardware
- Essential Tools: Grinder or metal file, drill with metal bits, clamps, measuring tape, brush or spray gun
- Common Techniques: Cleaning and de‑burring, bonding (epoxy or weld), drilling, sanding, priming, painting, and finishing
- Safety Gear: Safety goggles, ear protection, heat‑resistant gloves, respirator mask, and ventilated workspace
- Customization Ideas: Add color accents, rustic patina finishes, engraved initials, rope or ribbon details, and creative arrangements
- Perfect For: Home decor, garden art, gift ideas for horse lovers, seasonal centerpieces, or eco‑friendly upcycling
- Estimated Cost: ₱300 – ₱1,200 per project (depending on materials and tools on hand)
- Eco Tip: Repurpose discarded horseshoes to reduce metal waste and create long‑lasting, sustainable decor
Picking Your First Project
Rustic, modern, or whimsical — there’s a horseshoe craft for every style. Choose based on your skill level and tools: welders can build racks or fire pits, while beginners can bond, screw, or epoxy smaller items.
Click on any image to start the lightbox display. Use your Esc key to close the lightbox. ![]()
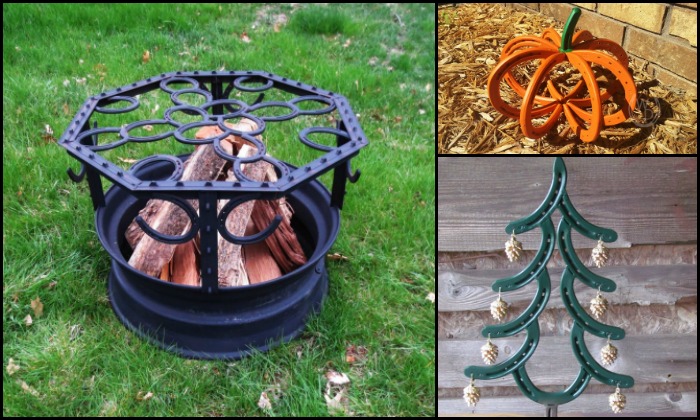
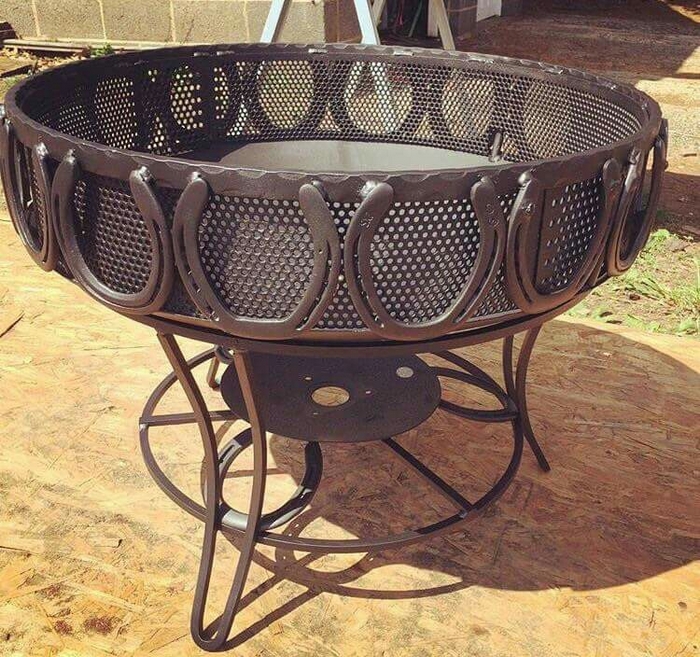
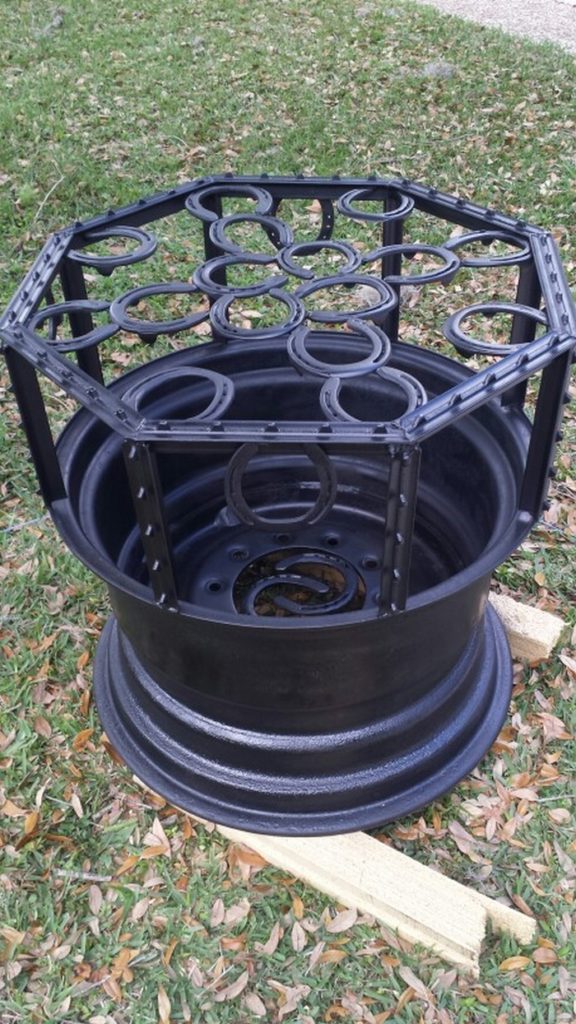
Horseshoe Fire Pit
Horseshoe fire pits are a stylish and attractive addition to any outdoor space. They are perfect for entertaining guests or simply enjoying a cozy fire on a cool evening.
Skill: Intermediate • Time: 2–4 hours • Weld required
What materials are needed to create a Horseshoe Fire Pit?
- 40–80 used horseshoes (quantity depends on diameter/height)
- Flat steel ring or rebar (optional base ring)
- High‑heat paint (optional)
- Gravel or pavers for base
What tools are needed for this project?
- Welder (MIG/Stick), angle grinder with flap disc, wire brush
- Clamps, measuring tape, square
- PPE: welding helmet, gloves, goggles, respirator

How to create a Horseshoe Fire Pit?
- Site & base
- Choose a level, nonflammable area. Lay a gravel or paver base.
- Clean
- Wire‑brush and de‑burr all shoes; remove scale/rust with grinder.
- First ring
- Arrange shoes in a circle (open ends alternating). Tack‑weld joints.
- Stack walls
- Create 2 to 4 more rings, staggering joints for strength. Weld at each contact.
- Airflow
- Leave small gaps between shoes for ventilation.
- Finish
- Grind sharp spots, high‑heat paint if desired. Cure paint per can.
- Safety: Keep extinguisher nearby and follow local fire codes.
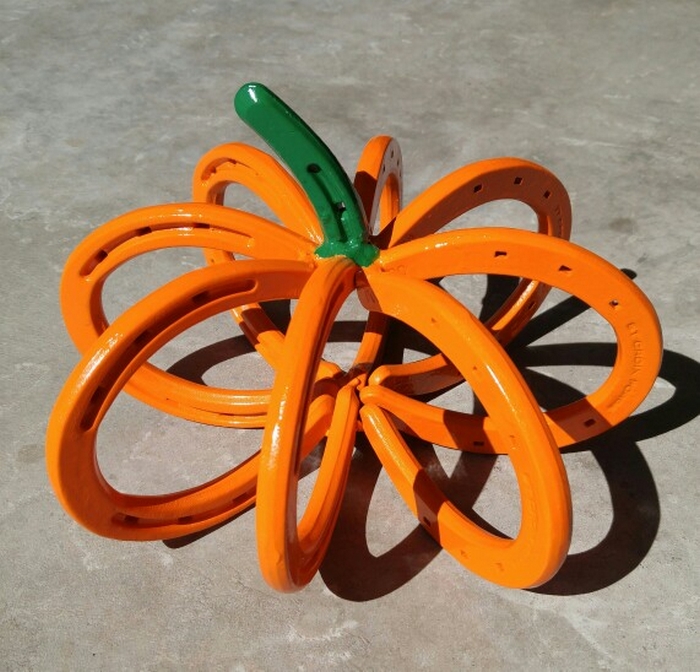
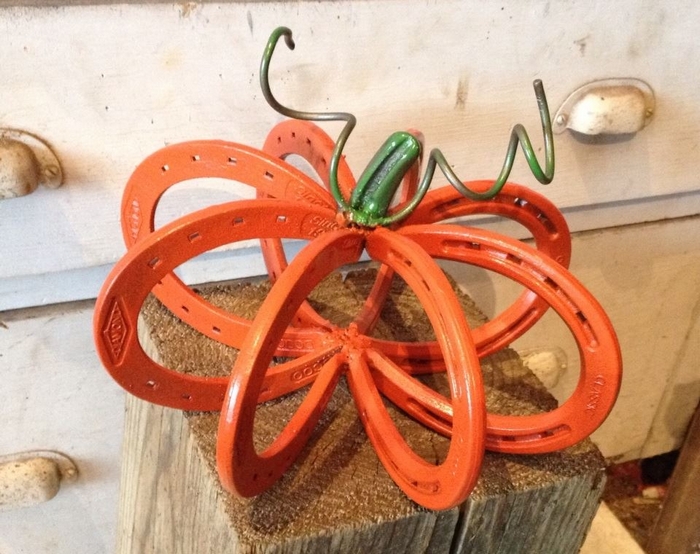
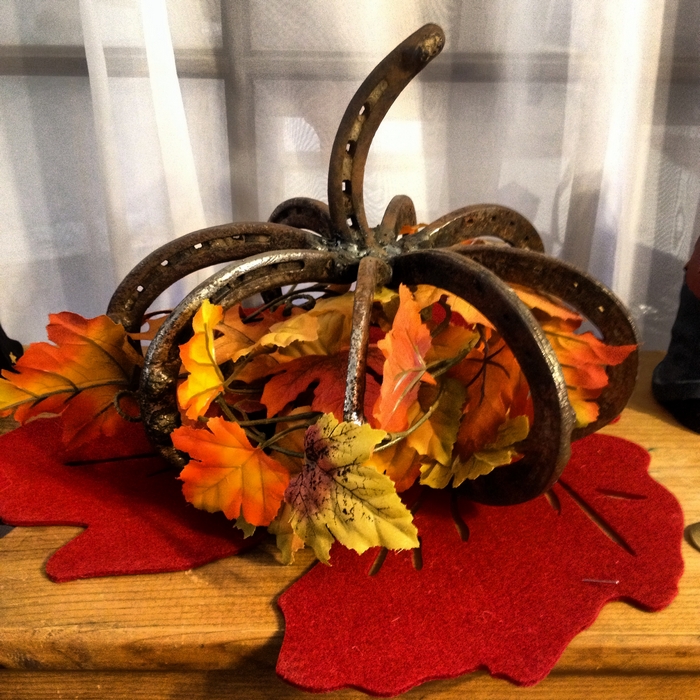
Horseshoe Pumpkin
If you’re looking for a unique way to decorate your home for Halloween, why not try using a horseshoe pumpkin? This fun and festive decoration is sure to add some extra spookiness to your home décor. Plus, it’s a great way to reuse old horseshoes that you might have lying around.
Skill: Beginner • Time: ~45–60 min • No‑weld friendly
What materials are needed for this Horseshoe Pumpkin?
- 7 horseshoes
- Two‑part steel epoxy or welder
- Orange spray paint + clear coat
- Twine, green wire, ribbon, or faux leaf (stem)
What tools are needed for this project?
- Clamps, wire brush/grinder, disposable mixing sticks
- PPE: gloves, mask, goggles
How to create a Horseshoe Pumpkin?
- Prep:
- Clean and roughen contact points on shoes.
- Dry‑fit:
- Arrange into a standing ring/pumpkin shape.
- Bond:
- Epoxy or spot‑weld each contact; clamp until cured/cooled.
- Paint:
- Orange coat, then clear seal. Let fully cure.
- Stem:
- Wrap twine/wire at top; add leaf/bow.
Pro Tip: Works great as fall décor or Halloween centerpiece.
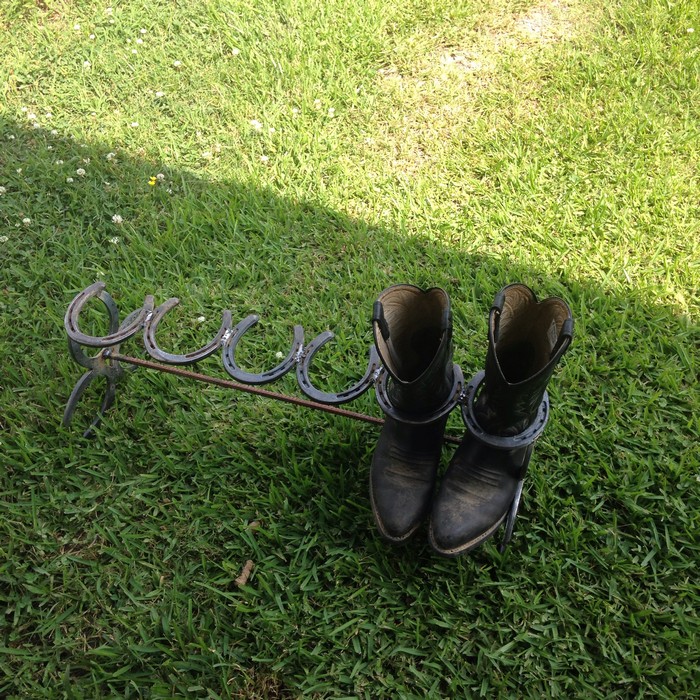
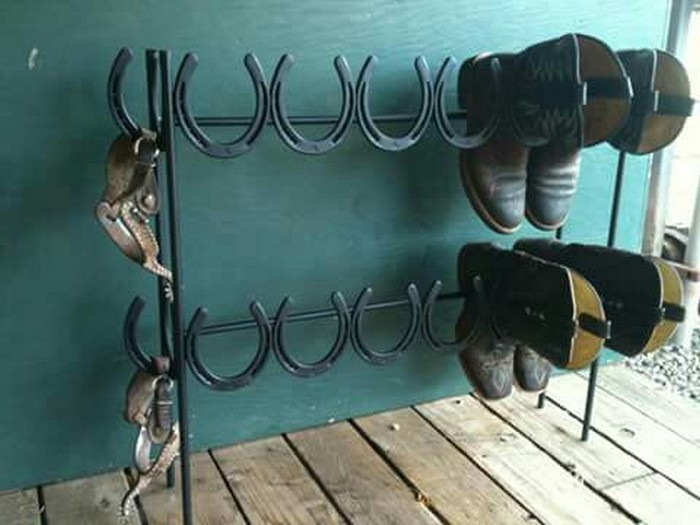
Horseshoe Boot Rack
If you’re like most people, your home is probably cluttered with shoes. But what if there was a way to organize them and keep them out of the way? With a horseshoe boot rack, you can do just that! This rack is perfect for organizing and keeping your shoes out of the way.
Skill: Intermediate (no‑weld variant available) • Time: 1.5–3 hours
What materials are needed for a Horseshoe Boot Rack Project?
- 12–20 horseshoes (depends on capacity)
- 2 steel flat bars or a wood base (no‑weld option)
- Screws/lag bolts (no‑weld), or welds
- Primer + paint or clear coat
What tools are needed for this project?
- Welder or drill/driver with metal bits
- Angle grinder/file, clamps, measuring tape, square
- PPE
How to create a Horseshoe Boot Rack?
Welded
- Prep shoes and cut two flat bars as rails.
- Layout: Pair shoes “U up” for pegs. Space evenly along rails.
- Weld: Attach pairs to rails; add second tier if desired.
- Finish: Grind, prime, paint/clear; mount to wall or add feet.
No‑Weld
- Use a wood beam/base; pre‑drill shoes and wood.
- Screw shoes “U up” as pegs. Seal wood and metal.

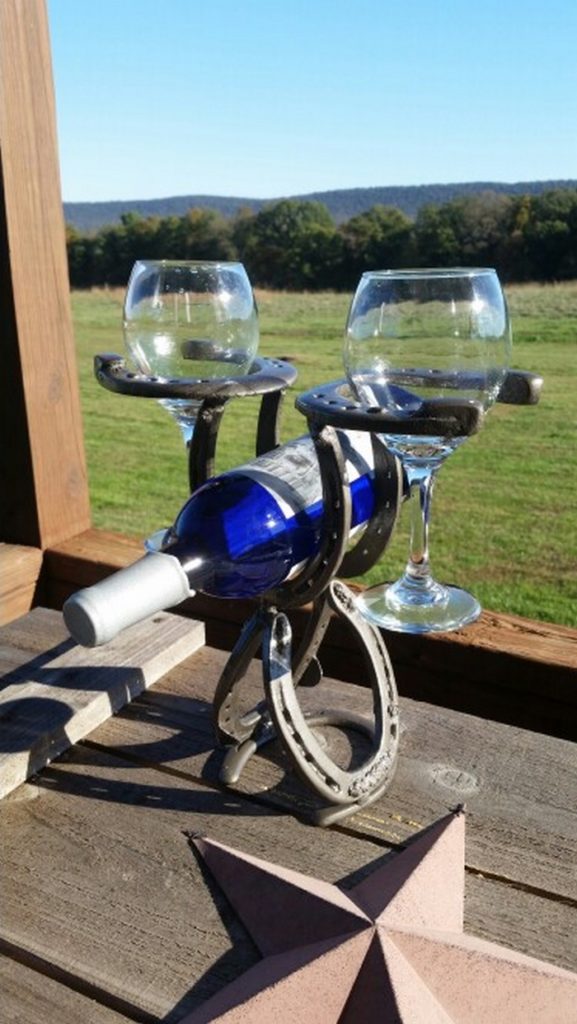
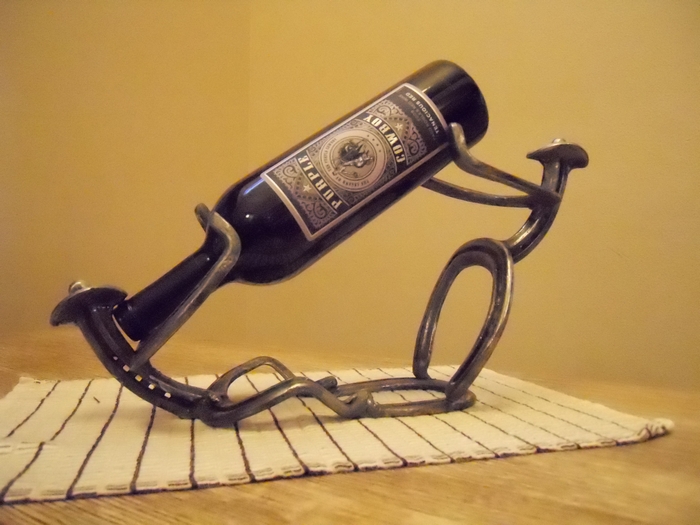
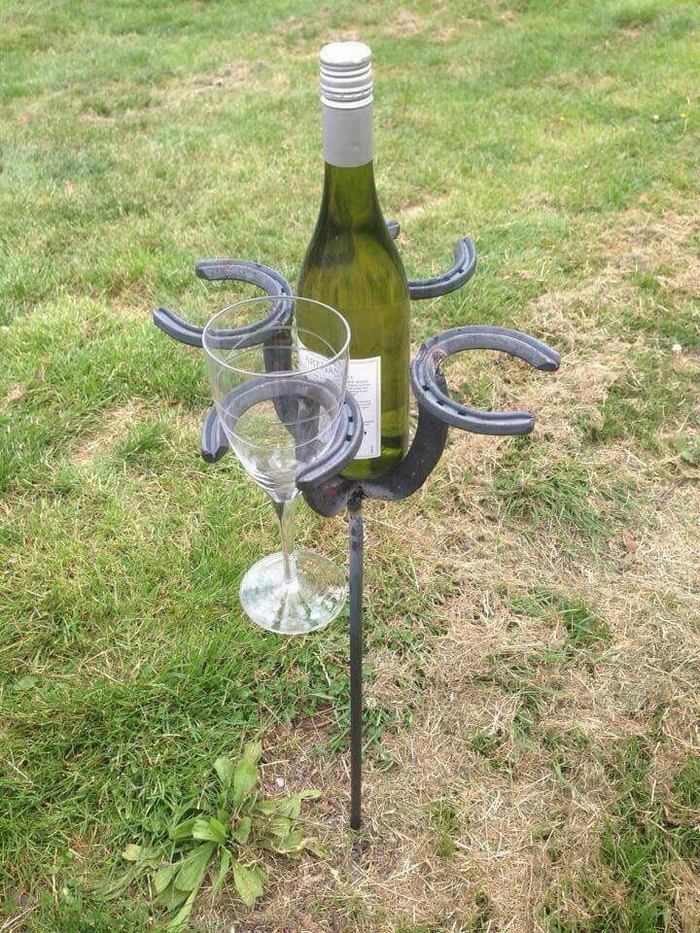
Horseshoe Wine Holder
This horseshoe wine holder is the perfect way to show your love for all things rustic. This beautiful wine holder is handmade from genuine horseshoes, making it a one-of-a-kind piece that is sure to impress your guests.
Skill: Intermediate (no‑weld possible) • Time: ~90 min
What materials are needed to create a Horseshoe Wine Holder?
- 8 horseshoes
- 2 steel flat bars (for wall unit) or steel plate (for tabletop)
- Screws/anchors (wall) or epoxy/welds
- Primer + paint
What tools are needed for this project?
- Welder or epoxy, drill (6 mm bit), file/grinder, clamps, level
How to create a Horseshoe Wine Holder?
- Clean/de‑burr all shoes.
- Rings: Form two rings (4 shoes each). Weld/epoxy at contact points.
- Connect: Set rings 15 cm apart. Attach to flat bars (wall) or to plate (tabletop).
- Finish: Prime, paint. For wall: hit studs or use heavy‑duty anchors.
This horseshoe craft can accommodate up to four wine bottles, making it perfect for entertaining. Whether you are hosting a dinner party or a small gathering, this horseshoe wine holder is a great way to add a touch of rustic charm to your event.
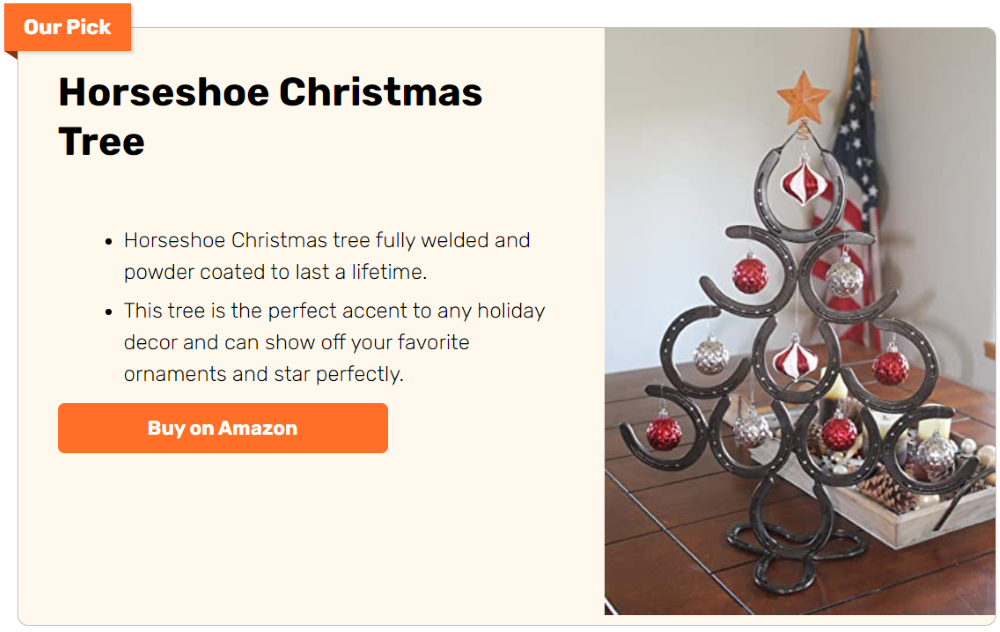
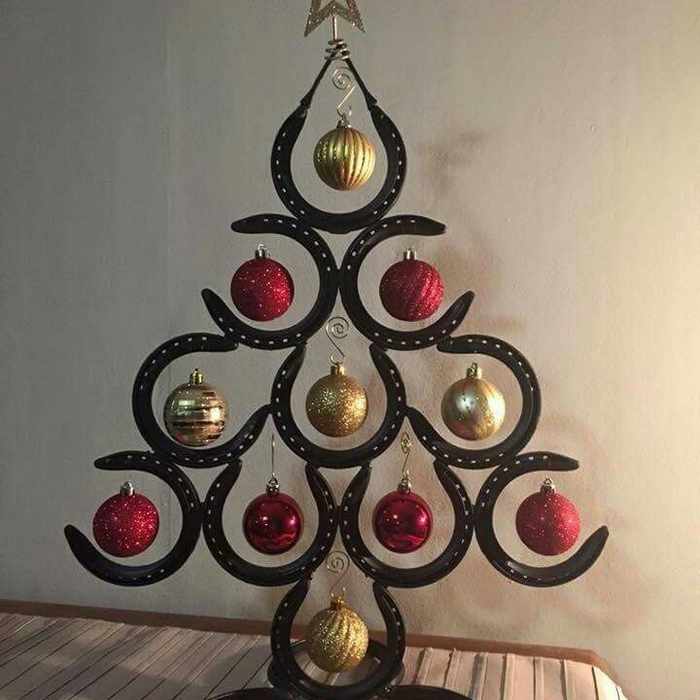
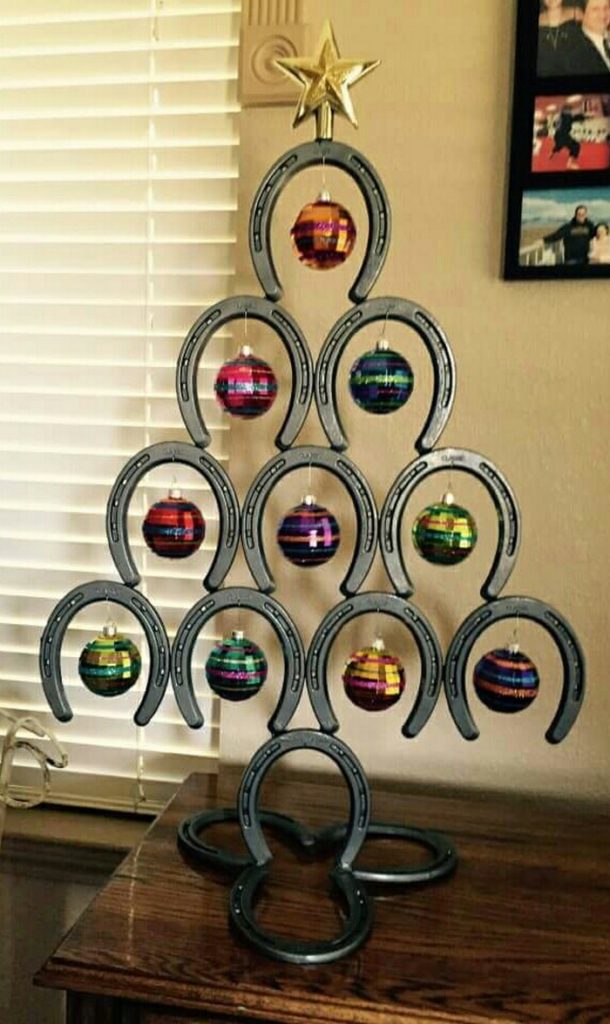
Horseshoe Christmas Tree
If you’re looking for a unique Christmas tree this holiday season, go for horseshoe tree. This unusual twist on the traditional Christmas tree is sure to turn heads and get people talking.
Skill: Intermediate • Time: 2–3 hours • Weld recommended
What materials are needed for this Horseshoe Christmas Tree Project?
- 15–30 horseshoes (size drives scale)
- Steel rod for trunk (optional)
- Green paint or clear coat; star topper (optional)
What tools are needed to create this project?
- Welder, grinder, clamps, square, PPE
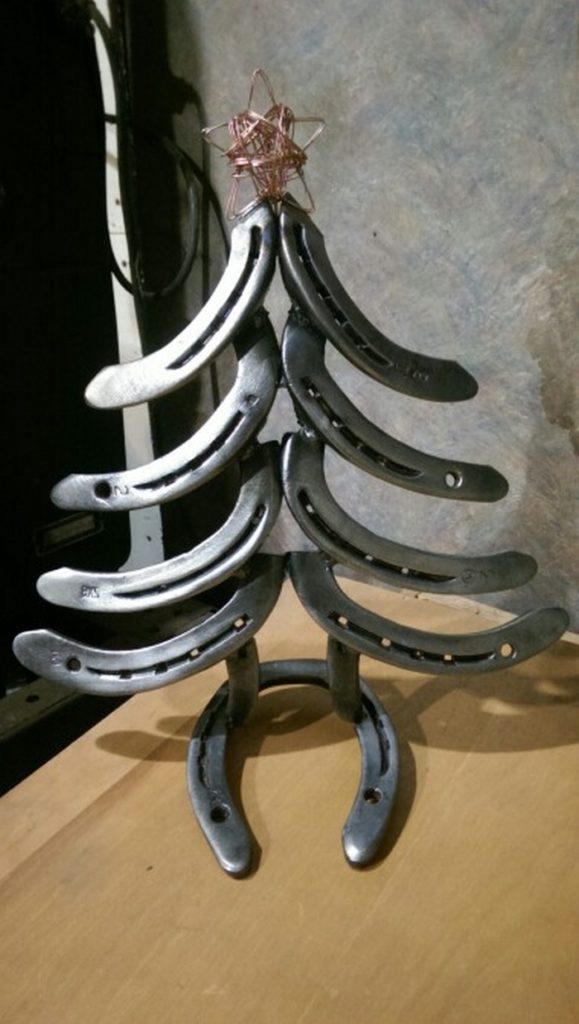
How to create a Horseshoe Christmas Tree
- Layers: Lay out tiers — largest base row to smallest top row.
- Weld: Join the shoes in each horizontal tier. Create 4 to 6 tiers.
- Stack: Weld tiers to a central rod or directly to each other, tapering as you go.
- Base: Weld feet or plate for stability.
- Finish: Paint green or clear. Add star/ornaments.

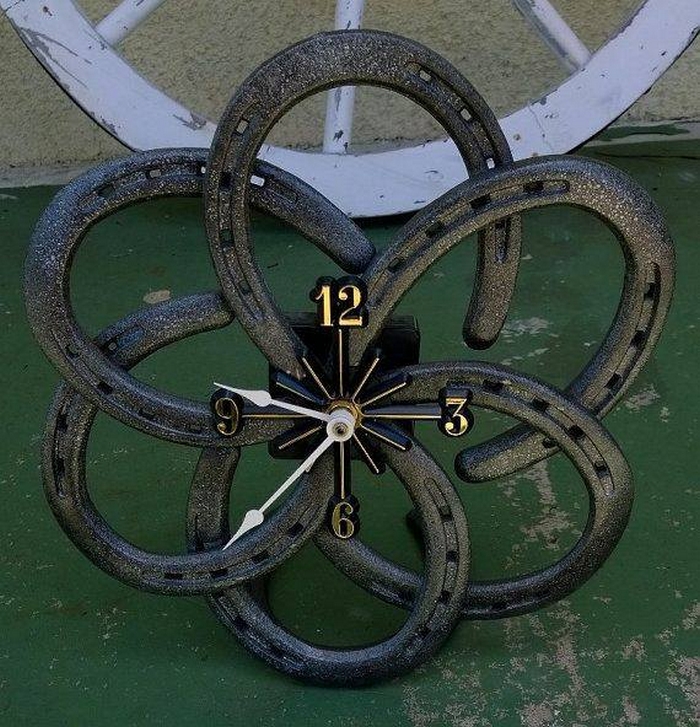
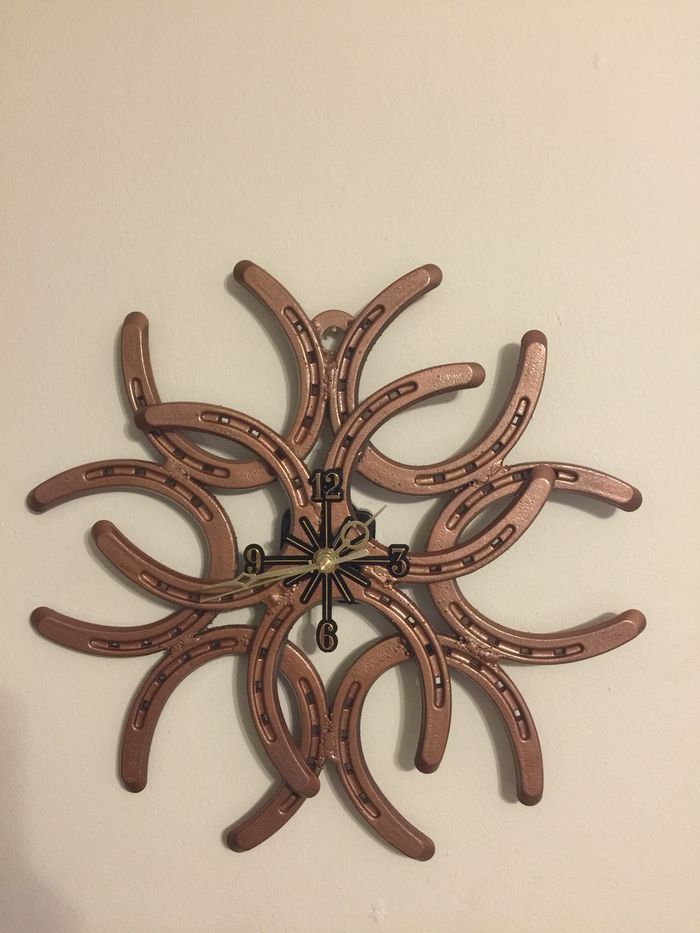
Horseshoe Clock
This horseshoe craft is an awesome addition to any room in your home. Your friends and guests will surely be amazed when they get to see this.
Skill: Beginner–Intermediate • Time: 60–90 min • No‑weld friendly
What materials are needed to create a Horseshoe Clock?
- 8–12 horseshoes
- Round backing board or metal plate (optional)
- Clock movement kit with hands
- Epoxy or welds; paint/clear coat
What tools are needed to create this project?
- Drill, small hole saw/bit for clock shaft, clamps
- Grinder/file, PPE
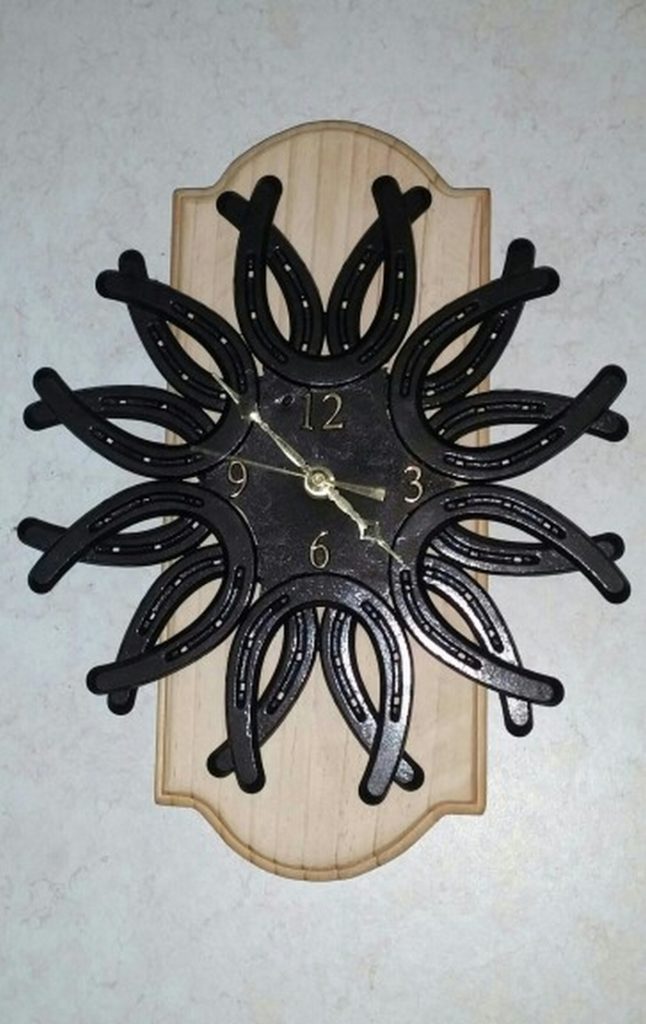
How to create a Horseshoe Clock?
- Layout: Arrange shoes in a circle (12 “hour” marks optional).
- Mount: Attach shoes to a backing (epoxy/screws) or weld together as a ring.
- Clock: Drill center hole; fit clock movement; attach hands.
- Finish: Paint or seal; hang on stud/anchor.
Pro Tip: Use gold accents or copper polish for a steampunk touch.
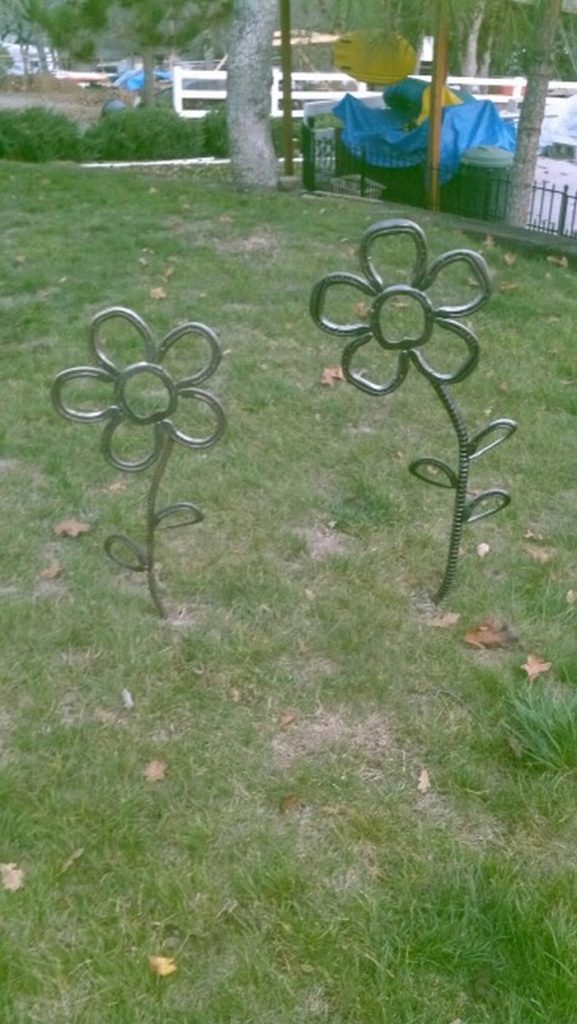
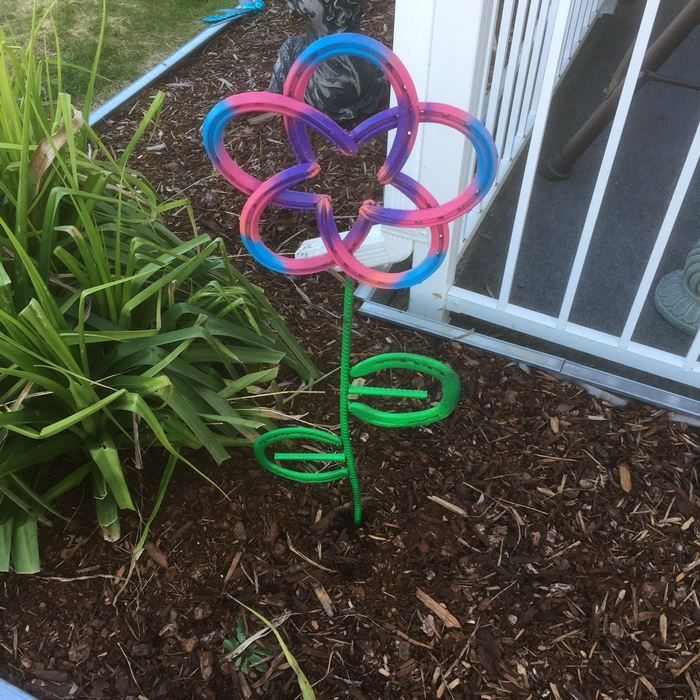
Horseshoe Flower Yard Art
Horseshoe flowers are a pretty and unique addition to any yard or garden. Handcrafted from durable metal, these flowers are built to last and add a touch of whimsy to your landscaping.
Skill: Intermediate • Time: 1–2 hours
What materials are needed to create a Horseshoe Flower Yard Art?
- 5–7 horseshoes (petals)
- Rebar/rod for stem; small plate for leaf (optional)
- Exterior paint or clear coat
What tools are needed for this project?
- Welder, grinder, clamps, PPE

How to create a Horseshoe Flower Yard Art?
- Petals: Arrange 5–6 shoes in a radial “flower” and weld at overlaps.
- Stem: Weld flower head to rebar; add a curved plate/rod as leaf.
- Base: Sharpen stem end or weld to a base stake.
- Finish: Prime and paint with UV‑resistant enamel.
Pro Tip: Apply UV‑resistant paint for weather protection.
Horseshoe Butterfly Yard Art
Add some personality to your garden with this horseshoe butterfly yard art! This cheerful decoration is sure to bring a smile to your face every time you see it. Butterflies are a symbol of transformation, new beginnings, and hope.
Skill: Intermediate • Time: 1–2 hours
What materials are needed to create a Horseshoe Butterfly Yard Art?
- 4 horseshoes (wings), 6–10 nails/bolts (body/antennae)
- Small plate or rod for body (optional)
- Paint/clear coat
What tools are needed for this project?
- Welder or epoxy (for light‑duty), grinder, clamps, PPE
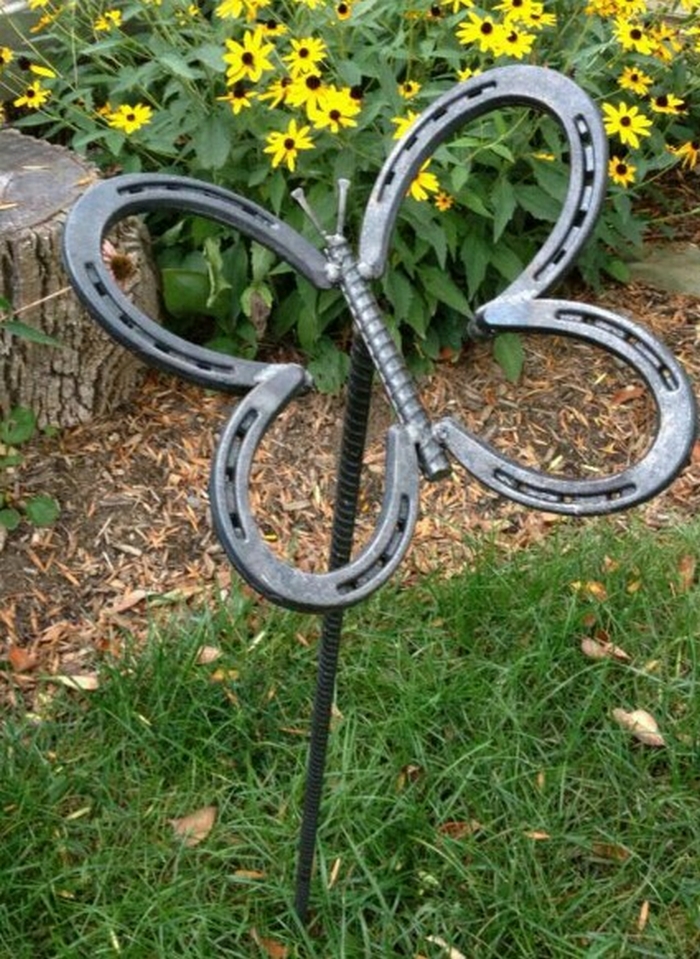
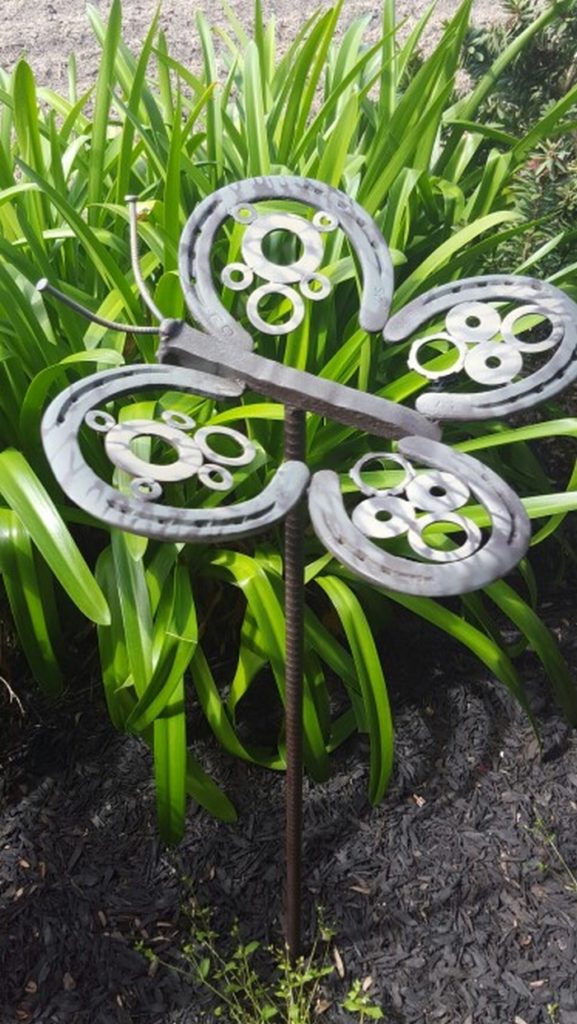

How to create a Horseshoe Butterfly Yard Art?
- Wings: Pair two shoes per side; mirror them to form wings.
- Body: Line nails/bolts as a thorax; weld to center. Add two bent nails for antennae.
- Mount: Weld a stake or add a rear bracket for wall mounting.
- Finish: Bright colors for wings; clear‑coat for weather.
What better way to start fresh in your garden than by adding a touch of whimsy with this horseshoe craft? Pro Tip: Spray paint bright colors to mimic real butterflies.
Horseshoe Fairy Door
Introducing the Horseshoe Fairy Door! This charming little door is the perfect way to welcome fairies into your home. Made of durable metal, this door features a beautiful design with intricate detailing.
It’s the perfect addition to any fairy house and is sure to bring a smile to any child’s face.
Skill: Beginner • Time: 45–60 min • No‑weld friendly
What materials are needed to create a Horseshoe Fairy Door?
- 1–2 horseshoes (frame)
- Small wood panel or metal plate (door)
- Tiny hinges/knob, screws, epoxy
- Moss, pebbles, mini lights (decor)
What tools are needed for this project?
- Drill/driver, metal/wood bits, file, clamps
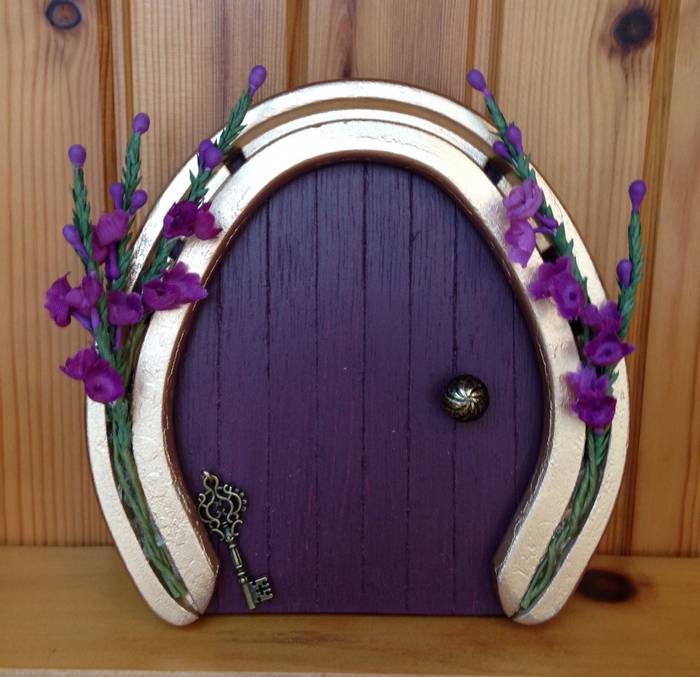

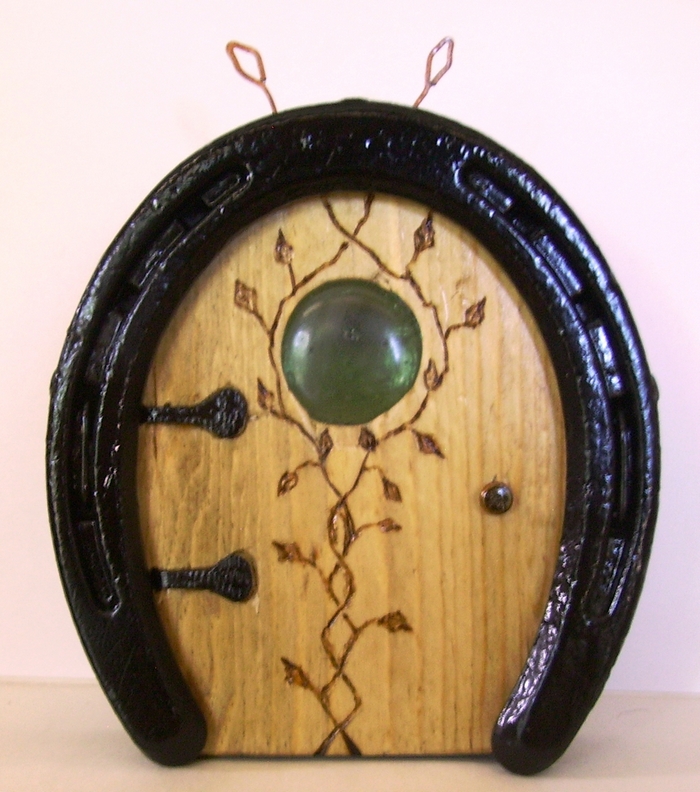
How to create a Horseshoe Fairy Door?
- Backer: Cut a small arched wood/metal door panel to fit inside a horseshoe.
- Attach: Epoxy or screw panel to shoe; sand edges smooth.
- Hardware: Add miniature hinges/knob; optional latch.
- Decor: Glue moss/pebbles; add battery micro‑lights. Seal for outdoors.
Pro Tip: Add mini hinges, moss, or fairy lights for a whimsical effect.
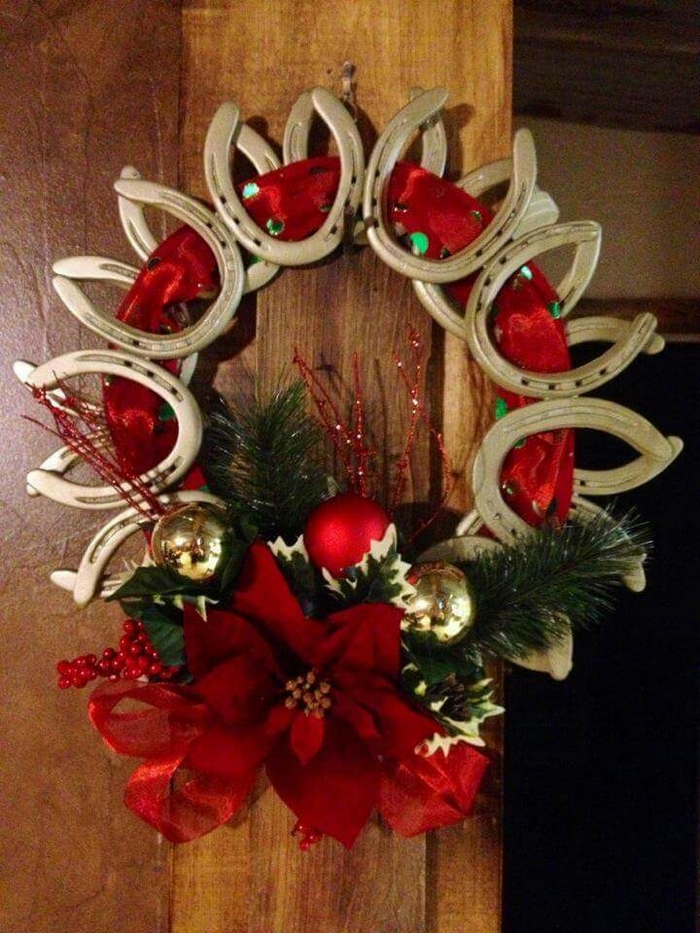
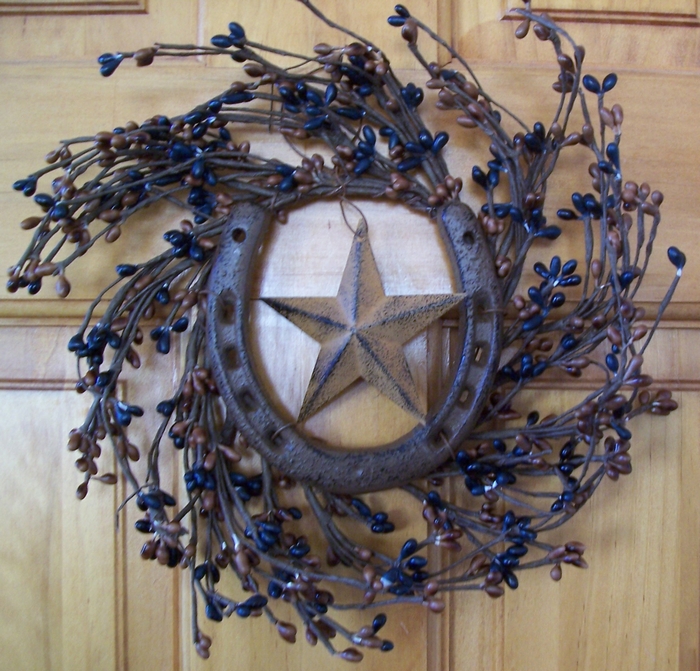
Horseshoe Wreath
This horseshoe wreath is the perfect addition to your home décor. It is crafted from natural horseshoes and features a beautiful, rustic design. This wreath is perfect for your front door or as a wall decoration.
Skill: Beginner–Intermediate • Time: 60–90 min • No‑weld possible
What materials are needed to create a Horseshoe Wreath?
- 12–14 horseshoes
- Epoxy or welds; ribbon/greenery/bow (seasonal)
- Hook or chain for hanging; paint/clear
What tools are needed to create this project?
- Clamps, grinder/file, PPE

How to create a Horseshoe Wreath?
- Ring: Arrange shoes tip‑to‑heel in a circle. Dry‑fit for even spacing.
- Join: Epoxy and clamp each contact (or spot‑weld).
- Finish: Paint or seal; attach hook or chain.
- Style: Add seasonal greenery, ribbon, or house numbers.
Pro Tip: Decorate per season — greenery for spring, bows for Christmas.
No‑Weld Horseshoe Ideas (Beginner Friendly)
Don’t weld? Use heavy‑duty epoxy or brackets. Easy projects: wreaths, centerpieces, bottle holders, or small signs screwed onto wooden bases. Best for: Apartments or tool‑limited workspaces.
You can also check other projects like clever cardboard crafts. How about the rhythmic whoosh of scissors and the mighty rustle of cardboard for an eco-friendly project? How does it sound?
Safety Essentials for Every Project
- Protective Gear: Wear gloves, goggles, ear protection, and heat‑resistant clothing.
- Heat & Fire Safety: Keep a fire extinguisher handy; never weld near flammables.
- Ventilation: Work outdoors or use a fume extractor when welding or painting.
- Tool Handling: Follow user manuals; keep cords and areas clutter‑free.
- Anchoring & Finishing: Double‑check welds or screws before hanging or loading items.
So, you’re ready to dive into the world of horseshoe crafts with confidence. Remember, safety is the secret ingredient that ensures your adventure is not only creative but also injury-free. So, gear up, follow these tips, and let your crafting journey be both artistry and safety!
Frequently Asked Questions
- Can beginners try their hand at creative horseshoe crafts, or are they better suited for experienced crafters?
- Creative horseshoe crafts are welcoming to all levels of crafters. Whether you’re a novice looking for a new DIY adventure or an experienced crafter seeking a unique challenge, these projects are designed for everyone.
- Where can I get horseshoes for creative crafts? Do I need to visit a blacksmith?
- You don’t have to forge a friendship with a blacksmith! Horseshoes are readily available at local farm supply stores, online marketplaces, and even flea markets. No need to saddle up for a blacksmith visit unless you fancy a unique touch.
- Do creative horseshoe crafts only complement rustic decor, or can they add flair to modern aesthetics?
- These crafts are as versatile as a chameleon in a paint store! Whether your style is rustic, farmhouse chic, or modern, creative horseshoe crafts can be adapted to suit your unique taste and decor.
- What’s the typical time commitment for a creative horseshoe craft project?
- The crafting time varies based on the complexity of the project. Some crafts can be finished in a creative afternoon, while others may take more time for intricate detailing and personalization.
- Can I infuse my creative ideas into horseshoe crafts, or should I strictly follow instructions?
- Absolutely! Horseshoe crafts are a canvas for your creativity. Feel free to add your flair, experiment with colours, and let your imagination take the reins. There are no strict rules – it’s your artistic journey!
- Are creative horseshoe crafts suitable as gifts?
- These horseshoe crafts make delightful and meaningful gifts. The personal touch of a handmade creation adds a special sentiment to any occasion.
The Wrap Up — Unleash Your Creativity
From wine racks to butterflies, every horseshoe craft lets you recycle metal and pour personality into something lasting.
No forge? No problem — a little grit, epoxy, and imagination go a long way.
So gather your old shoes, spark your creativity, and transform scrap iron into lucky masterpieces that tell your story.