Last Updated on December 15, 2025 by teamobn
A DIY solar furnace is a simple solar air heater that you can build with basic tools. It uses two glass window panes, a wooden frame, and a black surface to absorb sunlight and warm the air. A small fan or natural airflow then moves this warm air back into your room.
This project usually costs under 50 dollars in materials and can be built in a weekend by someone with basic DIY skills. It works best as a supplemental heater for a sunny room, not as a complete replacement for your main heating system. Always wear safety gear, follow local building codes, and ask a professional for help when working with electrical components.

Contents
- 1 What Is A DIY Solar Furnace?
- 2 Building a DIY Solar Furnace
- 3 How Effective Is A DIY Solar Furnace?
- 4 Benefits of a DIY Solar Furnace
- 5 Common DIY Solar Furnace Designs
- 6 Safety Precautions For A DIY Solar Furnace
- 7 Maintenance Tips For A DIY Solar Furnace
- 8 Conclusion
Project at a Glance
- Project type: DIY solar air heater (solar furnace)
- Skill level: Beginner to intermediate DIYer
- Estimated cost: Under 50 dollars in basic materials
- Build time: One weekend (about 6 to 8 hours of hands-on work)
- Best use: Supplemental heat for a small or medium room on sunny days
- Main materials: 2 glass window panes, 2 x 6 timber frame, black plastic sheet, ABS pipe, dryer vent hose
- Power source: Sunlight only, optional small fan for better airflow
- Key benefits: Lower heating bills, reduced carbon footprint, more energy independence
- Important safety notes: Wear eye and hand protection, handle glass carefully, mount on a stable surface, and follow local building and electrical codes
What Is A DIY Solar Furnace?
A DIY solar furnace is also called a solar air heater. It is a panel that collects heat from the sun and uses it to warm the air.
The basic idea is:
- Sunlight hits a dark surface inside a box.
- The dark surface heats up.
- Cool air from your room is pulled into the box, warmed by the hot surface, and then sent back into the room.
This kind of heater does not burn any fuel. It uses free solar energy to help reduce your energy bills and your carbon footprint.
Watch the quick tutorial below and see how easy it is to make your own solar furnace.
And while you’re on your quest to keep your home warm and cozy, why not also make these DIY insulated curtains? This will help make your solar furnace even more effective!
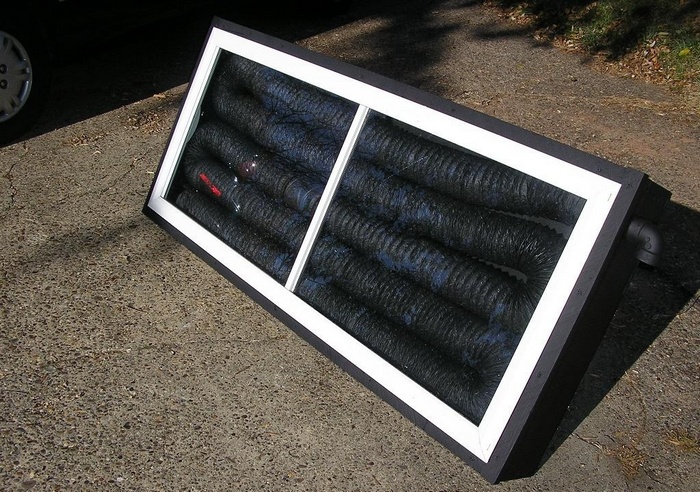
Building a DIY Solar Furnace
Click on any image to start the lightbox display. Use your Esc key to close the lightbox. ![]()
What Are the Materials Needed to Build a DIY Solar Furnace
- 3′ x 5′ Black Plastic
- 2 Glass Window Panes with Aluminum Frame
- 1/2″ Lag Bolts
- 2″ x 6″ Timber Frame
- ABS Plastic Pipe
- Dryer Vent Hose
- Black Spray Paint
- Screws or brackets for mounting the unit
And these tools:
- Measuring Tape
- Drill with drill bits
- Table saw, or a hand saw suitable for cutting timber
- Staple gun and staples
- Screwdriver
- Safety glasses and work gloves
Before You Start: Safety And Planning
Safety tips
- Wear safety glasses and gloves when cutting wood or handling glass.
- Work on a stable surface and keep the work area clear of clutter.
- Be careful with sharp edges on glass, frames, and cut metal or plastic.
- If you plan to use a fan or electrical parts, turn off the power before working and ask an electrician for help if you are not experienced.
- Do not mount the unit where it can fall or block exits or windows that are needed for emergency escape.
Planning the location
- Choose a south facing wall if you live in the northern hemisphere.
- Make sure the wall receives several hours of direct sunlight on winter days.
- Check that there is space inside the room for the warm air outlet and the cool air intake.
How to Build a DIY Solar Furnace: A Step-by-Step Guide
Step 1: Build The Wooden Frame
- Measure and cut the 2 x 6 timber to form a rectangle about 3 ft x 5 ft. This should match the size of your glass panes.
- Arrange the boards into a rectangle and drill pilot holes at each corner.
- Join the corners with 1/2 inch lag bolts. If you use pressure treated lumber, choose galvanized bolts and washers to reduce staining and corrosion.
- Check that the frame is square by measuring the diagonals. They should be the same length.
This frame is the main structure that will hold the absorber, the glass panes, and the vents.
Step 2: Add The Black Absorber Surface
- Lay the frame flat on a stable surface.
- Stretch the 3 ft x 5 ft black plastic sheet across one side of the frame. Make sure it is tight and smooth.
- Use the staple gun to attach the plastic to the wooden frame. Place staples every few inches around the edge.
- Check for wrinkles or loose areas and fix them. A smooth, dark surface absorbs heat more efficiently.
This black surface is where the sunlight will be absorbed and turned into heat.

Step 3: Install The Glass Window Panes
- Place the glass window panes with aluminum frames on top of the wooden frame. The glass should face outward.
- Adjust the panes so they are centered and fully cover the black plastic beneath.
- Once you are satisfied with the alignment, use lag bolts or appropriate fasteners to secure the window frames to the wooden frame.
- If desired, lightly spray the aluminum frame with black spray paint. A dark frame can absorb more heat and reduce reflections.
The glass creates a greenhouse effect. It lets sunlight in but helps hold the warm air inside the panel.
Step 4: Add Intake And Exhaust Vents
You will need an intake vent for cool air and an exhaust vent for the warm air.
- Decide which side of the frame will be the top and which will be the bottom when the furnace is mounted.
- At the top of the frame, mark a spot where the warm air will exit.
- Drill a hole through the frame that matches the diameter of your ABS plastic pipe. This is your exhaust vent.
- At the bottom of the frame, drill a similar hole for the cool air intake.
- Insert short sections of ABS pipe into both holes. They should fit tightly.
- Connect the dryer vent hose to the warm air outlet pipe at the top. This hose will run through your wall or window into the room.
- If needed, use screws, clamps, or metal tape to secure the hose and prevent air leaks.
Make sure the vents and hose connections are airtight. Gaps will reduce the heater’s performance.
Step 5: Connect The Furnace To Your Room And Test It
- Decide how you will connect the furnace to the room. Many DIY builders cut two round openings in a piece of plywood that fits into a window frame. One opening is for the warm air outlet and the other is for the cool air intake.
- Attach the dryer vent hose from the top outlet of the furnace to the upper opening in your wall or window insert. This will blow warm air into the room.
- Attach another section of hose or duct from the lower opening in the wall or window insert to the intake pipe at the bottom of the furnace. This allows cool room air to flow into the panel.
- Seal any gaps around the hoses with weatherstripping or sealant so that air does not escape.
- On a sunny day, check the system. You should feel warmer air coming from the outlet hose into the room.
Some builders add a small fan to increase the airflow. A low power fan can pull more air through the furnace and increase the heat output.
How Effective Is A DIY Solar Furnace?
A DIY solar furnace works best as a helper for your main heating system.
- It provides the most heat on clear, sunny days.
- It can noticeably warm a small to medium-sized room, such as a bedroom or home office.
- It will not usually heat an entire house on its own, especially in very cold climates.
If you have good insulation and several solar air heaters, you can reduce your use of electric or gas heat. However, a backup heating source is still important for cloudy days and nights.
Benefits of a DIY Solar Furnace
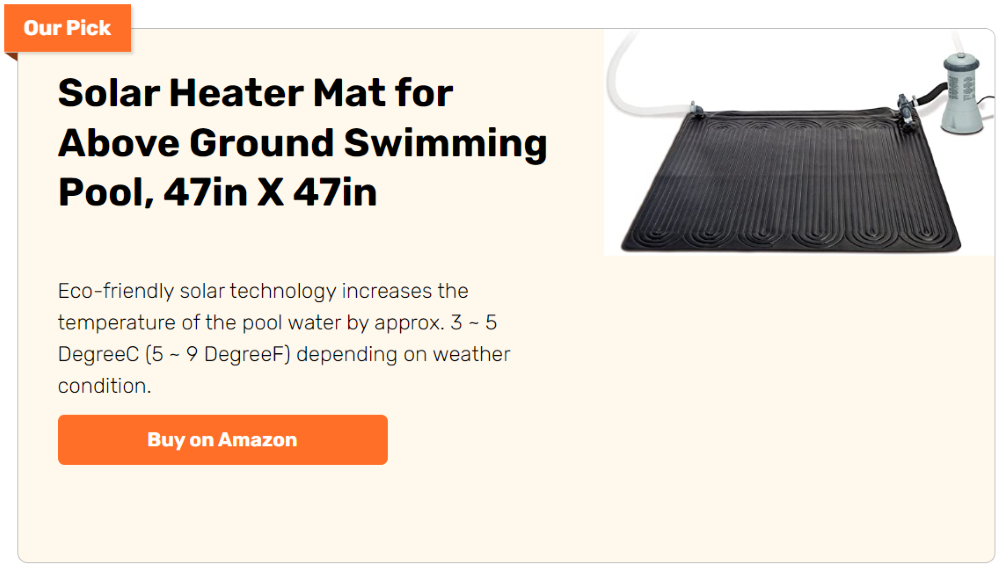
Eco-friendly Heating
- Uses free solar energy instead of fossil fuels.
- Reduces greenhouse gas emissions when it replaces or reduces other types of heating.
- Supports a more sustainable lifestyle.
Cost-Savings
- The main cost is the initial materials, which can be under 50 dollars for a basic design.
- Once installed, the sun is free, so operating costs are low.
- There are usually fewer moving parts than in traditional heaters, so maintenance needs are limited.
Energy Independence
- Reduces your dependence on utility companies and fuel price changes.
- Gives you some control over your heating, especially in sunny climates.
- DIY construction helps you understand and maintain your own system.
Common DIY Solar Furnace Designs
DIY solar air heaters appear in many forms, but most use similar ideas.
Pop Can Solar Collectors
- Use empty aluminum drink cans stacked in columns.
- Each can is cleaned, painted black, and drilled to allow air to flow through.
- Solar-heated air passes through the can columns and returns to the room.
- This design recycles waste material and creates a high surface area for heat transfer, but it can be time-consuming to build.
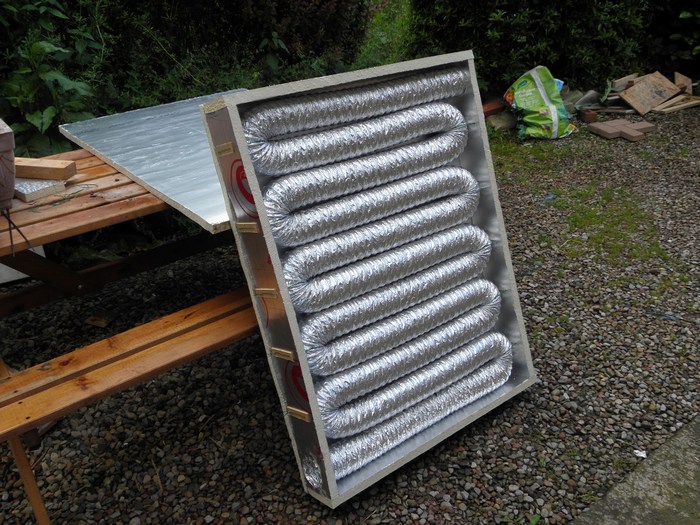
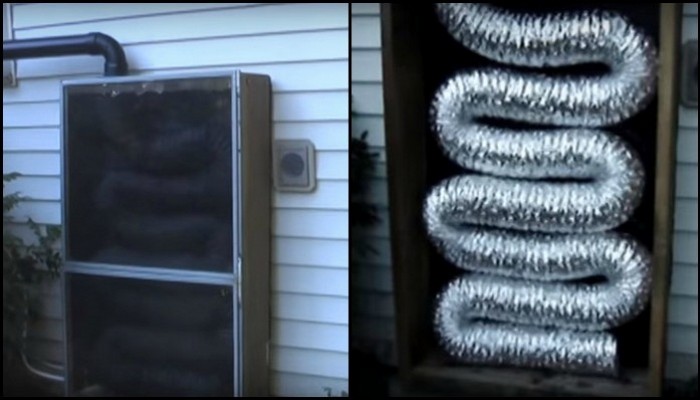
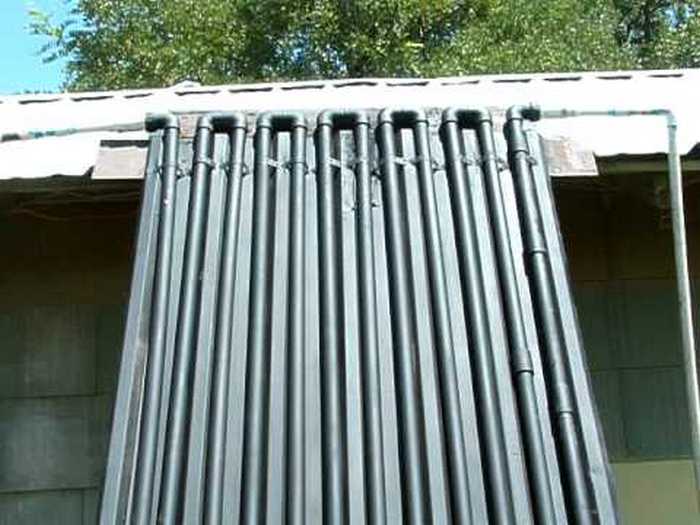
Downspout Solar Collectors
- Use black painted metal downspouts or eaves troughs instead of cans.
- Air flows through the tubes, which are heated by the sun.
- These collectors are often easier to build than pop can collectors and can be durable and clean looking.
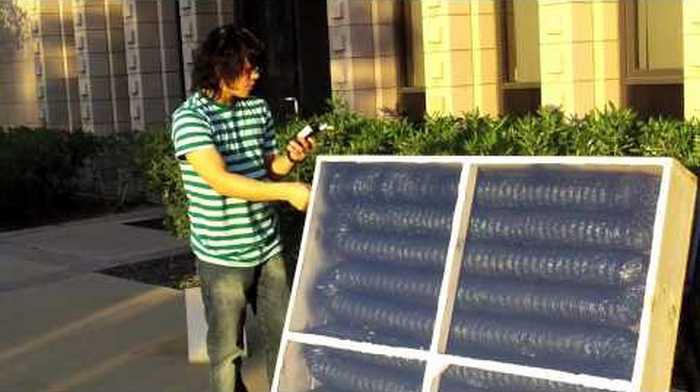
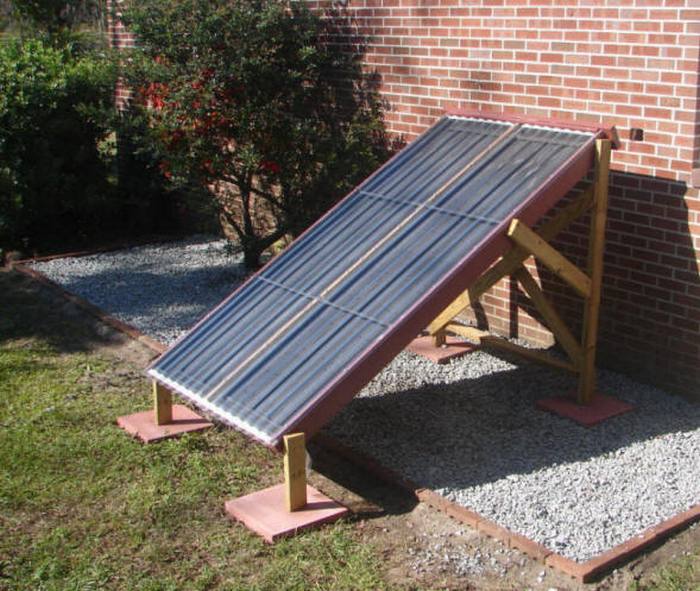
Solar Screen or Sheet Metal Absorbers
- Use several layers of black solar screen or a flat black sheet of metal as the absorber.
- Air flows behind or across these surfaces and is heated by contact.
- These designs are usually simple and low maintenance, with a clean, flat appearance.
All of these designs collect solar energy and use it to heat air. Your choice depends on your budget, tools, and how much time you want to spend building.
Safety Precautions For A DIY Solar Furnace
Handling Materials Safely
- Glass panes can break and have sharp edges, so handle them carefully and use gloves.
- Cut wood and plastic away from your body, and keep your hands clear of saw blades and drill bits.
- Wear safety glasses to protect your eyes from flying chips and dust.
- Work in a well-ventilated area, especially when spray painting or cutting materials.
Safe-Installation
- Mount the furnace on a stable wall, stand, or frame.
- Use appropriate screws, brackets, or anchors for the surface you are attaching to.
- If working at height, use a sturdy ladder and consider a safety harness.
- Follow local building codes, especially if you cut holes in exterior walls or modify windows.
Electrical Safety
- If you add a fan or other electrical parts, turn off the power before working.
- Use properly rated cables and connectors.
- If you are not confident in your skills, ask a licensed electrician to help with wiring.
Regular Checks
- Inspect the frame, glass, and vents regularly for damage, cracks, or loose parts.
- Make sure nothing blocks the vents, such as leaves, nests, or debris.
- Fix any problems immediately to prevent accidents and maintain performance.
Check our gallery for more solar furnace ideas you could install in your homes


Maintenance Tips For A DIY Solar Furnace
Keep the glass and surfaces clean
- Dust, pollen, and dirt reduce how much sunlight reaches the absorber.
- Wipe the glass with a soft cloth and mild soapy water when it looks dirty.
- Rinse with clean water and dry to avoid streaks or mineral spots.
- Do not use abrasive cleaners that can scratch the glass.
Inspect the structure
- Check the wooden frame for cracks, warping, or rot.
- Look for signs of rust or corrosion on metal parts.
- Examine the sealant around the glass panes and vents, and repair any gaps.
- Make sure hoses and duct connections remain tight and airtight.
Check the airflow
- Confirm that air is flowing from the intake into the furnace and out the warm air outlet into the room.
- Remove any blockages such as leaves or dust.
- If you use a fan, make sure it is running smoothly and quietly. Replace it if it fails or becomes very noisy.
Regular maintenance keeps your DIY solar furnace safe and efficient and can greatly extend its useful life.
Conclusion
A DIY solar furnace is an affordable and practical way to add solar heat to your home. With basic tools, simple materials, and a weekend of work, you can build a panel that uses sunlight to warm a small room.
While it will not usually replace your main heating system, it can lower your energy bills, reduce your environmental impact, and give you more control over your home’s comfort. With good planning, safe building practices, and regular maintenance, this project can be a rewarding step toward more sustainable living.
FAQ for DIY Solar Furnace
- How effective is a DIY solar furnace in heating a home?
- A DIY solar furnace is best for heating one room or helping your main heating system. On a sunny winter day, it can raise the temperature in a small to medium room by several degrees. To heat an entire house, you would need multiple units and excellent insulation.
- How much does it cost to build a DIY solar furnace?
- Most simple DIY solar air heaters cost under 50 dollars in basic materials if you already own the tools. Costs can rise if you buy higher-quality glass, thicker wood, or add fans and controls.
- Can I install a DIY solar furnace myself?
- Yes, many people with basic DIY skills can build and install a solar furnace. You should be comfortable with simple carpentry and safe tool use. For electrical work or complex wall penetrations, it is wise to consult a professional.
- Do I need a permit to install a DIY solar furnace?
- Permit rules depend on your location. Small, temporary units installed in window openings may not need permits, but larger, permanent panels connected through walls might. Check your local building codes and ask your local authority if you are unsure.
- Can a DIY solar furnace work in cold climates?
- Yes. A solar furnace can still collect heat on clear, cold days if the sun is strong. However, its performance decreases in very cloudy or short winter days. In cold climates, treat it as a helpful addition to your main heating, not a full replacement.
- Is maintenance difficult?
- Maintenance is usually simple. Clean the glass occasionally, check that the frame is solid, and keep vents and ducts clear of debris. Inspect for cracks, loose connections, or worn sealant once or twice a year.
- How do solar air heaters work in simple terms?
- Solar air heaters draw cool air from the room into a sunlit panel. Inside the panel, the air passes over a dark, heated surface. The air warms up and then flows back into the room through an outlet. This cycle repeats as long as the sun is shining and the air can move.
- How much heat can a panel like this provide?
- The exact amount of heat depends on the size of the panel, the materials used, and the strength of the sun. Larger panels can warm more air and reach higher outlet temperatures. Using metal with high thermal conductivity, such as aluminum or copper for absorbers, can improve performance compared to plastic.