Last Updated on November 10, 2025 by teamobn
Build a durable wooden smokehouse you can use year‑round. This plan creates a 48×24×24″ cabinet with adjustable vents, 6 to 7 racks, and a top chimney for clean, controllable smoke. It costs roughly $180–$350 in materials and takes 6–8 hours for an intermediate DIYer. You’ll learn how to frame, sheath, vent, gasket the door, set up thermometers, and choose the right woods — plus safety tips to avoid creosote and off‑gassing.
Contents
- 1 DIY Wood Smoker: Quick Specs (Time, Cost, Size, Safety)
- 2 4 Basic Parts of a Wood Smoker
- 3 Building a Wood Smoker
- 3.1 Precise Cut List:
- 3.2 What Materials are Needed to Build a Wood Smoker?
- 3.3 What Tools Are Needed for This Project?
- 3.4 How to Build a Wood Smoker?
- 3.4.1 Step 1: Frame and Square
- 3.4.2 Step 2: Install Rack Supports
- 3.4.3 Step 3: Sheath the Cabinet
- 3.4.4 Step 4: Build and Hang the Door
- 3.4.5 Step 5: Venting and Chimney
- 3.4.6 Step 6: Thermometers and Probe Port
- 3.4.7 Step 7: Fire source
- 3.4.8 Step 8: Roofing and Weatherproofing
- 3.4.9 Step 9: Burn-in and Leak Check
- 3.4.10 Step 10: Operating Targets
- 4 Choosing the Right Wood for Your Smoker
- 5 Conclusion
DIY Wood Smoker: Quick Specs (Time, Cost, Size, Safety)
- Finished size: 48″H × 24″W × 24″D cabinet (122 × 61 × 61 cm)
- Skill level: Intermediate DIY Build time: 6 to 8 hours (plus burn‑in)
- Estimated cost: $180–$350 (lumber, hardware, racks, roofing)
- Temperature targets: Burn-in ~250°F (121°C) for 2–3 hours; cook 180–275°F (82–135°C)
- Safety essentials:
- Only untreated lumber inside the smoke path
- No interior paints, finishes, or sealants
- Offset or heat-isolated fire source; never leave unattended
- Follow USDA internal temps (e.g., poultry 165°F/74°C) USDA FSIS
- Place outdoors with clearance from structures in line with local code and NFPA guidance (often 10 ft / 3 m; verify locally) NFPA
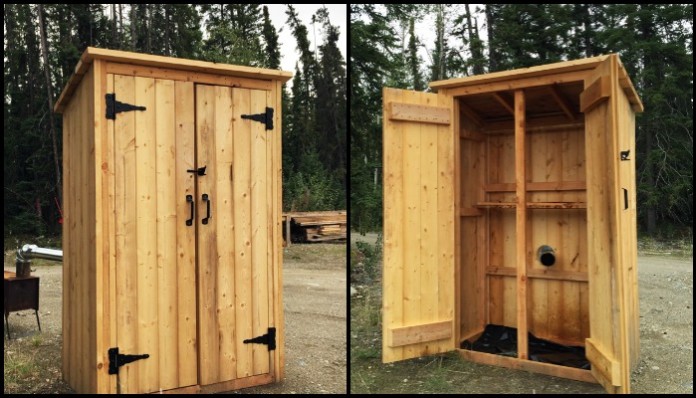
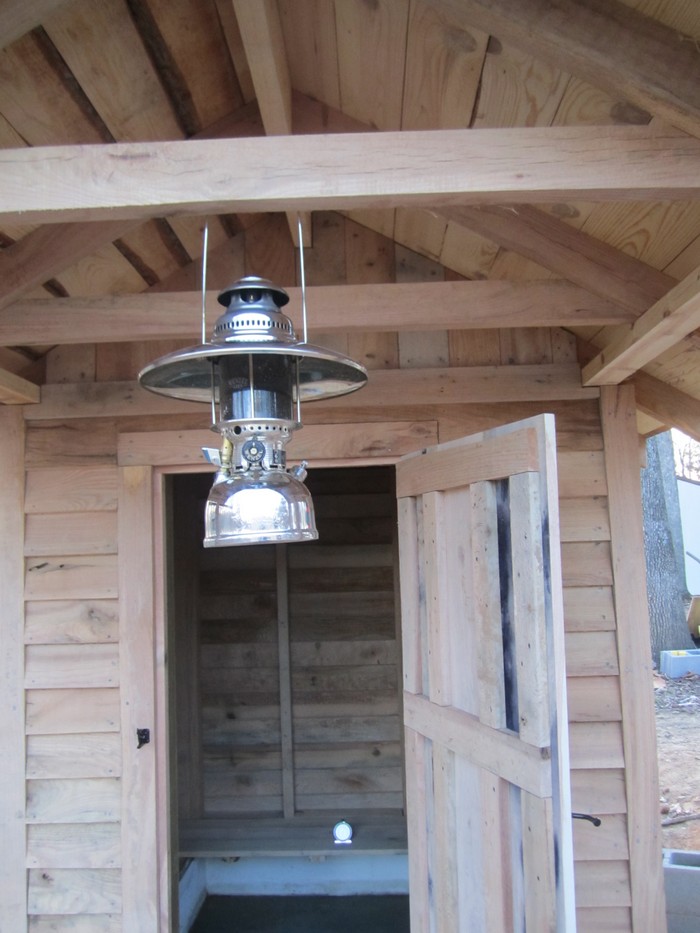
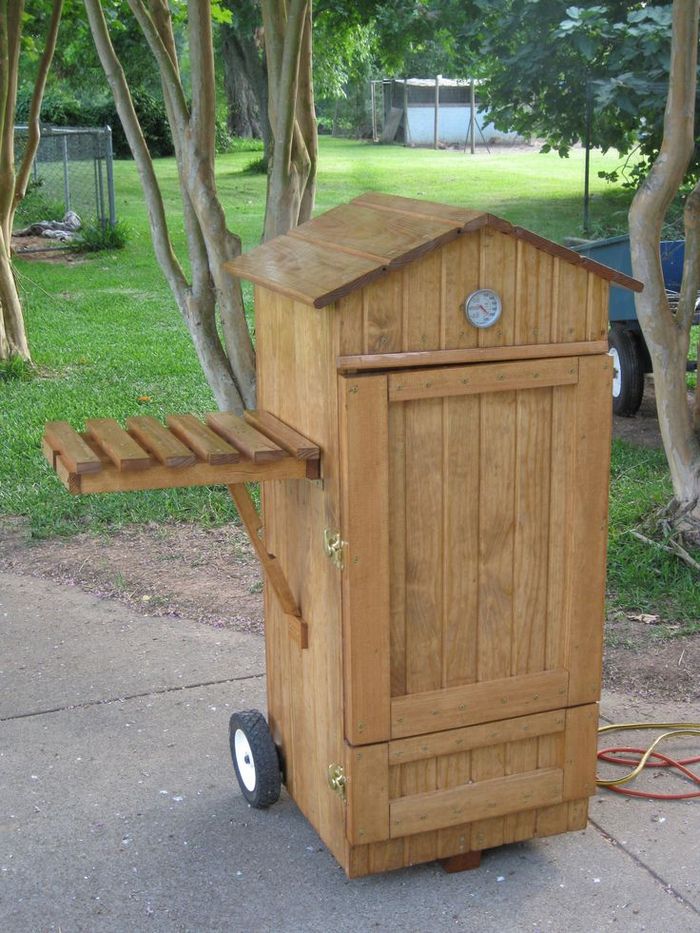
A great wood smoker you can enjoy all year round!
When it comes to smoking meats and fish, size definitely matters. If you’re smoking for a large group of people, you’re going to need a smoker that can accommodate a lot of food. Otherwise, you’ll be stuck smoking in batches, which can be time-consuming and frustrating.
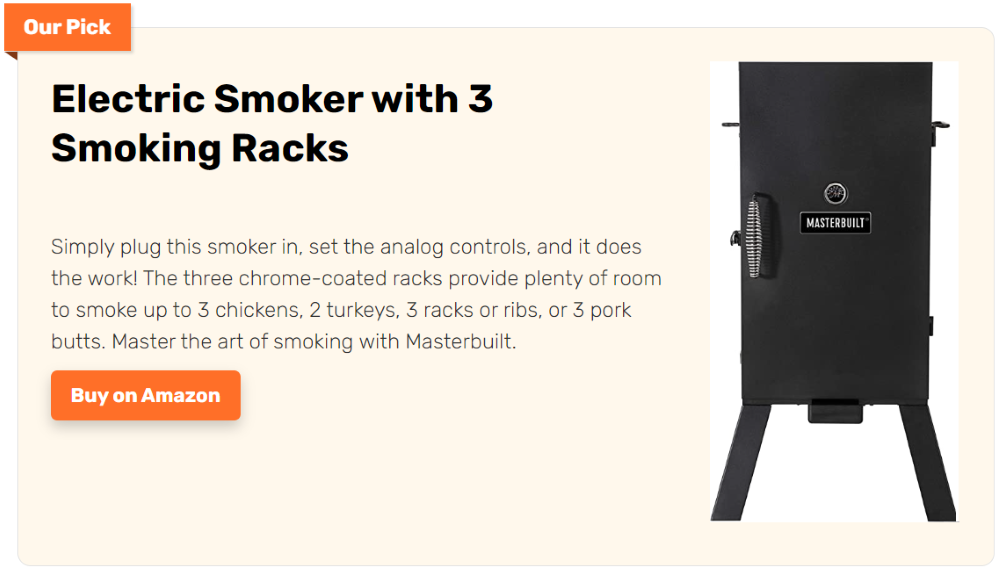
So, if you’re looking for a large smoker that can handle a lot of food, here are a few things to keep in mind. First, you’ll need to decide what type of smoker you want. There are electric smokers, which are easy to use but can be expensive. There are also charcoal smokers, which are less expensive but require more work to use.
You’ll be pleased to learn how easy it is to build your very own mini timber smokehouse. In fact, this DIY project can easily be finished over a weekend with just a few tools and some basic carpentry skills. The resulting smokehouse will be a great addition to your backyard and will allow you to enjoy delicious smoked meats and fish all year round.

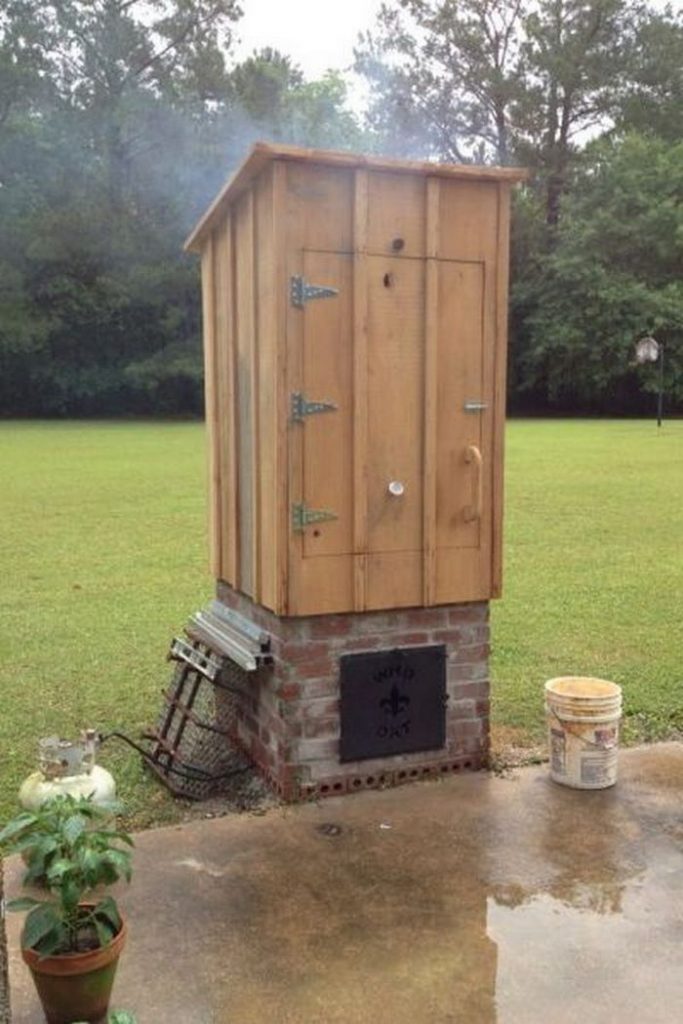
If you’re a fan of smoked meats, you’ll love having your own wood smoker right in your backyard. This easy-to-build wood smoker is perfect for backyard barbecue enthusiasts. With just a few modifications, you can turn a simple outdoor storage shed into a fully functional wood smoker.
So if you already have an old storage shed for your gardening tools, this project is perfect for you. With a little bit of work, you can easily turn it into a smoker that will make your friends and family drool.
Want to learn how this timber smoker was built? Then read our guide on how to make a smoker out of wood.
4 Basic Parts of a Wood Smoker
The Source of the Smoke
The source of the smoke is one of the most important aspects of a smokehouse. This could be a simple wood-fired box or a more sophisticated smoker. The wood used to create the smoke is also important. The most common woods used are hickory, mesquite, oak, and maple. Each of these woods imparts a different flavour to the meat being smoked.
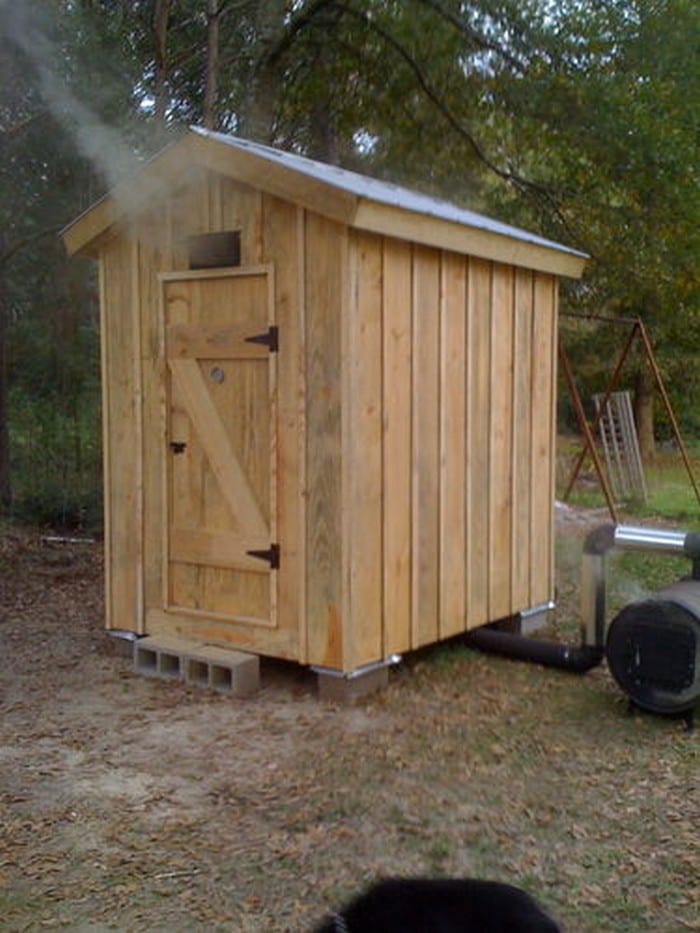
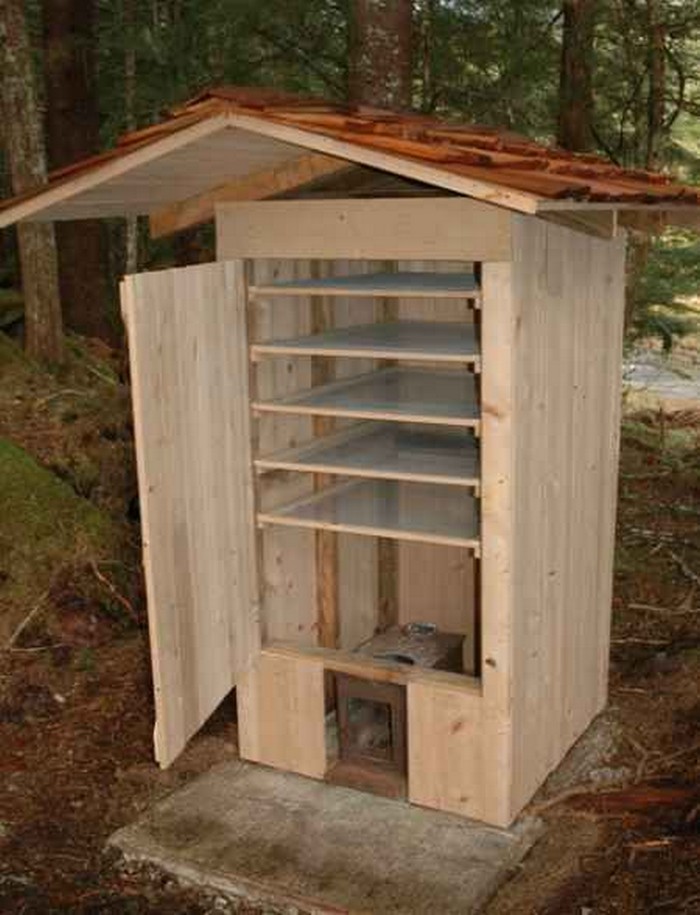
A Place to Hold the Smoke
Now that you’ve got your wood-fired box, it’s time to find a suitable place to hold the smoke. If you’re smoking a large amount of food, you’ll need a shed or other structure that can accommodate the size of your smoking operation.
A wooden shed is a great backyard storage solution and can be built relatively easily with the right tools and instructions. This guide will give you everything you need to know about building a wooden shed from scratch, including what materials you’ll need and where to find the best instructions.
With a little time and effort, you can have a beautiful and functional shed as a wood smoker that will provide years of smoking and enjoyment.
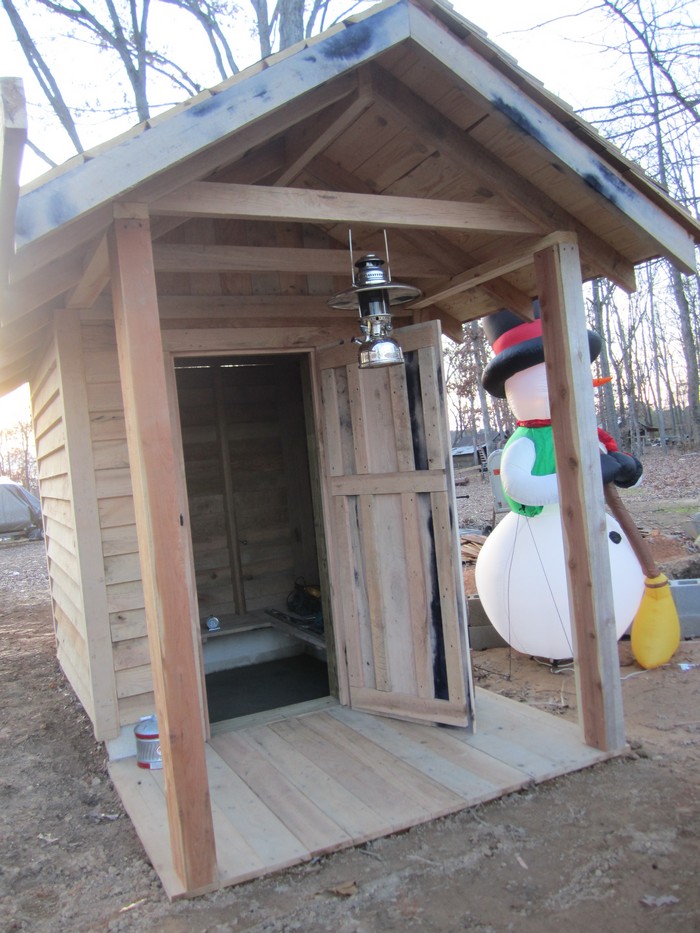
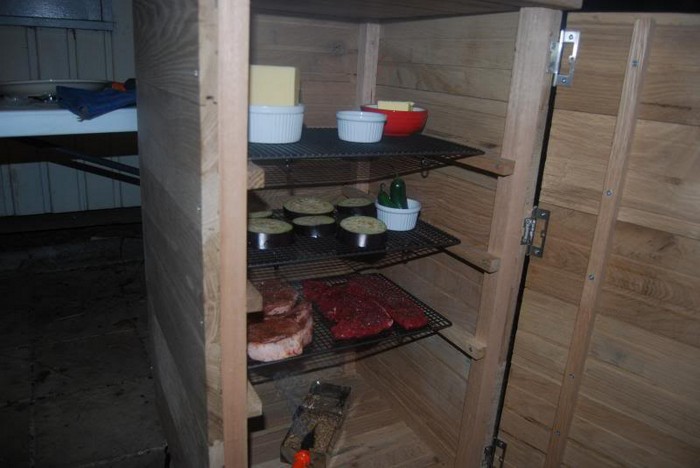
A Method to Hold the Meat in the Smoke
There are various ways you can hold the meat in your wood smoker. You can hang them, or you can place them on racks. If you choose to hang your meat, make sure that the hooks are placed properly so that the meat is secured and will not fall.
If you opt to place your meat on racks, ensure that they are placed far enough apart so that the heat can circulate properly and cook the meat evenly.
A Draft Regulator
A draft regulator should be installed in your wood smoker because it will help to ensure consistent smoking temperatures. By regulating the amount of air that is able to enter the smoker, you can better control the smoking process and produce more consistent results.
Additionally, a draft regulator can help to reduce the amount of fuel that is required to maintain smoking temperatures, which can save you money in the long run.
Building a Wood Smoker
Precise Cut List:
2×4 framing (untreated):
- 8 pcs @ 48″ (verticals)
- 8 pcs @ 21″ (width rails)
- 8 pcs @ 21″ (depth rails)
- 6 pcs @ 20.5″ (rack support cross pieces)
Plywood (1/2″):
- 2 panels @ 48″×24″ (sides)
- 1 panel @ 24″×24″ (top)
- 1 panel @ 24″×24″ (bottom)
- 1 panel @ 45.5″×22.5″ (door; allows ~1/8″ gap all around)
Racks and Accessories:
- 6–7 wire racks @ ~14.5″×20″ (2″ vertical spacing; lowest position for drip pan)
- High‑temp fiberglass door gasket (food‑contact safe)
- 2–3 sheet‑metal intake sliders; 2–3″ chimney with damper
- 1 bimetal door thermometer + optional probe port grommet (3/8″)
- Cast iron pan + firebrick (if using internal pan) or stovepipe + offset firebox parts
What Materials are Needed to Build a Wood Smoker?
- 2 sheets of 1/2″ Plywood
- 12 pcs of 2×4 Timber, 8′ long
- 6 pcs of gate-style Hinges
- 2 Handles and Latch
- Galvanized Nails
- Roofing Material
- 2-1/2″ Pocket Hole Screws
- Wood Glue
What Tools Are Needed for This Project?
- Measuring Tape
- Speed Square
- Kreg Jig
- Cordless Drill
- Circular Saw
- Miter Saw
- Safety Gear
How to Build a Wood Smoker?
Step 1: Frame and Square
- Assemble front and back rectangles: two 48″ verticals and two 21″ horizontals per rectangle.
- Connect with four 21″ depth rails at top and bottom to form the box.
- Check diagonals for square; adjust before fastening with 2‑1/2″ pocket screws and wood glue.
Step 2: Install Rack Supports
- From 8″ above the bottom, mark 2″ increments on both side frames.
- Attach 3/4″×3/4″ cleats or ripped strips level at each mark; allow ~1/8″ side clearance so racks slide freely.
Step 3: Sheath the Cabinet
- Attach 1/2″ plywood sides, top, and bottom with galvanized nails or screws; pre‑drill to avoid splitting.
- Leave the front open for the door.
Step 4: Build and Hang the Door
- Cut door panel 45.5″×22.5″ to maintain ~1/8″ gap on all sides.
- Mount with 6 gate‑style hinges for strength; add a latch and handles.
- Apply a high‑temp door gasket around the frame for a smoke‑tight seal.
Step 5: Venting and Chimney
- Intakes: drill 2–3 holes (1.5″) 3″ above the bottom on the side opposite your fire source; cover with sliding sheet‑metal plates for control.
- Exhaust: cut a 2–3″ hole centered at the top; add a chimney with a damper. Start cooking with top ~50% open.
Step 6: Thermometers and Probe Port
- Mount a bimetal thermometer at typical rack height.
- Add a 3/8″ grommet hole for digital probes so you can monitor grate and meat temps without pinching cables.
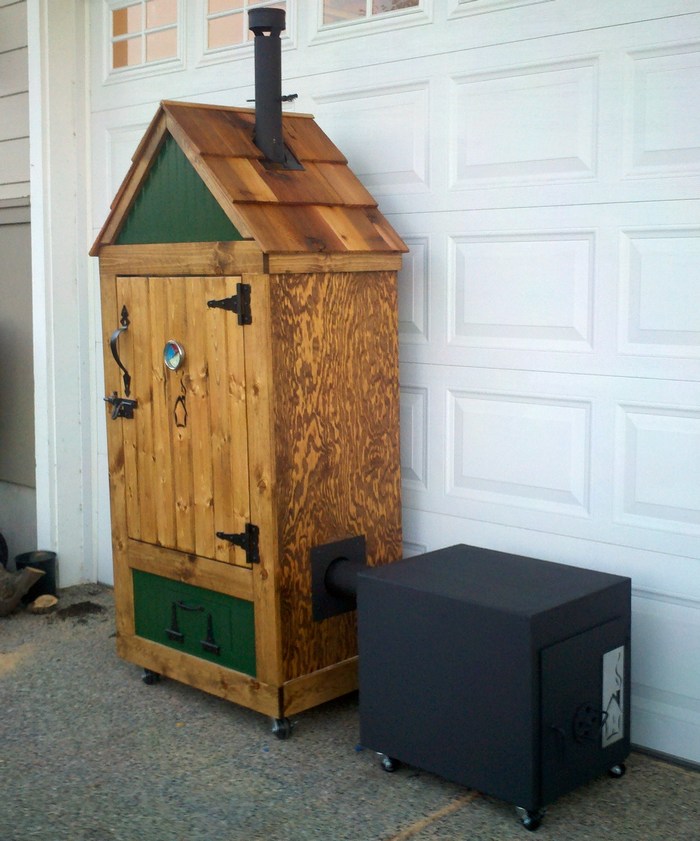
Step 7: Fire source
- Option A (safer): Offset firebox attached via 3–4″ stovepipe with a slight drop (helps draw smoke).
- Option B (simpler): Cast iron pan set on a firebrick at the cabinet bottom for charcoal and wood chunks; place drip/water pan on lowest rack.
Step 8: Roofing and Weatherproofing
- Add shingles or roofing to the top panel.
- Do not apply any sealant, paint, or finish inside the smoke path.
Step 9: Burn-in and Leak Check
- Run the smoker empty at ~250°F for 2–3 hours.
- Look for visible smoke leaks; adjust latches and gasket. Aim for clean “thin‑blue” smoke, not white billows.
Step 10: Operating Targets
- Typical hot smoking: 180–275°F. Start top damper at ~50% and intakes at 25–50%; stabilize before adding food.
Click on any image to start the lightbox display on how to make a smoker guide. Use your Esc key to close the lightbox.![]()


Choosing the Right Wood for Your Smoker
Choosing the right wood for your wood smoker is crucial for achieving the perfect flavor in your smoked meats. Different types of wood impart different flavors, and matching the wood to the type of meat can elevate your BBQ to new heights.
Let’s explore how to select the best wood for your wood smoker to ensure delicious results every time.
Comparable smoking woods table (normalized)
| Wood | Intensity | Flavor notes | Best for | Common mixes |
|---|---|---|---|---|
| Apple | Mild–Medium | Light, sweet, fruity | Pork, poultry, beef (light), seafood | Oak, cherry |
| Cherry | Medium | Sweet, fruity; adds red hue | Poultry, pork, beef | Oak, hickory, pecan |
| Hickory | Strong | Bold, “bacon-y,” can get bitter | Pork (ribs, shoulder), beef, turkey | Oak, fruit woods |
| Oak (red/white) | Medium–Strong | Rustic, balanced; versatile | Beef, pork, lamb, poultry | Cherry, apple, hickory |
| Mesquite | Very strong | Earthy, intense; can overpower | Beef, short cooks | Cut with lighter woods |
| Pecan | Medium–Strong | Sweet, nutty; milder than hickory | Poultry, pork, beef | Oak, fruit woods |
| Maple | Mild | Subtle, slightly sweet | Poultry, pork, cheese, veg | Apple, oak |
| Alder | Mild | Delicate, slightly sweet | Salmon/seafood, poultry, pork | — |
| Peach/Pear | Mild–Medium | Sweet, fruity (pear lighter; peach similar to hickory but sweeter) | Poultry, pork | Oak, apple |
| Plum | Medium | Sweet, bold, fruity | Pork, poultry, fish | — |
| Beech | Mild | Balanced, good all-rounder | Poultry, fish, pork, cheese | With stronger woods |
| Walnut (black/English) | Strong | Heavy; can be bitter | Beef, game; use sparingly | Fruit woods |
Notes and safety alignment:
- Mixing a “strong” with a “fruit” wood is consistently recommended for balance (e.g., hickory + apple, oak + cherry) across sources.
By carefully matching the wood to the meat, you can ensure that each smoked dish you prepare is flavorful, balanced, and delicious. Experimenting with different wood and meat combinations can also lead to exciting and unique culinary creations, expanding your smoking repertoire.
Experimenting with Flavors
Experimenting with flavors by mixing different types of woods is a creative way to customize the taste of your smoked meats. This approach allows you to blend the unique characteristics of various woods, creating a nuanced smoke that can enhance your dishes in unexpected ways.
Here’s how you can dive into the art of wood blending and discover new flavor profiles for your smoking projects:
- Start with a Base Wood
- Choose a base wood that provides the primary flavor you want with your wood smoker. For example, oak or hickory can serve as a strong foundation due to their versatile and robust flavors.
- These woods are excellent starting points because they offer a consistent smoke that complements a wide range of meats.
- Add a Secondary Wood for Complexity
- Incorporate a secondary wood with a different, perhaps milder for your wood smoker, flavor profile to add complexity. Maple or apple can introduce sweetness, while cherry might add a hint of fruitiness.
- The secondary wood should complement the base wood without overwhelming its flavor, creating a balanced and layered smoking experience.
- Consider the Meat
- Think about the type of meat you’re using on your wood smoker. Beef and pork can handle stronger, more intense smoke flavors, so pairing woods like mesquite with cherry can elevate these meats.
- Poultry and fish, being more delicate, might benefit from lighter combinations, such as alder and apple, which won’t overshadow the meat’s natural flavors.
- Experiment with Ratios
- The proportion of each wood type for your wood smoker can significantly affect the flavor of the smoke. Start with a higher ratio of the base wood and gradually increase the amount of the secondary wood until you find the perfect balance.
- For instance, a 3:1 ratio of hickory to apple wood can offer a strong smoke with a hint of sweetness, ideal for pork shoulders or ribs.
- Keep Notes
- Document your wood smoker experiments, including the types of wood used, their ratios, and the results.
- Noting the characteristics of the smoke and how well it paired with different meats can be invaluable for refining your smoking techniques and developing your signature flavor profiles.
- Share and Get Feedback
- Share your wood smoker creations with friends and family for their opinions on the flavor profiles. Feedback can provide insights into how others perceive the smoke and meat combination, helping you fine-tune your wood blends.
Mixing different woods allows you to create a range of subtle to complex flavors that elevate your smoked dishes beyond the traditional. This experimental approach not only broadens your smoking skills but also makes the process more enjoyable and tailored to your taste preferences.
Don’t hesitate to explore and play with different wood combinations to discover the unique flavors they can bring to your smoker.
Conclusion
Building your own wood smoker is a fulfilling project that enhances your DIY skills and opens up a whole new world of culinary possibilities. Following the step-by-step guide, you can construct a durable, efficient wood smoker using basic materials and tools. This smoker will serve as the centerpiece for many gatherings, allowing you to experiment with different smoking techniques and flavors.
FAQ: How to Make a Smoker
- What’s the best wood for smoking meat?
- Additionally, it increases energy efficiency by reducing fuel consumption, making your smoker both cost-effective and environmentally friendly. Properly cutting and securing insulation ensures optimal functionality and a better overall cooking experience.
- Can I mix different smoking woods?
- Yes. Mixing strong woods (like hickory or oak) with milder fruitwoods (like apple or cherry) balances strength and sweetness for a richer flavor.
- Do I need to soak wood before smoking?
- No. Soaking just delays ignition and makes more steam than smoke. Use dry, seasoned wood for steady, clean smoke.
- How do I know my wood is safe to use?
- Use only untreated, natural hardwood. Avoid wood that’s painted, stained, moldy, from pallets, or of unknown origin.
- How long should wood season before use?
- At least 6–12 months in a dry, well-ventilated area. Fresh (green) wood creates thick, bitter smoke.
- Can I use lumber scraps or pallets?
- Never. Most pallets or lumber are chemically treated and unsafe to burn near food.
- What color smoke should I aim for?
- Thin, blue or light gray smoke is ideal. Thick white smoke can make meat taste bitter.
- What’s the ideal temperature for smoking?
- Generally 225–250°F (107–121°C). Always follow USDA’s safe internal temperature guidelines (e.g., 165°F for poultry).
- Can I reuse smoker wood?
- No. Once burned, wood loses its flavor compounds — always start fresh.
An outdoor island as your workstation is a great companion to your wood smoker. Check out our outdoor grill island next!