Last Updated on December 9, 2025 by teamobn
If you raise your own livestock or are planning to start a homestead, a livestock fodder growing system is one of the best ways to cut feed costs and keep your animals healthy.
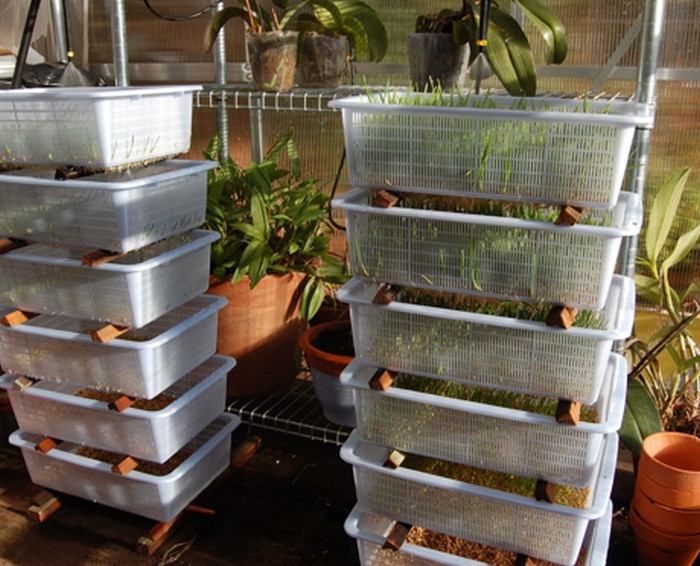
A livestock fodder growing system is a simple indoor setup that lets you sprout grains, usually barley, into fresh green feed in about 7 to 10 days. You can do this in a small room, such as a laundry room, using shelves and shallow trays. With the right setup, you can grow about 15 pounds of fodder per day, which is enough to feed 15 to 20 chickens or 3 to 4 dairy goats.
In this guide you will learn:
- Why a DIY fodder system is useful
- Exactly what materials and tools you need
- Step-by-step instructions to build your system
- How much water, time and space does it take
- How homegrown fodder compares to commercial feed
- Answers to common questions about fodder systems
Contents
- 1 Building a Livestock Fodder Growing System
- 1.1 What are The Materials For A DIY Barley Fodder System
- 1.2 Tools You’ll Need
- 1.3 Step By Step: How To Build A DIY Fodder System
- 1.3.1 Step 1: Sterilize The Trays And Lids
- 1.3.2 Step 2: Drill Drainage Holes In The Trays
- 1.3.3 Step 3: Soak The Barley Seeds
- 1.3.4 Step 4: Spread Seeds In The Trays
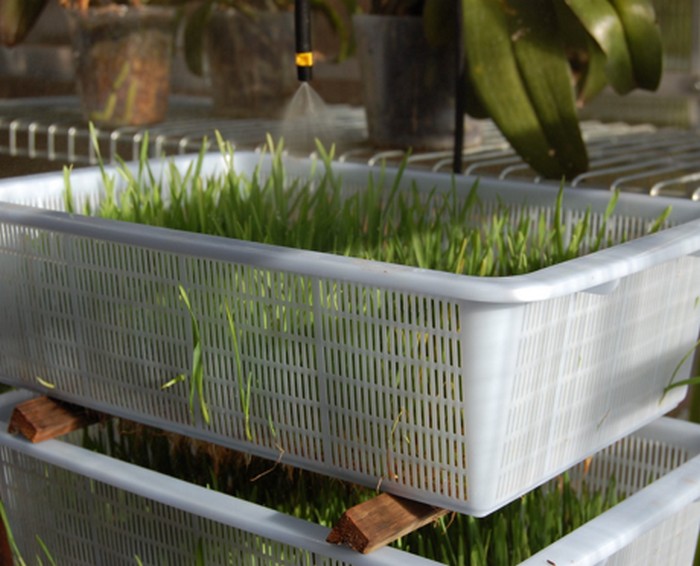
- 1.3.5 Step 5: Set Up Shelves, Light And Airflow
- 1.3.6 Step 6: Daily Watering And Care
- 1.3.7 Step 7: Harvest The Fodder
- 1.3.8 Step 8: Clean And Reset For The Next Batch
- 2 How Much Fodder Can You Grow Per Day
- 3 Nutritional Analysis of Home-Grown vs. Commercial Fodder
- 4 Water Management and Conservation in Fodder Production
- 5 Safety, Common Problems And Practical Tips
- 6 FAQ on Livestock Fodder Growing System
- 7 Conclusion
DIY Fodder System At A Glance
- Best for: Chickens, ducks, goats, sheep, cows, horses and rabbits
- Main grain: Barley (you can also use wheat, oats or rye)
- Space needed: A small indoor room with shelves and basic ventilation
- Daily output: Around 15 pounds of fodder per day from a small system
- Growth time: About 7 to 10 days from dry seed to finished fodder mat
- Daily time required: About 1 hour in the morning and 15 minutes in the evening
- Water use: Much lower than growing feed in a field. Even less water is used if you use a simple recirculating or hydroponic system
- Typical use: Supplement to dry feed for better nutrition and fresher greens
Building a Livestock Fodder Growing System
What are The Materials For A DIY Barley Fodder System
You can adjust this list to fit the size of your herd or flock, but these are good starting materials:
- Barley seeds (clean, good quality, not treated)
- Bleach (for sterilizing equipment)
- 5 small sprouting tubs or buckets for soaking seeds
- Plastic cutting board or tray to protect your work surface
- 5 black seedling trays with low sides
- 3 high plastic dome lids
- 2 low plastic dome lids
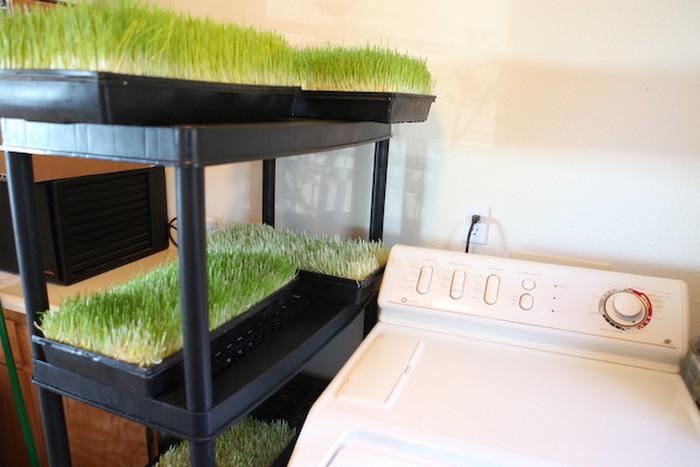
- Shelving system that can hold multiple trays with space between them
You can expand later by adding more trays and more shelves if you want more daily fodder.
Tools You’ll Need
- Drill with a small drill bit for making drainage holes
A simple handheld drill is enough. You may also want:
- A timer or reminder on your phone for soaking and watering times
- A measuring cup or small scale to measure seed amounts
Step By Step: How To Build A DIY Fodder System
Follow these 8 steps to build and run your livestock fodder growing system.
Step 1: Sterilize The Trays And Lids
- Mix a bleach solution that is 1 part bleach to 10 parts water in a large container or tub.
- Place the sprouting tubs, seedling trays and plastic dome lids into the solution.
- Let them soak for at least 30 minutes so they are well sterilized.
- Rinse everything thoroughly with clean water to remove any bleach.
- Let them air dry.
Keeping all equipment clean reduces the risk of mold and bacteria.
Step 2: Drill Drainage Holes In The Trays
- Place a plastic cutting board under each black seedling tray to protect your work surface.
- Use the drill to make small drainage holes in the bottom of each tray.
- Space the holes evenly across the base of the tray so water can drain out quickly.
Good drainage is very important. The seeds should be moist, but they should not sit in standing water.
Step 3: Soak The Barley Seeds
- Fill each small sprouting tub with clean water.
- Add barley seeds to the tubs. A common starting point is about 1 to 1.5 pounds of dry barley per standard seedling tray.
- Make sure all seeds are fully covered with water.
- Let the seeds soak for 8 to 12 hours.
Soaking wakes up the seeds and starts the germination process.
Step 4: Spread Seeds In The Trays
- After soaking, pour out the water and drain the barley seeds well.
- Spread the damp seeds evenly over the bottom of each prepared seedling tray.
- Aim for a single, fairly even layer of seeds with no deep piles.
- If the layer is too thick, air cannot move through it and mold is more likely to grow.
A single even layer helps the sprouts grow into a thick, even mat of fodder.
Step 5: Set Up Shelves, Light And Airflow
- Place the shelving system in a room with indirect sunlight or basic artificial light. The area should have some air movement and not be too humid.
- Put the seeded trays on the shelves. Leave some space between trays so air can flow around them.
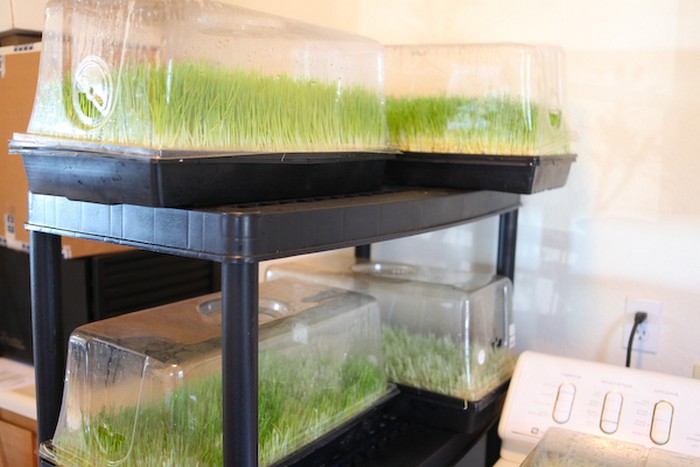
- For the first few days, cover the trays with the high dome lids. This keeps humidity around the seeds while they are sprouting.
You do not need strong light. Simple room light or indirect sunlight is enough for fodder.
Step 6: Daily Watering And Care
- Water the seeds lightly twice a day. You can use a watering can, spray bottle or gentle shower.
- Make sure the seed layer or fodder mat is moist but not soaked. The water should drain out of the holes in the tray.
- After the seeds have germinated and small green shoots appear, switch from the high dome lids to the low dome lids or remove the lids completely if humidity is high.
- Check the trays each day. If you see or smell mold, remove that tray at once and clean it thoroughly before using it again.
Keeping a regular routine is important. Consistent moisture and clean trays will give you good results.
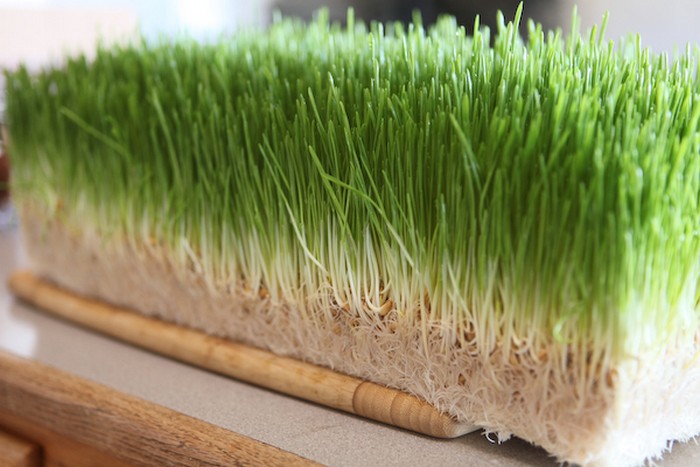
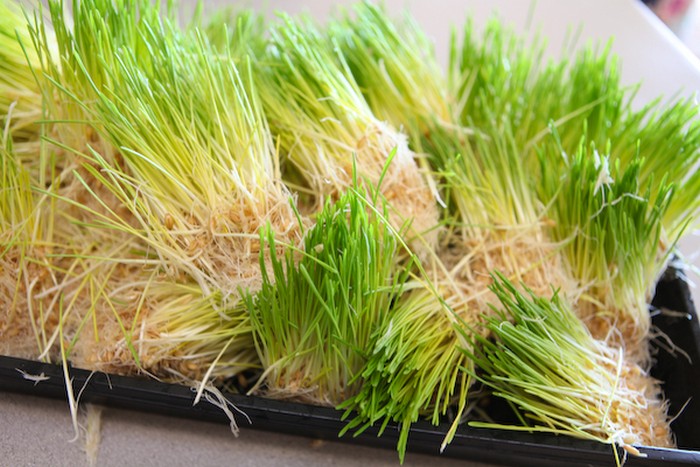
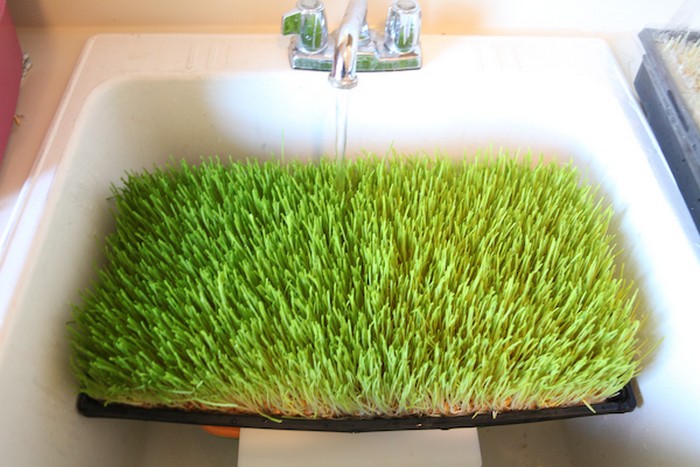
Step 7: Harvest The Fodder
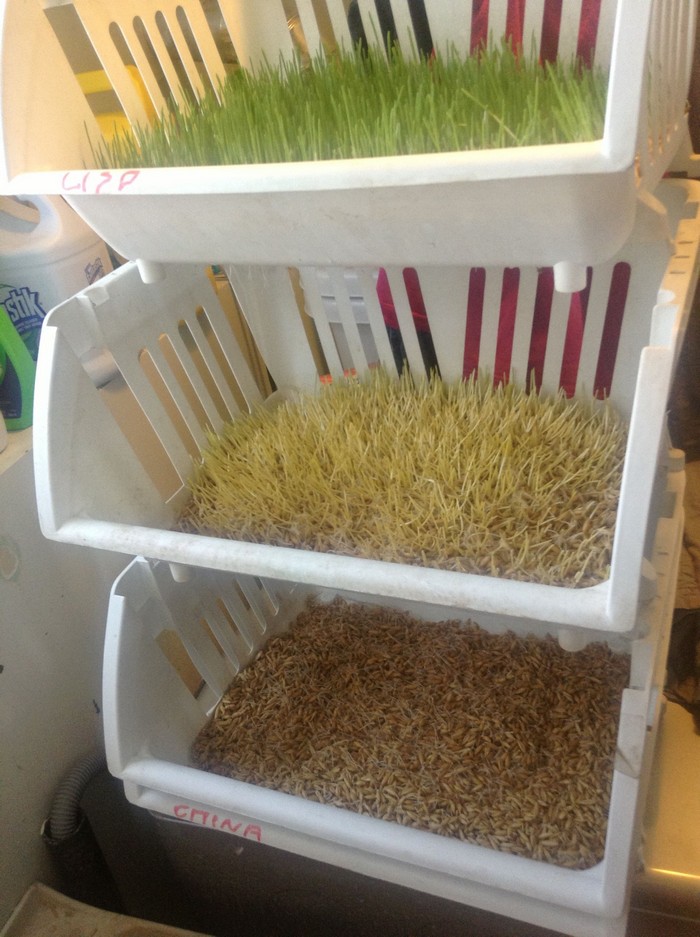
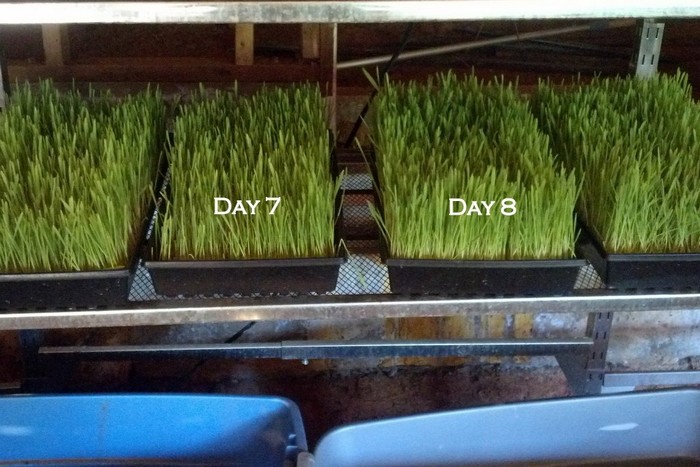
- The fodder is usually ready in about 7 to 10 days.
- At this point the seeds and roots will form a thick mat, and the green shoots will be several inches tall.
- Lift or slide the fodder mat out of the tray.
- Use the plastic cutting board and a sharp knife to cut the mat into sections that are the right size for your animals.
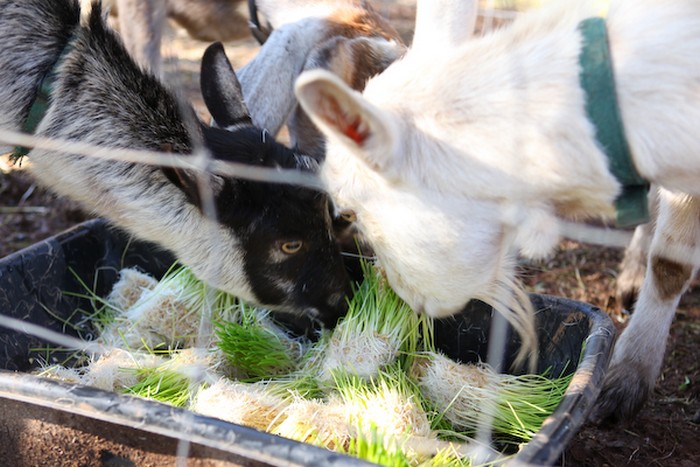
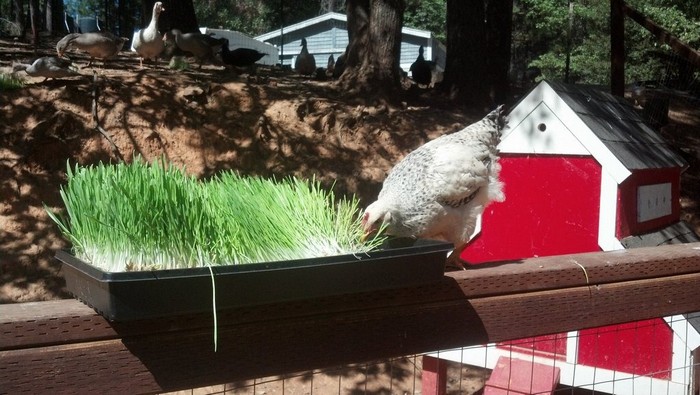
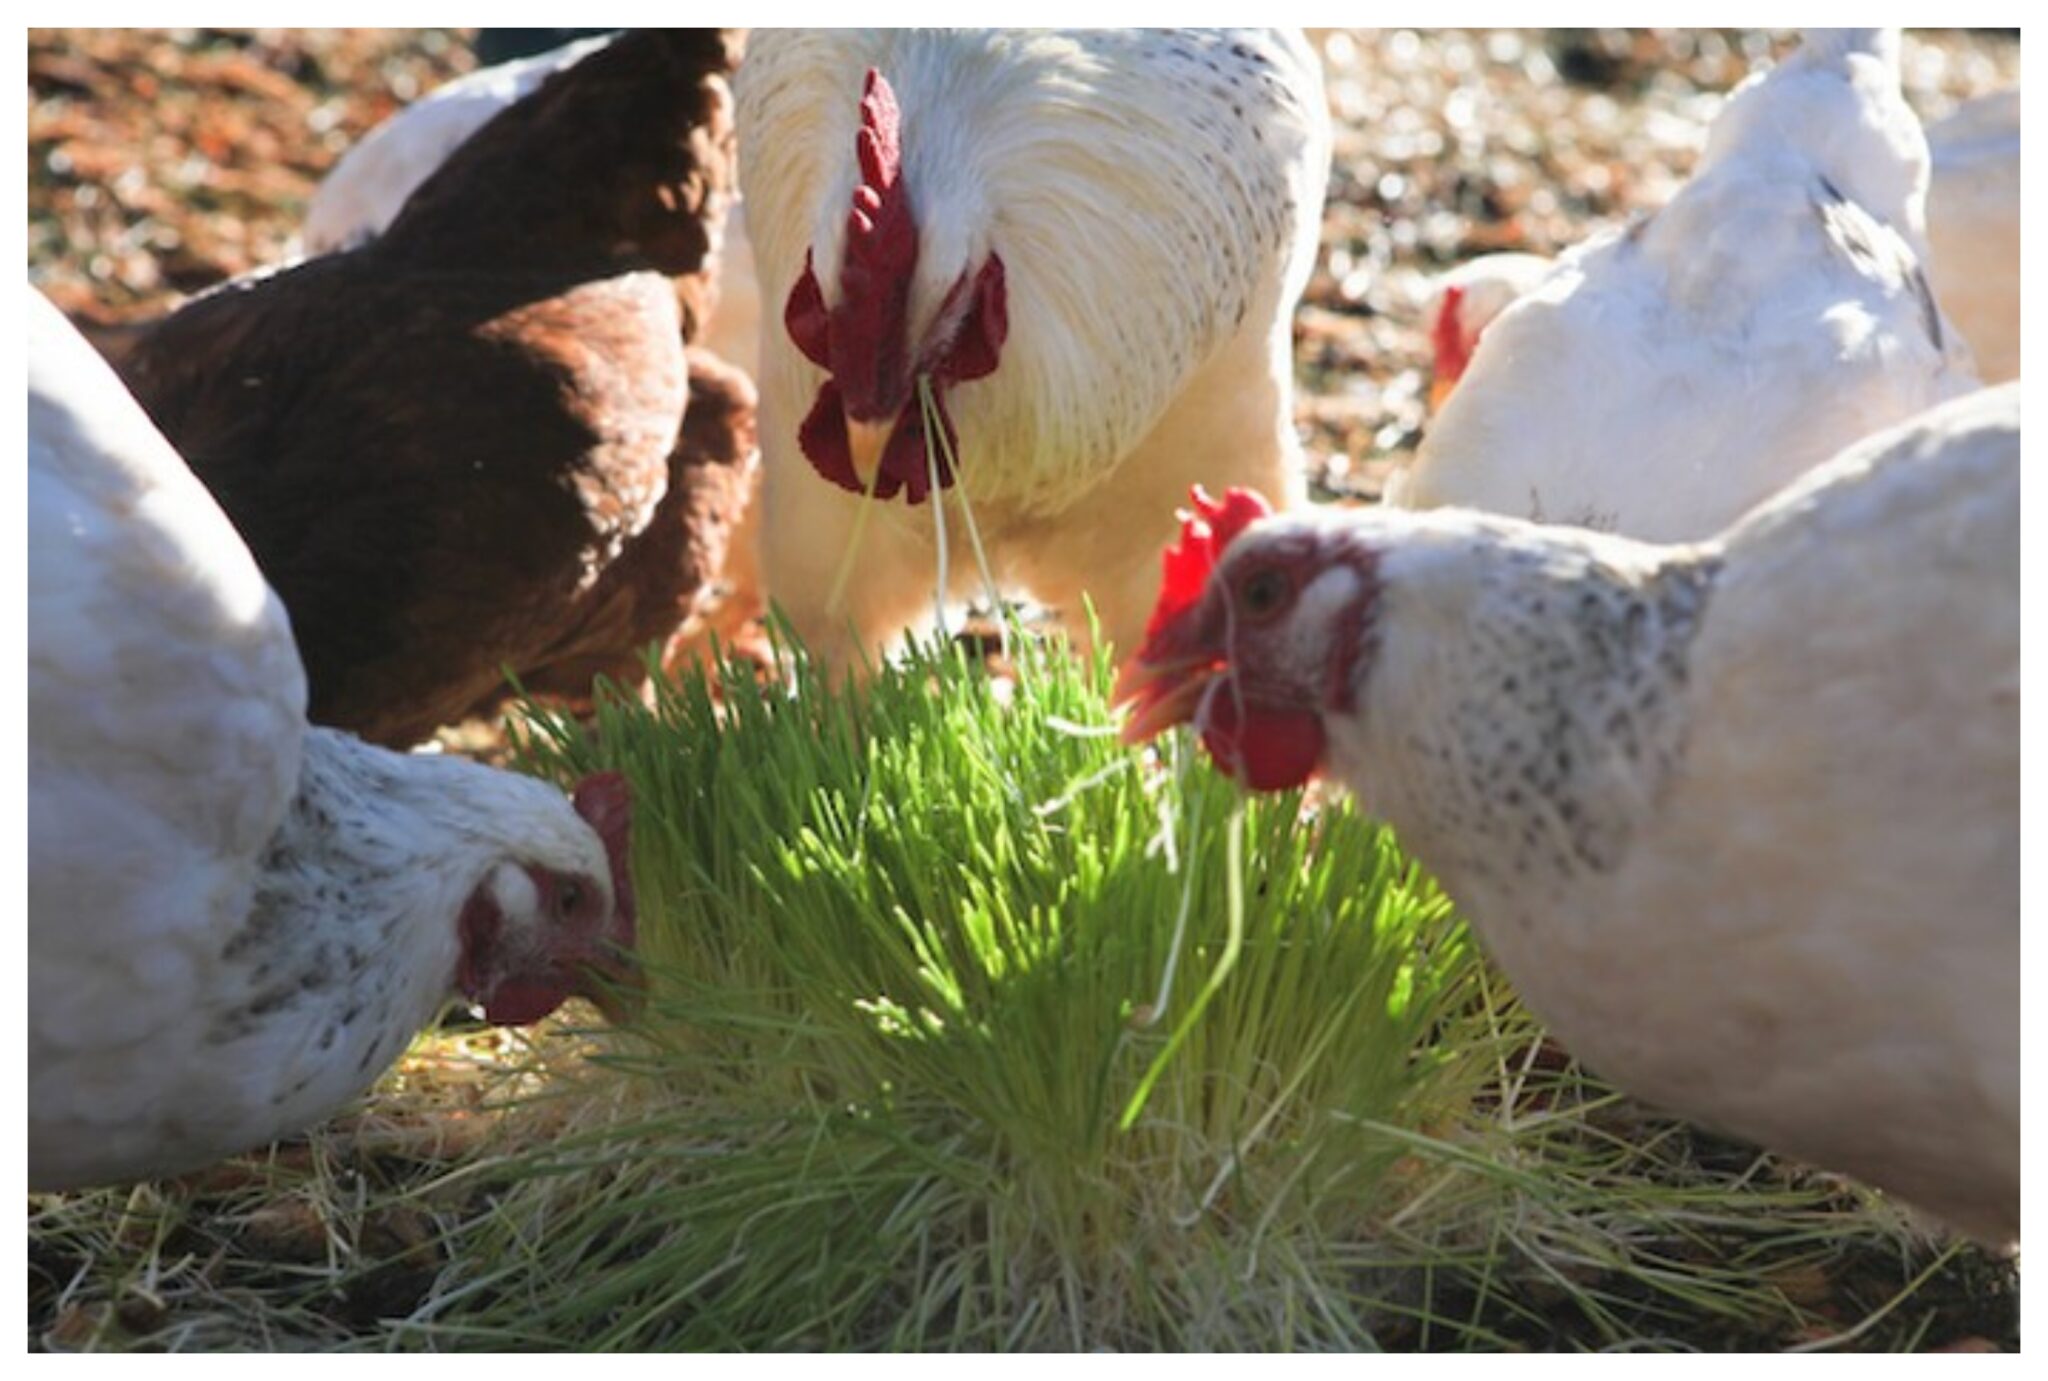
You can feed the whole mat, including roots, seeds and shoots.
Step 8: Clean And Reset For The Next Batch
- After harvesting, scrape out any leftover roots and rinse the trays and lids.
- Soak them in the bleach solution again, rinse with clean water and let them dry.
- Start a new batch by soaking more seeds and repeating from Step 3.
By staggering trays each day, you can have a steady supply of fresh fodder.
How Much Fodder Can You Grow Per Day
The amount of fodder you can grow depends on:
- Number of trays you run at once
- Amount of seed per tray
- How many days you let the fodder grow before harvest
As a simple example:
- 5 trays
- About 1 to 1.5 pounds of barley seed per tray
- 7 to 9 days of growth
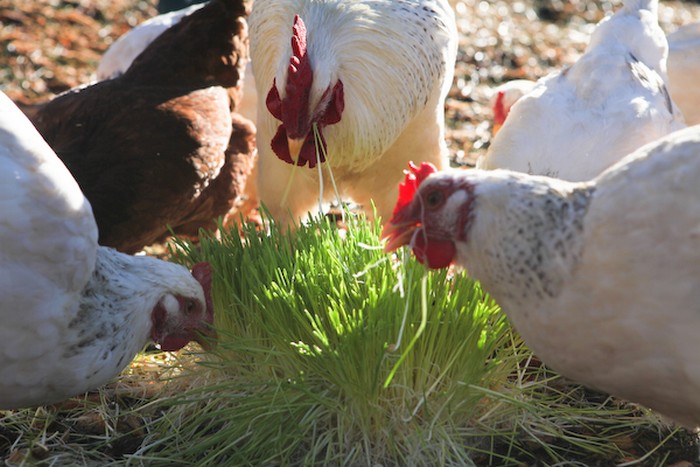
This can produce roughly 15 pounds of fodder per day, enough for:
- About 15 to 20 laying hens
- Or 3 to 4 dairy goats
You can adjust the number of trays if you have more or fewer animals.
Nutritional Analysis of Home-Grown vs. Commercial Fodder
Choosing between a homegrown fodder system and commercial feed affects cost, freshness and animal health.
Nutritional Content And Quality
Homegrown Fodder
- Freshly sprouted barley contains vitamins, minerals, enzymes and amino acids in a very available form.
- Sprouted grains can be easier for animals to digest than dry grains.
- You do not have preservatives, artificial colors or unwanted fillers.
- You decide if you want organic grain or conventional grain.
Commercial Feed
- Commercial feed is usually balanced for protein, energy and minerals, but quality can vary between brands.
- Some products contain fillers or byproducts that add bulk but not much nutrition.
- There may be residues from pesticides or herbicides in some ingredients.
- It is convenient, but you cannot easily change the recipe.
Impact On Animal Health
Animals on homegrown fodder
- Often show better feather, coat or hoof condition.
- May have stronger immune systems due to fresh vitamins, enzymes and omega-3 fatty acids in the green feed.
- Can have improved milk flavor and egg yolk color.
Animals on commercial feed alone
- Can grow well and produce meat, milk and eggs, but they may miss out on the extra benefits of very fresh greens.
- Long-term use of lower-quality feeds can affect overall health and productivity.
Cost Effectiveness And Sustainability
A DIY fodder system has some initial costs:
- Shelving
- Trays and tubs
- Dome lids
- Seed to start with
After that, the major costs are:
- Grain
- Water
- A small amount of electricity for light or fans, if needed
Compared to buying bagged feed all the time, a fodder system:
- Can reduce your overall feed bill
- Lowers the impact of price spikes when feed costs rise
- Uses less water and transport than commercial feed in many cases
For many small farms and homesteads, this mix of savings and reliability is very attractive.
Simple Comparison Table
| Aspect | Home grown barley fodder | Commercial feed or fodder |
|---|---|---|
| Freshness | Very fresh sprouted greens grown in 7 to 10 days | Processed and stored for long periods |
| Control over ingredients | Full control over grain type and quality | Limited control, depends on manufacturer |
| Use of additives | None unless you add them | May include preservatives or fillers |
| Water use | Low, especially with hydroponic or recirculating | High, including growing and processing raw crops |
| Setup cost | Higher at first, then a low daily running cost | No setup cost, but ongoing purchase cost |
| Suitability for small farms | Very good, easy to scale up or down | Good but can be expensive over time |
Click on any image to start the lightbox display. Use your Esc key to close the lightbox.![]()
Water Management and Conservation in Fodder Production
Water use in agriculture is a major concern in many areas. A well-designed livestock fodder growing system can use water very efficiently.
Why Water Efficiency Matters
- Water is limited in many regions.
- Lower water use means lower costs and less strain on local supplies.
- Efficient systems fit well with sustainable and regenerative farming.
Practical Water Saving Techniques
Recirculating systems
- Collect the water that drains out of trays and reuse it for watering.
- Use a simple tank or barrel under the shelves and a small pump to bring water back to the top.
- Refresh the tank regularly to keep the water clean.
Hydroponic systems
- Grow fodder without soil.
- Roots sit in a shallow film of water or are misted.
- Water and nutrients are reused many times, which can save up to 90 percent of water compared to traditional irrigation.
Rainwater harvesting
- Use gutters and a storage tank to collect rain from roofs.
- Use this stored water to run your fodder system.
- Reduces the need for well water or municipal water.
Drip or gentle irrigation
- For bigger or outdoor fodder setups, drip irrigation or gentle low flow systems reduce evaporation and runoff.
- Water is delivered directly to the root area.
Water retentive materials
- If you use any growth medium, consider materials like coco coir that hold moisture well.
- These help keep roots damp without frequent heavy watering.
Monitoring and timing
- Pay attention to tray moisture levels.
- Use regular watering times and adjust if you see water pooling or trays drying out too fast.
- Simple moisture checks by touch are often enough for a small system.
Good water management also improves fodder quality. Seeds and roots remain moist but not soggy, which reduces mold and root rot.
Safety, Common Problems And Practical Tips
To keep your fodder safe and your animals healthy, keep these points in mind:
- Never feed moldy or foul-smelling fodder. Throw it out and clean the tray.
- Keep all tubs, trays and tools very clean. Sterilize them between batches.
- Introduce fodder slowly if your animals are used only to dry feed. Mix a small amount of fodder with their regular ration at first.
- Remember that fodder is a supplement, not always a complete feed. Many animals still need access to minerals, roughage and, in some cases, dry grains or pellets.
- Watch manure and body condition. If animals get loose stools or lose condition, adjust the amount of fodder and balance with dry feed.
FAQ on Livestock Fodder Growing System
- What is a livestock fodder growing system?
- A livestock fodder growing system is a simple setup that lets you sprout grains like barley indoors to produce fresh green feed for your animals. It usually uses shallow trays on shelves. Seeds are soaked, spread in the trays, watered lightly and grown for 7 to 10 days until they form a thick fodder mat.
- Why should I build my own DIY fodder system?
- Building your own fodder system gives you control over what your animals eat. You can reduce your feed bill, provide very fresh feed and avoid unwanted additives. It also lets you grow green feed all year, even when pasture is poor or weather is bad.
- What materials do I need to start my fodder system?
- You will need barley seeds, a mild bleach solution for cleaning, several small tubs for soaking seeds, several shallow seedling trays, plastic dome lids and a simple shelving unit. You also need a drill to make drainage holes in the trays. A small pump and tank are helpful if you want a recirculating system.
- How long does it take for fodder to be ready to feed?
- Fodder is usually ready in about 7 to 10 days. In that time the soaked seeds sprout, the roots knit together and the green shoots grow several inches tall. At that point the whole mat of roots, seeds and shoots can be fed to your animals.
- How much water does a livestock fodder system use?
- A small fodder system uses surprisingly little water. You only add enough water to soak the seeds at the beginning and then keep the seed mat moist with light watering twice a day. If you collect and reuse drainage water in a tank, your system can use much less water than growing feed crops in a field.
- Can I use seeds other than barley?
- Yes. Barley is very popular because it sprouts quickly and makes a thick, nutritious fodder mat. You can also use wheat, oats, rye and some other grains. Try small test batches to see what your animals prefer and how each grain grows in your conditions.
- Is a livestock fodder system suitable for all types of livestock?
- Most farm animals can eat sprouted fodder. Chickens, ducks, goats, sheep, cows, horses, and rabbits often do very well on it. However, fodder is usually a supplement, not the only feed. Always consider the specific needs of each species and talk to a local vet or extension agent if you have doubts.
- How can I make sure the fodder is nutritious?
- Use high-quality, clean seeds from a trusted source. Keep your trays and room clean and well-ventilated. Make sure the fodder gets enough light for the shoots to turn a healthy green. Do not harvest too early or too late. Many people find that 7 to 9 days after soaking gives a good balance of root and shoot growth.
- How much does a small DIY fodder system cost to set up?
- Costs vary by country and what you already own. In many cases, you can set up a basic small system for the price of a metal shelf unit, several plastic trays and lids and a few tubs. The main ongoing cost is buying grain. Over time, many homesteaders find that the savings on commercial feed more than pay for the system.
- How do I prevent mold in my fodder trays?
- To prevent mold, keep your equipment very clean, avoid over-watering and make sure trays drain well. The seed mat should be damp but not swimming in water. Good air movement in the room also helps. If a tray shows signs of mold or smells bad, remove it at once, throw away the contents and sterilize the tray before reusing it.
Conclusion
A livestock fodder growing system is a simple and efficient way to grow fresh feed for your animals every day. With basic materials like trays, shelves and barley seeds, you can build a DIY system that:
- Reduces your dependence on commercial feed
- Cuts long term feeding costs
- Uses water efficiently
- Fits in a small space
- Provides healthy, green feed all year round
By following the step by step guide in this article, paying attention to cleanliness and moisture levels and starting with a small number of trays, you can quickly learn what works best for your animals and your climate. A home fodder system is a practical move toward more self reliant and sustainable livestock farming.


