Last Updated on February 5, 2025 by teamobn
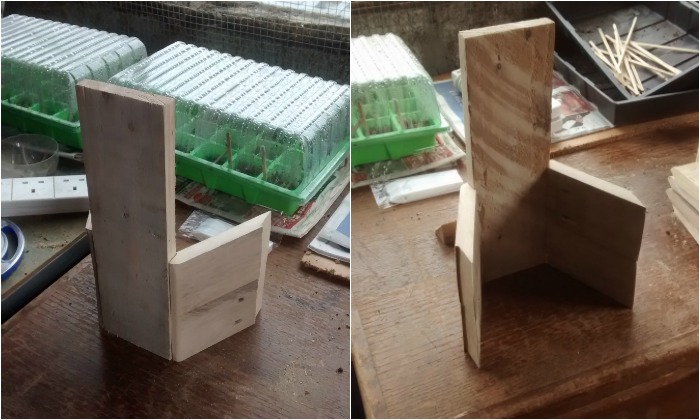
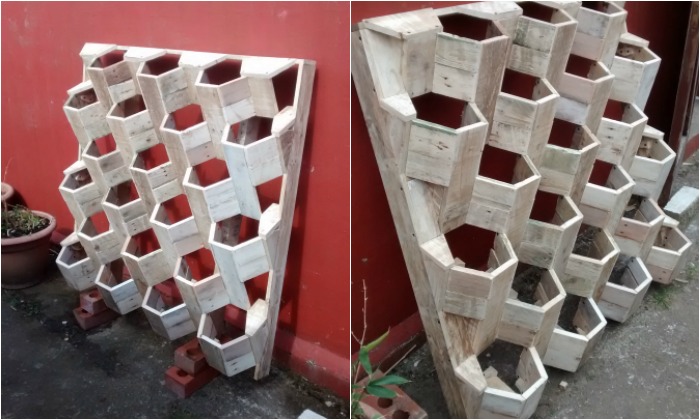
Assembling the body of the hive and adding braces: Each module of the herb hive project was glued up separately, with tack nails to hold them until the glue dried. They were clamped as needed at this stage until dry. Each module was screwed to another with one 25mm drywall screw through each ‘side’ piece (a total of 4 screws per module).
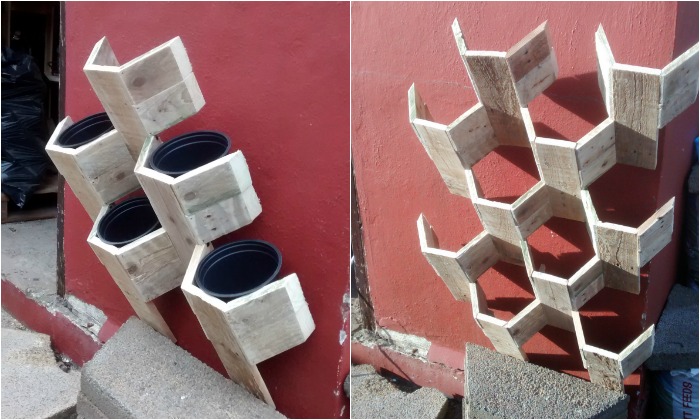
I actually assembled this in stages, assembling half a dozen modules, and then putting them together. Then another half dozen modules, adding to the growing hive. You’ll need a few clamps here. While I was assembling the body of the herb hive, it struck me that I needed some way to give the units a little more strength and something to give them a bit more shape. So I machined some hexagonal braces.
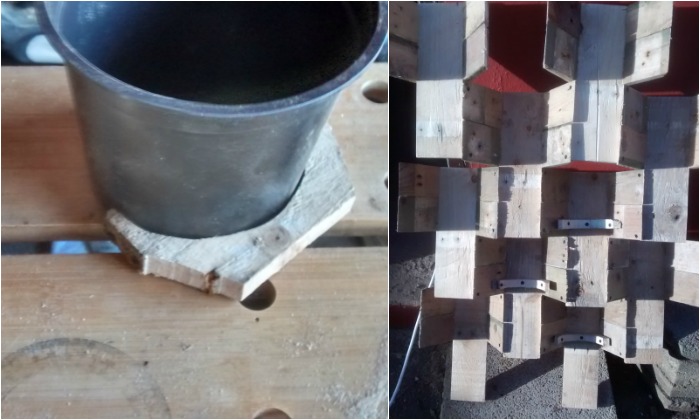
Each brace of the herb hive was made out of a 2.75″ by 6.5″ length of the board and was cut with two 60-degree angles. I also cut a circle out of the inside to allow my pots to sit in them comfortably. These also gave me a handy place to attach a shelf to hold the pots… These braces are not ideal, because two of the screws to attach them are running in the same direction as the grain. Drilling pilot holes, and going in at an angle here helped.
The shelves I used were just extra 6.5″ x 2.75″ pieces screwed up into the braces, though I did attach a block at the back of the shelves to stop the pots from being pushed backwards – I didn’t fit them until the next step.
My herb hive is 4 units wide at the widest, and 6 tall. That means that it has 4 modules on the floor, where the uprights needed to be shorter (5.5″ rather than 11″). I just cut a couple of my uprights in half.
Framing the hive: I tried to keep screws and other fixings to the inside rather than the outside of this because it’s a nicer finish that way. However, at this point, it was clear to me that the hive was going to be painted.
My wife didn’t like the mixed wood finish, and it was also clear I was going to need to get the filler out because of warping and differences in thicknesses of the wood I’d used. From here on, I didn’t worry too much about where the screws went, as I’d be using filler anyway.
Once the herb hive body was complete, it was time to make it look finished, and to square the whole thing up. I cut a length of 2.75″ board for the top, and one for each side then screwed it into the sides from the inside of the modules. The top piece was screwed down into the sides.
This left lots of gaps, top and sides, which I filled one by one.
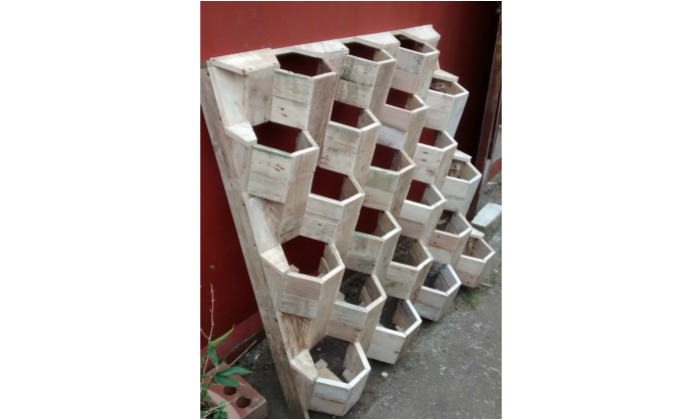
Gaps between pots on the highest layer were covered with half hexes with 30-degree chamfers to give a good fit against the top of the frame. 30-degree triangles cover the edge of the modules, and ‘quarter’ hex ledges sit above those triangles.
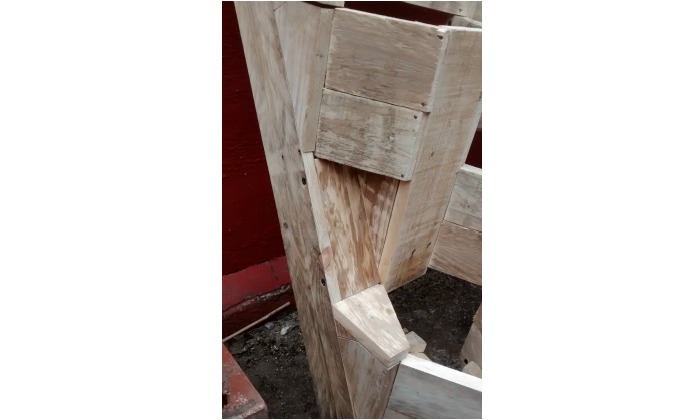
Attaching those took screws all over the place, and gave some more rigidity. I did split the upright of one of the modules while doing this because it was already warped and bowed before assembly. I put some extra braces on the back and got the filler out. My method of attaching the frame here was messy and awkward, and exactly the kind of detail you should plan instead of following my example.
I then filled the remaining holes in the sides of each layer with 30-degree angled triangles behind each upright, and short bits of board to cover the backs. These were mostly screwed because I was too impatient for glue at this point. There are still many holes on the undersides, which allow for drainage and airflow.
Finally, I screwed the aforementioned shelves in (just a bit of board to hold the pots up). Two screws each, from the underside of the shelf into the angled braces.
You’re done! Kinda…
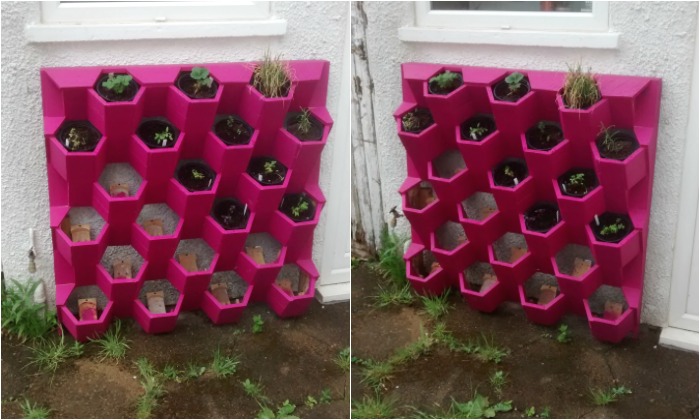
At this point, I got the filler out and spent a long time filling the cracks that opened during the framing out step. If it’s going to live outdoors, you will want to weatherproof it somehow. I painted mine with masonry paint, which gives a wonderful finish on wood and has good staying power.
Remember to paint inside and outside, to protect the wood properly, and so that it doesn’t swell in the rain! When painting, it’s best to do multiple thin coats, after making sure that the surface is clean. This will give you a nice even drip-free finish.
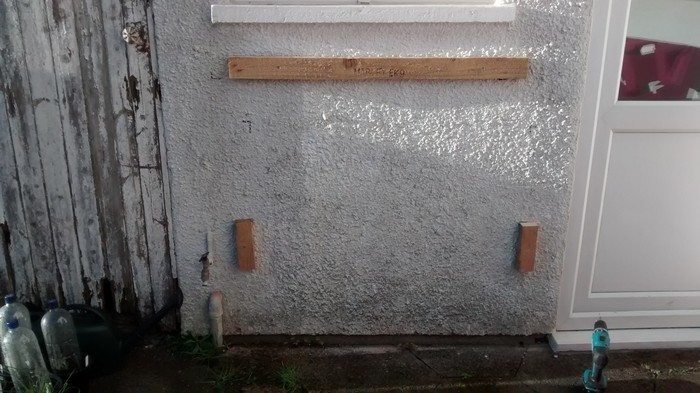
I then attached mine to the wall by screwing some thick batten (more pallet) to the wall and then screwing the hive top and sides to that batten. You could do this with french cleats, or any fixing method you want!
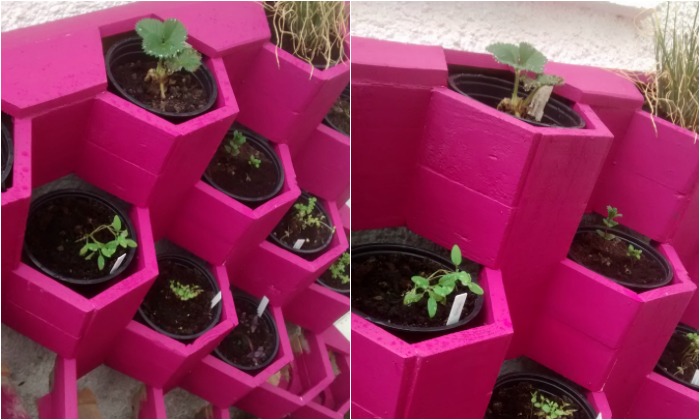
Touch up any paint you need to know that you’ve fitted it, and fill those holes with plants! I’ve got half a dozen basil plants, some (half dead) chives, and some strawberries in there at the moment. The weeds in the patio are doing better than my herbs right now…
If anyone makes something like this, I’d love to see how you got on, and I’d also love to see how you attach the hive to a frame! I made a mess of it, but I’m not sure how I’d do it better!
Maths! As promised, some maths here so that you can work out what sizes you need for different sizes of pots. You’ll have to put up with photos of scribbling here because MS paint is harder than a pen and my phone. Though my phone does struggle to focus without natural light.
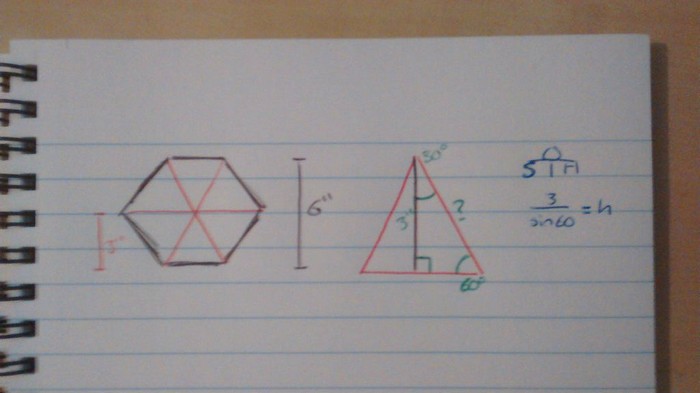
A hexagon to hold a 6″ pot needs to be 6″ at the smallest internal dimension (side to side), and we need to know the length of a side. A hexagon can be thought of as 6 equilateral triangles. If the whole is 6″ across, each triangle is 3″ high (red pen). If you cut that triangle in half, you have a right-angled triangle of 3″ on one side (green pen).
Now we need to know the length of the hypotenuse (the slanted edge). Trigonometry can tell you this is 3″ divided by sin(60 degrees) (the angle opposite the side we used the length of). This works out as ~3.5″ (3.464101615….)

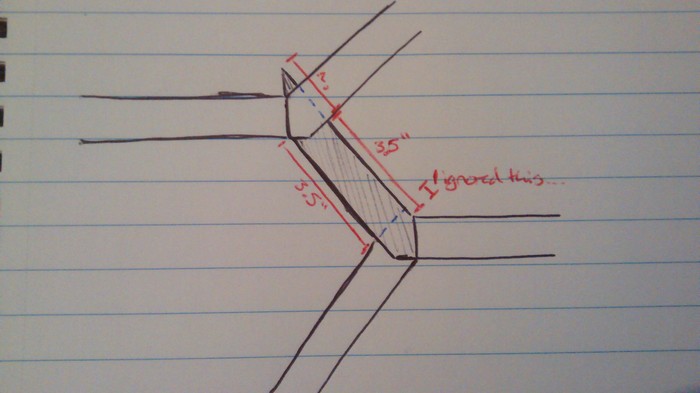
If it’s assembled like mine, there also needs to be 3.5″ between where the sides cross over each other and where they meet the uprights. This is a little more painful to work out. I dealt with this by lying to myself, and saying that I just needed 3.5″ plus the angled sections at each end, and adjusting the cut to what made it work (this also contributed to the warping in my planter).
You also need to use trigonometry here. Tan(60) x Wood thickness (0.75″ for me) will give you the length of the angled section of the piece (1.299″). Double it, and add it to the width of the hex you worked out above. (3.5+1.3+1.3 = 6.1)
I really hope this step helped someone because it was really hard to write. And I still don’t think I did a good job of it.
Thanks to ratMoose for this great project!
Herb Hive Maintenance: Keeping Your Vertical Garden Healthy
A well-maintained herb hive ensures a thriving, productive garden. Since vertical planters have unique challenges like soil drying out faster and limited root space, proper care is essential. With a few simple maintenance practices, you can keep your herb hive lush and full of fresh, flavorful herbs year-round.
Watering Techniques
Vertical planters tend to dry out more quickly than traditional garden beds. To prevent water stress, check soil moisture regularly. Herbs thrive in well-drained soil, so avoid overwatering, which can lead to root rot. A drip irrigation system or self-watering planters can help maintain consistent moisture levels, especially in warm weather. If watering manually, aim to water in the morning to give plants time to absorb moisture before the sun evaporates it.
Soil and Fertilization
Herbs need nutrient-rich, well-draining soil to grow well in a vertical hive. Use a high-quality potting mix with compost or organic fertilizer to replenish nutrients. Since nutrients wash out faster in vertical planters, apply a balanced liquid fertilizer every few weeks. Slow-release granular fertilizers are another option for steady feeding. Herbs like basil and parsley benefit from nitrogen-rich fertilizers, while Mediterranean herbs like rosemary and thyme prefer leaner soil with minimal feeding.
Pruning and Harvesting
Regular pruning encourages bushy growth and prevents herbs from becoming leggy. Harvest frequently by trimming herbs just above a set of leaves to promote regrowth. For woody herbs like rosemary and thyme, trim no more than one-third of the plant at a time. Remove any yellowing leaves or spent flowers to redirect energy toward fresh growth.
Managing Pests and Diseases
Even in a vertical setup, pests like aphids, spider mites, and whiteflies can still appear. Regularly inspect leaves for signs of infestation. A strong blast of water or insecticidal soap can help control pests without harming the plants. Fungal diseases, like powdery mildew, can develop in humid conditions. Ensure proper air circulation by spacing plants appropriately and avoiding excessive overhead watering.
Rotating and Replacing Plants
Herbs have different growth cycles; some may need replacing after a season. Annual herbs like cilantro and basil may only last a few months, while perennials like oregano and thyme will continue growing year after year. Rotate herbs as needed and replace any struggling plants to keep your herb hive looking full and productive. Companion planting can also help keep the garden balanced and deter pests naturally.
Seasonal Care
Adjust care routines based on the season. In hot summer, increase watering and provide shade if herbs show signs of heat stress. In winter, move tender herbs indoors or protect from frost. If your herb hive is indoors year-round, ensure the plants get adequate light, either from a sunny window or supplemental grow lights.
With regular care, an herb hive can provide a fresh supply of herbs while adding beauty to your space. Your vertical garden will stay healthy and productive throughout the year by keeping up with watering, pruning, pest management, and seasonal adjustments.
Conclusion
Building a herb hive planter is a rewarding DIY project that maximizes space while providing fresh, homegrown herbs. With proper materials, careful assembly, and regular maintenance, your vertical garden will thrive in any setting. Whether mounted on a wall or placed in a small outdoor space, an herb hive adds both functionality and visual appeal to your gardening efforts.
We have more creative planters for your garden. Check out our birdhouse planter project next!