Last Updated on August 18, 2025 by teamobn
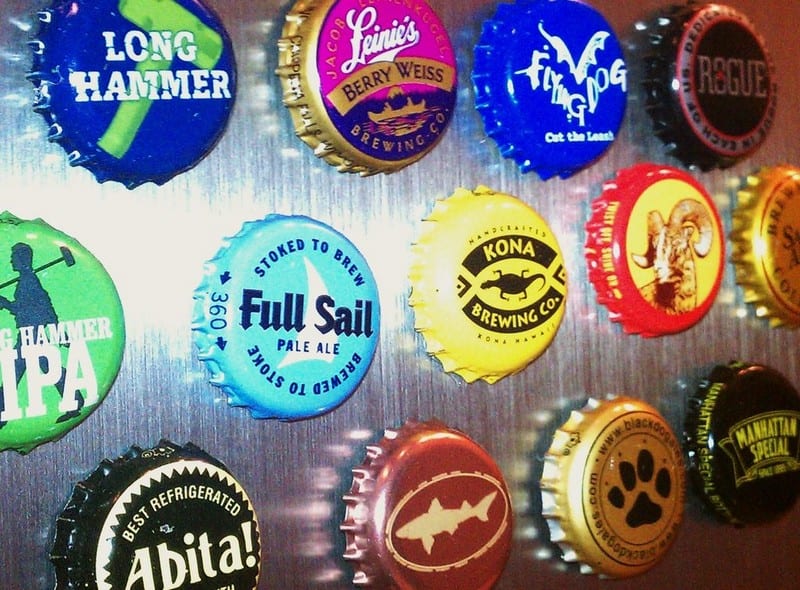
There are many beautiful recycling projects for bottle caps such as table tops and accessories, but this is one of the easiest projects you can do with them. It is literally as easy as 1-2-3, so start choosing your favorite bottle caps and create as many as you want!
This would also be a great just-because gift for those who love to drink. 🙂
Contents
Crafting Beer Cap Magnets
Materials:
- Bottle Caps
- Scissors
- Cardboard (thin)
- Hot Glue Gun
- Magnets
Steps:

Collect and choose the most beautiful bottle caps for you.

Cut a small square on the cardboard that would fit just right into the bottle cap – not too small. Make sure that it is attached well. When the glue has dried apply hot glue on top to stick the magnet.

Hold it for a while until the glue is dry. The glue and cardboard should keep the magnet slightly past the edge of the bottle cap so that it won’t scratch the surface of your refrigerator.

Make as many as you want! 🙂
Source: tjesse
Cleaning and Prepping Beer Caps Safely
Clean caps the right way to avoid rust and glue failures. A quick prep also keeps colors bright. Follow these safe steps and your beer cap magnets will last longer.
- Sort the caps. Keep crisp designs and undented rims. Set damaged pieces aside.
- Peel any foam liners and sticky residue. Warm caps in hot water to loosen the glue.
- Wash in warm, soapy water for 10 minutes. Swish and scrub gently with a soft brush.
- Rinse with cool water until squeaky clean. Avoid harsh scouring that dulls paint.
- Sanitize the interiors with isopropyl alcohol. Wipe and let flash-dry.
- Dry completely. Pat with a towel, then air dry or use a low, cool hair dryer.
- Smooth sharp edges. Wear cut-resistant gloves and file burrs lightly.
- Optional flattening. Sandwich a cap between cloths and tap with a rubber mallet. Check often.
- Scuff the inner surface with 400–600 grit sandpaper. Better tooth means stronger glue.
- Seal to prevent rust. Mist a clear acrylic coat inside and let cure per can directions.
- Store prepped caps dry in a zip bag with silica gel. They’ll stay ready for crafting.
Magnet Strength and Size That Actually Work
Picking the right magnet transforms caps into useful organizers. The hold must match your surface, cap shape, and payload. Use this guide to size magnets for durable beer cap magnets.
How Strong Should It Be?
Aim for neodymium discs with a listed pull force between 1.5 and 3 pounds for most fridges. Painted steel doors and curved panels reduce grip, so size up if slips happen. Glass boards need much stronger discs and won’t work well for lightweight caps. Test on your actual surface before batching. If you’re adding resin or inserts, account for the extra weight. Reliable hold makes beer cap magnets feel premium, not flimsy.
Sizing Discs to Fit Caps
Common pry-off caps fit discs from 10 to 12 millimeters in diameter. Thickness matters more than you think. A 2 to 3-millimeter disc often beats a wider, thinner one. Keep the magnet slightly proud of the rim so paint never rubs your door. If your caps are shallow, build a flat platform with cardboard or epoxy. You’ll get full contact and consistent hold across a whole set.
Magnet Types Compared
Ceramic ferrite is cheap but bulky and weak. It’s fine for memo boards that won’t see heavy use. Neodymium is compact and powerful. Grades like N35, N42, and N52 indicate strength. Higher numbers grip harder but can pinch fingers if stacked. For beer cap magnets, N42 usually nails the balance of power, price, and safety. Stick with nickel-coated discs to resist corrosion and keep the craft looking fresh.
Testing Without Guesswork
Do a quick slip test. Place the finished cap on your fridge and yank a postcard downward. If it slides, go up a thickness or diameter. Try a stack test with two sheets of printer paper. Still sliding. Add a felt or cork backer for micro-grip and scratch protection. You’re tuning friction as much as force. Document what works so future batches stay consistent and sale-ready.
Flattened vs Crimped Caps for Look and Grip
Style changes function with this craft. Flattened caps show more art and hold resin cleanly. Crimped rims add texture and lift. Here’s how each choice affects beer cap magnets today.
Flattened Caps When They Shine
Flattened caps give you a broad, even canvas for photos, maps, and resin domes. Adhesives spread uniformly and edges don’t fight your artwork. Place the cap between two cloth-covered boards and tap with a rubber mallet.
Check after each tap so paint stays intact. Finish with a clear sealer before embedding art. You’ll get a glossy, modern look that pairs well with themed sets and clean product shots.
Crimped Caps and Classic Texture
Crimped rims bring that unmistakable bottle-top profile. The raised edge keeps surfaces from touching paint, which helps prevent scuffs. The inner bowl cradles glitter, beads, and tiny charms.
Glue placement matters because curves reduce flat contact. Use a scuffed insert or a poured epoxy base to create a level bed for the magnet. You’ll keep the vintage vibe while upgrading function and durability for daily use.
Preventing Scratches and Wobbles
Rims and metal edges can mar appliances if magnets sit too low. Build a spacer from thin cardboard or a washer epoxied inside the cap. Add a felt or cork circle as the final layer. This lifts the magnet and adds micro-grip, so slides are less likely.
Round any sharp burrs with fine sandpaper. Your beer cap magnets will glide smoothly and park without leaving tracks behind.
Design Choices That Sell
Pick the shape to match the story. Flat caps suit minimalist art, crisp typographic labels, and domed resin finishes. Crimped caps fit rustic displays, brewery brand collages, and travel sets with tactile charm.
Mix both styles in a single collection to add depth on a board. Photograph on neutral metal with natural light. Clean reflections sell quality. When the look matches the hold, your magnets feel worth keeping.
Beer Cap Magnet Gift Ideas
Thoughtful gifts do not need big budgets. Beer cap magnets turn memories into useful keepsakes. Match the design to the event, add simple packaging, and you’ve got gifts people actually keep.
Wedding Favors Guests Won’t Toss
Create matching sets from the couple’s favorite brews or local craft labels. Add a tiny tag with the wedding date. Slip each magnet into a kraft envelope with a thank-you note. Beer cap magnets feel personal, travel well, and fit any theme. They also display nicely on venue signage before guests take them home.
Party Swag That Gets Used
Build color-coordinated sets for birthdays, reunions, or game nights. Mix soda and beer caps for all ages. Include one blank cap with a handwritten message. Pack four to six magnets in a clear sleeve with confetti. You’ll get instant fridge real estate and a fun reminder long after the cake is gone.
Man Cave and Home Bar Sets
Lean into breweries, teams, or regional pride. Keep the look rugged with crimped caps and cork backers. Arrange sets on a metal display card so buyers see grip strength. Offer custom picks from a big cap bin. Beer cap magnets make great add-ons for bar signs, tap handles, and bottle openers.
Personalization That Sells
Punch circles from maps, vintage ads, or photos, then seal with resin. Use type to spell initials or team chants. Add a single accent cap in metallic paint for pop. Include a mini care card and your shop link. Small details lift perceived value without raising costs.
Troubleshooting Beer Cap Magnets
Problems happen. Weak hold, sliding on glossy doors, and gummy residues can spoil the fun. Use these quick fixes to tune strength, improve friction, and keep finishes clean and bright.
Weak Hold on Fridges
Upgrade to thicker neodymium discs and scuff the glue surfaces. Build a flat platform inside the cap with cardboard or epoxy. Let adhesives cure fully. Test again with a postcard tug. If it still slips, go one magnet grade stronger. Beer cap magnets should lift a few sheets without creeping.
Slipping on Glossy Paint or Glass
Add a thin felt or cork backer to increase friction. Keep the magnet slightly proud of the rim so metal never rubs the door. Clean the surface with alcohol to remove oils. Heavier caps need wider discs. Write down the combo that works on your appliance. Repeat it for consistent sets.
Sticky Glue Residue
Warm the area with a hair dryer and peel slowly. Use citrus adhesive remover on a cloth, not directly on paint. Finish with soapy water and a clean rinse. Inside the cap, switch to epoxy or gel CA for neater bonds. Your beer cap magnets will look tidy and feel premium.
Crooked, Rattly, or Rusty Caps
If the magnet sits skewed, pry it off and sand the platform flat. Re-glue with clamps or weight. Add a light acrylic spray inside the cap to block moisture. File burrs on the rim to stop rattles. Store finished sets with silica gel. Clean, aligned caps grip better and last longer.
Conclusion
Beer cap magnets turn leftovers into useful, giftable art. Pick clean caps, prep them well, and match magnet strength to your surface. Add felt or cork to protect paint and boost grip. Troubleshoot slips or residue with simple tweaks, and seal to stop rust. Make a set for your fridge, gift a set to friends, and enjoy the little stories each cap carries.
Do you have plenty of caps left? Use it to build an awesome bottle cap table with our guide!