Last Updated on April 30, 2025 by teamobn
Pennies are the most unused money in our purses. Personally, I just leave them in a jar at home when it becomes too many to have more space in my purse. I won’t be paying things with them anyway. And if you let them accumulate in your bag you’d be wondering later on why your bag is so heavy.
Rather than keeping them deep in your pockets, consider uing these coins for your next DIY projects. Continue reading to know more about the many fun penny art projects you can make with your spare change.
Creative Penny Art Projects
Now I already have one tall jar of pennies and I searched for great ideas I could do with them. Here are 14 beautiful projects on the internet:
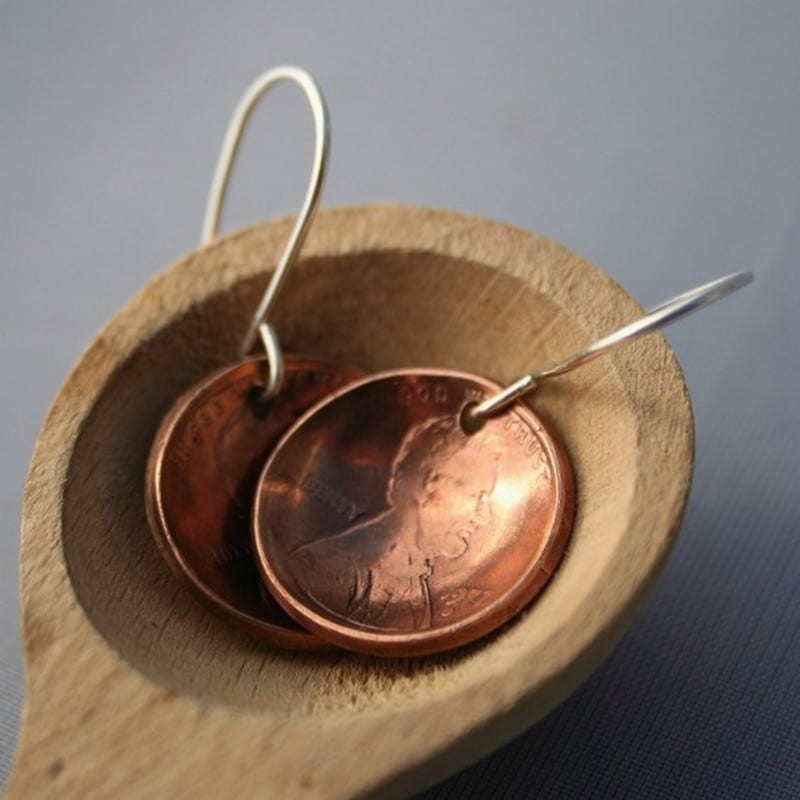
1. Cute Dangling Earrings
These penny art projects turn ordinary coins into stylish dangling earrings. You drill a small hole near the edge of each penny and attach a jump ring and an earring hook. A glossy sealant protects the surface and adds shine. The result is a rustic accessory that pairs with both casual and dressy looks.
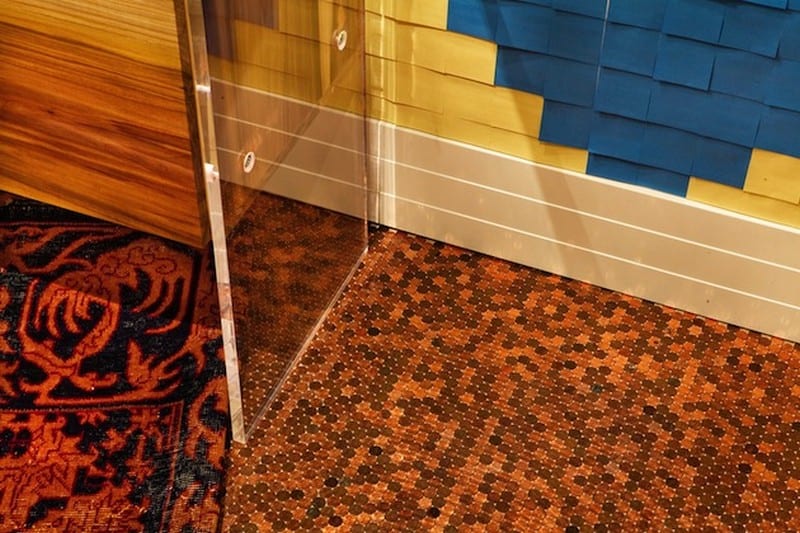
2. Penny Flooring
These penny art projects can transform a plain floor into a sparkling mosaic. You arrange pennies in a herringbone or random pattern on a prepared subfloor. Clear epoxy resin locks the coins in place and creates a smooth, durable finish. Light reflects off the copper to brighten any room.
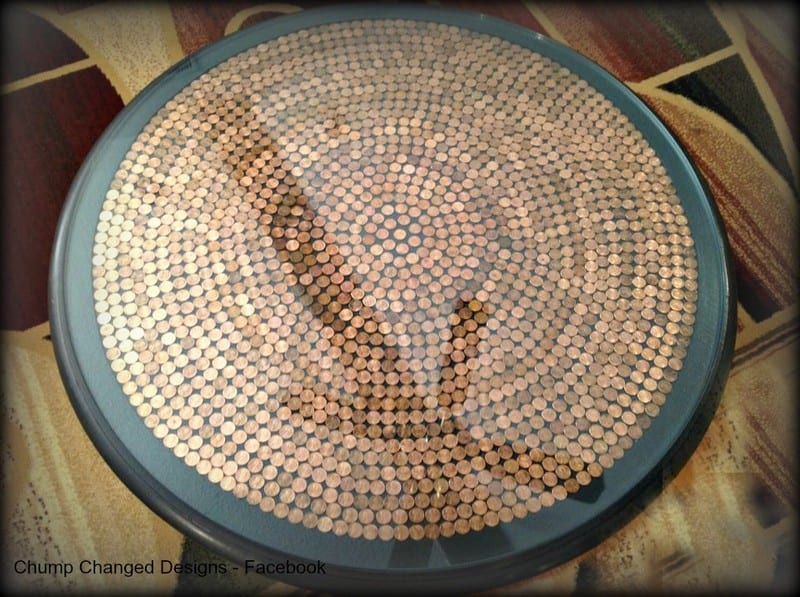
3. Center Table Redesign
These penny art projects give a fresh look to old furniture. Begin by gluing pennies in your chosen pattern across the tabletop. Next, pour clear resin over the coins to seal and level the surface. The finished table catches the eye and adds metallic charm to living areas.

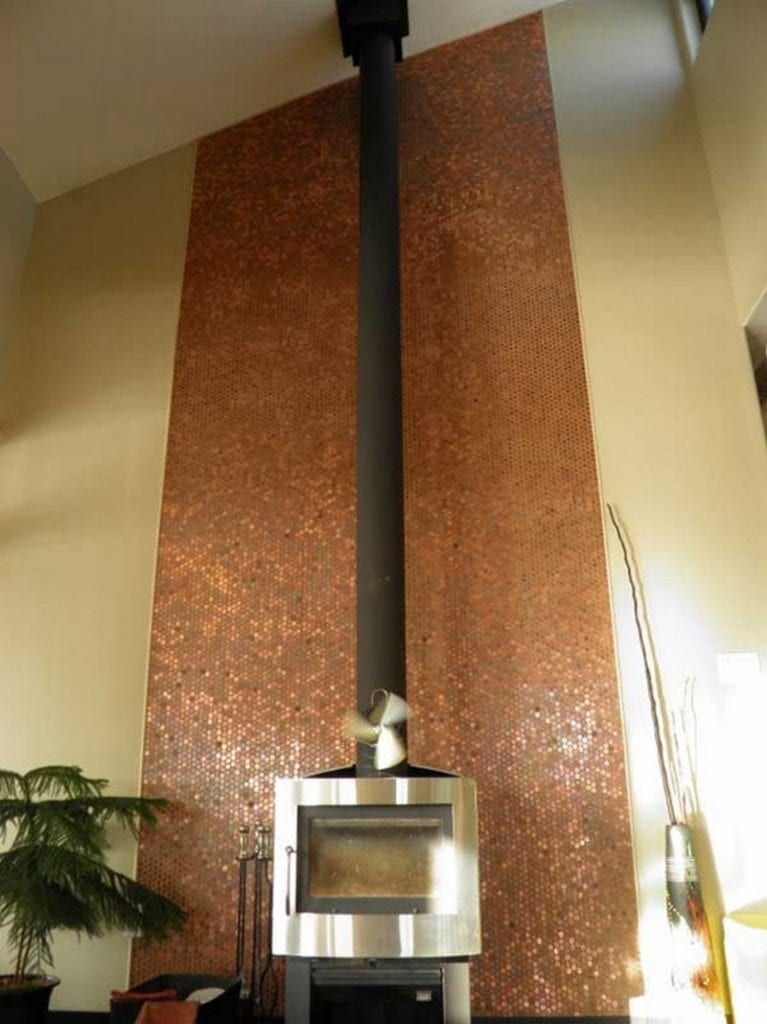
4. Penny-Covered Accent Wall
These penny art projects elevate any room with a copper-tone feature. Apply strong adhesive to wall sections and press pennies in neat, overlapping rows. After filling the space, brush on a clear coat to prevent tarnish and boost shimmer. The result is a warm, textured accent that works in modern or rustic settings.

5. Revamped Countertop
These penny art projects can turn a kitchen or bathroom counter into a showstopper. Tight rows of pennies are secured with adhesive before a layer of epoxy is poured on top. This creates a water-resistant, easy-clean surface. The metallic sheen brightens the workspace.

6. Cute Couple Keychain
These penny art projects offer a sweet, personalized gift idea. Drill a small hole near each coin’s rim and thread it onto a split ring with beads or charms. Apply a clear lacquer to guard against scratches. The lightweight keychain carries initials or special dates.

7. Elegant Penny Necklace
These penny art projects also include refined jewelry designs. Buff the coin gently to remove mint luster and attach a small bail at the top. Slide the penny onto a delicate chain for a vintage-inspired pendant. It pairs well with evening wear or as a standout everyday piece.

8. Decorative Penny Tray
These penny art projects extend to functional home accents. Glue pennies in a mosaic onto a wooden tray base and pour clear resin over the top. Once cured, sand the edges and add handles or leather wraps for comfort. The tray shines with handcrafted appeal and works for serving or display.
9. Accent Mirror Frame
Gluing pennies around a mirror’s edge creates a custom metallic border. Arrange coins face-out on the frame and secure with strong craft glue. Seal the coins with varnish to lock in the copper tone and prevent oxidation. The finished mirror becomes a unique focal point.

10. Matching Penny Ring
You can match a penny necklace with a simple coin ring. Punch or drill a hole at the top of the penny and slip it onto a hoop ring base. Lightly polish or lacquer the surface for durability. This minimalist band makes a stylish stackable accessory.

11. Framed Photos with Penny Trim
Add a penny trim to picture frames for an eye-catching detail. Press coins along the outer edge of the frame with strong glue. Once set, apply a clear sealant to preserve the metal’s shine. The finished frame highlights artwork with a warm, industrial touch.

12. Coffee Table Centerpiece
Create a solid resin centerpiece by embedding pennies in a shallow mold. Lay coins in your chosen pattern and pour clear resin over them until level. After curing, unmold and sand any rough edges. The result is a glass-like piece that magnifies the pennies’ copper glow.

13. Kitchen or Bath Backsplash
A penny backsplash brings sparkle to kitchens or baths. Adhere coins to a cement-backing panel in a grid or herringbone layout. Grout between coins as you would with tile, then seal the entire surface. This creates a durable, water-resistant wall accent.

14. Bowling Bowl Planter
Repurpose an old bowling bowl by lining the interior with pennies. Lay coins flat and secure with outdoor-rated epoxy. Fill the bowl with soil and plants for a whimsical planter. The copper finish contrasts beautifully with greenery.
No. 2 is my favourite. I need to collect more pennies to do it in my house. Which idea did you like the most? ![]()
Tips for sourcing, cleaning, and prepping pennies for crafting
Working with pennies can lead to beautiful DIY accents. Good prep work saves time. It boosts your penny art project. Use the steps below to gather, clean, and prep coins. A strong routine ensures smooth crafting. It lets you focus on design. Follow these guidelines before your next color, floor, or jewelry build.
Finding the Right Pennies
Start by sourcing pennies in bulk. Check local banks first. They often have rolls of coins you can buy for face value. You’re more likely to find uncirculated or lightly used pennies this way. Online marketplaces can work too.
Look for lots with matching dates if you need uniform color. Avoid rare or collectible coins. These belong in collections. For most penny art projects, common post-1982 copper-plated zinc pennies are best. They cost little and offer consistent tone.
Cleaning and Deodorizing Coins
Once you have your coins, it’s time to clean them. Fill a bowl with warm water and mild dish soap. Stir gently and drop pennies in for a few minutes. Use a soft toothbrush to remove dirt. A paste of baking soda and water can help lift stubborn grime. Rinse under running water. Pat dry with a lint-free cloth. Try these methods to avoid black spots. Clean coins improve shine in your penny art project.
Removing Tarnish and Polishing
Old pennies often show tarnish. You can use vinegar and salt for a deeper clean. Combine one cup of vinegar with a teaspoon of salt. Drop coins in and let them soak for five minutes. Gently scrub with a nylon brush. Rinse and dry.
For extra shine, buff lightly with a microfiber cloth. Avoid metal polish with harsh chemicals. This helps maintain the penny’s finish and makes each piece pop in your penny art project.
Prepping Coins for Crafting
After cleaning and polishing, organize the coins by date and condition. Lay them out on a clean surface. Use cotton gloves to avoid fingerprints. Measure and mark holes for earrings or keychains with a pencil. Secure pennies in a drill press or vise before drilling. Wear safety glasses and a dust mask.
Sand any sharp edges with fine-grit sandpaper. Wipe away residue with a tack cloth. Proper prep keeps your penny art project running smoothly. Store prepped coins in labeled containers for easy access.
Organizing and Storing Prepped Coins
Keep coins sorted by project type. Label small plastic bags or mason jars with dates or designs. Store in airtight containers to prevent dust and moisture. Use clear bins so you see the coin finish at a glance. Keep them in a cool, dry place away from sunlight. Organize by size if you work on flooring or wall panels. This system speeds up your workflow. It also ensures you grab the right coin for each step.
Safety and Handling Precautions
Always wear gloves when handling coins to avoid skin oils. Safety glasses protect your eyes when drilling or grinding. Work in a well-ventilated area if you use chemicals like vinegar or sealants. Use a dust mask when sanding or buffing to avoid inhaling fine particles. Keep tools tightly secured and use a clamp for drilling. Store sharp bits and blades safely. Clean up metal dust promptly. Following these steps ensures safe crafting every time.
Conclusion
Penny art projects unlock artistic potential in everyday coins. They let you craft jewelry, home accents, and functional decor with a metallic twist. With simple prep and basic tools, you’re set to create unique, eye-catching pieces.
We have more incredible art projects to try at home. Check out our resin art guide!