Last Updated on September 26, 2025 by teamobn
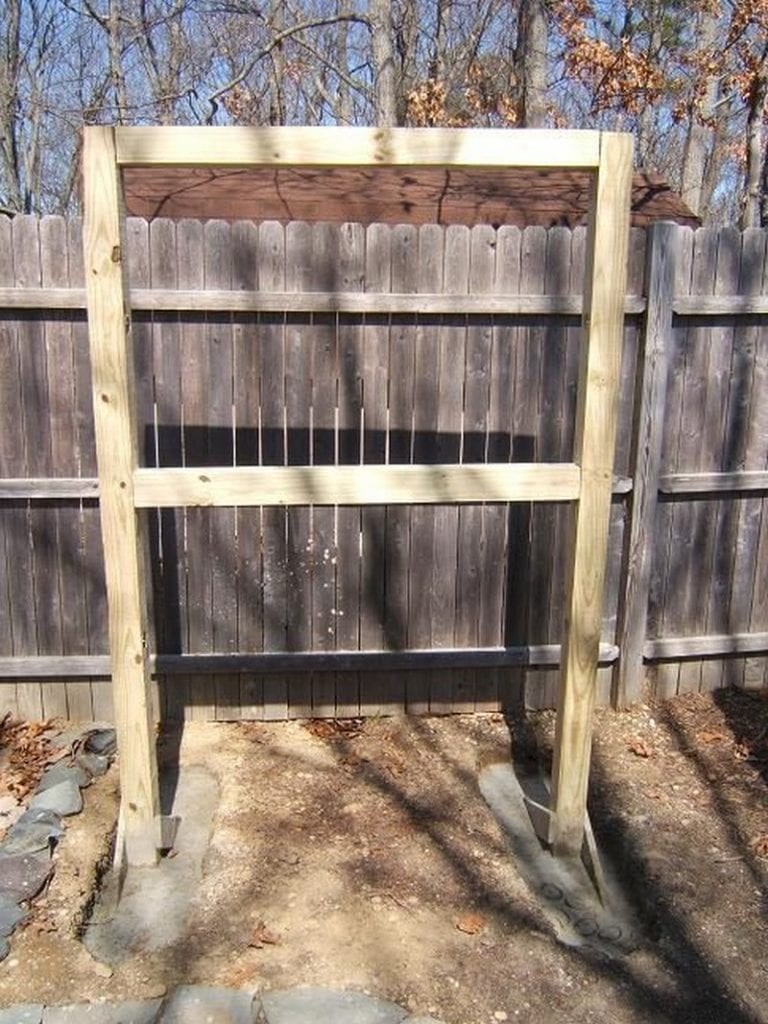
After I dug the holes and set the frame into place, I filled the holes with fast-setting cement. Each hole took 6 bags (12 total – 60 lbs. each).
Once the barrels are made and full, they could get very heavy with the compost so the frame and concrete anchors of the composter must be strong. I feel as though the stakes and concrete will prevent the frame from leaning or moving much.

I used galvanized poles left over from another job and cut two 5 foot lengths. These go through the holes in the posts and are what holds the barrel.
Be careful when selecting poles, since they will need to be strong to support the weight of the barrels when they’re full.

Once the frame was ready, I began working on the barrels which are made from 55 gallon drums.
I decided to use blue since they get warm and will heat the compost inside. The barrels need to be a dark color since light colors will reflect the sun and heat is important when composting.
Using a 2 inch hole saw, I cut holes exactly in the center of the bottom and top of the barrels. This is what the pole will go through.

Then, using a rotary saw, I cut a rectangular door into each barrel. Take care that the door is big enough to allow comfortable access to the inside of the barrel.
After that, I used a drill to drill several hundred holes all over the barrels to allow for air to circulate inside the barrel. Air is also important when composting.
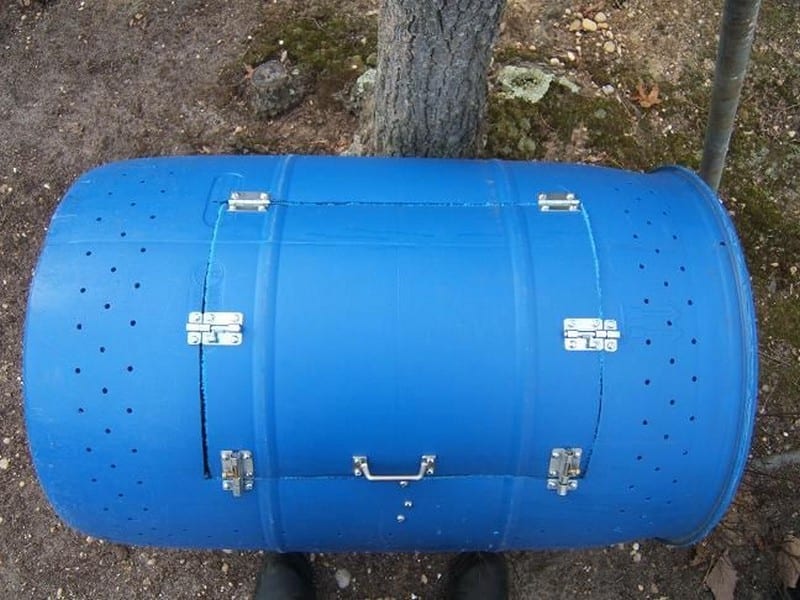
To make the door, I had to get several pieces of hardware.
I needed 2 flat braces, 2 handles, 4 hinges, 8 barrel locks and enough screws/nuts/washers to hold everything on.

Each door got 4 barrel locks since they work together to hold the door closed while spinning and they help to keep the shape of the door, since they tend to lose their shape and flatten out.
Each barrel also got a flat brace installed inside. It sticks up slightly to prevent the door from falling inward.
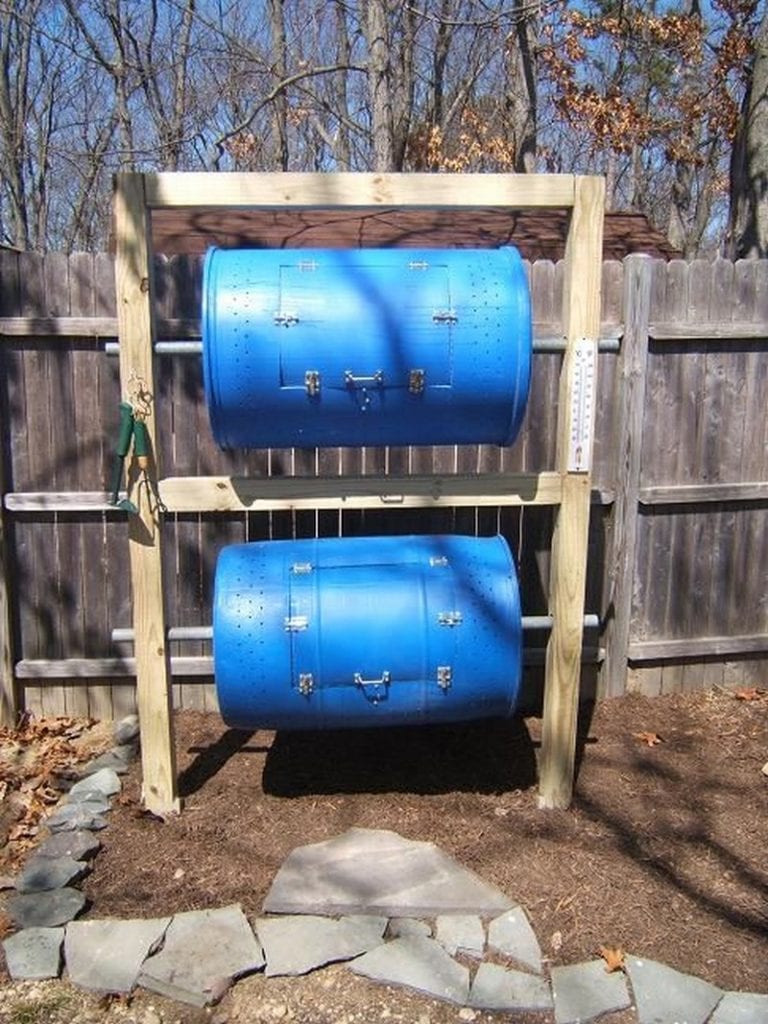
Now that the barrels were finished, I put the pole through the barrel and put them on the frame.
I checked everything and made sure that the barrels spun on the poles properly. At this point, the project is complete.
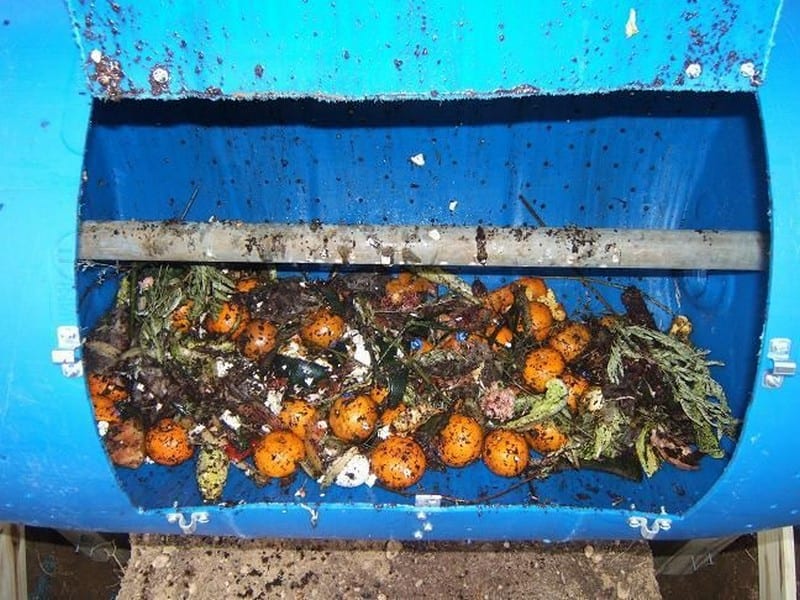
Making compost in the barrels is easy. Simply throw all kitchen scraps, lawn clippings, leaves and other organic matter into it and it will decompose naturally and make healthy soil.
Once one barrel is full, the next one can be started on. Rotate the barrels every so often to mix and aerate the compost.
***Take care not to put things like meat and animal feces into the the compost – only vegetables and plants. However, one exception to this would be eggshells. If unsure, do an internet search on composting to find lists of acceptable materials.***

This step is purely optional, but I don’t want to have to make a trip out to the composter every time I make something in the kitchen, so what I do is keep a little plastic bin in my freezer. I put everything in there and when it gets full, I dump it into the composter. It melts and decays right along with everything else and saves me a few trips.
Compost is not only good for your garden but good for the environment too. Reduce your carbon footprint by composting what you can, and recycling, reusing or repurposing the rest.
Could you use one in your garden?
Thanks to
Pest-Proofing a DIY Composter
Keep wildlife out through smart design and tidy routines that remove temptations while preserving airflow. This overview focuses on hardware, spacing, and feeding habits so your DIY composter stays productive, discreet, and safe even in busy backyards.
Rodent-Resistant Openings
Small mammals target the weakest gap, so reinforce every vent. Mount 6.35 mm hardware cloth behind the drum wall, not over it, then secure with stainless washers and bolts. Maintain hole spacing for airflow and add internal baffles to block straight odor paths. Replace plastic mesh with galvanized wire and use a compressible lid gasket that seals scent cues before they attract attention to the DIY composter.
Secure Latches and Hinges
Choose through-bolted hasps paired with spring-loaded draw latches that lock under tension and resist lid prying. Add angle-bracket shields over hinge pins, then swap loose screws for stainless bolts with nylon locknuts. Weatherstripping around the rim preserves compression and helps maintain internal heat. Fewer pry points, tighter seals, and steadier temperatures make the DIY composter a tougher, quieter target for curious visitors.
Raised Stands and Clear Zones
Height deters climbers and gives you visibility. Set the drum on a strong frame with a smooth, non-climbable approach to the door. Maintain 45–60 cm of bare, swept ground around the base so tracks and burrows are easy to spot. Trim vegetation and remove stacked items that create ladders. A simple drip edge diverts moisture and keeps the area beneath the DIY composter uninviting.
Clean Feedstock Habits
Most incursions follow smell, not hunger. Bury kitchen scraps under a cap of shredded leaves or cartonboard right after loading. Skip meat, fish, and oils, and freeze fruity peels during peak fly season. Rinse collection pails daily and wipe any spills on the drum or stand. Good housekeeping breaks scent trails before they form patterns that lead pests back to your DIY composter.
Odor Control and Moisture Management
Prevent smells by managing air, moisture, and recipe balance so microbes stay active and aerobic. This section explains ratios, structure, and drainage practices that keep decomposition efficient and your yard comfortable while the DIY composter runs hot and steady.
Dialing In Carbon–Nitrogen Ratios
Earthy aromas follow balanced recipes. Start with roughly two parts browns to one part greens by volume, then adjust based on temperature and smell. If it turns sharp or sour, add shredded leaves, straw, or cartonboard and extend tumbling. Grass-heavy mixes benefit from dry wood shavings that absorb moisture and add structure. Keep a bin of browns beside the DIY composter so every load gets capped immediately.
Moisture and the Squeeze Test
Microbes need damp, not soggy, conditions. Squeeze a handful and watch for just a few drops, which indicate ideal hydration. No droplets means the mix is too dry and decomposition slows. A steady stream signals oversaturation and likely anaerobic odors. Correct wet batches with shredded cardboard, dry mulch, or finished compost. After storms, inspect weep points and the ground around the DIY composter for lingering puddles.
Particle Size and Turning Rhythm
Oversized pieces trap cool pockets while dust-fine particles pack tight and starve microbes of air. Chop stalks to finger width and tear cartons into postage-stamp pieces to balance porosity and surface area. Turn on a weather-aware cadence, often every two or three days during active heat, then taper as temperatures stabilize. Consistent oxygen and structure preserve that clean forest-soil aroma throughout the cycle.
Drainage, Leachate, and Filters
Excess liquid pushes systems anaerobic. Drill low weep holes that drain into a gravel bed or bottle, then monitor color and odor for early warnings. If leachate runs dark and sharp, increase browns and extend aeration. Fit a mesh-and-charcoal cap over a vent near the loading door to polish escaping smells. Good drainage and simple filtration protect neighbors and keep the workspace pleasant.
Conclusion
A well-built drum DIY composter turns scraps into soil quickly with minimal mess, provided you plan for airflow, moisture balance, and safe materials. Reinforce vents with hardware cloth, fit tight latches and gaskets, and keep a steady turning rhythm to maintain oxygen and keep pests and odors at bay. Stay near a two-to-one brown-to-green ratio, adjust for season and rainfall, and use drainage or shade to maintain aerobic and productive biology.