Last Updated on October 29, 2025 by teamobn

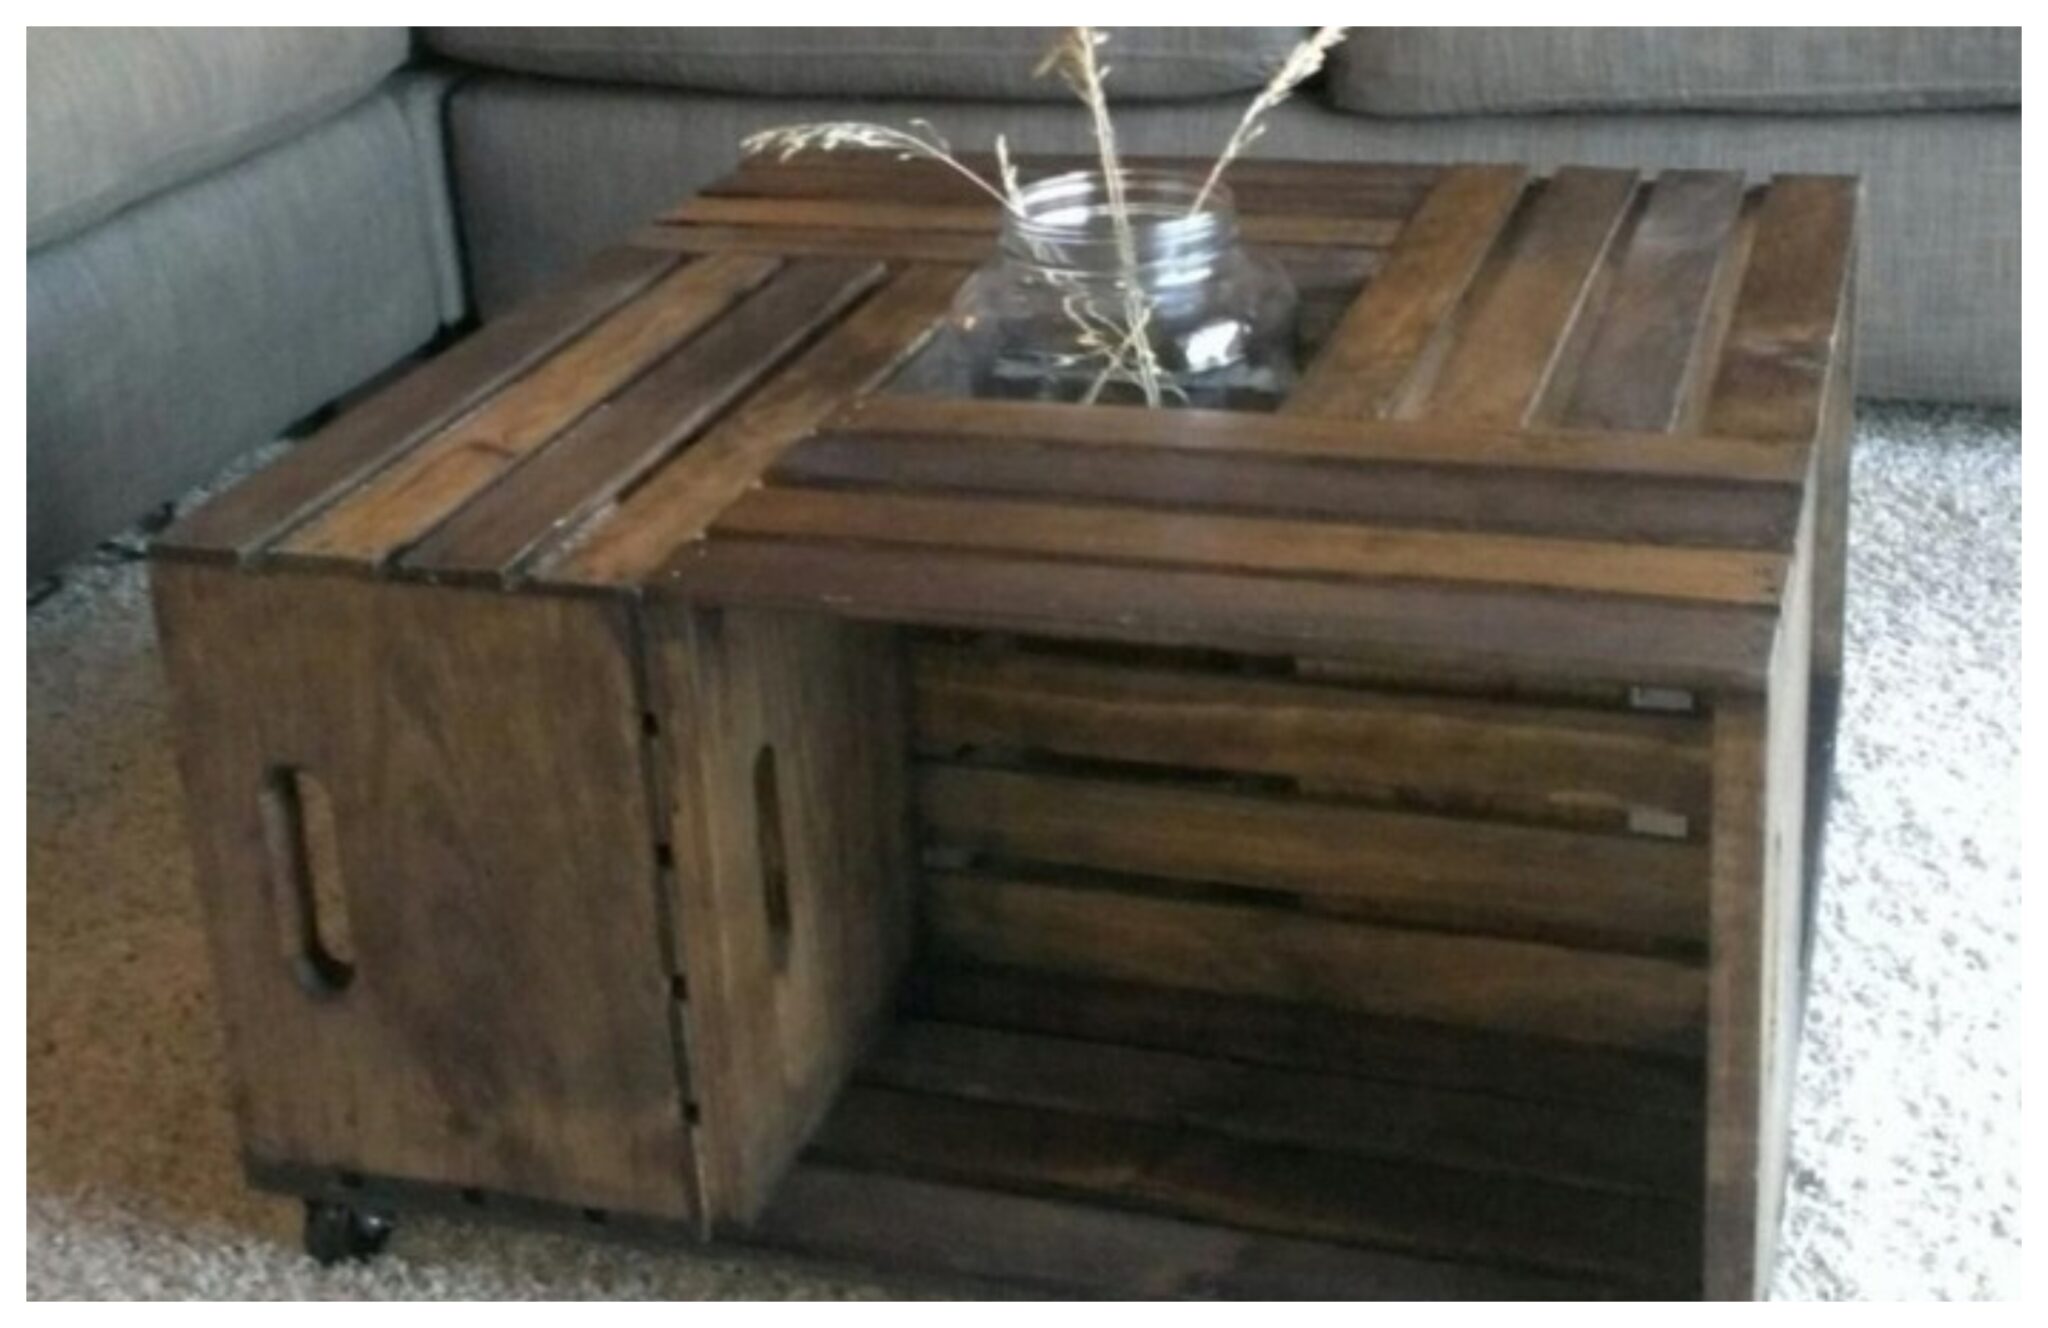
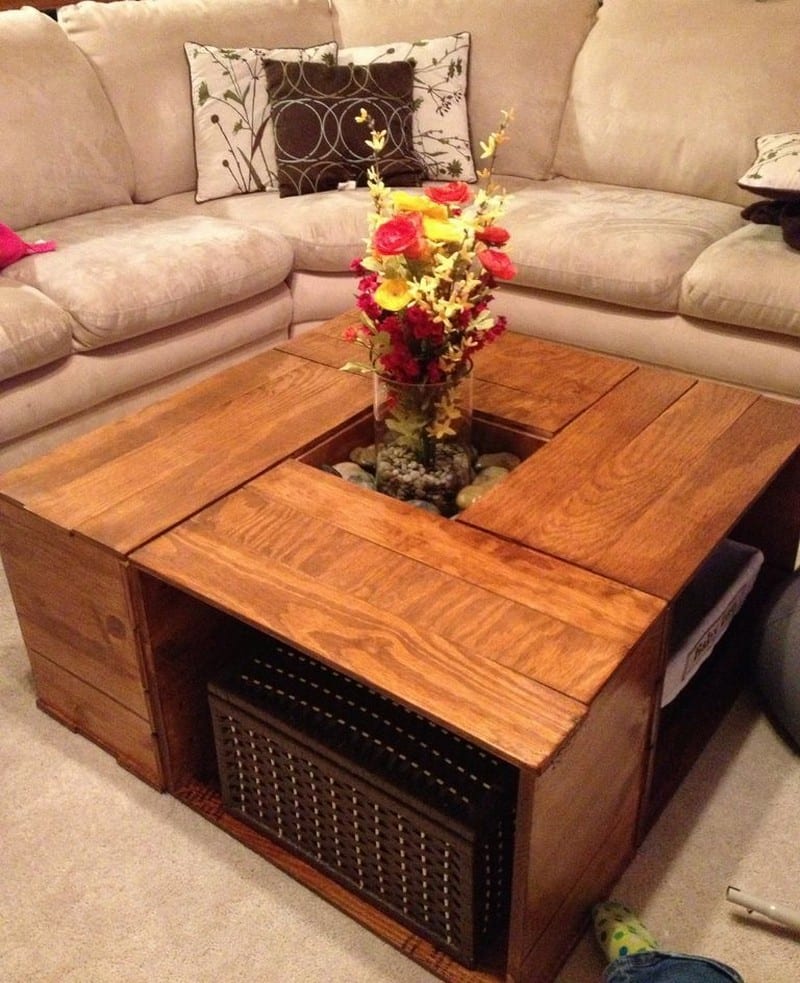
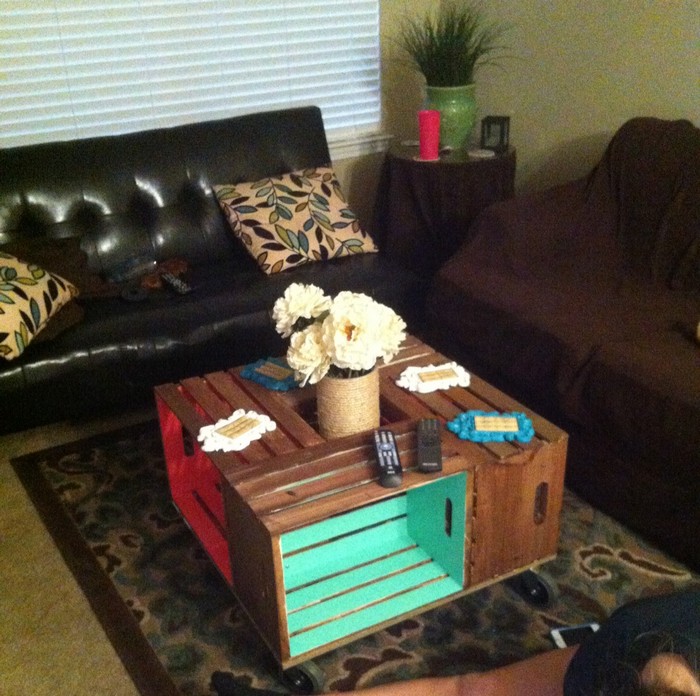
There’s nothing quite like a sturdy crate coffee table with plenty of storage space. This one made from crates will let you store throw rugs, magazines, board games, and other items tucked away but within easy reach. This is a great way to keep your living space tidy and organized, while still being able to enjoy all your favourite things.
Do you want a stylish, rustic crate coffee table that won’t break the bank? You can easily achieve this look by doing it yourself – and it will only cost you around $50. If you use reclaimed wood, you may even be able to get the project done for less.
Why settle for store-bought when you can create your own unique crate coffee table version at home? With just a few supplies and a little time, you can have your very own one-of-a-kind project.
Contents
Building a Crate Coffee Table DIY Furniture
You’ll need these materials:
- 1 1/4in Finishing Nails
- 1″ in Wood Screws
- Wood Glue
- 1-16inX21/32X8ft Board
- 4-2ftX2ft 1/4in Plywood
- Wood Stain
And these tools:
- Hammer
- Square
- Table Saw
- Measuring Tape
- Sander. with 120 and 220 grit sand paper
Steps to build this crate coffee table:
You can start this DIY crate coffee table project by cutting the pieces. Cut the 8ft board into 8 1ft sections. Cut the 2ftx2ft plywood into 4inX2ft strips. Once all the pieces are cut, sand each one down to create a smooth surface.


You will need to use two of the 16in x 1ft boards, and nine of the 4in x 2ft boards, plus one piece of excess panelling cut from the 2×2 plywood (roughly 3in x 2ft). With these materials, you can follow the instructions below to assemble your crate coffee table.

After cutting the parts for your DIY crate coffee table project, use three panels for each side and three plus excess on the bottom. Make sure you have enough spacing to slide a piece of ply in between the bottom panels, then close the square hole in the middle. This will create a sturdy and stylish coffee table that will be the perfect addition to your home.

To ensure your crates fit together evenly, lay them out on their side and dry-fit them together. Once you’re happy with the fit, use 1in wood screws to connect the crates together. Make sure to predrill the holes for the screws, and to countersink the screws so that the wood doesn’t split.
To create a sturdy and reliable storage unit, screw three crates together and measure the area in the middle to fill. Then, cut a piece of plywood to fit inside and use wood glue to attach it. Finally, screw the last crate in place. This unit will provide ample space for storing your belongings, and can be easily customized to fit your specific needs.

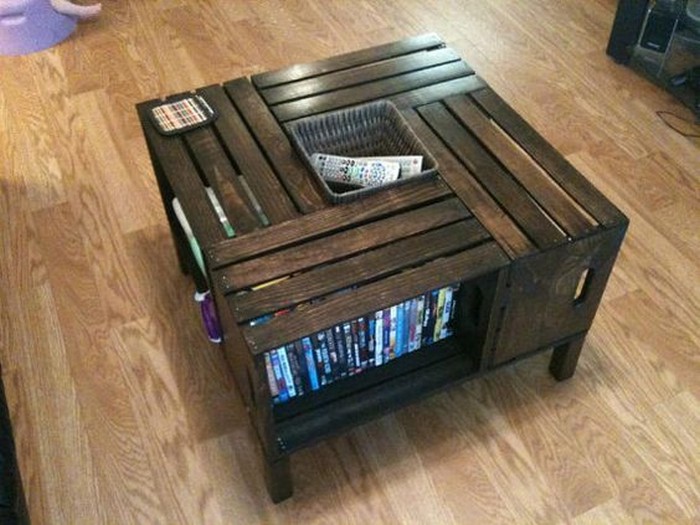
Now that you have sanded and stained your DIY crate coffee table, it is time to protect it with a polyurethane coating. I recommend using an antique walnut stain with polyurethane already in it. This will give your coffee table two coats of protection.

I filled the square with a vase of flowers and rocks. I also put some baskets underneath for storage. This is a great way to add a touch of nature to your home while still being able to keep things organized.
If you could change one thing about this coffee table, what would it be? Is there anything you don’t like about it, or is it perfect as it is?
Thanks to SuzukiDHP for this great project.
Choosing Crates: Size, Quality, and Wood Source
A well-chosen box sets the tone for any crate coffee table DIY project. These next tips help you pick lumber that looks good, lasts long, and fits your room.
Crate dimensions that suit room traffic
Measure sofa height, walkway width, and rug placement before spending cash. A coffee table DIY project works best when the finished top sits level with your couch cushions and still leaves thirty inches for knees to pass. Test multiple footprint shapes on the floor with painter’s tape until one feels natural.
Checking structural integrity before sanding
Grip each corner and twist hard. Slats shouldn’t creak. Reject anything with deep splits or worm holes because weakness here spreads through the whole crate coffee table DIY project once weight and finish get added. Tug nails with pliers. Loose hardware points to hidden rot.
Reclaimed versus new lumber sources
Reclaimed pine has knots and nail scars that scream character, yet moisture can wreak havoc if you rush. Bake boards in direct sun for two days, then cool inside to balance humidity. New spruce comes clean and square, saving you time on the crate coffee table DIY project. Budget decides which path wins.
Sorting surfaces for top and sides
Lay every board flat, brush away dust, then mark attractive grain with chalk. Those faces become the table rim or lid. Plainer pieces hide underneath. This simple step gives the crate coffee table DIY project a designer vibe without extra cost.
Sanding workflow that stops swirl marks
Start at 120 grit, vacuum, then move to 180 and 220. Always finish with the grain, never across it. Smooth fibers drink stain evenly and elevate the final crate coffee table DIY project from hobby to heirloom.
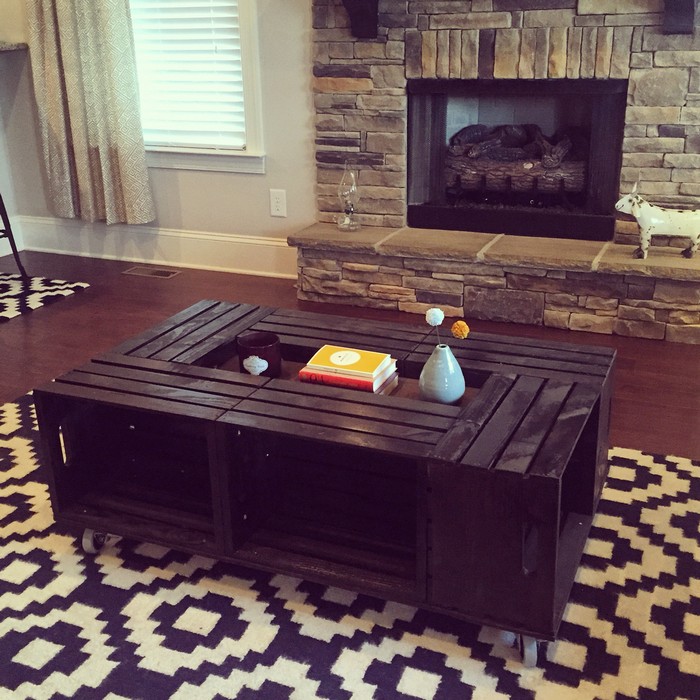
Adding Casters for a Mobile Crate Coffee Table DIY
Rolling furniture lets you clean, rearrange, or host game night with ease. The guidance below shows how to bolt wheels on a crate coffee table DIY project without wobble or squeaks.
Selecting wheel types for indoor floors
Rubber casters glide over hardwood and vinyl while metal cores brave thick carpet. Choose four swivels rated for two hundred pounds so the crate coffee table DIY project moves fully loaded. If you entertain outside, pick stainless bearings that shrug off damp patios.
Mounting hardware that won’t split the base
Mark pilot holes with an awl, drill through the thickest rails, and slip carriage bolts with washers on both sides. Bolts clamp tighter than screws and spread force, extending the life of the crate coffee table DIY project. Tighten nuts a quarter-turn past hand snug, over-cranking crushes fibers.
Locking and aligning for safe use
Install two locking wheels on the sofa side so the table stays put when kids lean over chess boards. Align casters on a perfect rectangle or the crate coffee table DIY project will drift sideways when pushed. Test glide paths by rolling in circles and setting brakes at every quarter turn.
Adding a hidden fifth wheel for heavy loads
If your crates span more than thirty inches, screw a small caster under the center seam. That discreet helper prevents sag and makes the crate coffee table DIY project feel weightless even when you pack it with art books.
Protecting floors from dents and streaks
Slide a scrap board under each wheel and spin twice. No gouges means the rubber compound is soft enough. If you see shiny trails, swap to polyurethane casters before finishing the crate coffee table DIY project.
Crate Coffee Table DIY Guide
Click on any image to start the lightbox display. Use your Esc key to close the lightbox. ![]()

Finishing Touches: Stain, Paint, and Protective Sealers
Color and clear coat turn raw boxes into centerpiece furniture. Follow these finishing moves to give your crate coffee table DIY project style and stamina against daily spills.
Preparing the wood for an even coat
Vacuum every joint, wipe with a damp microfiber cloth, then let dry. Raised fibers appear. Knock them down with 320 grit for glass-smooth grain. This prep stage decides how refined the crate coffee table DIY project will look in bright daylight.
Choosing color that complements décor
Warm walnut matches leather sofas, driftwood gray brightens coastal rooms, and bold navy sides with a natural top adds contrast. Test swatches on off-cuts under living-room bulbs. Once you love a shade, label the can so future tweaks match the original crate coffee table DIY project finish.
Applying sealers for durability
Water-based polyurethane dries fast and keeps pale woods bright. Oil-based options deepen tone and add warmth. Brush thin coats along the grain, wait full cure time, and sand lightly between layers. Three coats turn the crate coffee table DIY project into a spill-proof surface for coffee mugs and remote controls.
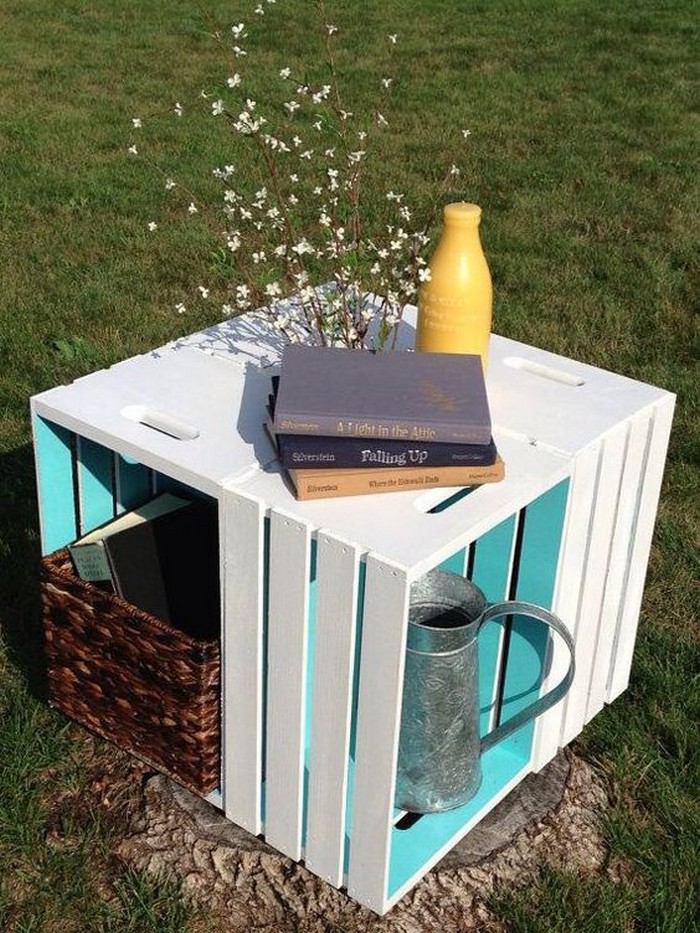
Mixing paint and stain for two-tone flair
Mask crate edges with painter’s tape, stain the lid, then roll on matte paint for the sides. Peel tape while still tacky to avoid chip lines. This style trick makes the crate coffee table DIY project pop without fancy joinery.
Refreshing the surface after years of use
Scuffs happen. Lightly sand affected spots, wipe dust, and dab matching finish with a foam brush. Blend strokes outward so patches vanish. Ten minutes of upkeep keeps your crate coffee table DIY project looking showroom new for decades.
Conclusion
Building a crate coffee table DIY furniture piece proves that practical design can be budget-friendly. You choose the crate sizes, bolt on smooth casters, and apply a finish that fits your décor. Each step demands careful measuring, sanding, and sealing, but no advanced joinery. The result is a sturdy table with hidden storage that rolls out of the way for cleaning.
Do you have an old window instead of crates? Those are perfect for our old window coffee table project!