Last Updated on November 11, 2025 by teamobn
Best lumber rack for small spaces: Wall-mounted racks are the top choice for most small workshops, using vertical space to free up floors. For ultimate flexibility, rolling carts work best. High ceilings? Choose overhead storage systems.
| Storage Type | Best For | Space Saved | Cost | Difficulty |
|---|---|---|---|---|
| Wall-Mounted | Most workshops | Floor space | $50-150 | Easy |
| Overhead | High ceilings | Floor + wall | $100-300 | Medium |
| Rolling Cart | Mobility needs | Flexible | $75-200 | Easy |
| Vertical Compact | Tight corners | Minimal footprint | $30-100 | Easy |
| DIY Combination | Custom needs | Maximum | $40-120 | Medium |
Contents
- 1 Why Proper Lumber Storage Matters
- 2 Quick Decision Guide: Which Lumber Rack is Right for You?
- 3 Comparison Table: 5 Best Lumber Rack Ideas
- 4 Smart Lumber Rack Ideas
- 5 Conclusion
Why Proper Lumber Storage Matters
Storing lumber in small spaces doesn’t mean sacrificing organization or safety. The right lumber rack prevents wood warping, saves floor space, and makes materials instantly accessible. Whether you’re a DIY enthusiast, professional carpenter, or homeowner tackling renovation projects, these five lumber storage solutions maximize every inch of your workshop or garage.
Key benefits of proper lumber storage:
- Prevents warping and moisture damage
- Eliminates tripping hazards
- Saves 40-60% of floor space
- Reduces project time by improving accessibility
- Protects your lumber investment
Quick Decision Guide: Which Lumber Rack is Right for You?
Choose based on your situation:
- Wall-Mounted Racks → You have strong walls and need reliable, permanent storage
- Overhead Systems → You have 8’+ ceilings and want maximum floor space
- Rolling Carts → You move materials between workstations frequently
- Vertical Compact → You have narrow corners or tight spaces
- DIY Combination → You want customizable storage on a budget
Comparison Table: 5 Best Lumber Rack Ideas
| Feature | Wall-Mounted | Overhead | Rolling Cart | Vertical Compact | DIY Combination |
|---|---|---|---|---|---|
| Floor Space Used | None | None | Minimal | Minimal | Minimal |
| Weight Capacity | 200-500 lbs | 300-600 lbs | 150-300 lbs | 100-200 lbs | 200-400 lbs |
| Lumber Length | Up to 12′ | Up to 16′ | Up to 8′ | Up to 10′ | Up to 12′ |
| Installation Time | 2-3 hours | 3-5 hours | 1 hour | 1-2 hours | 3-4 hours |
| Portability | None | None | High | Low | None |
| Cost Range | $50-150 | $100-300 | $75-200 | $30-100 | $40-120 |
| DIY Difficulty | Easy | Medium | Easy | Easy | Medium |
| Best Workspace | Standard garage | High-ceiling shop | Multi-station shop | Tight corners | Custom spaces |
| Accessibility | Excellent | Moderate | Excellent | Good | Excellent |
| Customization | Medium | Low | Medium | High | Very High |

Smart Lumber Rack Ideas
Here are five of the greatest small-space lumber rack solutions. These creative, practical solutions maximize every inch of your workshop or garage.
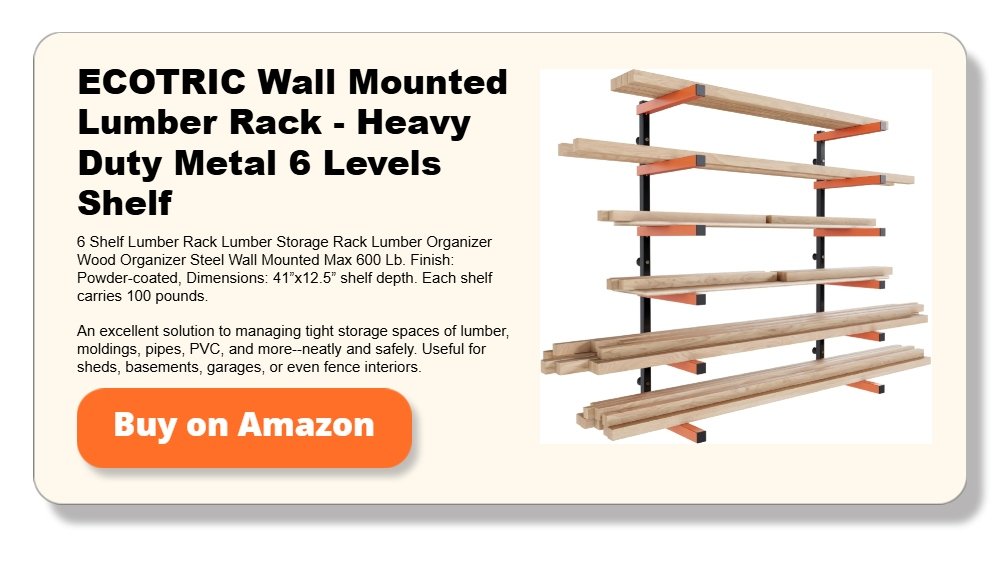
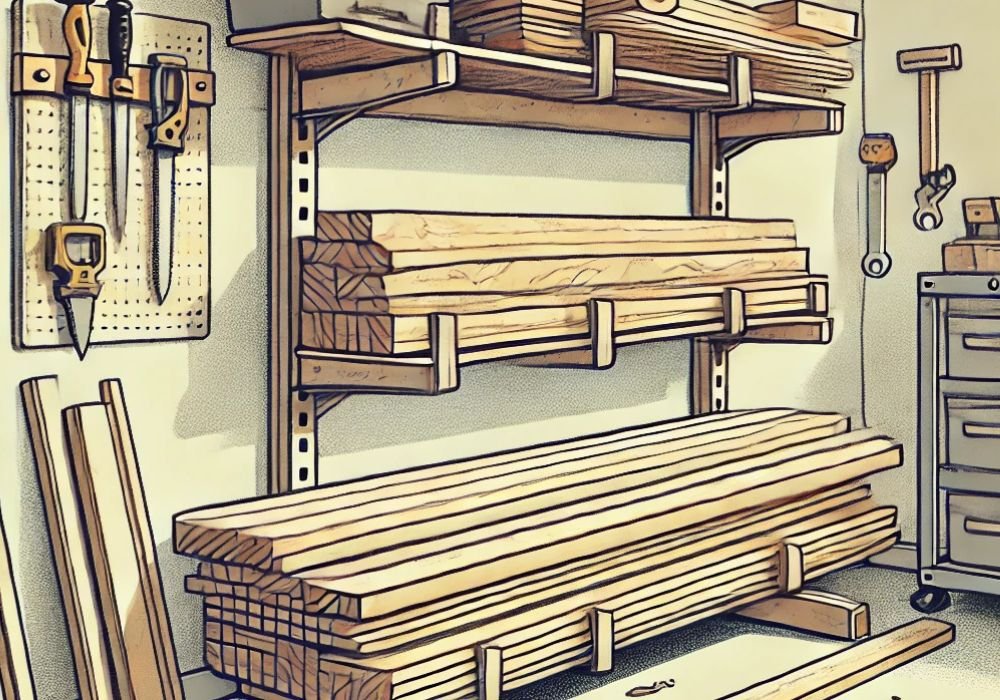
Wall-Mounted Lumber Racks (Best Overall)
Wall-mounted lumber racks are the most popular solution for small spaces, using vertical surfaces to free up valuable floor space. They’re versatile, sturdy, and ideal for organizing lumber of various sizes.
Key Benefits
- Maximizes vertical space – Uses walls instead of floors
- Prevents warping – Allows air circulation around wood
- Easy access – Materials visible and within reach
- Highly customizable – Adjustable or fixed configurations
- Cost-effective – $50-150 for most setups
What materials are needed to build a Wall-Mounted Lumber Rack?
- Steel racks: Heavy-duty, corrosion-resistant, supports 300-500 lbs
- Aluminum racks: Lightweight, rust-proof, supports 200-300 lbs
- Wooden brackets: Budget-friendly DIY option, supports 150-250 lbs with proper installation
What tools are needed to build a Wall-Mounted Lumber Rack?
- Stud finder
- Heavy-duty lag bolts or screws (3-4″ length)
- Level
- Drill with appropriate bits
How to build a Wall-Mounted Lumber Rack?
- Locate wall studs using a stud finder
- Mark bracket positions (24-32″ apart for long lumber)
- Install at chest height (48-60″) for optimal access
- Secure brackets with lag bolts into studs
- Test weight capacity before fully loading
⚠️ Safety Note: Never install into drywall alone – always anchor into studs.
If you’re ready to build your own, you can check other ideas in this step-by-step DIY lumber rack build for a sturdy system that fits tight workshops and budgets.
Best Uses
- 2x4s, 2x6s, and dimensional lumber
- Plywood sheets (with proper bracket spacing)
- Crown molding and trim pieces
- Smaller offcuts in dedicated sections
Pros & Cons Table
| Pros | Cons |
|---|---|
| Zero floor space used | Requires solid walls with studs |
| Accommodates various lumber sizes | Permanent installation |
| Professional appearance | Limited by wall length |
| Long-lasting durability |
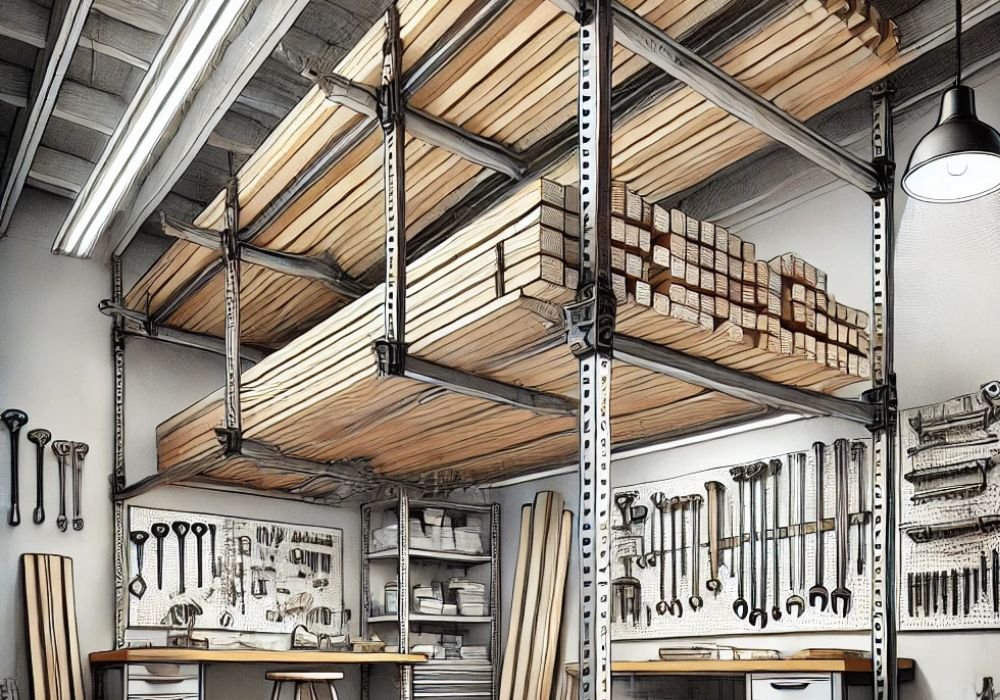
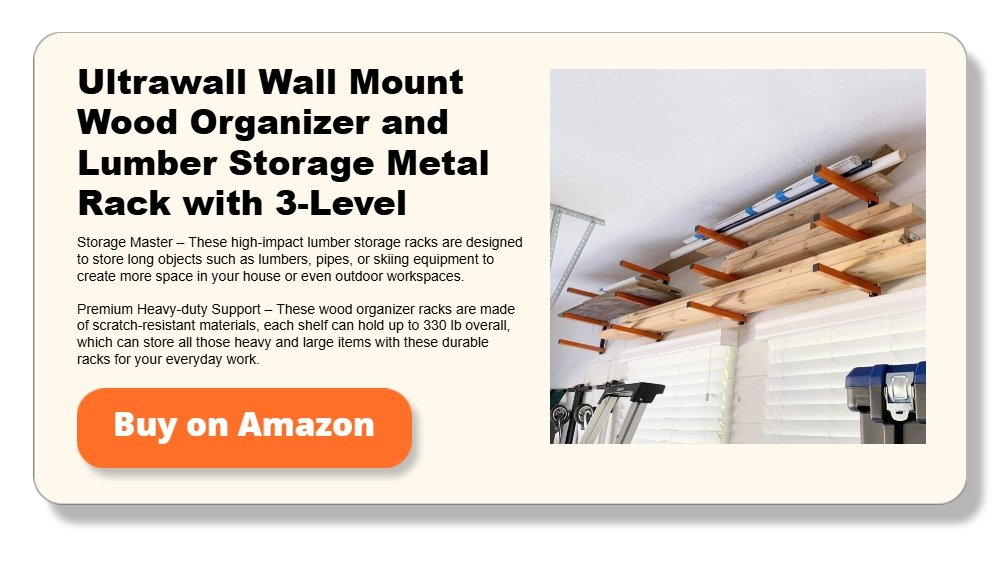
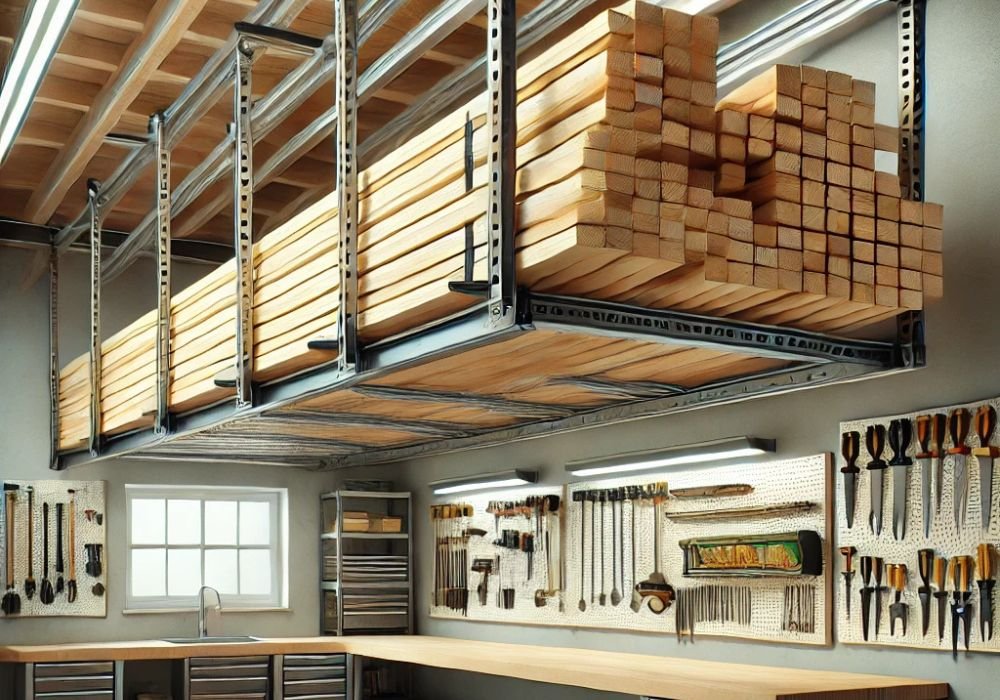
Overhead Storage Systems (Best for High Ceilings)
Overhead storage systems utilize ceiling space to store lumber completely out of the way. Perfect for workshops with 8+ foot ceilings where floor and wall space are at a premium.
Key Benefits
- Maximum space efficiency – Frees floor AND wall space
- High weight capacity – Supports 300-600 lbs
- Stores long materials – Handles up to 16′ boards
- Multi-purpose – Can store lumber, ladders, and seasonal items
- Safe storage – Keeps materials away from moisture and spills
System Features – Essential features to look for:
- Adjustable height/length: Customize to ceiling height and lumber dimensions
- Drop-down mechanisms: Some models include pulley systems for easy access
- Heavy-duty construction: Steel frame rated for 400+ lbs
- Safety straps: Prevent lumber from sliding off
Installation Considerations
Pre-installation checklist:
- Ceiling height: Minimum 8 feet (9-10 feet ideal)
- Joist location: Must anchor into ceiling joists or beams
- Clearance: Check garage door tracks, lights, fans
- Access method: Ladder or step stool needed
Installation tips:
- Use a joist finder to locate ceiling joists
- Mark joist positions clearly
- Install lag bolts (minimum 3″ into joists)
- Space mounting brackets 24-36″ apart
- Test with light weight before full loading
DIY vs. Pre-Made
Pre-made systems ($100-300):
- Quick installation (2-3 hours)
- Engineered weight ratings
- Professional finish
- Warranty included
DIY systems ($40-100):
- Custom sizing
- Repurpose existing materials
- Use 2x4s with heavy-duty brackets
- Add rollers for easier access
Organization Tips
- Store longest boards in the center
- Place frequently used materials near ladder access points
- Group by lumber type and dimension
- Create an inventory list for large collections
- Label sections for quick identification
Pros and Cons Table
| Pros | Cons |
|---|---|
| Maximizes unused ceiling space | Requires ladder access |
| Keeps workspace completely clear | More complex installation |
| Protects from ground-level damage | Not suitable for low ceilings (<8 feet) |
| Ideal for long boards and sheets | Limited accessibility compared to wall mounts |
Rolling Lumber Carts
Rolling lumber carts combine storage with portability, allowing you to move materials wherever needed. Ideal for workshops with multiple workstations or shared garage spaces.
Key Benefits
- Ultimate flexibility – Move materials to any workstation
- Space-efficient when not in use – Roll out of the way
- Organized compartments – Vertical and horizontal sections
- Multi-functional – Store tools and lumber together
- No installation required – Ready to use immediately
Essential Features – Must-have components:
- Heavy-duty locking casters (4-6″ diameter)
- Swivel wheels for maneuverability
- Locking mechanism for stability
- Weight rating: 100+ lbs per wheel
- Multiple storage sections
- Vertical dividers for offcuts
- Horizontal shelves for long boards
- Tool storage bins or hooks
- Sturdy frame construction
- Steel or reinforced wood frame
- Supports 150-300 lbs total
- Low center of gravity prevents tipping
DIY Rolling Cart Build
What materials are needed to build a DIY Rolling Cart?
- 3/4″ plywood (base: 24″ x 36″)
- 2x4s for vertical dividers
- 4 heavy-duty casters (4-6″)
- Wood screws and wood glue
- Optional: small shelf or tool hooks
How to build a DIY Rolling Card?
- Cut the plywood base to the desired size
- Attach casters to corners (inset 1-2″ from edges)
- Build vertical dividers with 2x4s
- Space dividers 6-8″ apart for different lumber widths
- Add a horizontal shelf 12-18″ from the base
- Sand edges and apply a protective finish
Total build time: 2-3 hours
Cost: $75-120 for DIY version
Organization Strategy: Maximize Cart Efficiency
- Front section: Frequently used materials
- Vertical slots: Short offcuts, organized by width
- Horizontal shelf: Longer boards (up to 8′)
- Side hooks: Measuring tape, pencil, small tools
- Bottom bin: Scraps under 12″
Labeling System: Use Color-Coded Tape or Labels
- Red: Hardwoods
- Blue: Softwoods
- Green: Treated lumber
- Yellow: Plywood/sheet goods
Best Applications
Small to medium collections
- Multi-station workshops
- Shared garage spaces
- Projects requiring material transport
- Mixed lumber types and sizes
Pros and Cons Table
| Pros | Cons |
|---|---|
| Move materials to the work area | Uses some floor space |
| Versatile storage options | Lower weight capacity than fixed racks |
| Easy DIY construction | Wheels can lock if overloaded |
| Doubles as mobile workbench | Limited to shorter lumber lengths |
| Doubles as a mobile workbench |

Compact Vertical Lumber Storage
Compact vertical lumber storage systems maximize tight spaces by storing wood upright in corners or narrow wall sections. Perfect for minimalist workshops where every square foot counts.
Key Benefits
- Minimal footprint – Uses just 2-4 square feet
- Utilizes corners – Makes use of dead space
- Better air circulation – Prevents warping and moisture damage
- Visual organization – See all materials at a glance
- Budget-friendly – $30-100 for most setups
Design Features: Key Components
- Stable base platform
- Minimum 18″ x 18″ for stability
- Weighted or secured to wall
- Made from plywood or 2×4 frame
- Vertical supports
- Spaced 4-6″ apart
- Made from wood, PVC pipe, or metal rods
- Height: 6-8 feet typical
- Adjustable dividers
- Separate by lumber width
- Removable for flexibility
- Can accommodate different wood types
DIY Vertical Storage Build: Simple PVC Pipe Design
What materials are needed to build a Simple PVC Pipe Design Vertical Lumber Storage?
- 3/4″ plywood base (24″ x 24″)
- 6-8 PVC pipes (1.5″ diameter, 6-8′ length)
- Wood screws and mounting brackets
- Wall anchors (if securing to wall)
How to build a simple PVC Pipe Design Vertical Lumber Storage?
- Cut plywood base
- Drill holes for PVC pipes (spaced 6″ apart)
- Insert pipes into holes
- Secure with wood glue and screws from bottom
- Optional: Anchor top of pipes to wall for extra stability
Build time: 1-2 hours
Cost: $30-60
DIY Vertical Storage Build: Alternative Wood Design
What materials are needed to build a Wooden Vertical Lumber Storage?
- 2x4s for base frame (24″ x 30″)
- 1x2s or 1x3s for vertical dividers
- Heavy-duty L-brackets for wall mounting
How to build a Wooden Vertical Lumber Storage?
- Build rectangular base with 2x4s
- Attach vertical dividers every 6-8″
- Mount to wall with L-brackets
- Lean lumber against dividers
Safety Best Practices
⚠️ Important Safety Tips:
- Always anchor tall racks to the wall
- Don’t exceed 150-200 lbs capacity
- Place heavier boards toward the back
- Keep shorter pieces in front
- Install in corner for added stability
- Use a base wider than the tallest lumber height
Organization Method: Sorting Strategy
- Front slots: Frequently used sizes (2x4s)
- Middle slots: Medium-use materials
- Back slots: Specialty woods or long-term storage
- By length: Shorter (4′) to longer (10′)
- By width: Group similar dimensions together
Best Applications
- Small workshops (100-300 sq ft)
- Garage corners
- Shed storage
- Narrow wall sections
- Offcut organization
- Small lumber collections
Pros and Cons Table
| Pros | Cons |
|---|---|
| Smallest footprint of all options | Lower weight capacity (100-200 lbs) |
| Utilizes otherwise wasted corner space | Stability concerns with tall lumber |
| Excellent air circulation for wood | Not ideal for very long boards (12’+) |
| Easy visual inventory | Requires wall anchoring for safety |
| Very budget-friendly | Limited storage volume |
DIY Combination Racks
DIY combination racks merge vertical and horizontal storage into one adaptable system. Perfect for those who need maximum flexibility and want to tailor storage to their exact specifications.
Key Benefits
- Ultimate customization – Design for your exact needs
- Dual storage modes – Vertical AND horizontal sections
- Cost-effective – Use scrap materials ($40-120)
- Scalable design – Expand as collection grows
- Repurposes materials – Eco-friendly solution
Best Uses for DIY Combination Racks
Combination racks are ideal for workshops or garages where you need to store various types of wood in a single space. They’re perfect for managing materials for multiple projects, from large renovation tasks to smaller DIY crafts.
By building a DIY combination rack, you’ll create a storage solution that’s functional and tailored to your workspace. This customizable approach ensures your lumber stays organized, accessible, and ready for your next project.
| Pros | Cons |
|---|---|
| Complete design flexibility | Requires woodworking skills |
| Accommodates all lumber types | Time-intensive build (4-6 hours) |
| Most cost-effective for large storage | Need tools and materials |
| Can use reclaimed materials | Must ensure structural integrity |
| Expandable and modifiable | Permanent or semi-permanent installation |
| Satisfaction of DIY project |
Frequently Asked Questions
- What’s the best lumber rack for very small garages or shops?
- If wall studs are available, a wall‑mounted rack frees floor space and stays accessible. If wall space is limited, go vertical in a corner with an anchored vertical rack. Where neither wall nor floor space works, consider an overhead rack if you have safe joist access and adequate clearance.
- How far apart should I space wall‑mounted lumber rack brackets?
- For 8–12 ft boards, plan bracket spacing at about 24–32 inches on center to reduce sagging. Use closer spacing for heavier species or wider shelves. Always lag into studs with 5/16–3/8 inch hardware and follow the rack manufacturer’s specs.
- How much weight can ceiling/overhead lumber racks hold?
- Many ceiling racks are rated between 200–600 lb when properly lag‑bolted into joists. Verify joist size and spacing, maintain overhead clearance for doors/lights/fans, and follow manufacturer install instructions for fastener type and torque.
- When should I choose a rolling lumber cart instead of fixed racks?
- Choose a rolling cart if you need mobility, share a garage, or move stock to your workbench. A compact cart (roughly 6–10 sq ft footprint) can mix vertical bays for offcuts with horizontal shelves for longer boards. Use heavy‑duty locking casters and keep heavy stock low to prevent tipping.
- Is vertical lumber storage safe in tight spaces?
- Yes, when built with a stable, wide base and anchored to the wall. Lean longer boards slightly and keep heavier pieces low. Add dividers to separate thicknesses/lengths and a toe‑kick or low rail to prevent sliding. Vertical storage offers the smallest footprint and great visibility.
- What’s the best way to store plywood and sheet goods in small shops?
- Use wall arms with adequate arm length and close spacing to prevent bowing, or build a dedicated rolling sheet cart so you can move panels safely. Support sheets at multiple points, and keep them off the floor to avoid moisture and edge damage.
- How do I prevent warping and moisture damage regardless of rack type?
- Maintain airflow (leave 1–2 inch gaps), keep wood off the floor, and aim for 40–60% relative humidity. Acclimate new stock for 24–48 hours before milling. Load heavier boards lower and store out of direct sun to minimize uneven drying. For long‑term stacks, use stickers (spacers) between layers.
Conclusion
Choosing the right lumber rack ideas can transform a cluttered workspace into an organized and efficient area. Each idea offers unique benefits tailored to small spaces, helping you keep materials accessible and safe. With the right system in place, you’ll save time, reduce frustration, and enhance your DIY or renovation projects.
While you’re optimizing lumber storage, don’t forget your garden gear — use these tips to organize your yard tools efficiently so your small workspace stays clutter-free.
We have more ways on boosting your workspace for wood projects. Check out our guide on setting up your woodworking shop!