Color-blocking in the garden uses broad, unbroken swaths of a single hue or plant to deliver a modern impact. Perennial “band” plantings translate that idea into long, repeatable ribbons that simplify choices and reduce maintenance. With a few reliable species arranged in horizontal or diagonal strips, you can build rhythm, depth, and season-long color. This guide covers the essential design principles, practical plant palettes, and a simple process to go from sketch to soil.
Key Takeaways
Contents
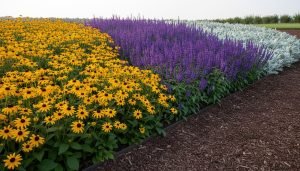
- Repeating bands of one plant or color create clean modern borders with strong impact.
- Limit the palette to two or three main bands plus one accent for a clear 60 30 10 balance.
- Scale band widths to bed depth and keep bands at least four times longer than their width for an intentional appearance.
- Favor reliable clump-forming perennials and triangular spacing to knit quickly and stay tidy with low maintenance.
- Keep edges crisp and color continuous by following a simple seasonal calendar for cutback, watering, and divisions.
How to Do Perennials Color-Blocking
Perennial color blocking creates bold, simple borders using repeating bands of reliable plants. Follow this process to plan, mark, and plant ribbons that deliver rhythm, seasonal interest, and lasting appeal.
Materials and Tools
- Measuring tape, 25 to 50 ft
- Graph paper or a simple garden planning app
- Landscape marking paint or sand, plus stakes and string or a flexible garden hose for layout
- Spade or flat edger, sharp shovel, and hand trowel
- Garden fork or broadfork, steel rake, and wheelbarrow
- Compost, plus coarse sand or fine gravel if drainage needs improvement
- Balanced organic slow release fertilizer, optional
- Mulch, one to two inches, such as shredded bark, pine fines, or decorative gravel
- Drip irrigation kit or soaker hoses with a pressure regulator and timer, optional
- Metal or plastic edging or a paver mowing strip, optional
- Selected perennials for each band, with about ten percent extra for fill-ins
- Plant labels and a weatherproof marker
- Gloves, knee pad, eye protection, and a hose with a spray nozzle or watering wand
Step-by-Step: From Blank Bed to Bands
- Measure and mark the bed. Confirm bed length and depth, and determine the primary viewing angle. Decide on two or three primary bands plus one accent that follows a 60/30/10 visual balance. Sketch the bands on paper before you mark lines on the site.
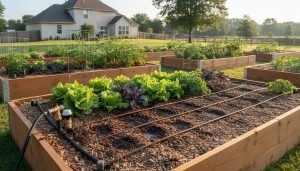
- Prep soil and define the edge. Remove weeds and grass. Loosen eight to ten inches of soil and blend in two to three inches of compost. Grade for positive drainage away from structures. Cut a crisp edge with a spade and install edging if you want it.
- Lay out the bands. Use stakes and string or a hose to outline paths for each band. Keep widths consistent. Small beds work with twelve to eighteen inches. Medium beds suit eighteen to thirty inches. Large beds can hold thirty to forty eight inches. Align bands to the primary viewpoint and allow gentle curves.
- Stage plants by band and height. Group plants by species and place pots on the soil before digging. Use triangular spacing. Groundcovers sit eight to twelve inches apart. Mid perennials sit twelve to eighteen inches apart. Tall types sit eighteen to twenty-four inches apart. Place taller plants toward the back or toward the center of island beds.
- Plant and water in. Dig holes twice the rootball width and set crowns at grade. Tease circling roots. Backfill, firm the soil, and water thoroughly to settle it. Add a starter fertilizer if you choose to use it. Keep edges straight and tidy as you move along the bed.
- Install irrigation if desired. Run drip lines or soaker hoses down the center of each band and stake them in place. Test coverage and adjust emitters. Set a timer for consistent deep watering.
- Mulch and label. Apply one to two inches of mulch and keep it off the crowns. Leave a maintenance gap of two to three inches along edges to simplify weeding. Label bands and species with durable tags.
Core Design Principles
While most gardeners can grow perennials, it takes patience and skills to create an attractive color-blocking garden with the plant. Use the following core design principles for your perennials color-blocking layout for that spectacular outcome.
Keep the Palette Tight
Limit your scheme to two or three primary bands with one accent that provides contrast and lift. Aim for a 60/30/10 balance so the largest band carries the view, the secondary band adds variety, and the accent provides a clear punch. Choose cultivars with dependable color and tidy habits so the bands show as continuous ribbons. Resist the urge to add extras, since visual clarity comes from restraint and repetition.

Proportion and Scale
Size band widths to bed depth so plants mature into a solid block without crowding. Use about 12 to 16 inches for beds that are 3 to 4 feet deep, 18 to 30 inches for beds that are 5 to 7 feet deep, and 30 to 48 inches for beds that are 8 to 12 feet deep. Keep each band at least four times as long as it is wide so the line feels intentional rather than choppy. Taper band ends gently rather than cutting them off abruptly, and avoid bands that are narrower than the mature spread of the chosen plant.
Color Strategy
Decide whether your border leans warm or cool, then let one family dominate so the whole reads as a single composition. Separate adjacent bands by value or temperature so each ribbon remains visually distinct when viewed from the street or patio. Use green, blue green, and silver foliage as calming neutrals that link strong flower colors. Balance saturated blooms with softer tints or dusky tones so the design stays elegant under bright summer light.
Texture and Form
Mix a few distinct plant shapes to build rhythm without clutter. Combine spiky verticals, rounded mounds, and airy fillers so the eye moves smoothly along each band. Let foliage carry interest beyond bloom by choosing leaves with reliable color, sheen, or variegation. Introduce one structural grass or upright perennial per composition to add backbone and winter silhouette.
Repetition, Rhythm, and Spacing
Repeat the same bands or echo plants across the bed so the design feels cohesive from end to end. Use consistent on-center spacing with triangular placement to remove gaps and produce a continuous color read.
As a rule of thumb, plant one to two groundcovers per square foot, one half to one mid-sized perennial per square foot, and one quarter to one half tall perennial per square foot, then adjust for vigor. Keep a narrow maintenance gap along edges so lines stay crisp and easy to weed.

Layering for Depth
Arrange tall plants at the back of a border that faces one direction, and place the tallest plants in the center of island beds that are viewed from all sides. Step heights in clear increments so foreground, middle, and background remain readable.
A simple ratio that works is short, one times, middle, one and a half times, and tall, two times the height of the short layer. Avoid sudden jumps in height that fragment the band.
Orientation and Flow
Aim bands toward the primary viewpoint so lines guide the eye where you want it to go. Straight bands feel modern and formal, while shallow arcs and diagonals add depth on modest sites. Terminate bands at a boulder, a path, or a structural shrub so the line feels anchored. Avoid dead ends that dissolve into lawn or disappear behind utilities.
Seasonal Sequencing
Choose plants with strong foliage or seedheads so bands look finished even when blooms rest. Stagger bloom windows so one band peaks while another provides support. Plan for at least three seasonal highlights, such as spring flowers, summer saturation, and autumn structure. In colder climates, favor perennials that stand through winter and deliver sculptural silhouettes after frost.
Durability and Maintenance
Favor clump-forming species with clean habits and long-lived crowns so bands hold their shape for years. Avoid aggressive spreaders and self-seeders that cross lines and blur colors. Plan division intervals for vigorous growers and schedule a yearly edge refresh to keep bands sharp. Design with tools and workflow in mind so cutback, weeding, and irrigation checks can happen in efficient passes.
Wildlife and Site Conditions
Match plants to sun, soil, moisture, and wind so bands thrive with minimal intervention. Where browsing is everyday, select deer and rabbit-resistant choices that maintain edges and form. In hot reflective sites near pavement, use drought-tolerant species and lighter foliage to manage heat. Layer bloom across the season to support pollinators while maintaining your color plan.
Edge and Hardscape Integration
Install a mowing strip or steel edging where turf meets the bed so the boundary stays clean. Allow a two to three-inch maintenance gap inside the edge that remains free of crowns and mulch buildup. Place paths at logical intervals for access without trampling bands. Keep materials simple, so hardscaping frames the color rather than competing with it.
Test and Adjust
Stage plants in pots and photograph from the main viewing angle before you dig. Adjust band widths, color balance, or plant counts where the read feels thin or crowded. Plant confidently once the mockup looks strong, then fine-tune in year two as plants mature. Expect the full design intent to emerge once roots are set and spacing tightens.
Maintenance Calendar and Tips
A smart maintenance rhythm keeps color bands crisp, healthy, and low effort. Use this season-by-season calendar to time cutbacks, watering, divisions, and edge care for a designer look.
Spring
- Cut back last year’s stems before new growth reaches two inches, so fresh shoots do not tear.
- Edge the bed and reset a clean maintenance gap to simplify weeding and keep lines sharp.
- Top dress with one to two inches of compost and lightly scratch it in where the soil is thin.
- Divide vigorous clumps and replant to maintain density while keeping each band within its width.
- Reconnect drip lines, flush emitters, and set a baseline schedule that suits your soil and climate.
- Install discreet supports for tall growers early so stems harden in an aligned position.

Summer
- Water deeply once or twice per week so bands receive about one to two inches, depending on heat and wind.
- Deadhead with intent and by species, so rebloom remains strong without exhausting plants.
- Shear Nepeta and Salvia after the first flush to encourage a fresh round of flowers.
- Clip spent umbels of Achillea and mounded Coreopsis to reduce seed and keep bands tidy.
- Leave select Echinacea and Rudbeckia seedheads if you want wildlife value and late texture.
- Scout for pests and disease during morning rounds and remove affected stems before issues spread.
- Cut the edge lightly and spot mulch open soil so weeds do not break the band read.
Fall
- Evaluate thickness and color balance, then flag areas that need division or edits next spring.
- Cut back floppers and remove only what looks messy while keeping attractive seedheads for structure.
- Refresh mulch with a light layer that covers bare soil yet stays off crowns.
- Plant late-season divisions or replacements early enough to root before consistent frost arrives.
- Reduce irrigation as temperatures drop while maintaining deep watering during dry stretches.
Winter
- Leave sturdy grasses and seedheads standing for silhouette and habitat until late winter.
- Protect exposed crowns with a thin mulch collar after the soil cools but before deep cold.
- Inspect edging and reset lifted sections after freeze and thaw cycles disturb boundaries.
- Prune woody perennials at the appropriate time and remove winter damage before spring growth begins.
- Photograph the garden from main viewpoints to guide edits when planning resumes in early spring.
Long Term Care and Troubleshooting
- Divide clump-forming perennials every three to five years so bands remain dense and uniform.
- Replace weak patches quickly and match spacing to the surrounding band so the read stays continuous.
- Track thuggish spreaders and edit firmly so colors do not bleed across lines over time.
- Refresh edges each year and renew mulch sparingly so crowns breathe and stems emerge cleanly.
- Keep simple notes on dates, bloom windows, and water needs so adjustments become precise and repeatable.
- If a band looks flat, layer texture by pairing a spiky form with a mounded neighbor while keeping the color story consistent.
Conclusion
Color blocking with perennials is done by planning the garden bed borders that show cleanly from a distance and stay manageable through the years. Once your bands are established, repeated species and crisp edges make every task faster and more predictable. You will create a stunning outdoor space with colored garden areas when you are done.
FAQs Perennials Color-Blocking
- How long until my bands create a solid ribbon aesthetic?
- With quart perennials spaced 12 to 18 inches on center, most sunny beds reach a convincing continuous showing by the second summer, while shadier sites often need a third season. Plugs set at 8 to 10 inches on center knit groundcovers by the first fall and bring mid sized perennials into cohesion by the following spring. You can speed the effect by tucking a living mulch such as creeping thyme or low sedges between crowns in year one and thinning as the main plants mature.
- What budget should I plan for a 100 square foot band project
- A typical build with a 60-30-10 layout runs about 700 to 1,300 dollars when you combine plants, compost, mulch, and basic irrigation. As a planning baseline, allocate around 120 plugs for the groundcover portion at 2 to 4 dollars each, about 30 quarts for the mid layer at 6 to 10 dollars each, and 5 to 6 one-gallon anchors at 12 to 18 dollars each, then add 100 to 200 dollars for compost and mulch. Edging can add 40 to 80 dollars and a simple drip kit often lands between 60 and 120 dollars.
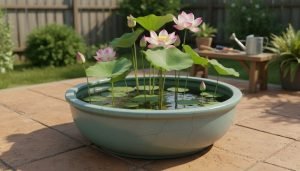
- Can I color block with perennials in containers or on a rooftop terrace
- Yes, treat each planter as a mini band and size containers generously so roots can run. Use boxes at least 20 to 24 inches deep, target about three-quarters to one cubic foot of mix per mid-sized plant, and give tall grasses 1.5 to 2 cubic feet each. A dependable mix uses roughly 60 percent pine bark fines, 30 percent coco coir or peat, and 10 percent perlite with a slow-release fertilizer at label rates, topped with a thin gravel mulch to manage evaporation.