Last Updated on October 30, 2025 by teamobn
In the grand scheme of things, the home gardener’s goals are humble. The world won’t end if the raspberry bushes are not pruned on schedule, though it will be a tad better if they are. There is no crime in growing too many lettuce seedlings, even if your time could be spent more wisely. Yet even the experienced gardener will tell you that growing rosemary requires levels of patience, determination, and focus that verge on the heroic.
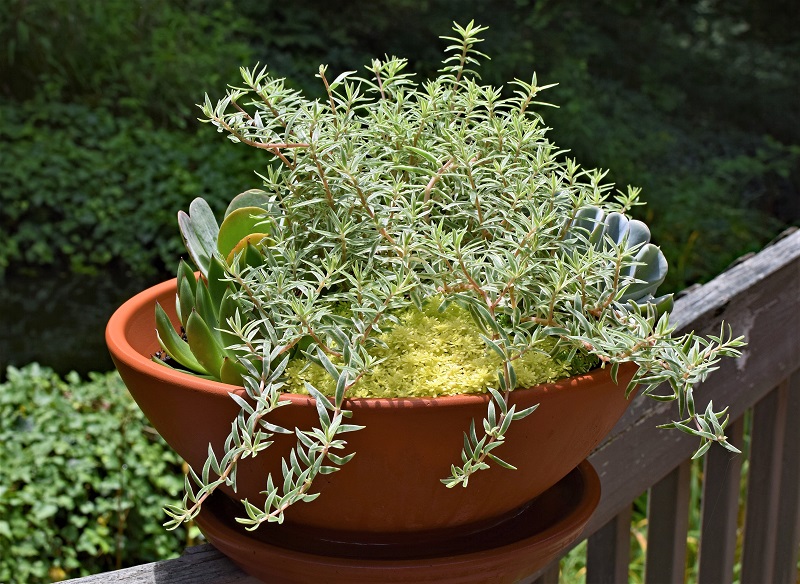
With its fresh, woodsy fragrance, rosemary is bound to please dinner guests. Fortunately for gardeners, with a bit of tenacity and tender care, you can grow rosemary plants in a container out on the patio.
True, this herb requires more in the way of maintenance and gardening diligence than others. But the culinary value of fresh rosemary, lovingly grown and husbanded, is by far worth the trouble. Rosemary, after all, is no ordinary herb.
Follow our guide below on growing rosemary in containters:
No Ordinary Herb
Contents
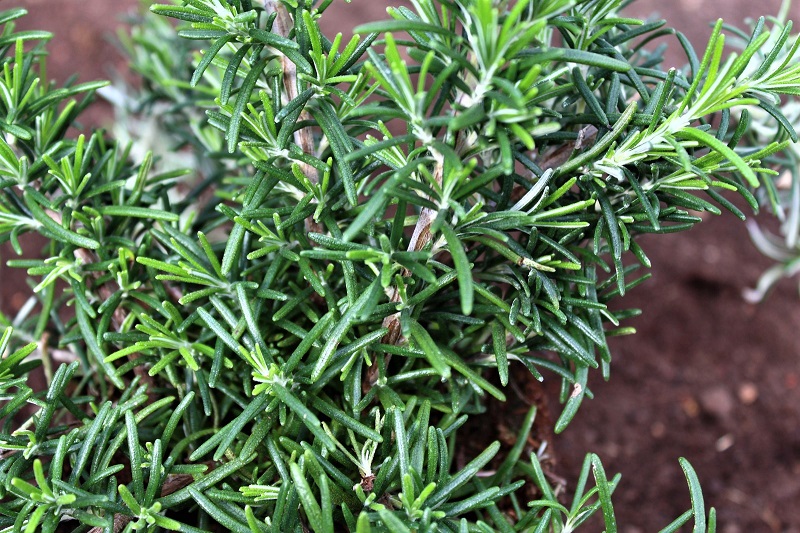
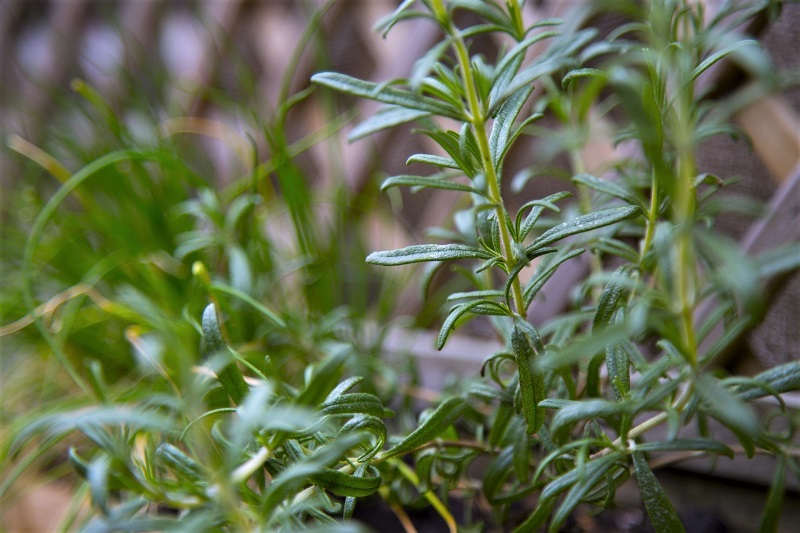
Rosemary grows best when allowed eight hours of sunlight a day. Due to its extensive root system, select a container that will accommodate at least three gallons of potting mix. Consider containers made of clay or wood. These will provide better oxygenation than plastic pots. Good oxygenation reduces the risk of root rot.
Basil, cilantro, and parsley will all readily sprout from seed and grow quickly. This is not the case with rosemary. This difficult evergreen can cause the gardener a good deal of frustration between its low germination rate and problematic seedling care. That’s why experts recommend that you start your rosemary from cuttings.
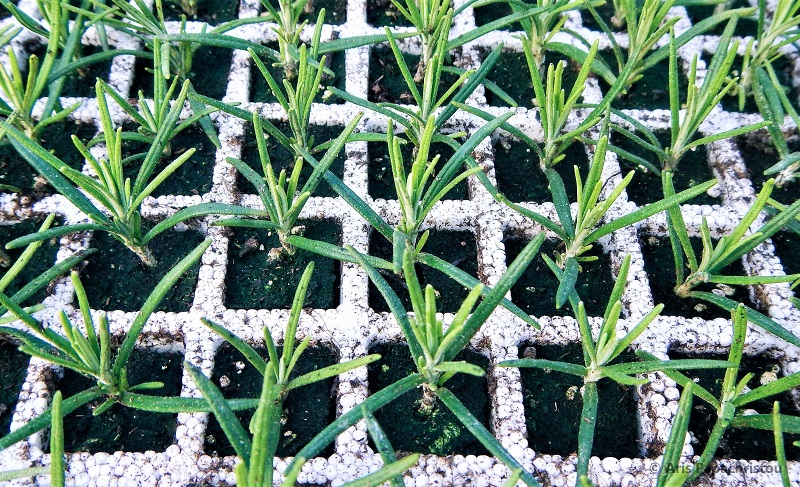
Making Your Own Rosemary Cuttings
Growing rosemary from seeds can be frustrating due to its low germination rate and slow growth. That’s why many gardeners prefer to propagate rosemary from cuttings. This method ensures faster growth, stronger plants, and a better success rate. Plus, it allows you to clone an existing rosemary plant with desirable traits, such as strong fragrance or robust growth.
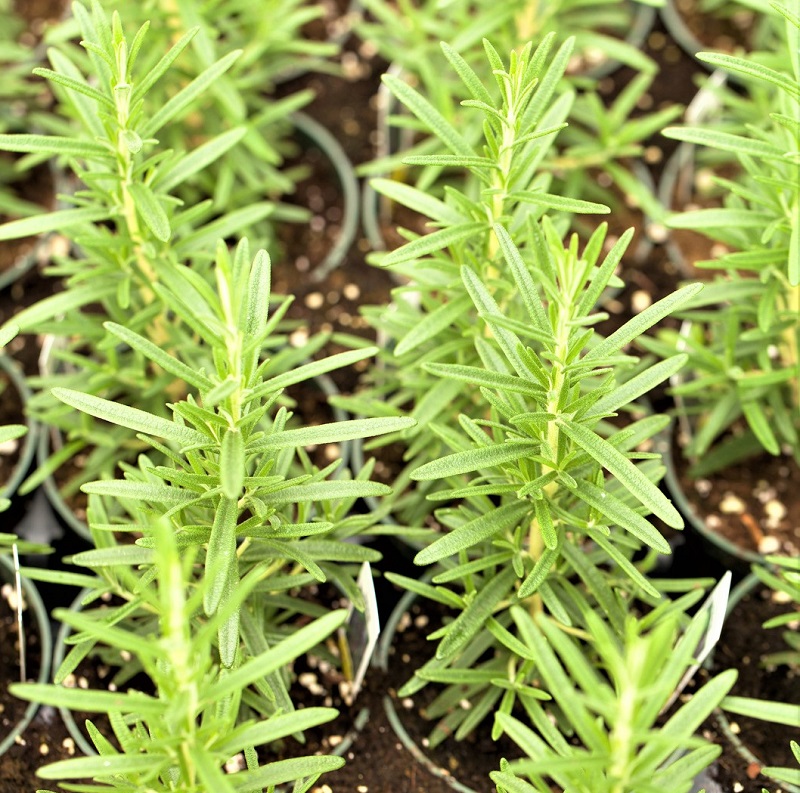
Choosing the Right Rosemary Plant for Cuttings
Healthy, well-established rosemary plants are the best candidates for propagation. Look for a donor plant that has vibrant green leaves, strong woody stems, and no signs of disease or pests. Avoid plants that appear stressed or have yellowing leaves, as they may struggle to produce roots.
Taking and Preparing Rosemary Cuttings
Using clean, sharp pruning shears or scissors, snip a three-to-four-inch piece of new growth from a healthy stem. Soft, green, and flexible stems root more easily than older, woody ones. Remove the leaves from the bottom two inches of the cutting to prevent rot and improve root development. If desired, dip the cut end in a rooting hormone to increase the chances of successful propagation.
Planting Rosemary Cuttings in Soil
Fill a small container with well-draining potting mix, preferably one that contains perlite or sand for aeration. Make a small hole in the soil and insert the cutting, ensuring that the stripped portion is fully buried. Lightly press the soil around the base to keep it stable. Water the soil gently to ensure it stays evenly moist but not waterlogged.
Providing Ideal Growing Conditions
Place the container in a warm spot with indirect sunlight. Avoid direct sun exposure at first, as young cuttings can dry out quickly. A temperature range of 65–75°F (18–24°C) is ideal for root development. If the air is dry, covering the container with a plastic bag or humidity dome can help retain moisture and encourage faster rooting.
Caring for the Cuttings and Encouraging Root Growth
Keep the soil consistently moist but not soggy. Overwatering can cause rot, while underwatering can lead to wilting. After two to three weeks, check for root development by gently tugging on the cutting. If there is resistance, roots have started to form. At this stage, gradually expose the plant to more direct sunlight to help it acclimate before transplanting.
Transplanting and Growing Your New Rosemary Plants
Once the cutting has developed a healthy root system, usually within four to six weeks, it can be transferred to a larger container. Choose a pot with good drainage and fill it with a high-quality, well-draining potting mix. Water thoroughly after transplanting, then continue regular care by providing ample sunlight and occasional feeding with a diluted organic fertilizer.
With patience and proper care, your rosemary cuttings will mature into thriving plants that enhance your container garden with their fragrance, beauty, and culinary value.
Selecting a Growing Medium
Rosemary in containers thrives when given the right soil conditions. This Mediterranean herb is particular about its growing medium, requiring soil that provides both nutrients and excellent drainage. Without proper soil, rosemary in containers can suffer from root rot, stunted growth, or poor flavor development. Choosing the right mix is crucial to maintaining a healthy, productive plant.
Understanding Rosemary’s Soil Needs
Unlike some herbs that tolerate a variety of soil types, rosemary in containers demands a well-draining mix that mimics its natural habitat. The plant’s roots prefer a light, aerated environment where excess water can drain quickly. Heavy, compacted soils retain too much moisture, which can cause root diseases and limit growth.
Choosing the Right Potting Mix
When selecting soil for rosemary in containers, opt for a high-quality potting mix designed for Mediterranean plants, succulents, or herbs. Look for blends rich in composted organic matter to supply essential nutrients. However, avoid dense, moisture-retentive mixes intended for general houseplants, as they may not drain well enough.
To improve drainage, choose a mix with added perlite, vermiculite, or coarse sand. These amendments help keep the soil light and well-aerated, preventing water from accumulating around the roots. If purchasing a pre-mixed soil isn’t an option, you can make your own by combining equal parts of standard potting mix, coarse sand, and perlite.
Maintaining the Right Soil Conditions
Even with a well-draining mix, rosemary in containers benefits from additional precautions to ensure its roots stay healthy. Always use pots with drainage holes to allow excess water to escape. Avoid compacting the soil too tightly when planting, as this can restrict airflow to the roots. Over time, soil in containers can become depleted of nutrients, so occasional feeding with an organic, well-balanced fertilizer will help maintain plant health.
By selecting the right growing medium and maintaining proper soil conditions, you can give your rosemary in containers the best possible environment to grow strong, fragrant, and full of flavor.
Planting Rosemary Outdoors in a Container
Growing rosemary outside in a container is a terrific approach to keeping control over its growth environment while cultivating this aromatic herb. Sun-loving and thriving in the correct surroundings, rosemary is Following a few simple guidelines will help you to make sure your rosemary flourishes in its container and gives you fresh, aromatic sprigs for cooking and adornment.
Timing and Weather Considerations
Plant rosemary outdoors in a container at approximately the typical last frost date for your area. Rosemary is rather tough, however young plants may be vulnerable to abrupt cold shocks. Should frost still be a concern, leave the container in a covered place or be ready to move it indoors over night. Your rosemary will establish more easily once conditions are regularly warm.
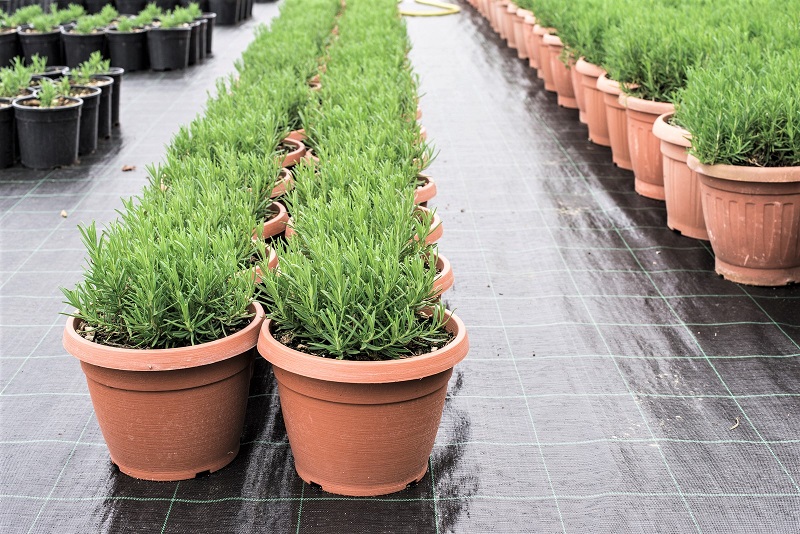
Selecting the Right Container
To fit the root structure of rosemary, use a container minimum 12 inches in diameter and 12 inches deep. Preventing water from accumulating at the bottom and resulting in root rot depends on a pot including drainage holes. Excellent options are terracotta or unglazed ceramic pots as they let extra moisture escape, therefore preventing the soil from being overly saturated.
Filling the Container with Soil
Designed for herbs, Mediterranean plants, or succulents, use a well-draining potting mix. Steer clear of thick garden soil as it will smother the roots and holds too much moisture. Aeration and drainage will be enhanced in a mixture with perlite, sand, or vermiculite. Almost to the top, fill the container almost entirely, allowing around one inch of room to facilitate watering.
Planting the Rosemary Cutting or Transplant
If you’re starting with a cutting that has already developed roots, plant it in the center of the container, making sure the base of the stem is just above the soil line. If you’re transplanting an established rosemary plant, gently loosen the root ball before placing it in the pot to encourage outward root growth. Firmly pack the soil around the plant to remove air pockets but avoid compacting it too much.
Watering and Sunlight Requirements
After planting, water your rosemary thoroughly, ensuring that moisture reaches the entire root system. The soil should be evenly moist but never soggy. Moving forward, water only when the top inch of soil feels dry to the touch. Overwatering is one of the biggest threats to rosemary in a container, so always allow the soil to dry slightly between waterings.
Place your rosemary container in a sunny location where it will receive at least six hours of direct sunlight each day. A south-facing patio, balcony, or garden spot is ideal. If you live in an extremely hot climate, provide some afternoon shade to prevent the plant from drying out too quickly.
By following these steps, you’ll set up your rosemary in a container for long-term success. With proper care, it will grow strong, healthy, and ready to be harvested whenever you need fresh rosemary for cooking or natural remedies.
Keeping Your Rosemary Alive and Thriving
Water your rosemary thoroughly once the top inch of soil dries. The standard expert advice is to water thoroughly, then let the soil dry out. If watering floods the container, pour the excess into a neighboring plant’s pot. Overwatering rosemary can lead to root rot and then sudden death.
Beyond watering, feed your plant some well-diluted liquid seaweed fertilizer or fish emulsion every few weeks. This will help rosemary generate long, somewhat spindly new growth. These should be soft and tender enough to eat raw in salads.
Overwintering Rosemary Indoors
Your rosemary plant will constantly remind you how much it prefers the winter conditions of the Mediterranean over those of your apartment or patio. See how long you can keep the plant safely outside. This may require bringing the pot indoors on especially cold nights. Many gardeners have kept a single pot of rosemary alive for many years this way.
Rosemary is not only perennial but also evergreen. It can stay outdoors in a pot for as long as temperatures don’t drop below 20°C. Otherwise, it must come inside for the months of serious cold. Find a cool indoor area exposed to as much sunlight as possible during the day.
Harvesting Rosemary
One of the greatest benefits of growing rosemary in containers is the ability to harvest fresh sprigs whenever you need them. This versatile herb adds a fragrant, earthy touch to countless dishes, and harvesting it correctly ensures you get the best flavor and aroma. With the right technique, rosemary in containers will continue producing healthy growth, allowing you to enjoy fresh herbs throughout the season.
When and How to Harvest for Best Flavor
The ideal time to harvest rosemary in containers is early in the morning. At this time, the plant’s essential oils are most concentrated, giving the leaves their strongest fragrance and taste. To harvest, use clean scissors or pruning shears to snip off the soft, new growth at the tips of the branches. Avoid cutting into the older, woody stems, as these take longer to regrow.
Frequent harvesting encourages the plant to produce fresh shoots, keeping it healthy and compact. However, avoid removing more than one-third of the plant at a time, as excessive pruning can weaken rosemary and slow its growth.
Signs Your Rosemary Needs Attention
Although rosemary is a sturdy plant, if cultivated in a small container or if its care regimen has to change, it may display symptoms of stress. Yellowing leaves around the base of the plant might suggest root-bound rosemary. This is time to repot into a three to four-inch bigger container to give the roots more room.
If the leaf tips become brown or the plant starts to shed leaves, overwatering is probably the cause. Let the soil dry somewhat to stop root rot before watering again. Using a well-aerated potting mix and guaranteeing appropriate drainage can assist to preserve the health of the plant.
Storing and Using Freshly Harvested Rosemary
One can utilize fresh rosemary right away or save it for later use. Stow the sprigs in a glass of water on your kitchen counter or wrap them in a moist paper towel to keep them fresh in the refrigerator. Hang sprigs upside down in a dry, dark area to air-dry them for long-term storage. Strip the leaves from the stems once dry, then keep them in an airtight container.
Regular harvesting and good maintenance will help your rosemary in containers to remain vibrant, therefore provide you with a consistent supply of aromatic herbs for tea, cooking, and even home herbal treatments.
Conclusion
The tips above should help you on your way to growing rosemary in containers. Bring your rosemary indoors when the weather gets too cold. Other than that, just stick close to your watering regimen and you’ll be able to harvest fresh rosemary in abundance. Your dinner guests will surely thank you for it.
Are you still looking for more ingredients to cultivate at home? Check out our guide on 7 herbs you can grow indoors!