Last Updated on March 24, 2025 by teamobn
When it comes to solutions for carrying gardening tools, the options are almost endless. Everyone – from DIY enthusiasts to gardening experts – is faced with a dizzying number of choices. Bags, totes, carts, even wheelbarrows -how are you supposed to narrow down your options?
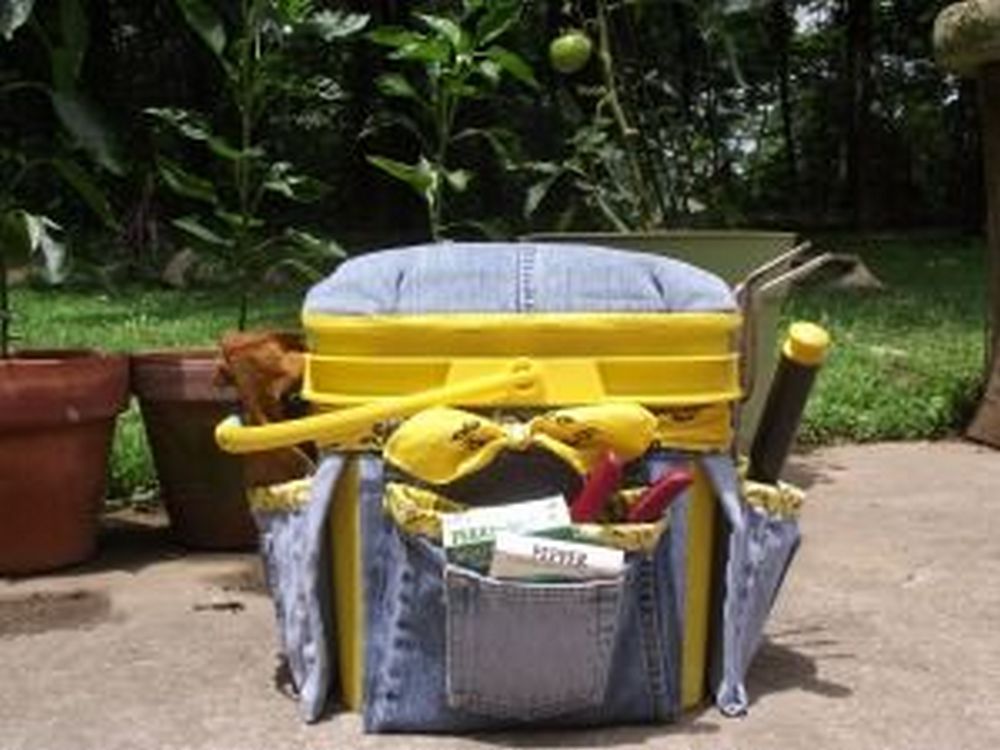
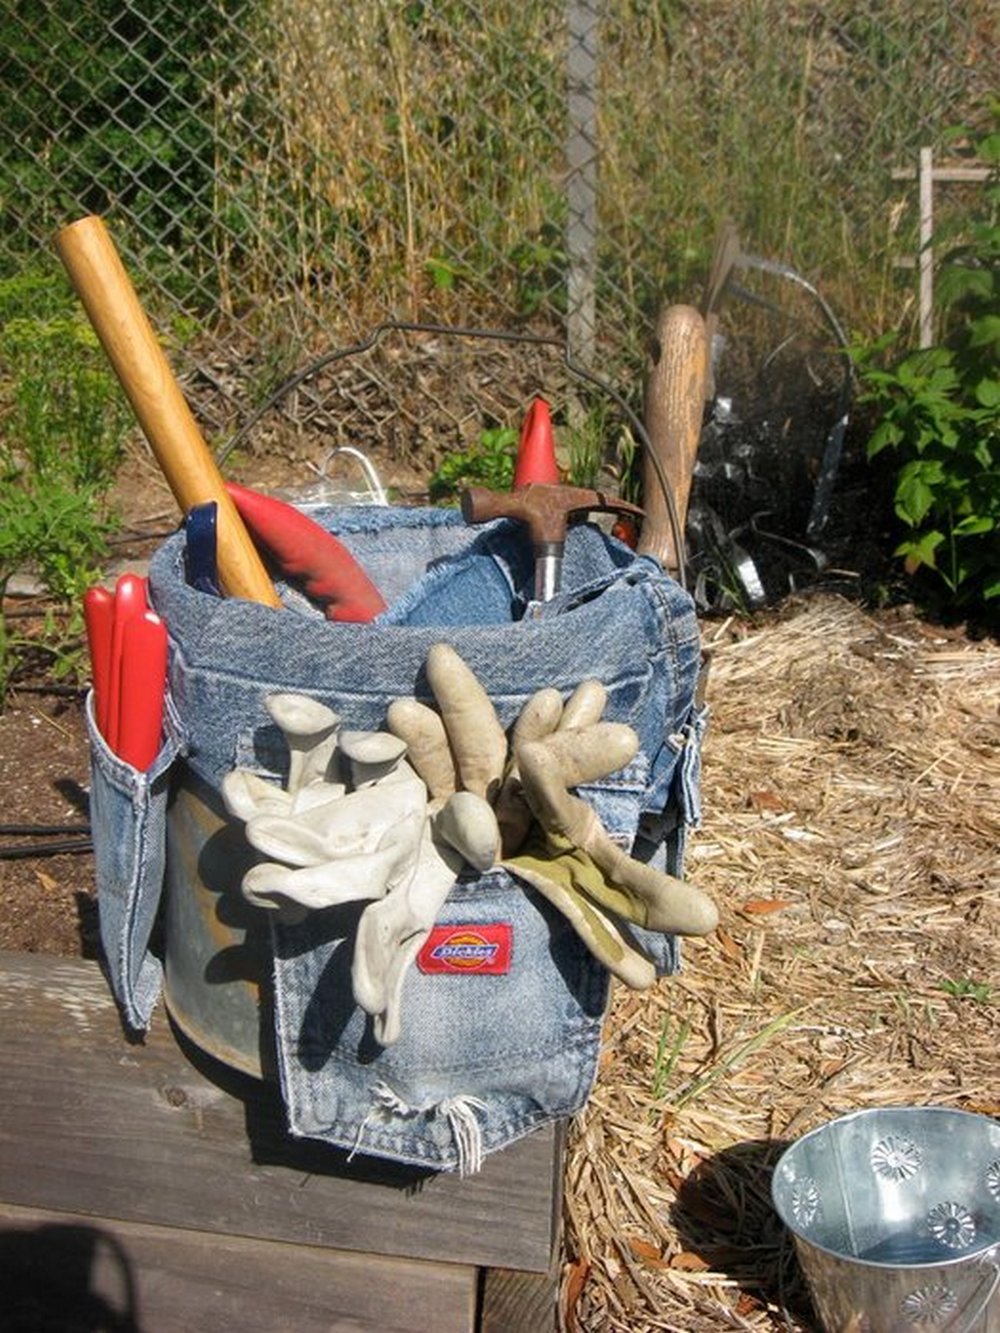
Well, here’s a great idea that’ll have you hitting two birds with one stone. If you have old pairs of jeans (we all do), you can sew them up and place them on a bucket. You’ll end up with something where you can place your garden tools inside and carry them as one. Pretty neat, right?
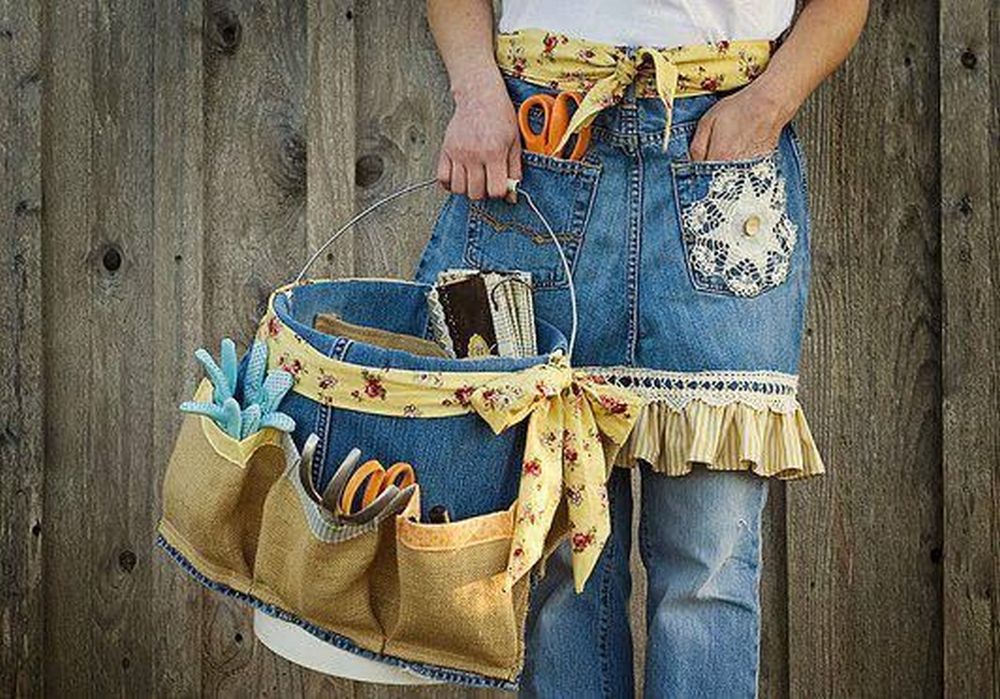
A gardening bucket caddy involves the simple act of cutting and sewing. If you don’t know how to operate a sewing machine, do it by hand. It’s a pretty easy project, you won’t have to stress it out.
Crafting a Gardening Bucket Caddy
Contents
Materials:
- Old jeans
- Bucket
Tools:
- Needle and Thread
- Sewing Machine (optional)
Steps:
Step 1: Choose and Prepare the Jeans
Pick a sturdy pair of old jeans. Heavier denim works best because it holds tools without sagging. Wash and dry them if they’ve been sitting in storage.
Step 2: Cut the Legs Off
Lay the jeans flat on a table. Cut off both pant legs, starting just below the back pockets. You’ll use the legs to create the pockets and straps for your bucket caddy.
Step 3: Make the Pocket Panels
Take one pant leg and cut it open along the seam to create a flat panel. Repeat with the other leg. These panels will wrap around the outside of the bucket. If your bucket is large, you may need extra fabric from another pair of jeans.
Step 4: Fit the Panels Around the Bucket
Wrap one panel around the bucket to check the fit. The fabric should reach around the bucket with a little overlap. Trim any excess fabric if needed.
Step 5: Pin and Sew the Pocket Sections
Decide where you want the pockets to be. Use pins to create pocket sections by folding up the bottom part of the fabric (around 6 to 8 inches) to form a pocket strip. Sew along the sides and bottoms of each pocket. You can make different widths to fit various tools.
Step 6: Attach the Panels Together
Sew the ends of your denim panels together to form a sleeve that slips over the bucket. Test the fit before sewing. You want it snug but not too tight.
Step 7: Secure the Caddy to the Bucket
Slide the denim sleeve onto your bucket. Adjust it so the pockets are evenly spaced. For extra security, you can sew or glue the top edge of the fabric to the bucket, but this is optional.
Step 8: Add Extra Features (Optional)
If you have scraps left, you can sew a handle or loop for holding gloves or string. You could also add a padded section at the top for comfort when carrying.
Step 9: Fill Your Caddy with Tools
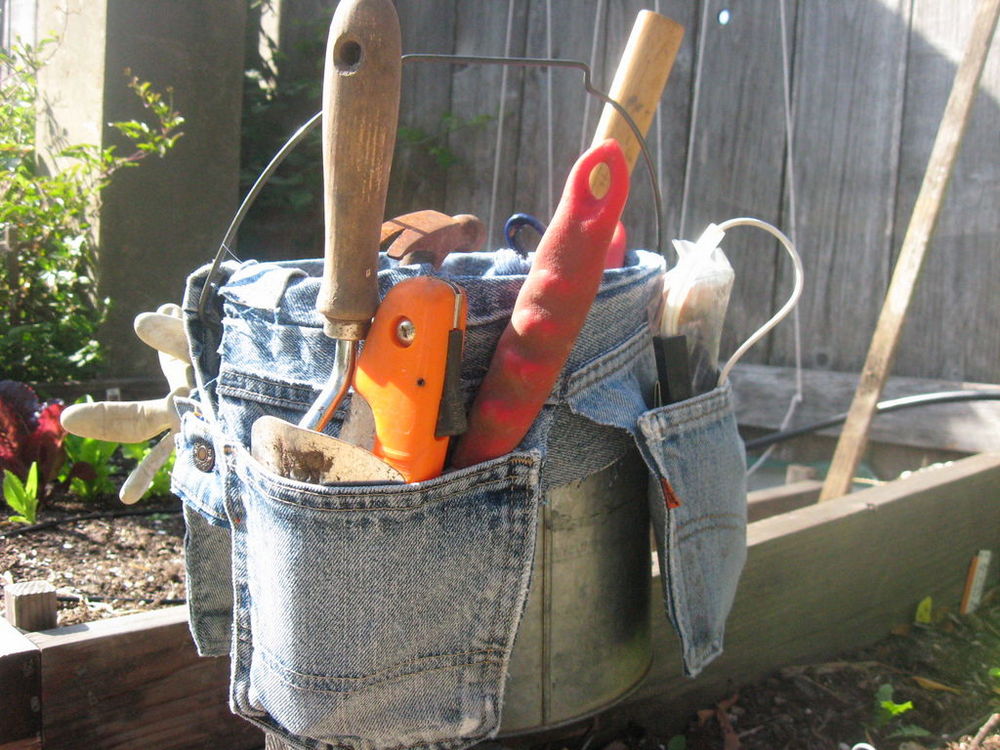
Now that your gardening bucket caddy is finished, fill it with hand tools, seed packets, gloves, and whatever else you need in the garden. The center of the bucket can still hold larger items or even water.
Benefits of Using a Gardening Bucket Caddy
A well-organized garden makes your work easier and more enjoyable. Whether you’re tending to a vegetable patch, flower beds, or container plants, having your tools within arm’s reach can save time and effort. A gardening bucket caddy is a simple, practical solution that helps streamline your gardening routine. It keeps everything you need close at hand while reducing clutter in your workspace. Here are some key benefits of using a gardening bucket caddy in your daily gardening tasks.
Keeps Tools Organized and Accessible
One of the biggest advantages of a gardening bucket caddy is its ability to keep your tools neatly organized. Small items like hand trowels, pruning shears, gloves, seed packets, and plant markers can easily get misplaced or buried under soil and mulch. A bucket caddy provides dedicated pockets and compartments, making it easy to keep everything in its place. This saves time and reduces frustration because you’ll always know where your tools are. No more searching around the yard or garden shed.
Improves Efficiency and Saves Time
A gardening bucket caddy helps you work more efficiently. Instead of walking back and forth between the garden and the shed to retrieve tools, you can carry them all in one convenient container. This reduces unnecessary trips and allows you to focus on the task at hand. Whether you’re planting, weeding, or harvesting, having everything in one spot helps you stay productive and get more done in less time.
Enhances Portability and Convenience
Gardening often involves moving from one spot to another. A gardening bucket caddy makes this much easier. Its design allows you to carry a variety of tools and supplies comfortably, all in one go. Many caddies are lightweight, and when attached to a sturdy bucket, they offer a balanced, easy-to-carry system. Some people even customize their caddy with shoulder straps or padded handles for added comfort. You can also use the inside of the bucket to hold larger tools, soil, fertilizer, or even harvested produce.
Reduces Clutter and Promotes Safety
Leaving tools scattered around the garden can create clutter and pose a tripping hazard. A gardening bucket caddy helps prevent this by providing a dedicated place for everything. Keeping your tools organized and in one spot not only reduces clutter but also promotes a safer working environment. This is especially important if children or pets are nearby. You’re less likely to leave sharp tools lying around when you have an easy way to store them.
Versatile and Customizable
Another benefit of a gardening bucket caddy is its versatility. You can tailor it to fit your specific needs. Some gardeners add extra pockets or loops to hold specialty tools. Others may customize the caddy with water-resistant fabric or additional padding for comfort. The central bucket can also double as a small seat or a container for collecting weeds, cuttings, or garden waste. This flexibility makes a gardening bucket caddy one of the most adaptable tools you can have.
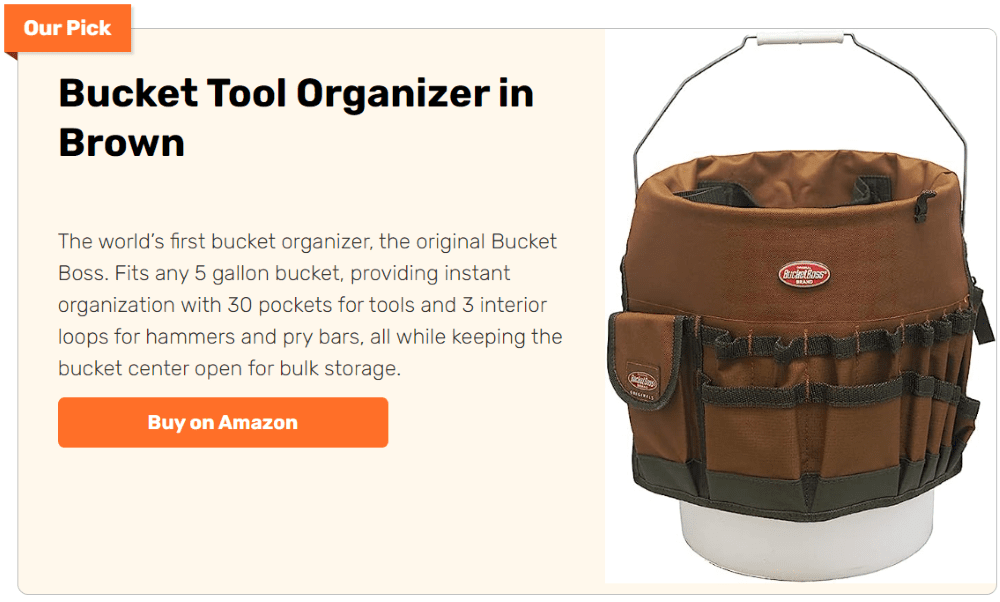
Inexpensive and Easy to Make
A gardening bucket caddy doesn’t have to be an expensive investment. Many DIY versions can be made from items you already have at home, such as old jeans and a spare bucket. Creating your own caddy is not only cost-effective but also allows you to personalize it to suit your gardening style. Whether you choose to make one yourself or buy a ready-made version, the benefits are clear.
A gardening bucket caddy is a simple tool that offers convenience, efficiency, and organization for gardeners of all levels. It’s an easy addition to your gardening routine that can make a noticeable difference in how smoothly your tasks are completed.
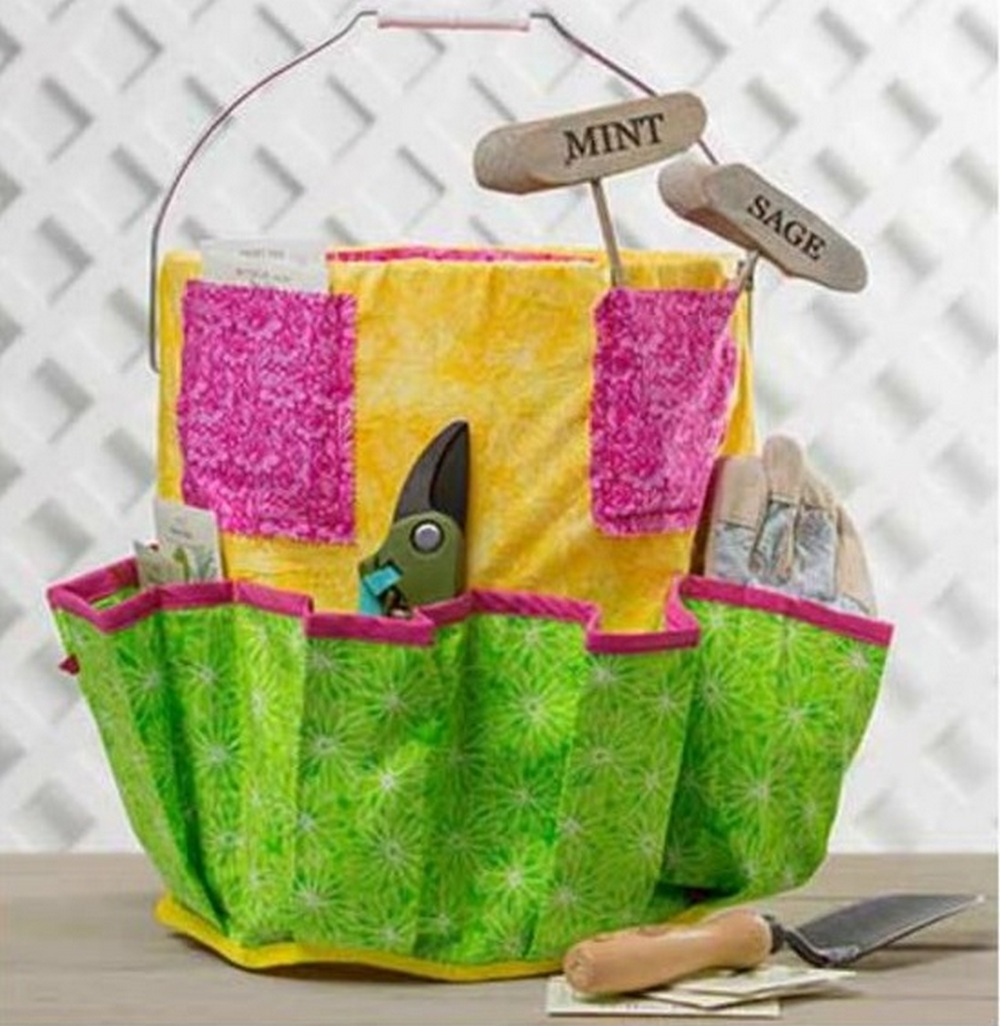
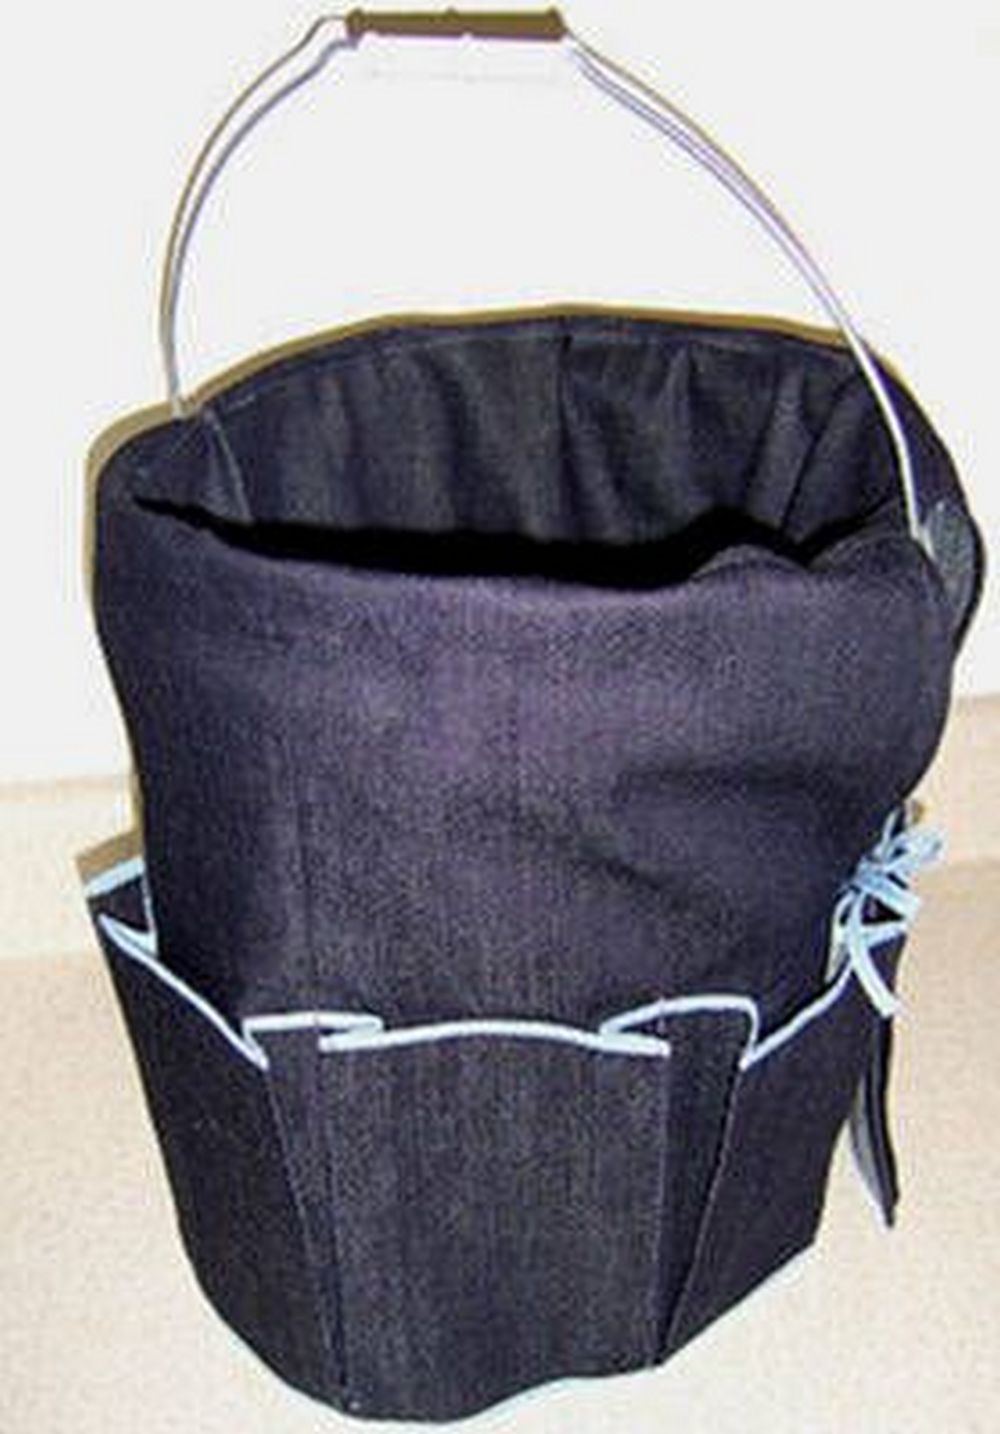
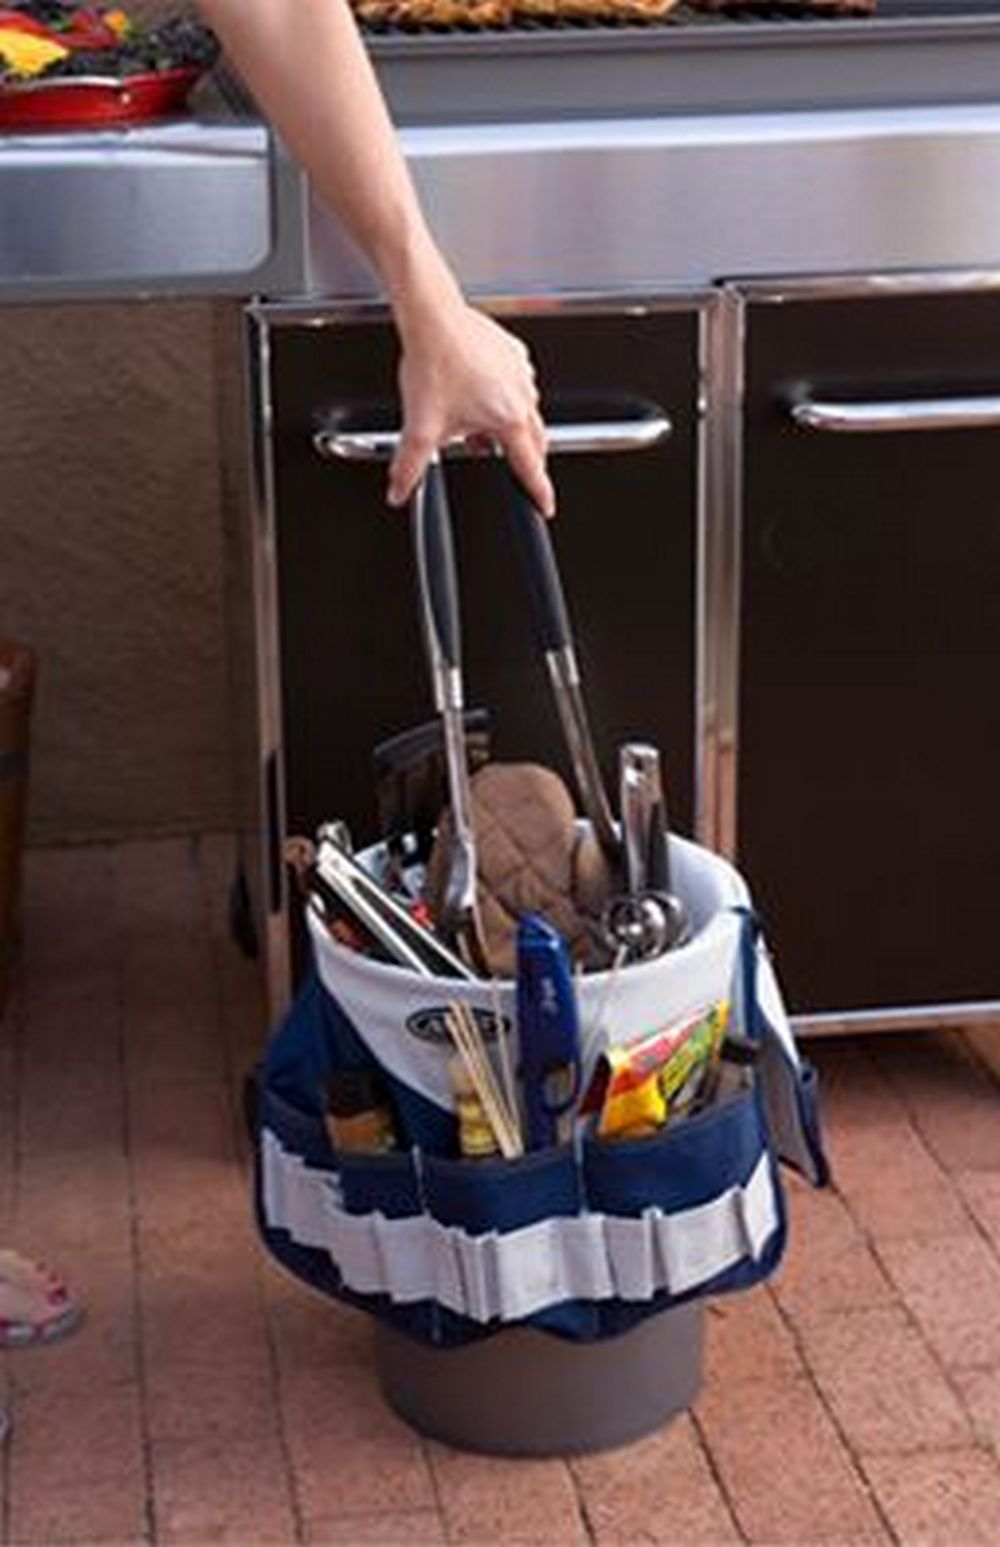
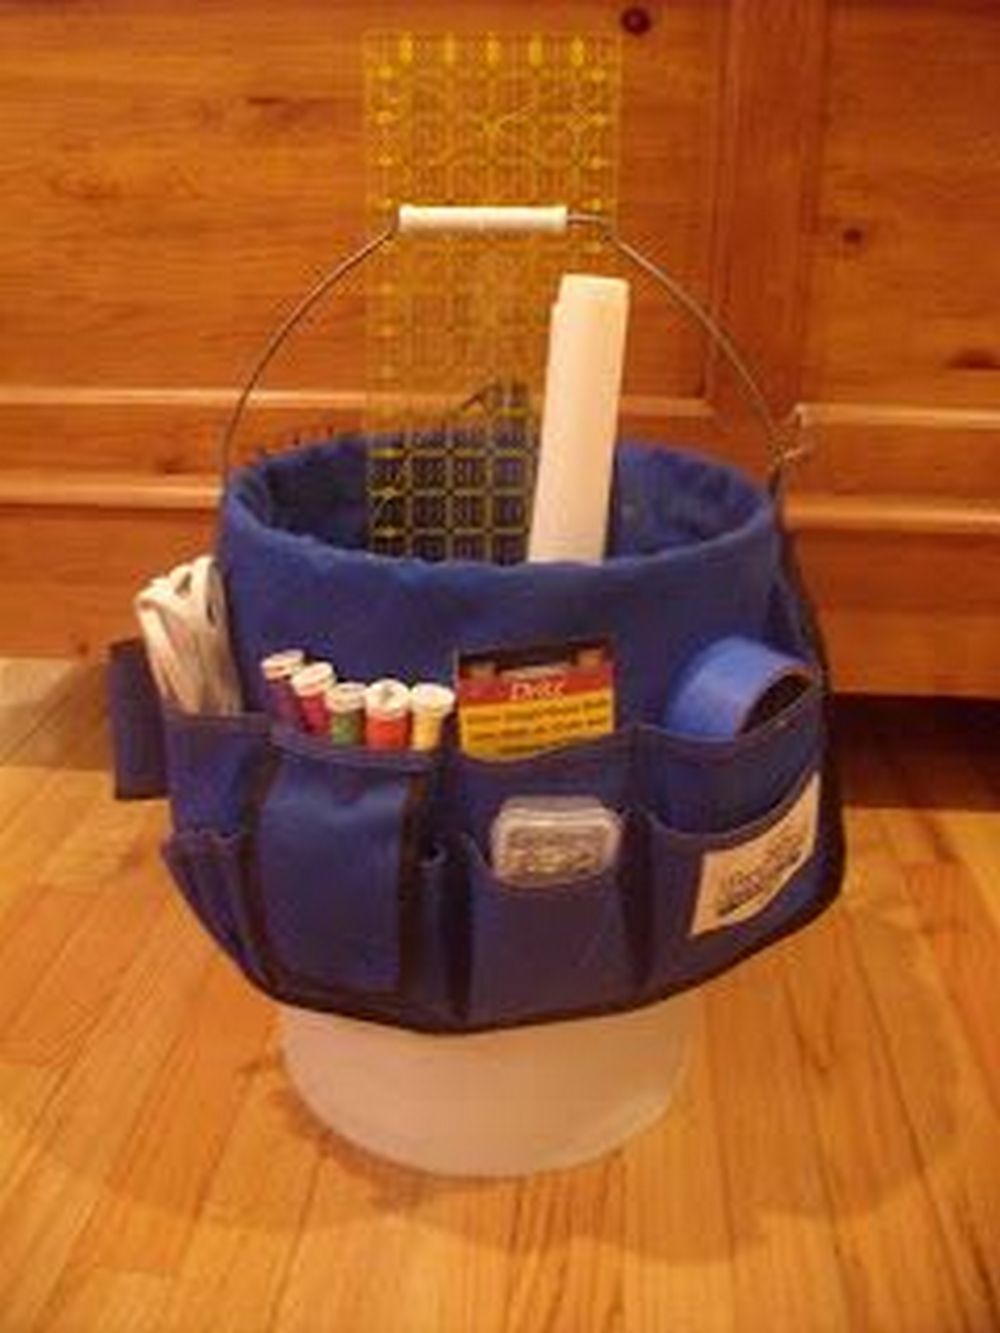
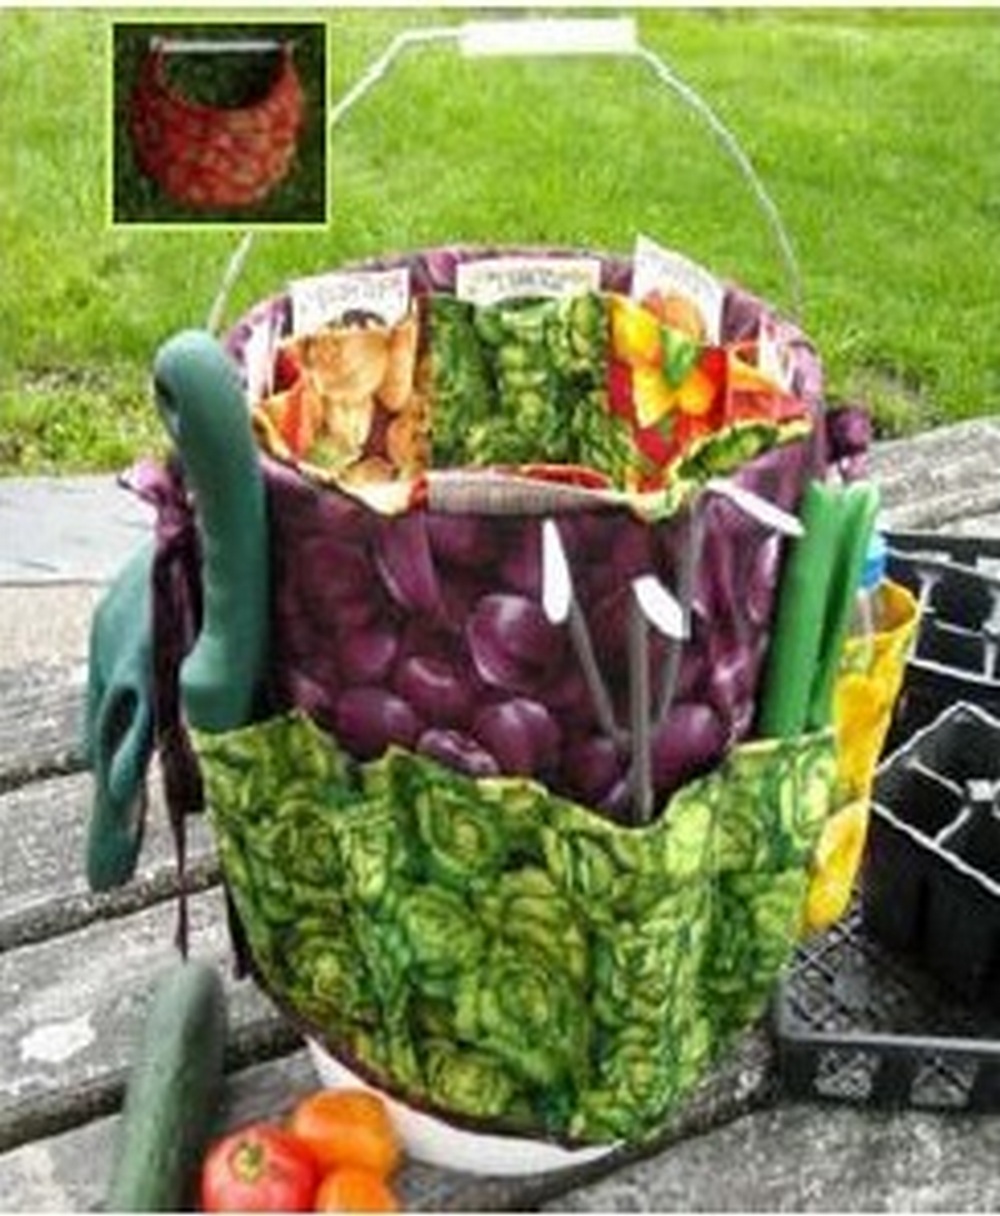
Gardening Bucket Caddy Gallery
Click on any image to start the lightbox display. Use your Esc key to close the lightbox.
Customizing Your DIY Gardening Bucket Caddy
Making a DIY gardening bucket caddy is already a practical project. Customizing it takes things a step further by tailoring the design to fit your exact needs. Whether you want more storage space, a splash of color, or added comfort, there are many simple ways to personalize your caddy. These custom touches can make gardening more efficient and enjoyable.
Add Extra Pockets for More Tools
The beauty of a DIY gardening bucket caddy is that you can add as many pockets as you like. If you find the standard pockets aren’t enough, sew additional ones using extra fabric from your old jeans or scrap materials. Create larger pockets for bigger tools like pruners or hand rakes. Smaller ones can hold seed packets, pens, or garden labels. Varying pocket sizes gives you more flexibility for organizing tools and supplies.
Use Water-Resistant or Durable Fabrics
While denim works well, you can upgrade your gardening bucket caddy by using water-resistant materials. This helps protect your tools from moisture and makes the caddy easier to clean. Waxed canvas, outdoor fabric, or recycled shopping bags are good options. These materials can stand up to dirt, rain, and regular wear and tear.
Add Labels or Tags
Keeping track of what’s in each pocket can be tricky, especially if you’re storing smaller items. Adding labels or tags to your pockets is a simple fix. You can sew on fabric labels, use waterproof tags, or even paint directly on the pockets. Labeling helps you stay organized and saves time when you’re busy in the garden.
Incorporate a Tool Loop or Clip
Certain tools, like pruning shears or garden scissors, are easier to access when attached to a loop or clip. Sew a sturdy loop onto one of the pockets or use a carabiner to hold frequently used tools. This allows you to grab them quickly without digging through the pockets.
Attach a Padded Handle or Shoulder Strap
If you move around your garden a lot, carrying your bucket for extended periods can be uncomfortable. You can add a padded handle cover for better grip. If you prefer to go hands-free, attach a shoulder strap using strong webbing and metal rings. A padded strap distributes the weight evenly and reduces strain on your arms.
Paint or Decorate for Personal Style
Customizing your gardening bucket caddy isn’t just about function. It can also be about style. Paint the bucket in bright colors or patterns to match your garden décor. Use stencils to add floral designs or your initials. Adding a decorative touch makes your caddy more personal and fun to use.
Include a Cushion on the Lid
If your gardening bucket caddy has a lid, you can turn it into a comfortable seat. Attach a foam cushion covered in waterproof fabric. This provides a handy place to sit while planting or pruning and saves your knees and back from strain.
Install a Small Trash Bag Holder
Keeping your garden tidy is easier when you have a spot for waste. Add a hook or clip to your caddy to hold a small trash bag. You can quickly drop in weeds, deadhead flowers, or other debris as you work, keeping your garden clean and clutter-free.
Customize the Interior Storage
Don’t overlook the space inside your bucket. Use small containers, jars, or dividers to organize fertilizers, soil amendments, or garden twine. You can even place a small watering can or spray bottle inside.
These customizations make your gardening bucket caddy more practical and comfortable to use. Whether you add extra pockets or a splash of color, each change makes your caddy a better tool for your gardening routine.
Conclusion
Crafting a gardening bucket caddy is an easy and practical project that keeps your tools organized and within reach. With simple materials like old jeans and a bucket, you can create a customized caddy that suits your gardening needs. It’s a cost-effective solution that adds convenience and efficiency to your outdoor work.
We have more ways to upcycle old belongings to garden tools. Check out our shoe organizer hanging garden project next!