Last Updated on June 5, 2024 by teamobn
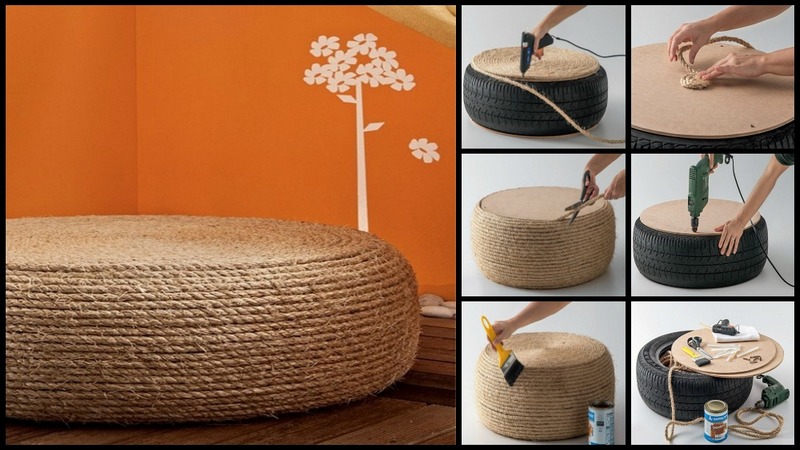
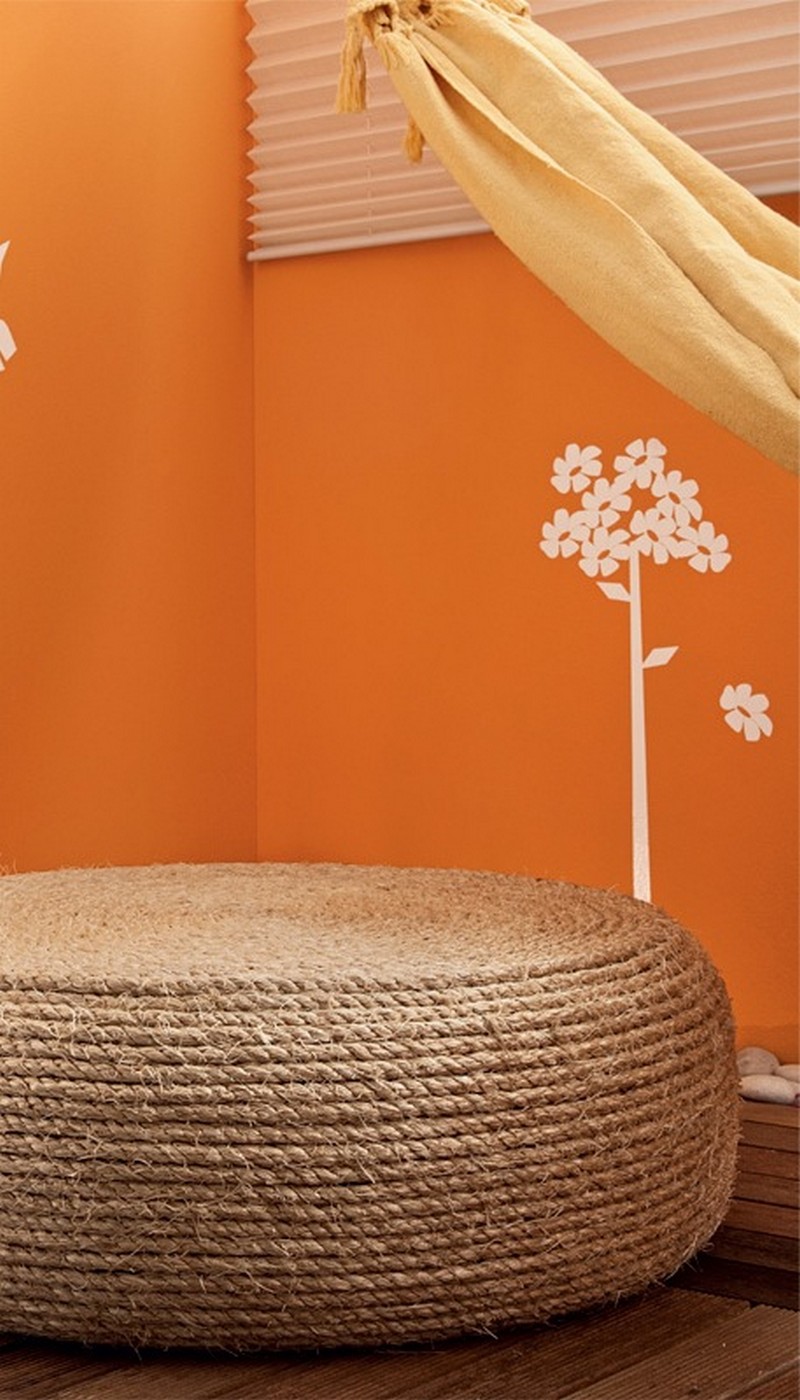
Old tires – Hard to get rid of and bad for the environment. What’s the solution? Turn them into an ottoman!
Burning or landfills are both unwelcome ideas for disposing of worn-out and damaged tires as they cause health, safety, and environmental problems. This is why recycling, repurposing or upcycling old tires is an alternative encouraged and done by many.
If you have one or some old tires lying in your garage, this idea is a clever and beautiful project you can do.
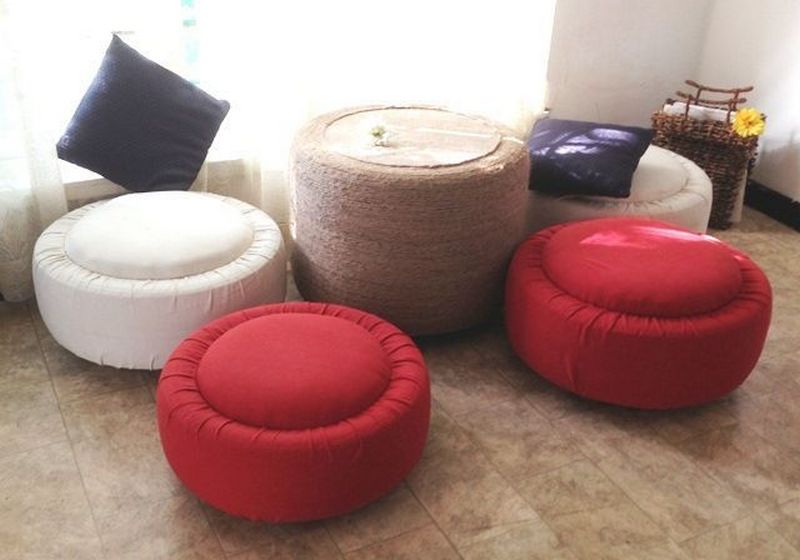
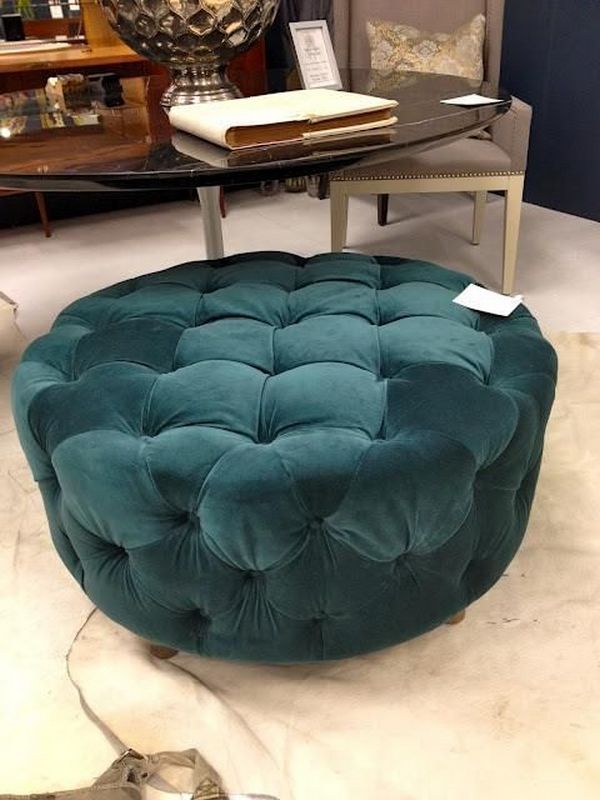
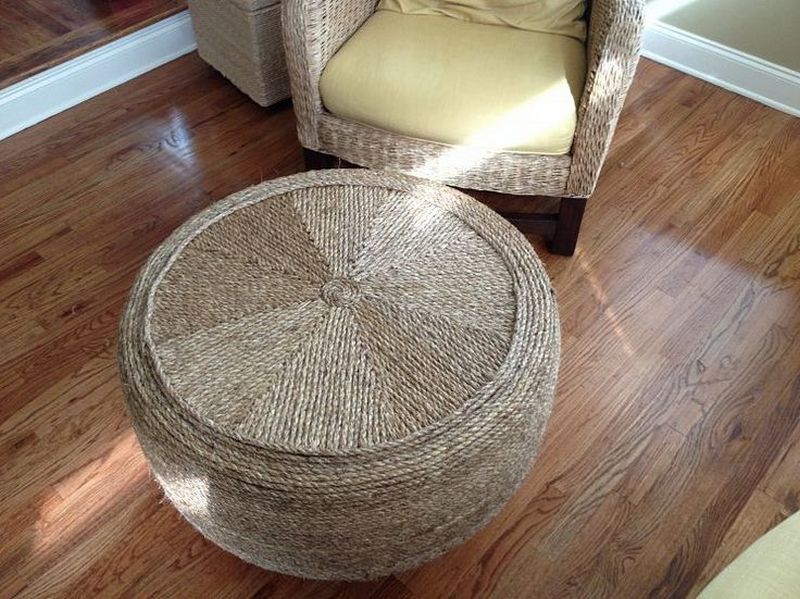
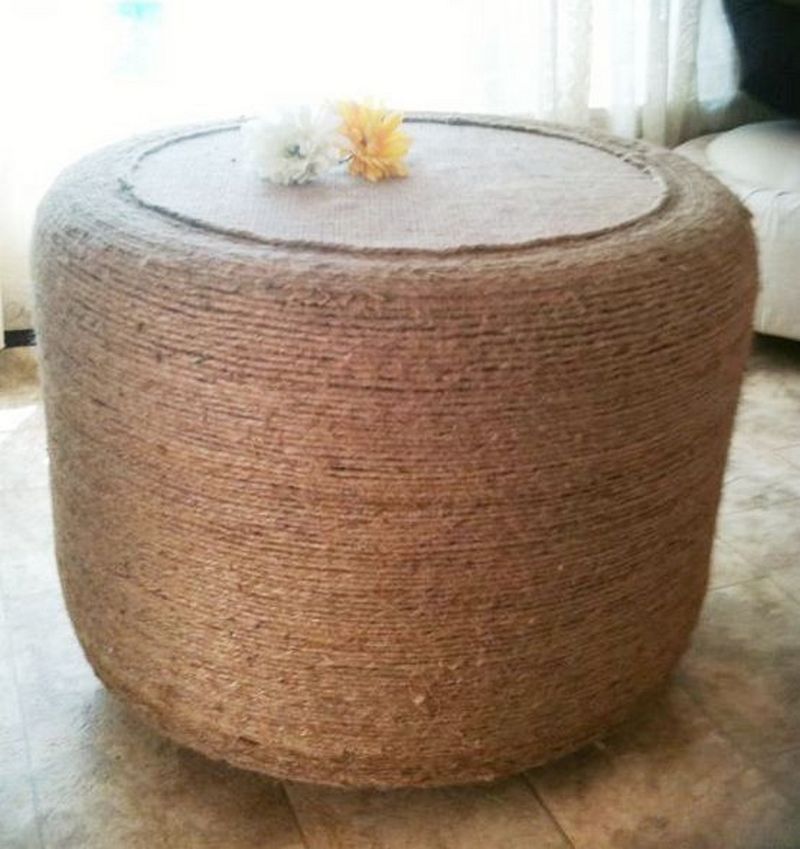
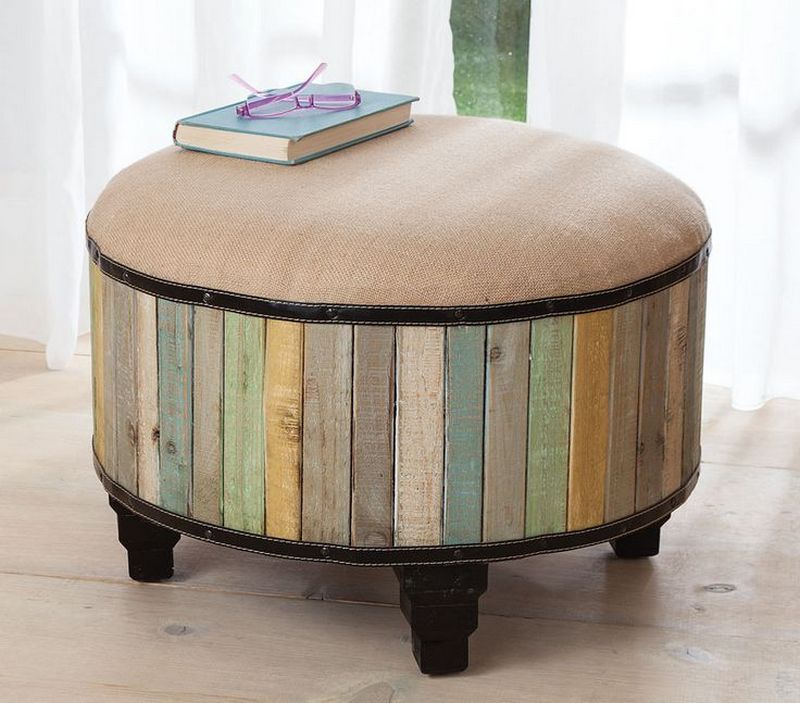
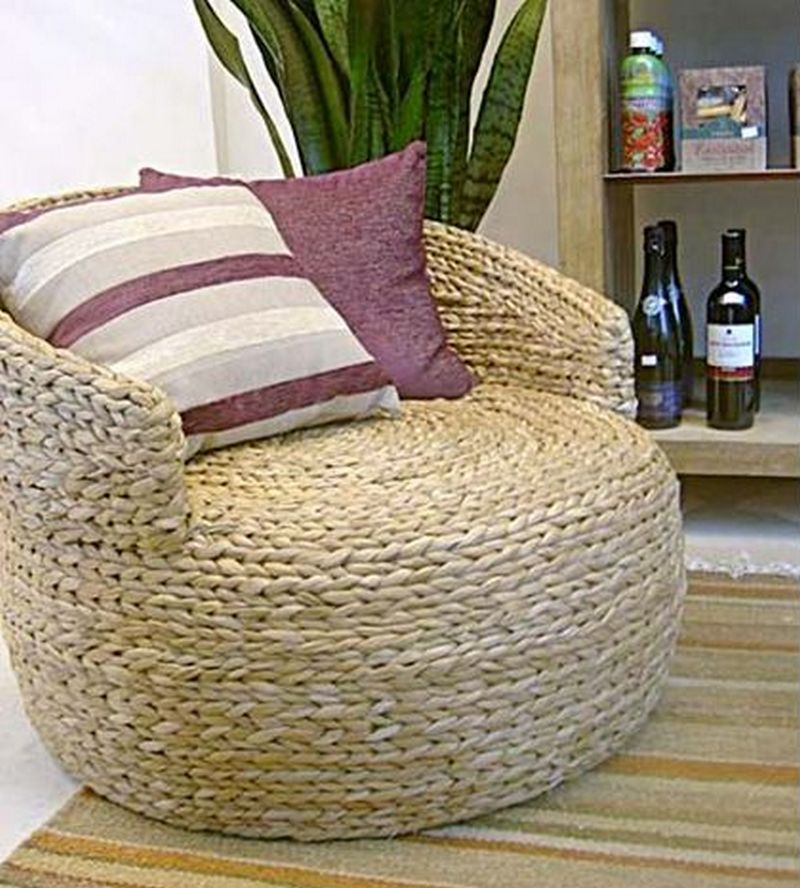
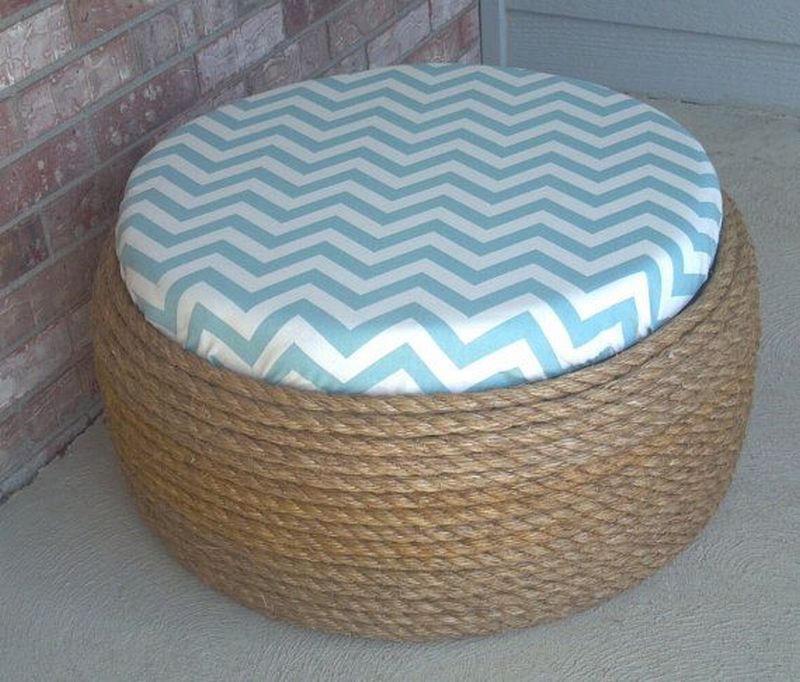
There are many ways/designs for turning an old tire into this kind of furniture. You can use a rope to cover the tire if you think a rustic style will suit your home. If you like having bright accents in your interior then upholstering it with a colourful fabric is the idea for you.
Building a Tire Ottoman
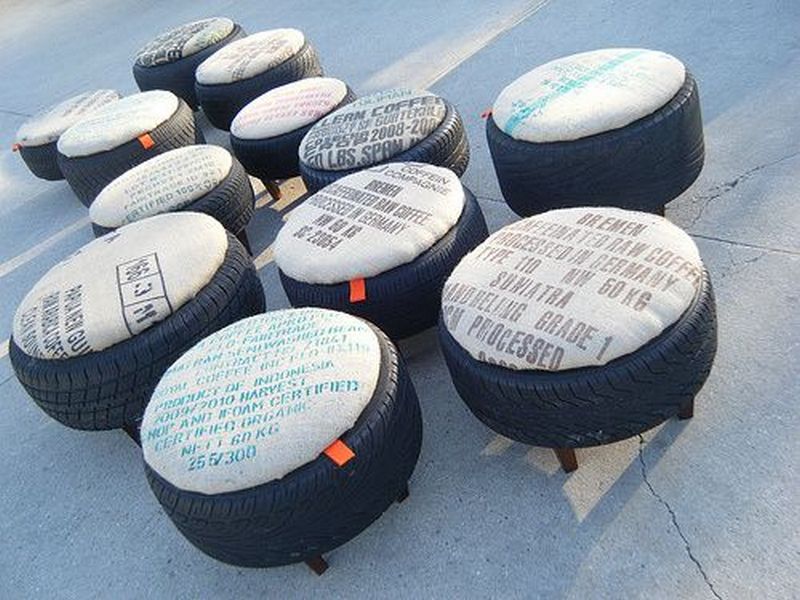
Need some furniture for your outdoor area? Then this project is for you, too! Keep it simple – just add cushions and legs to a few old tires and you have yourself good-looking tire ottoman furniture set for your outdoor living area.
Is this going to be your next recycling project?
Materials
- Tire
- 6mm MDF
- 10mm Jute Rope
- 6 pieces Phillips Screws
- Seal
- Cloth
Tools
- Glue Gun
- Drill
- Phillips Screwdriver
- Scissors
- Paint Brush
Instructions
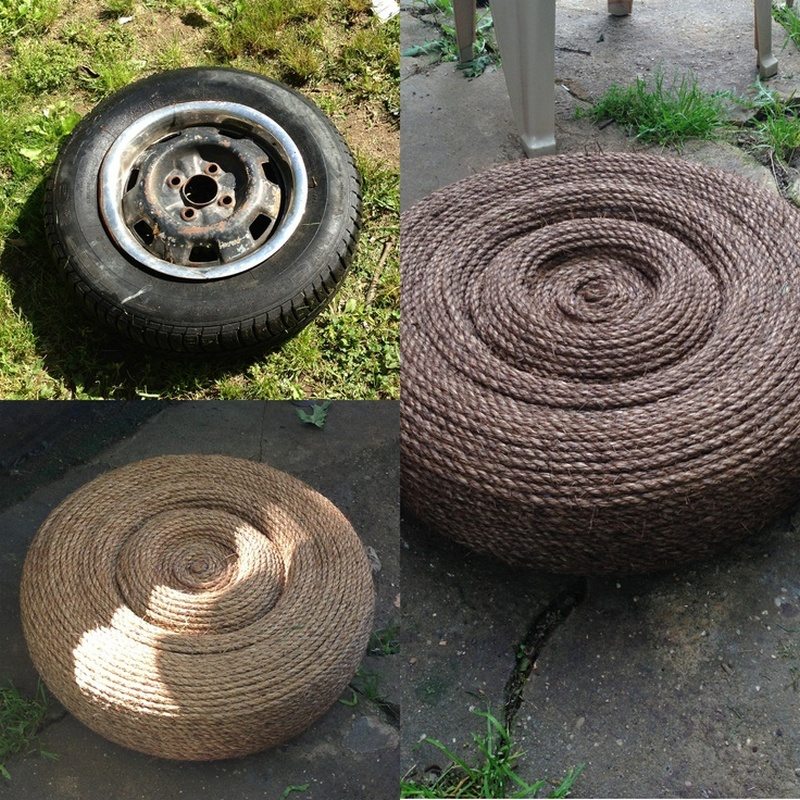
Step 1: Prepare the Tire
- Clean the Tire: Wash the tire thoroughly to remove any dirt and grime. Allow it to dry completely.
- Apply Sealant: Use the paint brush to apply a layer of sealant on the tire. This will help protect the tire and prevent any deterioration, especially if the ottoman will be used outdoors.
Step 2: Prepare the MDF
- Measure and Cut the MDF: Measure the opening of the tire and cut two circles from the 6mm MDF to fit exactly inside the tire—one for the top and one for the bottom.
- Drill Holes: Align the MDF circles on the top and bottom of the tire. Use the drill to create aligned holes through the MDF and into the tire where the screws will go.
Step 3: Attach the MDF to the Tire
- Attach the Bottom MDF: Place one MDF circle inside the bottom of the tire. Secure it by drilling the Phillips screws through the pre-drilled holes, ensuring the MDF is firmly in place.
- Secure the Top MDF: Place the second MDF circle on the top of the tire and repeat the process to secure it with screws. This top board can be fixed or removable, depending on whether you want to use the inside of the tire for storage.
Step 4: Cover the Tire
- Prepare the Rope and Cloth: Cut the cloth to size so it wraps around the tire. Cut enough jute rope to cover the entire tire and the MDF tops.
- Attach the Cloth: Use the glue gun to attach the cloth around the sides of the tire, ensuring it is smooth and without wrinkles.
- Wrap the Rope: Start at the bottom of the tire, applying hot glue in sections and pressing the jute rope into the glue firmly. Continue wrapping the rope around the tire, keeping it tight and even until the entire tire and the sides of the MDF top are covered.
Step 5: Final Touches
- Trim Excess: Use scissors to trim any excess cloth or rope. Make sure all ends are securely glued down to prevent fraying or lifting.
- Inspect and Adjust: Check the ottoman for any loose sections of rope or cloth. Apply additional glue where necessary to secure all materials.
- Final Seal: Optionally, apply another layer of sealant over the rope and cloth to enhance durability and resistance to moisture.
Step 6: Enjoy Your Ottoman
- Place your new tire ottoman in your desired location, be it inside for a rustic addition to your decor or outside on a patio. You can add a cushion on top for extra comfort if desired.
Click on any image to start the lightbox display. Use your Esc key to close the lightbox. You can also view the images as a slideshow if you prefer 😎


You can more get step by step instructions here…
Here’s a quick video.
Environmental Benefits of Tire Upcycling
Upcycling old tires into functional items like a tire ottoman is not just a creative activity but also a significant environmental endeavor. Each year, millions of tires are discarded, posing serious environmental threats due to their non-biodegradable nature and the hazardous materials they contain. By turning an old tire into a tire ottoman, you contribute to environmental conservation in several impactful ways. Here’s how:
Reducing Landfill Space
- Decrease in Waste: Tires are bulky and take up considerable space in landfills. By repurposing a tire into a tire ottoman, you effectively remove it from the waste stream, reducing landfill use and promoting a cleaner environment.
Cutting Down Pollution
- Avoiding Burning: Burning tires releases toxic chemicals into the air, including volatile organic compounds (VOCs), which contribute to air pollution and pose health risks. Using a tire to make a tire ottoman keeps it out of burn piles and helps maintain air quality.
- Reducing Leachate Formation: When it rains, water flows through landfills, picking up trace chemicals from waste like tires, which can contaminate local soil and groundwater. By upcycling a tire into a tire ottoman, you prevent these pollutants from entering the ecosystem.
Conserving Resources
- Minimizing Raw Material Usage: Creating new products often requires new resources. By repurposing an existing tire into a tire ottoman, you reduce the demand for new materials, thus conserving natural resources and reducing the energy consumption associated with manufacturing new goods.
- Promoting Sustainable Practices: Upcycling encourages both manufacturers and consumers to consider more sustainable practices in everyday life. It sets a precedent for the creative reuse of materials that might otherwise be considered waste.
By choosing to make a tire ottoman, you’re not only adding a stylish and practical piece to your home but also actively participating in environmental preservation. This project highlights how individual actions can contribute to broader environmental goals, such as reducing waste, cutting down on pollution, and conserving natural resources. Engaging in tire upcycling is a proactive step towards a more sustainable future.
Maintenance and Care for Your Tire Ottoman
A tire ottoman is not only a stylish addition to your home decor but also a durable piece of furniture. However, like any item, it requires proper maintenance to ensure it lasts long and continues to look great. Here are some essential tips on how to care for your tire ottoman, ensuring it remains in top condition through the years.
Regular Cleaning
- Surface Wipe-down: Regularly wipe the surface of your tire ottoman to remove dust and debris. Use a damp cloth for the jute rope and a mild cleaner suitable for the type of cloth you’ve used. Avoid harsh chemicals that can degrade the materials.
- Deep Cleaning: Occasionally, you might need to perform a deeper clean, especially if the ottoman is used outdoors. Use a mild soap solution to scrub the jute and cloth gently, then rinse with a clean, damp cloth and let it dry completely in a well-ventilated area.
Protecting the Material
- Use of Sealants: Reapply a waterproof sealant once a year or as needed to protect the tire and rope from moisture and prevent mold and mildew growth. This is particularly important for tire ottomans used in outdoor settings.
- Avoid Direct Sunlight: If possible, keep your tire ottoman out of direct sunlight to prevent the material from fading or becoming brittle over time. UV rays can deteriorate most materials, so consider a UV-protectant spray if sunlight exposure is unavoidable.
Managing Wear and Tear
- Regular Inspections: Check your tire ottoman periodically for signs of wear and tear. Pay attention to the tightness of the rope and the condition of the MDF boards. Tighten or replace anything that seems loose or worn out.
- Prompt Repairs: Address any damage as soon as it appears. Re-glue sections of the rope that may have become loose using a glue gun, and patch or replace the cloth if it becomes torn or excessively worn.
Seasonal Storage
- Proper Storage: If your tire ottoman is used seasonally, particularly in outdoor environments, store it in a dry, covered area during off-season months. Covering it with a breathable fabric cover will protect it from dust and pests.
Enhancing Durability
- Rotate Regularly: Just like with any seat or cushion, regularly rotating your tire ottoman can help prevent uneven wear and tear, especially if it’s used frequently. This is particularly effective if the ottoman serves as a seat and has added cushions.
- Spot Clean Stains Immediately: If any spills occur, especially on fabric or rope-covered areas, clean them up immediately to prevent staining. Use a suitable fabric cleaner and follow it with a damp cloth to dab away the cleaner and any residue.
Environmental Considerations
- Control Humidity: If the tire ottoman is kept in a humid environment, it’s important to control the humidity levels to prevent the growth of mold and mildew. Using dehumidifiers or ensuring good airflow can help protect the ottoman from moisture-related damage.
- Use Furniture Pads: To prevent scratches on the floor and to ease the movement of the tire ottoman, consider attaching furniture pads to the bottom. This is especially useful if the ottoman is placed on hardwood or tile floors.
Cosmetic Upkeep
- Refresh the Look: Over time, the jute rope or fabric may start to look worn or outdated. Consider rewrapping or reupholstering the ottoman to refresh its appearance. This can be a fun way to update the look according to new decor trends or personal preferences.
- Polish Hardware: If your tire ottoman includes any metal components, such as decorative studs or functional hardware, keep them polished and free from rust. Use appropriate metal cleaners and a soft cloth to maintain their shine and prevent corrosion.
Long-term Care
- Annual Check-ups: Dedicate time once a year to thoroughly inspect your ottoman. Look for internal damage or issues that might not be visible on the surface. This might include checking the integrity of the internal structure or ensuring that any adhesives used are still holding firmly.
- Protect from Pets: If you have pets, it’s wise to protect the ottoman from scratches or bites. Using a protective cover when the ottoman is not in use can help prevent pet-related damage.
By following these maintenance and care guidelines, you’ll extend the life of your tire ottoman and keep it looking as good as new. Regular upkeep not only preserves the functionality and aesthetic of your ottoman but also enhances the overall appeal of your living space.
Conclusion
Turning discarded tires into chic, useful furniture is easy and environmentally friendly when you build a tire ottoman. Using upcycling, this do-it-yourself project not only gives your house design a distinctive touch but also advances environmental sustainability. Anyone can make a nice and comfortable ottoman out of an old tire with the proper materials, tools, and a little work.
If you liked this project, you will also like viewing these furniture ideas…