Last Updated on May 15, 2024 by teamobn
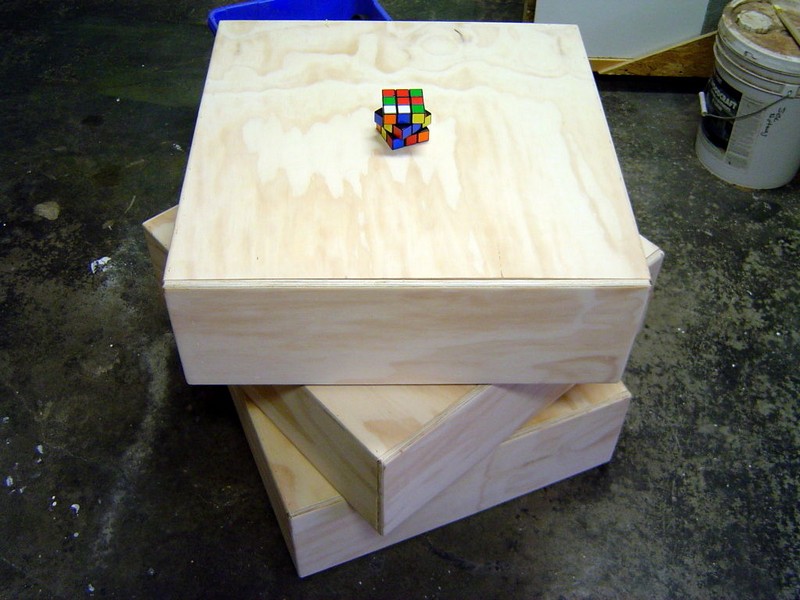
The Rubik’s Cube is a great toy for people of all ages to enjoy. It is not only entertaining but also provides a stimulating challenge that can help develop a child’s spatial awareness and problem-solving skills. Playing with the Rubik’s Cube can also help improve a child’s fine motor skills.
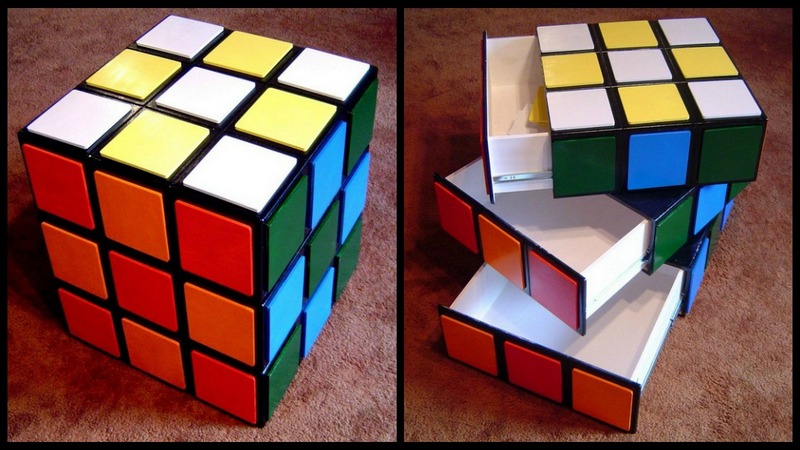
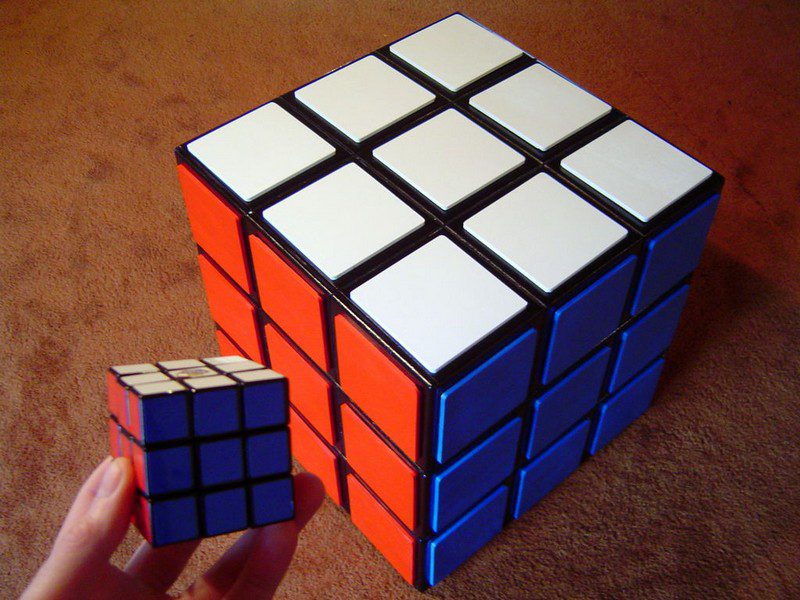
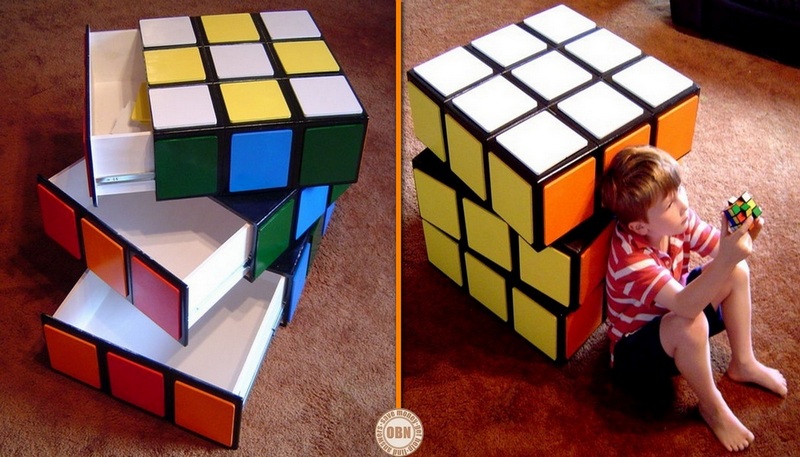
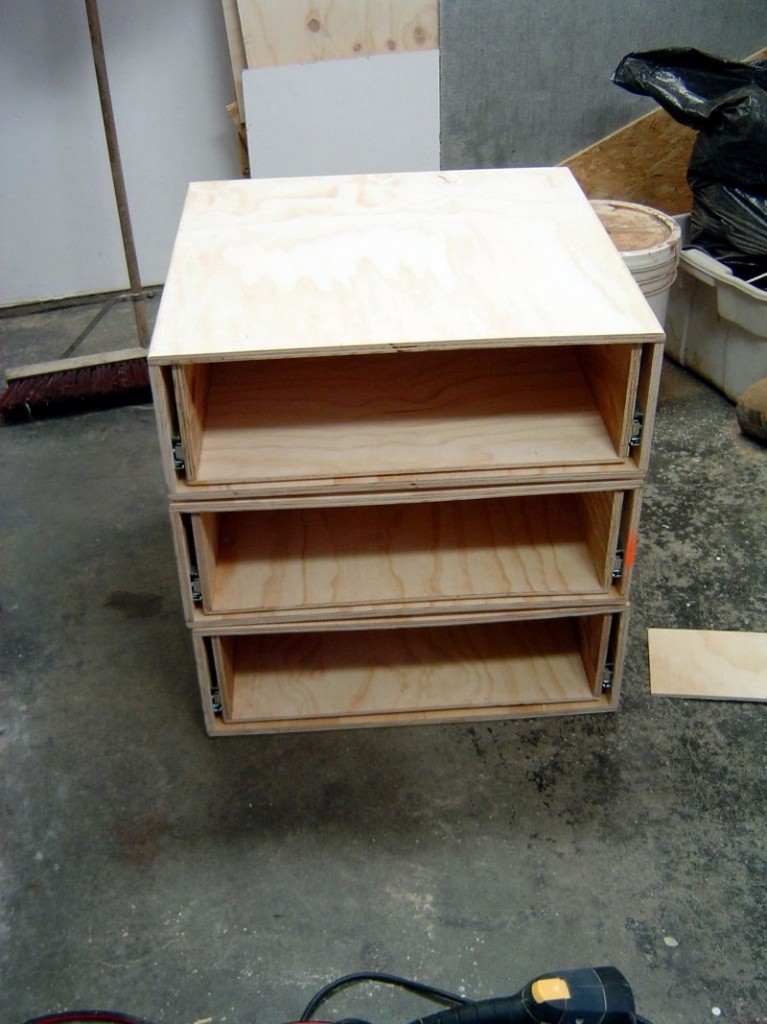
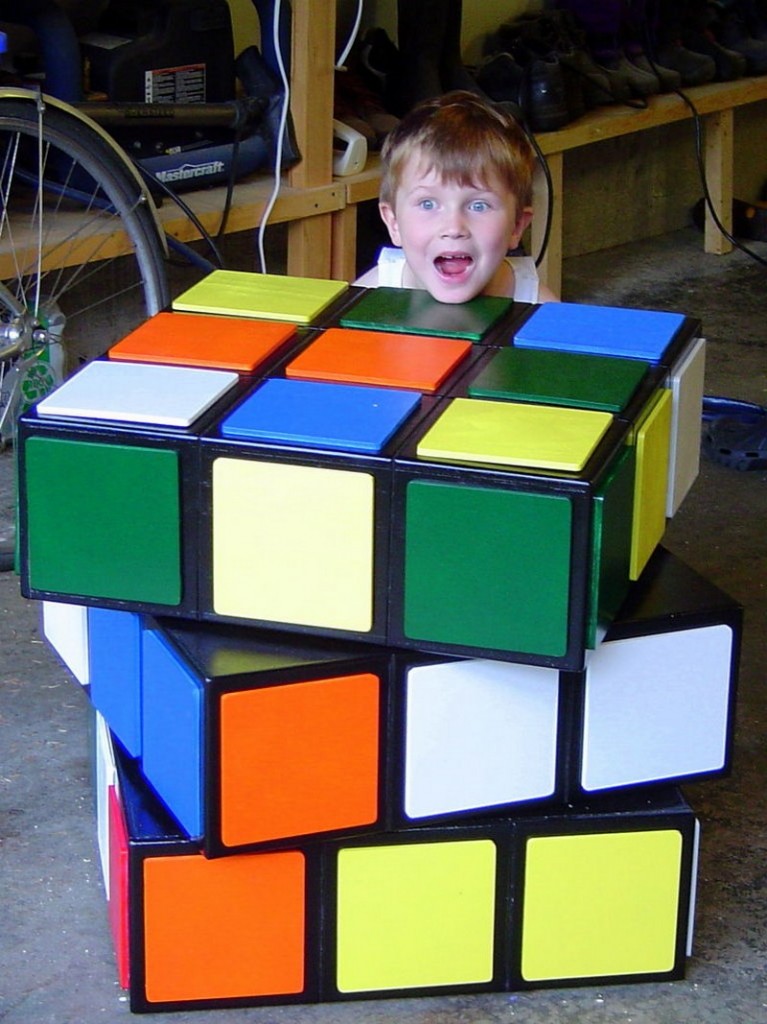
You can incorporate Rubik’s cube into a dresser. This Rubik’s cube dresser is not as complex as the actual puzzle. The dresser simply consists of three drawers stacked on top of each other using Lazy Susan bearings. This allows it to rotate 360 degrees.
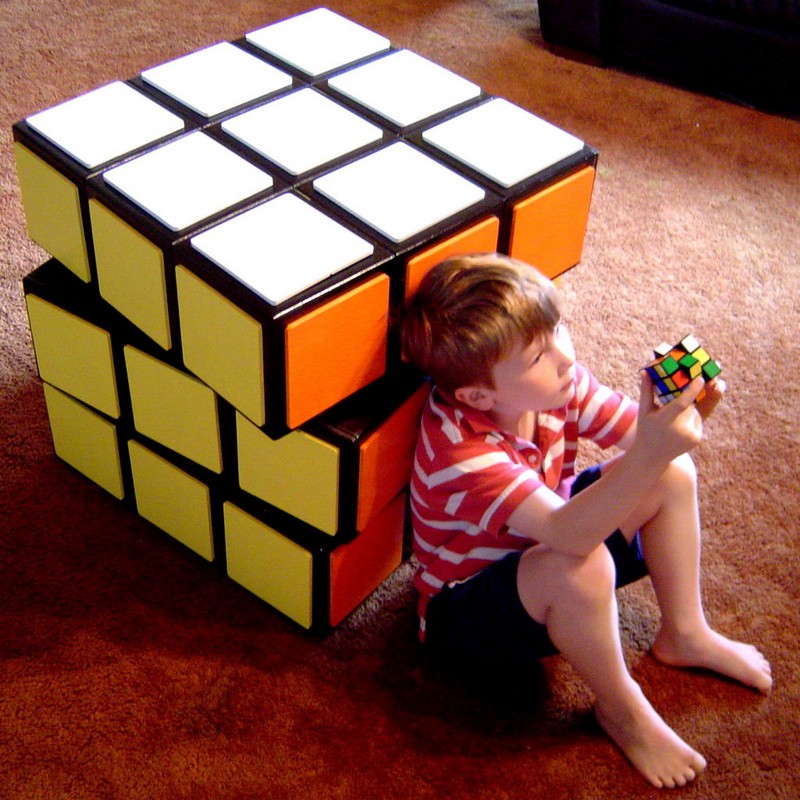
Although it doesn’t have the same mechanisms as the actual Rubik’s cube, it’s still a puzzle that can keep the kids busy. The coloured tiles are detachable and can be rearranged using magnets, allowing them to complete the puzzle.
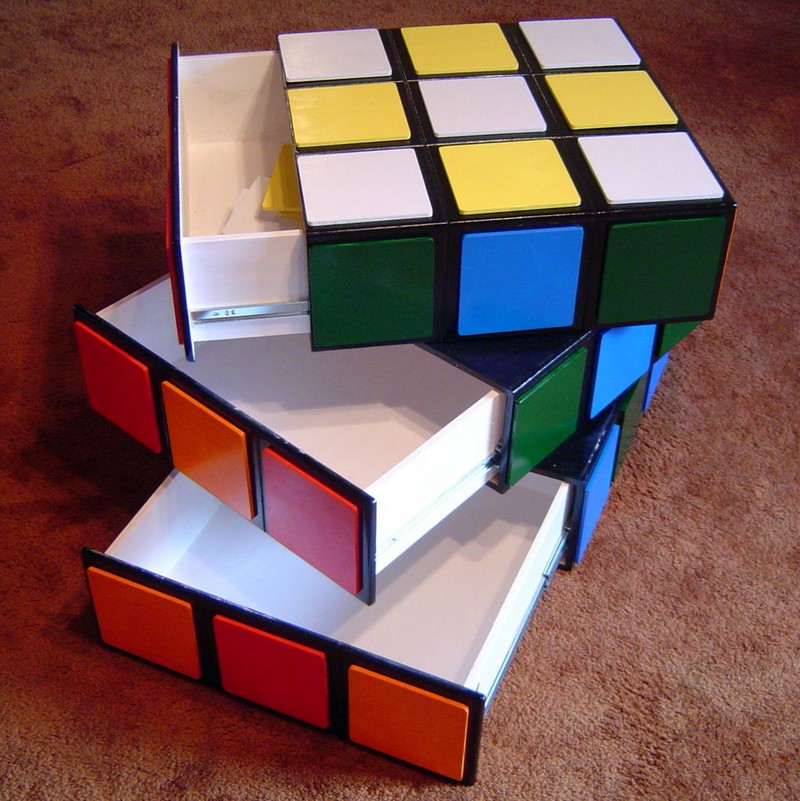
And let’s not forget that it is a functional storage unit. In fact, accessing the items stored inside the dresser is made easy as the drawers can rotate.
This is perfect storage for the kids’ room where they can keep their underwear, socks, and even their toys.

There are many advantages of having a Rubik’s Cube Dresser in your home. First, it is a great conversation starter. Everyone who sees it will want to know where you got it and how it works. It is also a great way to show off your creative side to your guests.
Another advantage of Rubik’s Cube Dresser is that it is a great way to organize your clothes. The dresser has compartments of different sizes that can hold everything from shirts to socks.
This way, you can easily find what you are looking for and your clothes will stay neat and tidy. This will add to your kids’ interest in storing and fixing their things properly. Your kids will surely love to have one.
Lastly, the Rubik’s Cube Dresser is simply a fun and unique piece of furniture to have in your home. It is a great addition to any home and is sure to liven up any room in your house.
Looking for a unique piece of furniture for your place? Why not build this DIY Rubik’s cube dresser? We have listed all the materials that you will be needing for this particular DIY project.
And, it’s not as time-consuming as you think it is, as long as you have gathered all the materials needed for the project. You may just need a weekend to complete this very creative piece of furniture which your child will surely adore.
Constructing a Rubik’s Cube Dresser
Materials
- 1-1/2 sheets of 1/2″ plywood
- 1-1/2 sheets of 1/4″ plywood
- 2 pieces 12″ Lazy Susan bearings
- 3 pairs of 22″ full extension slides
- 60 pieces 1/2″ flat head screws
- 36 pieces 3/8″ rare-earth magnets
- 54 pieces 3/8″ steel washers
- 54 pieces 6 mm x 30 mm dowels, cut in half
- Wood glue
- Epoxy glue
- Brad nails
- Undercoat
- 6 different colours of Gloss Paint (of your choice)
- Black gloss paint
Tools
- Circular Saw
- Table Saw
- Miter Saw
- Router
- Orbital Sander
- Cordless Drill with a 3/8″ Forstner bit
- Brad Nailer
Instructions
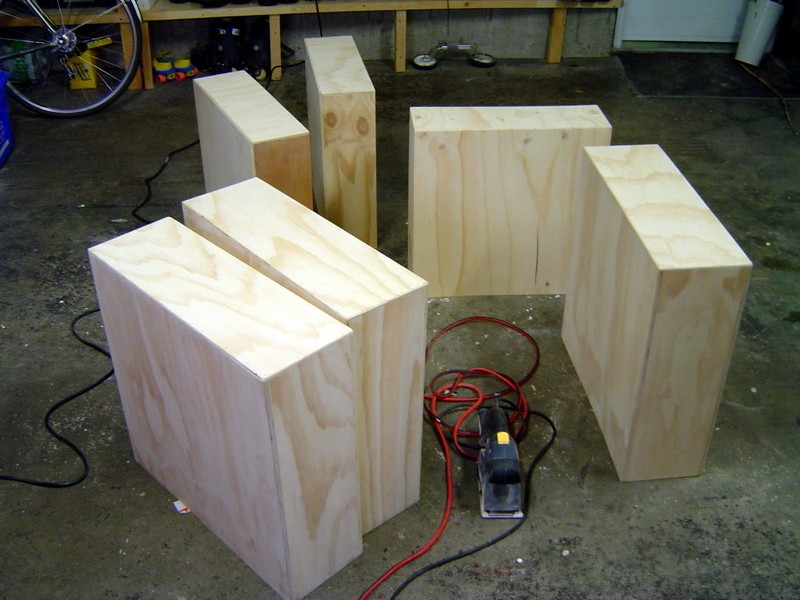
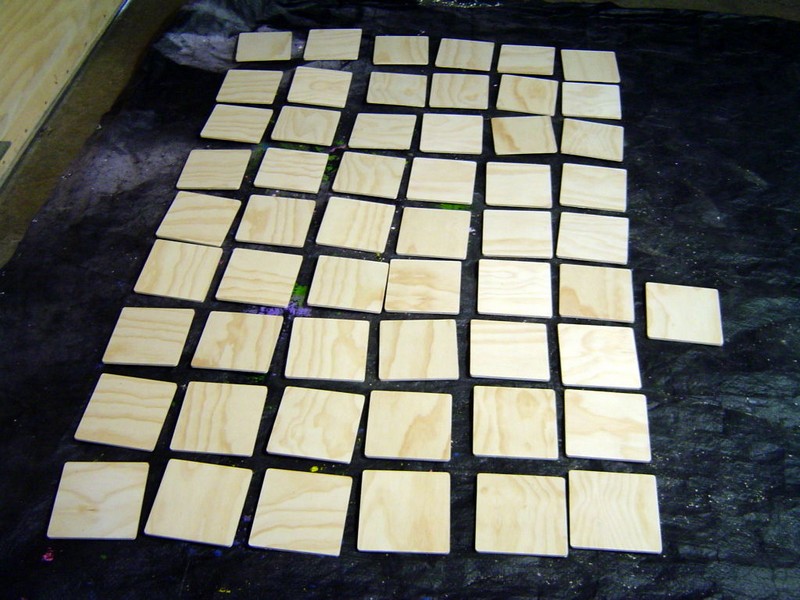
- Prepare the Wood:
- Use the table saw and circular saw to cut the 1/2″ plywood into three equal pieces for the sides and top of the dresser.
- Cut the 1/4″ plywood for the back panel and drawer bottoms.
- Assemble the Dresser Frame:
- Use wood glue and brad nails to assemble the cut pieces into a box shape. The 1/2″ plywood forms the top, bottom, and sides, while the 1/4″ plywood is used for the back.
- Install Lazy Susan Bearings:
- Attach the Lazy Susan bearings at the bottom and top inside corners of the dresser frame using flat head screws. Ensure they are centered to maintain balance.
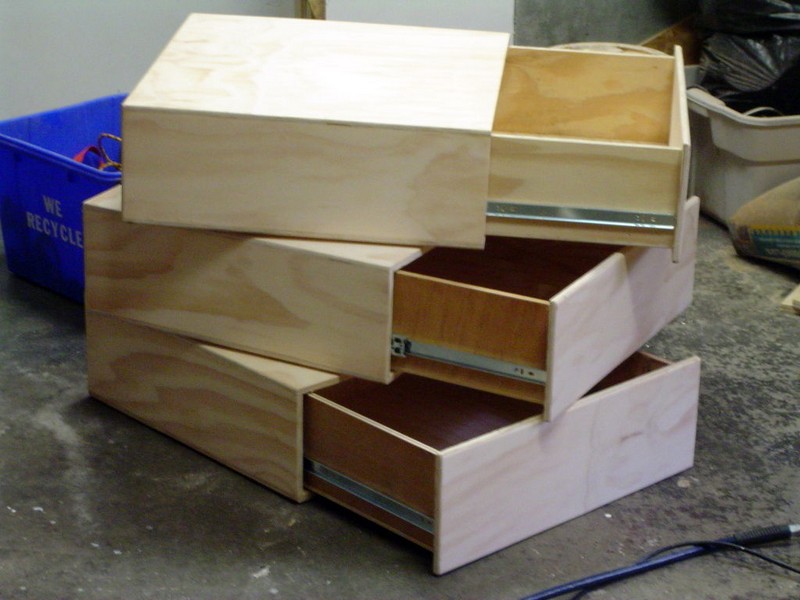
- Build the Drawers:
- Cut the remaining 1/2″ plywood for the drawer sides and faces. Utilize the router to create slots for the drawer bottoms.
- Assemble the drawers using wood glue and brad nails. Install the drawer slides on the sides of each drawer and corresponding interior sides of the dresser.
- Attach Magnets and Steel Washers:
- Drill holes on the drawer faces using the Forstner bit. Insert rare-earth magnets and secure with epoxy glue.
- Attach steel washers to the inside face of the dresser, aligning them with the magnets when the drawers are closed.
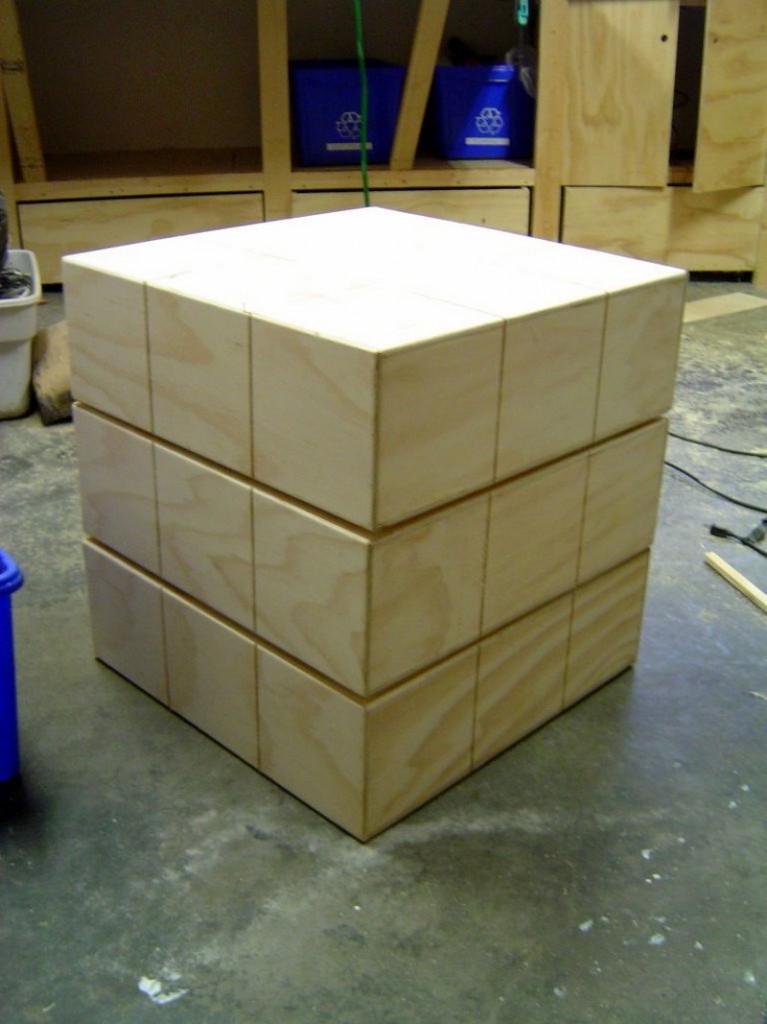
- Dowel Installation:
- Using the cordless drill, make evenly spaced holes along the drawer fronts. Insert the dowels cut in half with wood glue to create the Rubik’s cube effect.
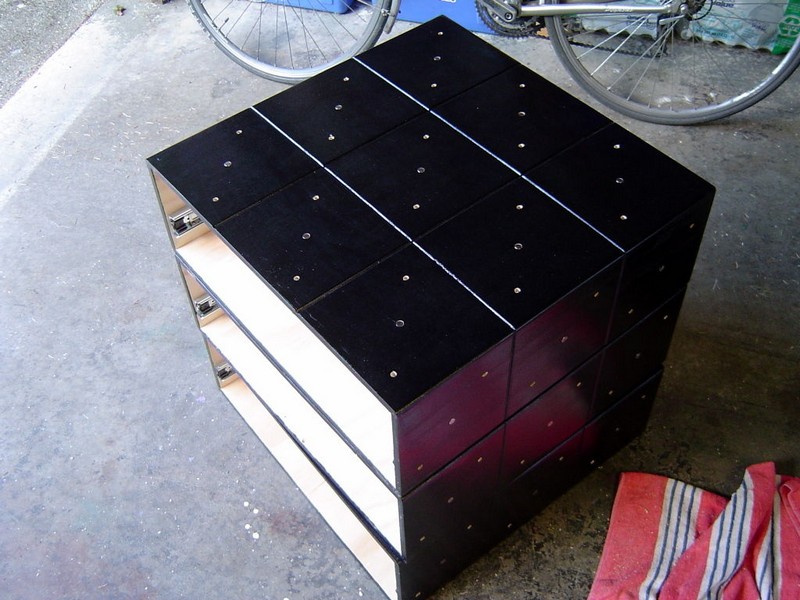
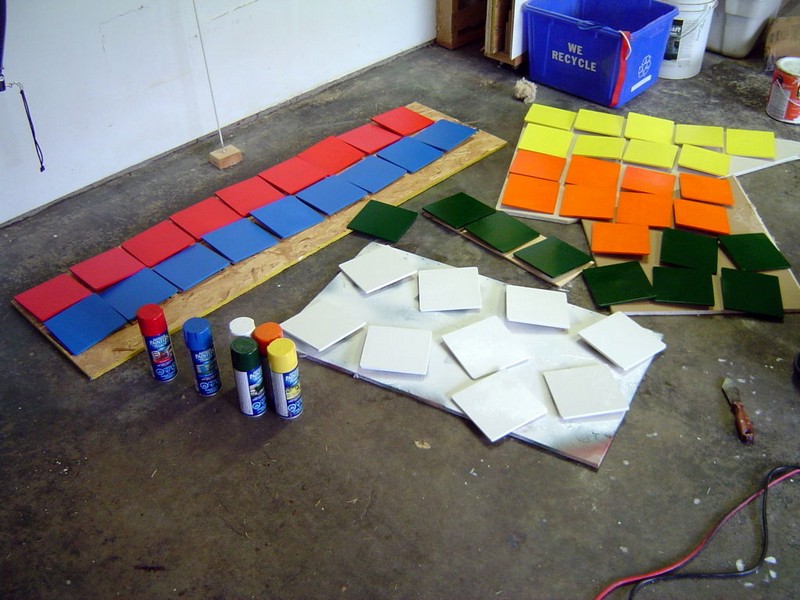
- Painting:
- Apply undercoat to all exterior and interior surfaces. Once dry, sand lightly with the orbital sander for a smooth finish.
- Paint the drawers and dresser frame with the chosen colors of gloss paint to mimic the Rubik’s Cube colors. Use black gloss paint for the lines separating the colors.
- Final Assembly:
- Once the paint is dry, attach the drawers to the dresser using the full-extension slides.
- Ensure the rotation mechanism via Lazy Susan bearings works smoothly and adjust as necessary.
- Finishing Touches:
- Check all components for smooth operation and safety. Make any necessary adjustments to the magnets or paint touch-ups.
Click on any image to start the lightbox display. Use your Esc key to close the lightbox. You can also view the images as a slideshow if you prefer 😎


Thanks to makendo for this great project. You can get step-by-step instructions here…
Here are more storage ideas to inspire you…
Click on any image to start the lightbox display. Use your Esc key to close the lightbox. You can also view the images as a slideshow if you prefer 😎
Customization Ideas for Your DIY Rubik’s Cube Dresser
When crafting a DIY Rubik’s Cube dresser, the possibilities for customization are as varied and vibrant as the puzzle itself. Whether you’re aiming to complement a room’s decor or inject a personal touch, these ideas will help you tailor the Rubik’s Cube dresser to your tastes and needs.
Color Variations
Instead of sticking with the classic Rubik’s Cube colors, consider using a monochrome palette or pastel shades for a subtler look that might better match your room’s decor. For a more dynamic Rubik’s Cube dresser, metallic or neon paints can add a modern twist. Experiment with different color layouts or create patterns within each color block for a truly unique piece.
Functional Add-ons
Enhance the practicality of your Rubik’s Cube dresser by adding various functional elements. Consider incorporating LED lights inside the drawers or under the dresser for a futuristic feel and added visibility in low light. For added convenience, installing a push-to-open mechanism can make the drawers more accessible by eliminating the need for handles.
Decorative Handles
Custom handles can transform the look of your Rubik’s Cube dresser. Use themed knobs, like miniature Rubik’s cubes, or go for elegant crystal or rustic vintage handles depending on your room’s style. Each handle can be a different color to match or contrast with the drawer it’s on, adding an extra layer of customization.
Surface Textures
For a tactile element, explore different surface textures. Using a technique like decoupage, you can add graphic prints or fabric to the sides of the drawers. Textured wallpapers or relief painting techniques can also give your Rubik’s Cube dresser an artistic edge, making it not only a piece of furniture but also a piece of art.
Interactive Features
Make your Rubik’s Cube dresser a more interactive piece of furniture by incorporating elements that engage. You could add a chalkboard paint section for notes or drawings, or use a section of the dresser as a pegboard for hanging accessories. Another fun idea is to create drawers that need to be solved like a puzzle to open, adding a layer of challenge and engagement.
These customization ideas for your Rubik’s Cube dresser allow you to create not just a storage unit but a standout piece that reflects your creativity and style. Whether you’re drawn to aesthetic changes or functional upgrades, there’s an array of options to make your Rubik’s Cube dresser uniquely yours.
Child Safety Features for Your DIY Rubik’s Cube Dresser
Ensuring the safety of children is paramount, especially when it comes to furniture in their living spaces. If you’re planning to build a DIY Rubik’s Cube dresser for a child’s room, incorporating several child safety features is essential.
Here are some important considerations and modifications to make your Rubik’s Cube dresser both fun and safe for young users.
Secure Attachment
The most important safety feature for any piece of furniture in a child’s room is stability to prevent tipping. Secure your Rubik’s Cube dresser to the wall using furniture anchors or brackets. This is crucial as the rotating feature of the dresser might tempt children to pull or climb on it, increasing the risk of tipping.
Smooth Edges and Corners
Children are often bustling around, and sharp corners or rough edges can pose significant injury risks. Round off all corners and edges of your Rubik’s Cube dresser using a router or sandpaper. Consider adding corner guards that blend with the design to further soften any sharp points.
Non-Toxic Materials and Paints
Since children might touch or chew on surfaces, it’s vital to use non-toxic materials. Ensure all paints, finishes, and glues used on your Rubik’s Cube dresser are child-safe and free from harmful chemicals like lead or phthalates. Opt for water-based or milk paints known for their safety and environmental friendliness.
Safe Mechanisms
The rotating mechanism of the Rubik’s Cube dresser should be secure and child-proof to prevent little fingers from getting caught. Use high-quality Lazy Susan bearings and ensure they are enclosed or fitted with a child-safe guard. Regularly inspect these mechanisms to ensure they remain secure and operate smoothly without catching or jerking.
Magnetic Safety
Since your Rubik’s Cube dresser may use magnets for the detachable color tiles, it’s crucial to ensure these are securely embedded and inaccessible to children. Magnets can be hazardous if swallowed. Use strong adhesive like epoxy glue to affix magnets inside the drawer panels and regularly check that they remain firmly in place.
By integrating these child safety features, your DIY Rubik’s Cube dresser will not only be a delightful addition to your child’s room but also a safe storage solution. Regular checks and maintenance of these safety features will help ensure that the Rubik’s Cube dresser remains a secure and cherished piece in your home.
Conclusion
A satisfying do-it-yourself project that blends creativity and utility is creating your own Rubik’s Cube dresser. It provides an unusual way to store things that makes people talk and gives any space a lighthearted touch. This piece is not only visually striking but also safe and robust for daily usage thanks to careful material selection and integration of safety elements.
If you liked this project, you will also like viewing these DIY Storage Projects…