Last Updated on July 2, 2025 by teamobn
Thinking of buying stepping stones for your yard? Why not create your own DIY garden stones !
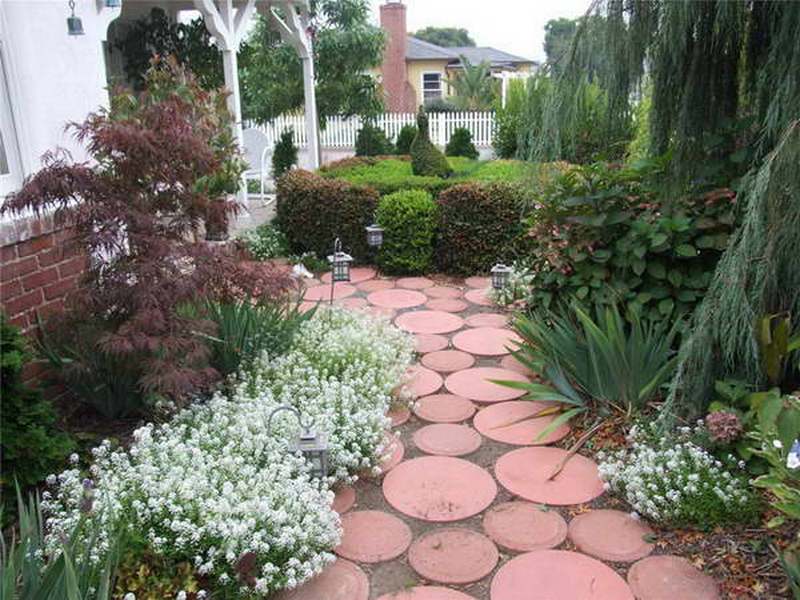
Wear patterns created by foot traffic are a common backyard problem. This issue becomes more evident when it rains. Erosion results in bare patches that turn into mud when wet.
You can even get the kids involved with this project. The steps in making garden stepping stones are very simple that even kids can participate, making their own personalized garden stepping stones that come in the shapes and colors they desire.
Creating DIY Garden Stones
Could your yard use a couple of personalized DIY garden stones?
You’ll need these materials:
- Round Non-Stick Cake Pan
- Glass Gems
- Sea Glass – optional
- Concrete
- Vaseline
- Contact Paper
- Old Plates/Saucers not in use
- Old Towel/Cloth
- Marine Varnish
- Chicken Wire
- Bucket
- Water
- Safety Glasses
- Dust Mask
- Rubber Gloves

And these tools:
- Hammer
- Trowel
- Wire Cutter
- Paint Brush
Steps:
Step 1: Prepare Your Workspace
Lay out an old towel or cloth on a flat surface. Put on your safety gea. rubber gloves, dust mask, and safety glasses. Work in a well-ventilated area, ideally outdoors.
Step 2: Prep the Molds
Take your round non-stick cake pan or walkway stone mold. Coat the inside with a light layer of Vaseline. This makes it easier to remove the stone once it sets.
Step 3: Create the Decorative Layout
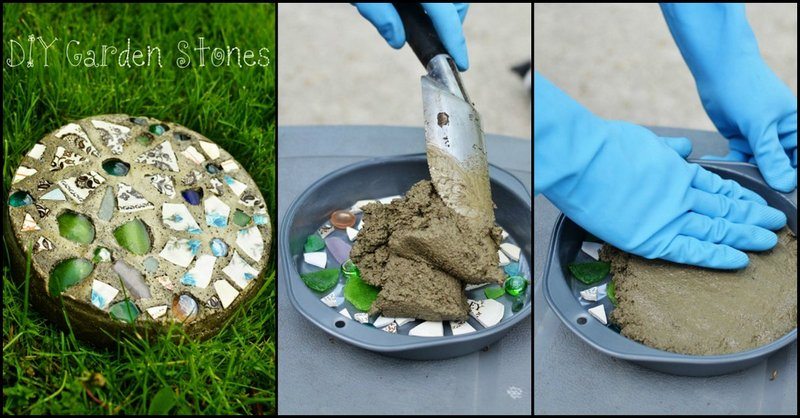
Cut a piece of contact paper to fit the base of your mold. Place it sticky-side up in the bottom of the pan. Arrange glass gems, sea glass, or broken pieces of old plates/saucers in your chosen design. Remember, this will be the top of your stone, so place them face-down.
Step 4: Cut and Add Reinforcement
Use the wire cutter to cut a circle of chicken wire slightly smaller than your mold. This wire will reinforce the stone. Set it aside for now.
Step 5: Mix the Concrete
In a bucket, mix the concrete according to the package instructions. Add water gradually until it reaches a thick, oatmeal-like consistency. Don’t over-mix or it will weaken the final result.
Step 6: Pour and Layer the Concrete
Spoon a layer of concrete into the mold, covering the decorations gently. Press the chicken wire into the concrete while it’s still soft. Add more concrete on top to fill the mold to the desired thickness. Smooth the surface with a trowel.
Step 7: Tap Out Air Bubbles
Lightly tap the sides of the mold with your hammer to release trapped air bubbles. This step helps the concrete settle evenly and reduces cracking.
Step 8: Let It Cure
Cover the mold with a towel to keep it from drying too quickly. Let the stone cure for 24–48 hours in a shaded area. Avoid direct sun which can cause rapid drying and cracks.
Step 9: Unmold and Finish the Surface
Once cured, gently remove the stone from the mold. Peel off the contact paper to reveal your design. Use a damp cloth to wipe away any dust or residue.
Step 10: Seal with Marine Varnish
Use a paintbrush to apply a thin, even coat of marine varnish to the top and sides. This seals the surface and protects it from weather damage. Let it dry completely before placing the stone in your garden.
Unique Design Ideas for DIY Garden Stones
Creating DIY garden stones isn’t just a practical solution for garden pathways. It’s also a creative and enjoyable activity. It’s also an opportunity to bring personality and charm to your outdoor space. From bold colors to natural textures, there are countless ways to make each stepping stone a reflection of your style.
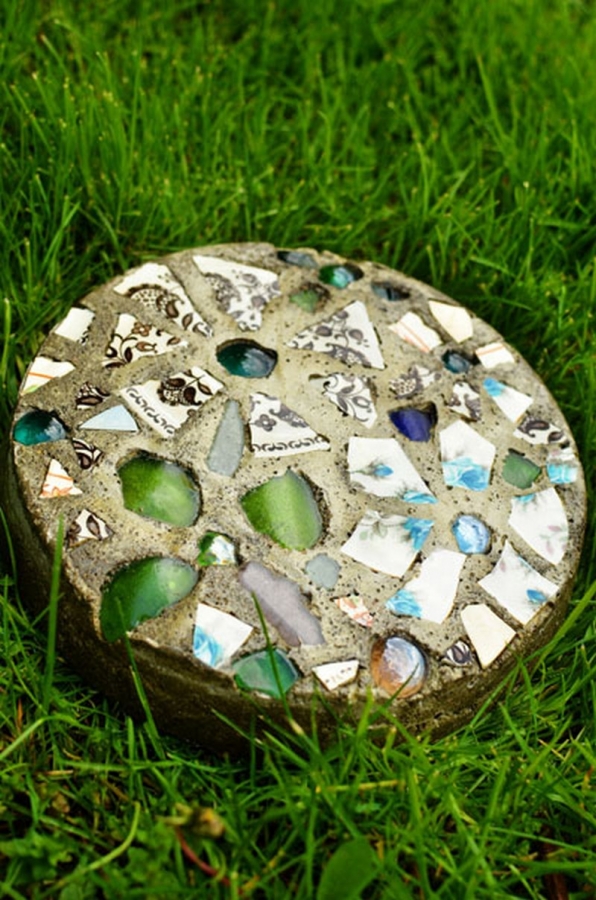
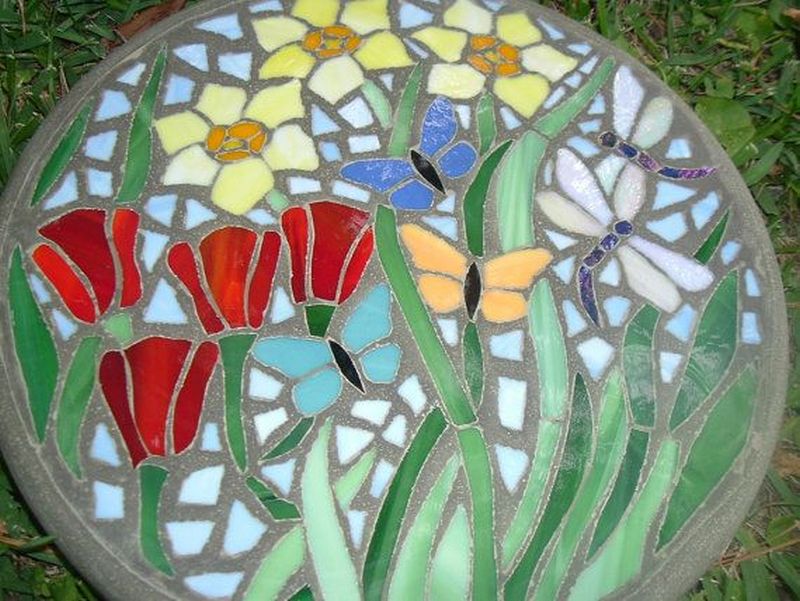
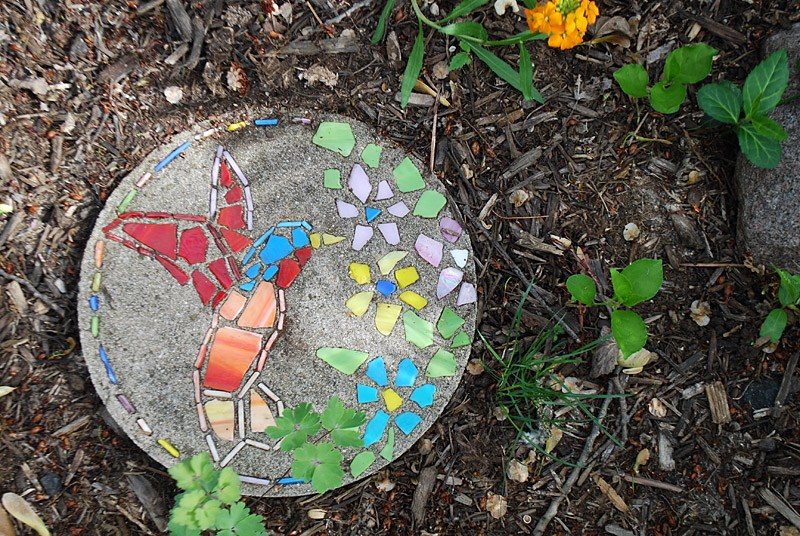
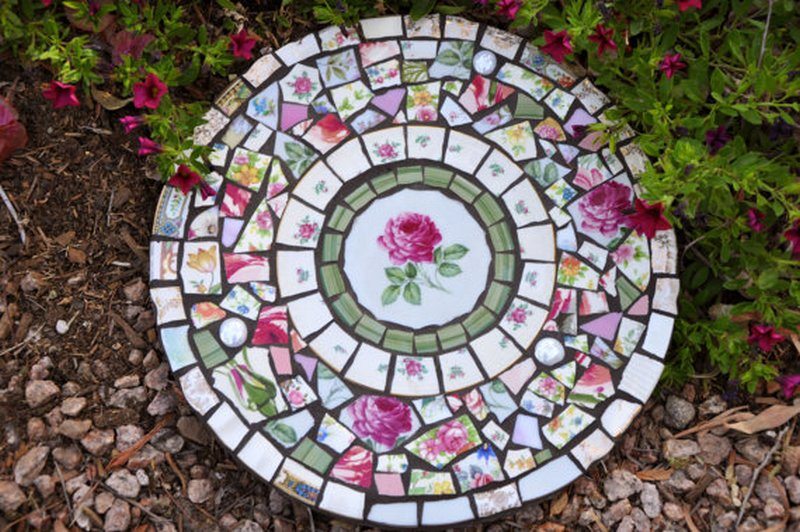
Mosaic Patterns with Broken Ceramics
One of the most striking ways to customize DIY garden stones is by using mosaic art. Break old plates, tiles, or ceramic mugs into small pieces and arrange them into colorful patterns. You can form spirals, floral designs, or even abstract art.
It’s a great way to upcycle materials that would otherwise be thrown out. The glossy surfaces also add a touch of brightness that stands out against soil and greenery.
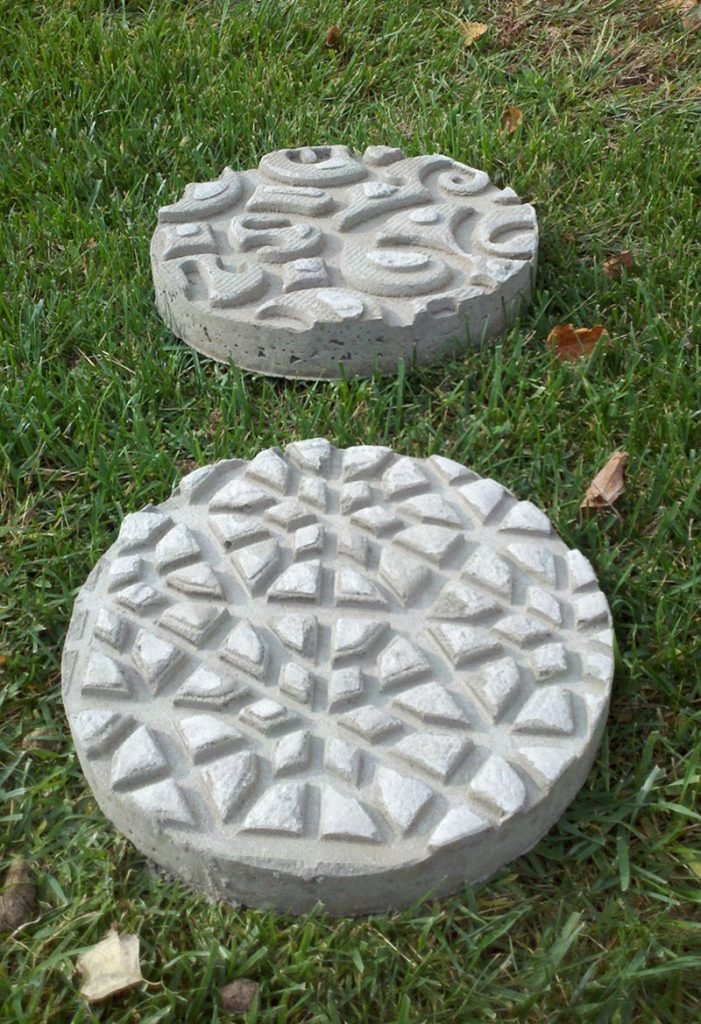
Nature-Inspired Leaf Imprints
Add an organic look to your DIY garden stones by pressing real leaves into wet concrete. Large leaves like hosta, fern, or rhubarb work well for this. Press the leaf vein-side down into the concrete, wait a few minutes, then peel it away.
The result is a beautifully detailed impression. You can leave it as-is for a minimalist stone or paint the imprint to highlight the texture.
Glow-in-the-Dark Embeds
For a magical nighttime garden, embed glow-in-the-dark pebbles or powder into the surface of your stones. These materials absorb sunlight during the day and glow softly at night.
It’s a fun and practical touch that illuminates walkways without requiring wiring or fixtures. Kids especially enjoy this luminous effect, and it adds whimsy to fairy gardens or backyard trails.
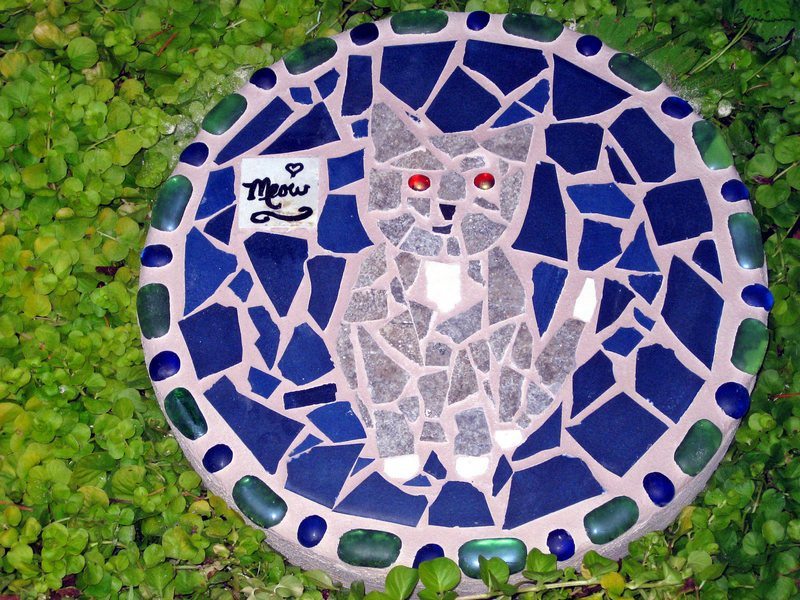
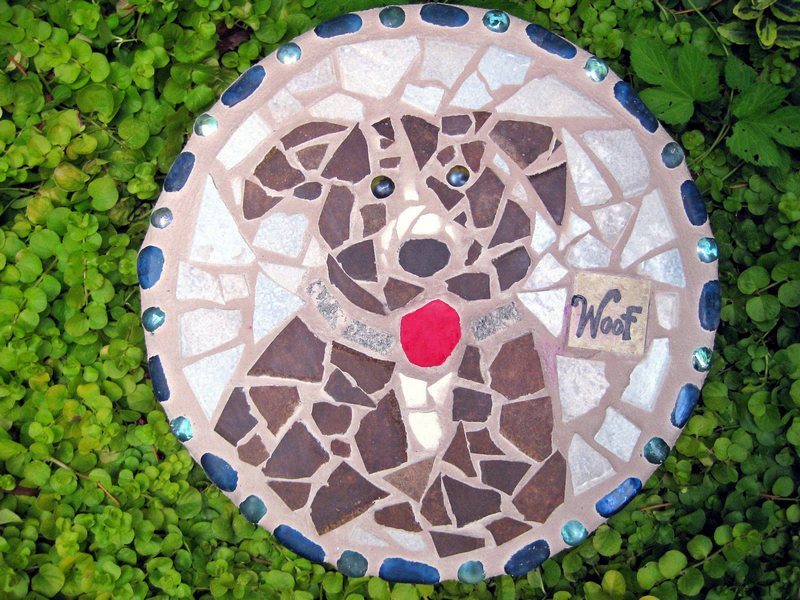
Stamped Words and Quotes
Incorporate personal touches by stamping words into your garden stones before they set. Use rubber alphabet stamps, cookie cutters, or even hand-carved wood blocks.
You can mark a stone with a favorite quote, your family’s names, or seasonal greetings. This is a thoughtful way to honor a pet, celebrate a milestone, or inspire a daily smile while walking in the yard.
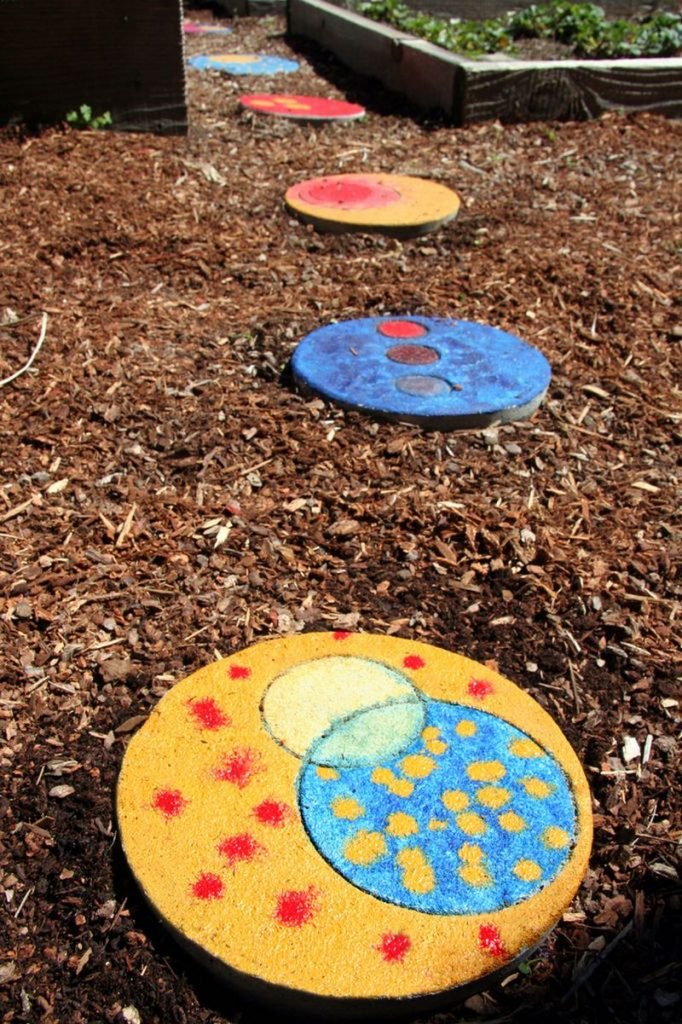
Layered Color Swirls
Instead of sticking to bare gray concrete, try mixing in cement colorants to make vibrant designs. Pour multiple colors into the mold at once and swirl them gently with a stick. The result is a marbled, one-of-a-kind surface. Use earthy tones to blend with the natural landscape or bright hues to make your stepping stones pop.
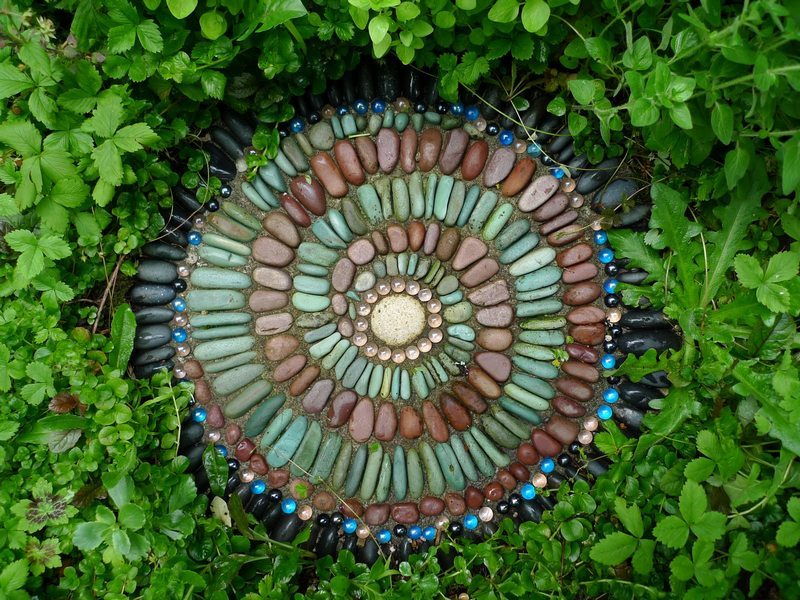
Pressed Shells and Pebbles
For a coastal or rustic theme, press small shells, pebbles, or river stones into the top layer of the concrete. You can create borders, patterns, or fill the entire surface with natural textures. These additions make the rocks more visually interesting and bring a touch of the seaside or mountain trail to your backyard.
Animal Tracks and Footprints
Capture a memory by pressing a pet’s paw or a child’s hand into the concrete. It’s a heartfelt way to mark time and create a lasting keepsake. You can write the name and date beside the print to turn your DIY garden stones into a personal timeline scattered through your landscape.
With a little planning and creativity, each stone becomes more than just a stepping surface. It becomes a piece of art that tells a story.
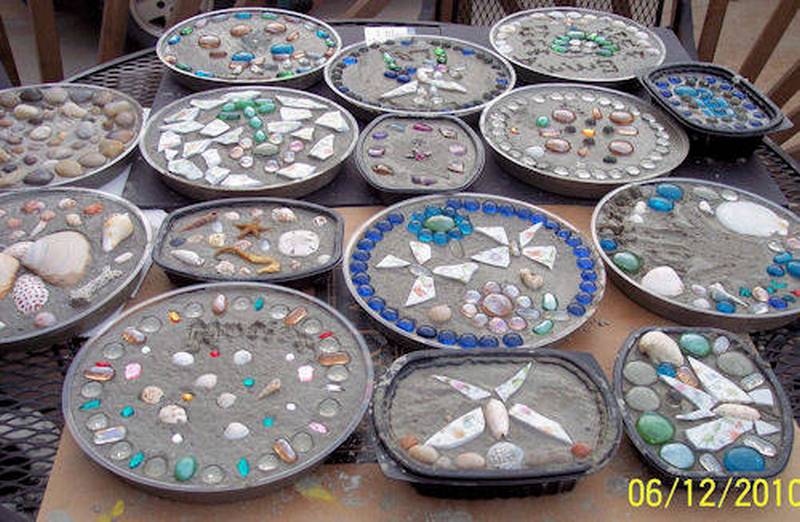
DIY Garden Stones Gallery
Click on any image to start the lightbox display. Use your Esc key to close the lightbox. You can also view the images as a slideshow if you prefer 😎

Using Recycled Materials in DIY Garden Stones
Adding recycled materials to your DIY garden stones not only reduces waste but also brings a unique and textured charm to your garden. From broken ceramics to bottle caps, everyday items you’d normally throw away can be transformed into beautiful and durable garden features. These stones are a creative way to make your outdoor space both eco-friendly and visually appealing.
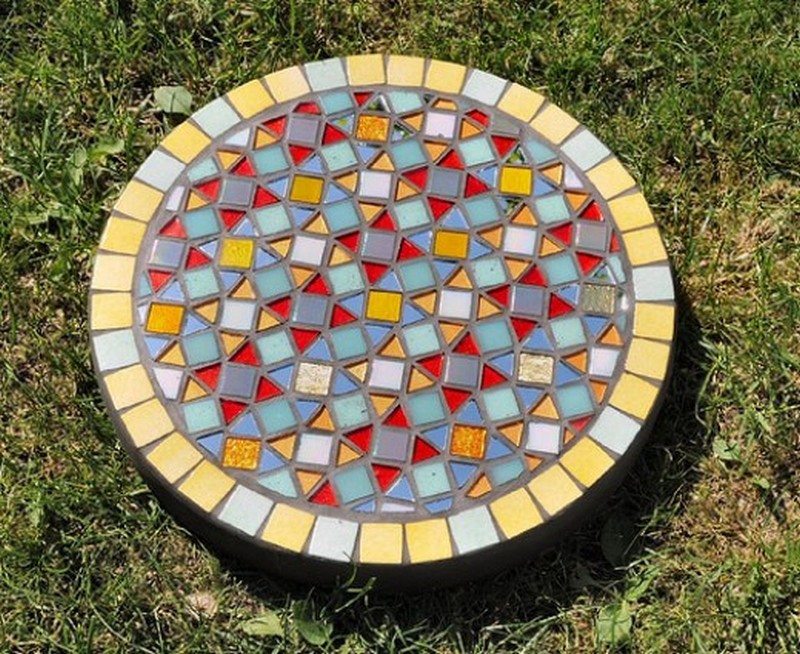
Broken Tiles and Crockery
Cracked plates, chipped teacups, or broken tiles from old renovations can be turned into vibrant mosaic patterns on the surface of your garden stones. Just break them into smaller pieces using a hammer wrapped in a towel to avoid flying shards.
Arrange them in the mold before pouring concrete for colorful, custom designs. This method gives each stone its own identity and is a fantastic way to preserve items that once had sentimental value.
Bottle Caps and Metal Scraps
Plastic or metal bottle caps can add a playful, industrial touch to your DIY garden stones. Arrange them in simple shapes or borders, or mix them with other materials for more layered textures. Flattened soda can pieces or other small metal scraps can be used in similar ways. Not only does this prevent landfill waste, but it also helps create a garden feature with an urban or steampunk flair.
Glass Jars and Bottles
Old glass bottles and jars can be cut into smooth pieces and embedded into stones for a colorful, translucent look. Sea glass works especially well if you already have a collection. These glass bits catch sunlight beautifully and give your garden an artistic shine. Be sure to handle and sand any sharp edges before use to keep the surface safe.
Reclaimed Wood Embeds
You can also press pieces of reclaimed wood into the top layer of concrete. This gives your stone a rustic look that pairs well with natural landscapes. Just keep in mind that wood will weather faster than concrete, so it’s best used decoratively or sealed with a waterproofing agent. Wood letters or shapes are another option for adding texture or initials to your design.
Old Jewelry and Trinkets
Small charms, single earrings, and outdated costume jewelry often end up forgotten in drawers. Instead of letting them gather dust, incorporate them into your DIY garden stones. These little accents can add sparkle and detail. Place them around a central motif or use them to form patterns along the edges.
Upcycled Fabric Texture
Though not a visual material, you can press textured fabrics into wet concrete to create subtle patterns. Use an old doily, lace curtain, or burlap to imprint texture into the surface of your stone. Once removed, the pattern remains and can be highlighted with outdoor paint if desired. It’s an easy way to reuse worn-out linens and add a vintage touch.
By using recycled materials in your DIY garden stones, you turn trash into treasure. These additions not only give your garden a personal, creative touch but also help reduce your environmental footprint. Every stone becomes a small, meaningful act of reuse that makes your outdoor space even more special.
Conclusion:
Making DIY garden stones is a creative and rewarding way to enhance your outdoor space. Each stone offers a chance to personalize your garden while using affordable or recycled materials. From mosaics to leaf imprints, the design possibilities are endless. These stones aren’t just practical. They’re lasting reflections of your creativity. With a bit of time and imagination, your garden path can become a work of art.
If you liked this project, you will also like viewing these stepping stones and pathways…