Last Updated on December 17, 2025 by teamobn
What is a cinder block bench?
A cinder block bench is one of the easiest and cheapest outdoor seating projects you can build. To make a basic bench, you stack cinder blocks to form two supports, lay wooden posts across the top for seating, then add paint and cushions. The project takes about 2 to 3 hours for a beginner and costs much less than buying a new outdoor bench.
Quick Facts:
- Difficulty: Beginner
- Time needed: 2 to 3 hours
- Estimated cost: $50 to $100
- Best for: patios, fire pits, small backyards, garden seating
- Bench dimensions: About 6 to 8 feet long, 18 inches high. You could do it in just hours.
Safety Tips for Building a Cinder Block Bench
Before you start, keep these safety points in mind:
- Wear work gloves and safety glasses when handling blocks and cutting wood.
- Build on firm, level ground so the bench does not wobble.
- Let the construction adhesive cure for at least 24 hours before sitting on the bench.
- Check the bench regularly for loose blocks or damaged wood.
- Do not use cinder block benches for load-bearing structures. They are for seating only.
Why Build a Cinder Block Bench?
Need an outdoor bench in your backyard? Here is a great DIY project for you that is very easy. You could finish it in just a few hours.
A cinder block bench is a simple yet powerful addition to your outdoor space. It provides seating for you and your guests while also offering a place to rest your legs, whether you are having a dinner party or entertaining your children with some backyard games.
When selecting a bench for the outdoors, there is a wide variety of materials that you can choose from. These include wood, metal, plastic, and even stone.
Wood is the most popular of these. The advantage for you is that you can sand and stain it to look like almost any color imaginable. You can also cut it to fit the size of your yard or patio.
Metal is another option because it is durable and can be painted or stained to match your home’s decor.
Wooden and metal benches are expensive and time-consuming to build or remove, so concrete and cinder blocks are popular alternatives.
But cinder blocks are by far the most uncommon and inexpensive type of bench option. Cinder blocks are sturdy, easy to maintain and repair, and easy to transport.
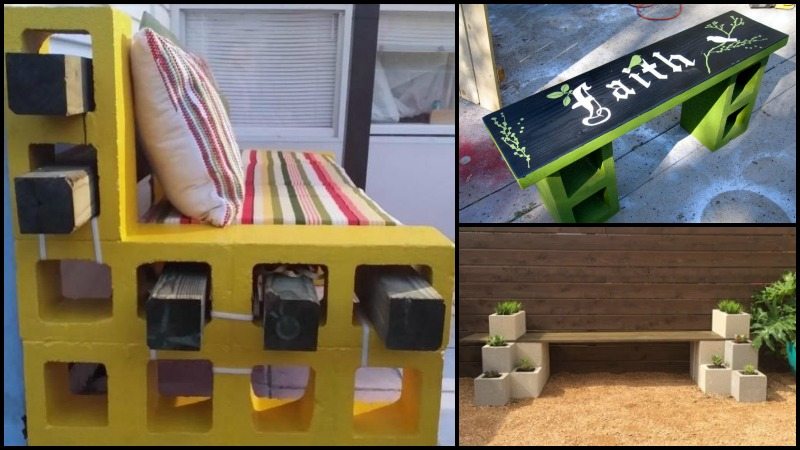
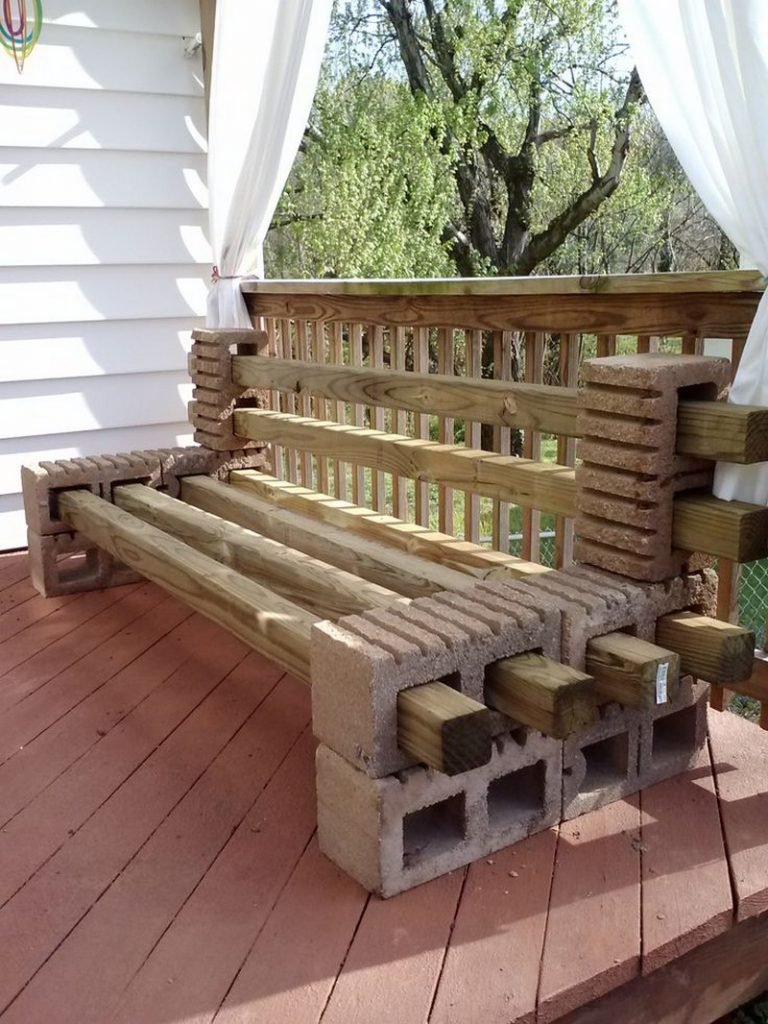
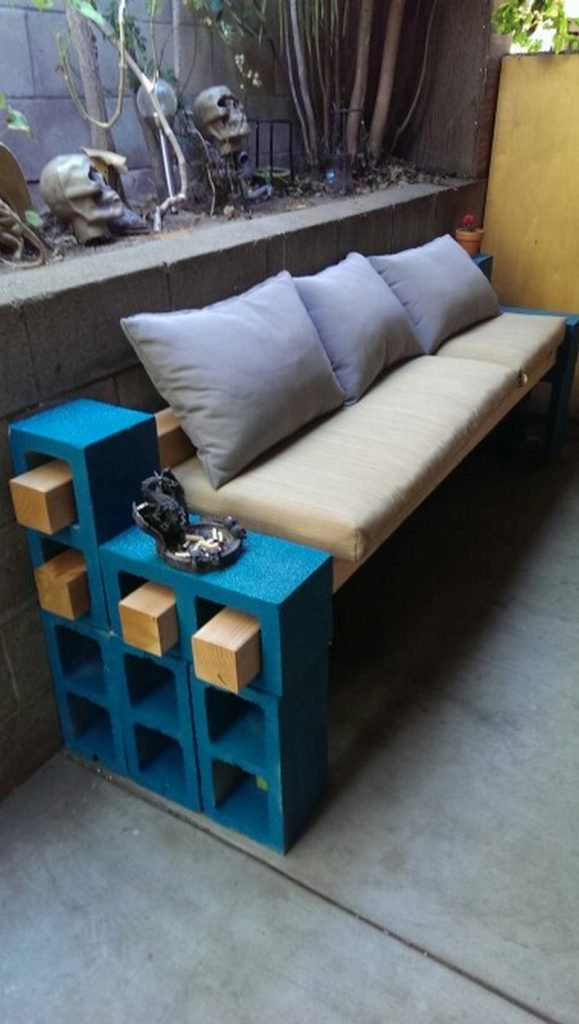
Build this beautiful bench in your outdoor area using only cinder blocks and lumber. This outdoor furniture is very quick to make with just a few easy steps.
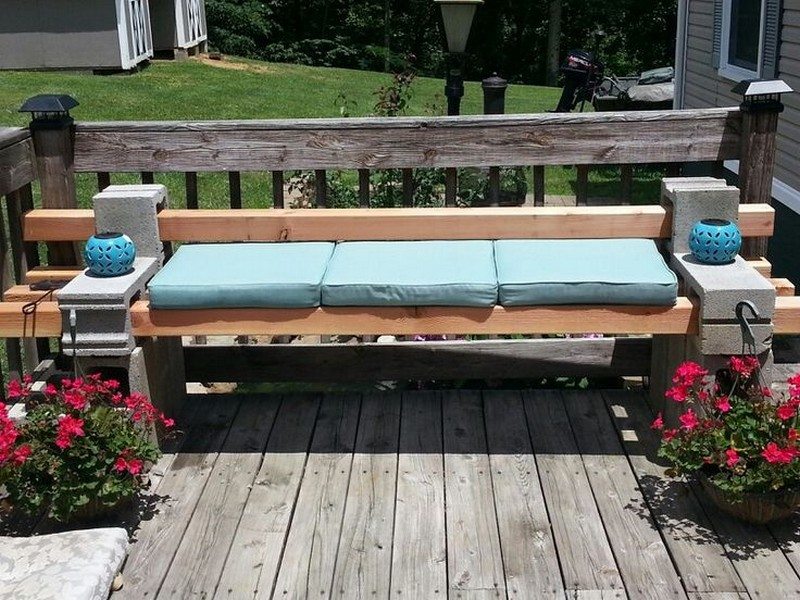
A coat of paint and some fabric cushions will make this bench unique in your backyard.
DIY Cinder Block Bench Guide
What Materials Are Needed for This Cinder Block Bench Build
- 12 standard 8x8x16 cinder blocks (6 blocks for each support tower)
- 3 pieces of 4 inch x 4 inch x 8 foot pressure-treated lumber (for the seat)
- Construction adhesive (exterior grade, for masonry and wood)
- Outdoor cushions (optional, for comfort)
- Exterior paint or stain (optional, for color)
What Are the Tools Needed
- Measuring Tape
- Carpenter’s Level
- Paintbrush or roller (if painting)
- Work gloves
- Safety glasses
How Do You Build a Cinder Block Bench? (Step-By-Step Instructions)
Step 1: Prepare the Site
Choose a level and stable area for the bench in your garden or patio. Clear the space of debris, rocks, and weeds. Use the measuring tape to make sure you have enough room for the bench.
The area should be slightly larger than the bench’s final size. For a 6 to 8-foot bench, you will need a space about 8 feet long and 2 feet wide.
If the ground is uneven, you may need to dig out the high spots or add gravel to the low spots to create a flat base.
Step 2: Lay the Foundation
Position three cinder blocks on the ground as the base for one side of the bench. Arrange them in sets of two, placing them side by side with the holes facing up and down.
Repeat this process for the other side of the bench, ensuring both sides are parallel. The distance between them should match the length of your lumber (about 6 feet for 8-foot posts).
Use the carpenter’s level to ensure everything is even and adjust as necessary.
Step 3: Apply Concrete Adhesive
Once your first tower is level, apply construction adhesive to the top of each block before adding the next block. This will help hold the blocks together and keep the bench stable.
Make sure the adhesive is applied evenly across the top of each block.
Step 4: Add the Second Layer of Blocks
Repeat steps 2 and 3 to build the second support tower. Place it 6 to 8 feet away from the first tower, depending on the length of your lumber.
Use the measuring tape to make sure both towers are the same distance apart at the top and bottom. This keeps the bench level.
Use the carpenter’s level again to make sure both towers are the same height and are standing straight.
Wait at least 24 hours for the construction adhesive to cure completely. Do not move the blocks or place any weight on them during this time.
If you skip this step, the blocks may shift and the bench will not be stable.
Step 5: Position the Lumber
After the adhesive has dried and the cinder blocks are secure, place the 4 inch x 4 inch lumber pieces across the top of the two support towers to create the seating surface.
Make sure the wood extends evenly on both sides. The wood should rest flat on top of the blocks.
For added stability, you can apply a small amount of construction adhesive where the wood meets the cinder blocks. Keep in mind that this will make the wood harder to remove later.
Step 6: Paint the Bench (Optional)
If you want to add color to your bench, now is the time. Choose a paint or stain that is made for outdoor use and works on both concrete and wood.
Apply the paint with a brush or roller for an even coat. Cover the cinder blocks and the wood if you want.
Let the paint dry completely according to the instructions on the can. This usually takes 24 to 48 hours.
Step 7: Add Cushions for Comfort
Add outdoor cushions on the lumber to finish your bench. This adds comfort and style.
Once everything is dry and set, your cinder block outdoor bench is ready to use. Enjoy your new seating area in your garden or patio, perfect for relaxing or entertaining guests.
Step 8: Enjoy Your New Bench
Once everything is dry and set, your cinder block outdoor bench is ready to use. Enjoy your new seating area in your garden or patio, perfect for relaxing or entertaining guests.
What Are Some Easy Design Variations for a Cinder Block Outdoor Bench?
Creating a cinder block bench is a simple, low-cost way to add seating and style to your outdoor space. With their strength and flexibility, cinder blocks allow many design variations to suit any garden, patio, or backyard theme.
Here are several design ideas to inspire your next DIY project and make sure your cinder block outdoor bench becomes a statement piece in your outdoor living area.
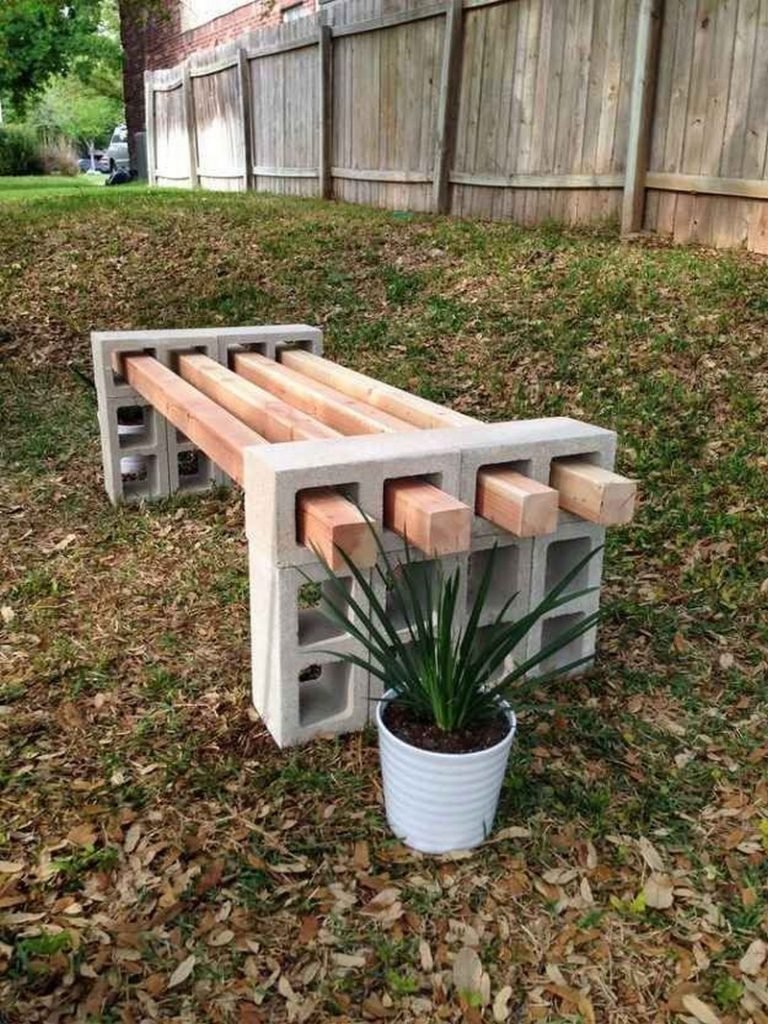
Classic Linear Bench
The Classic Linear design is the most straightforward way to build a cinder block outdoor bench. This design involves stacking cinder blocks straight up and laying lumber across the top to create a seating surface.
It is ideal for simple gardens or as accent seating along garden paths. To make the bench look better, consider painting the cinder blocks in a color that matches your outdoor decor.
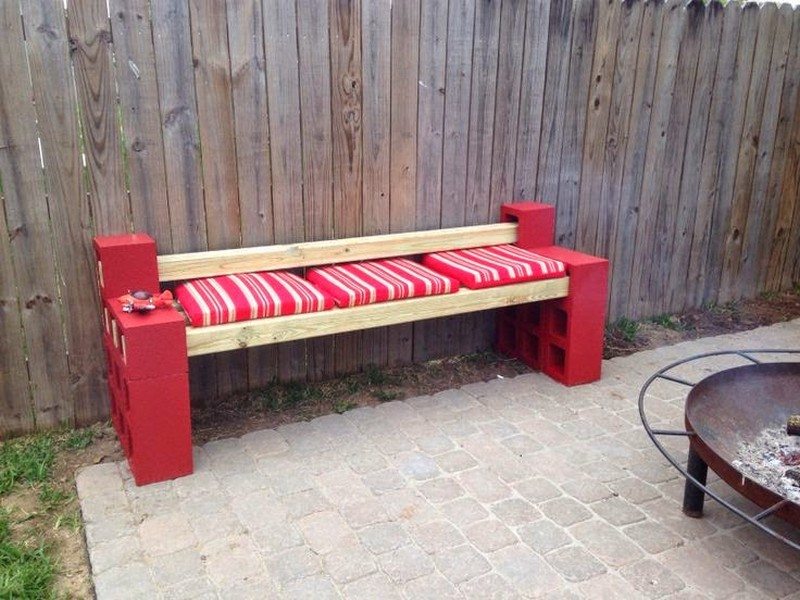
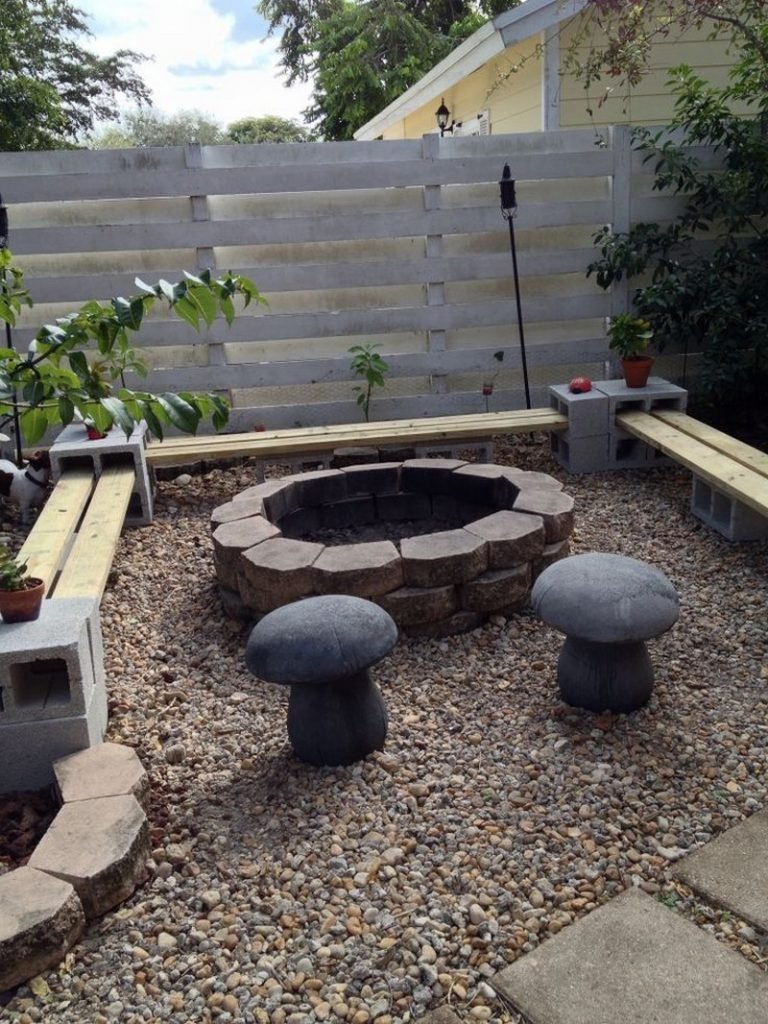
Curved Bench Design
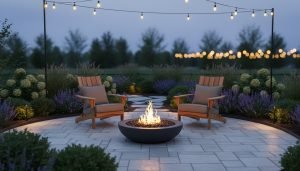
For those looking to add a dynamic element to their outdoor space, the Curved Bench design offers an inviting alternative. Arrange the cinder blocks in a gentle curve and place the lumber on top for seating.
This variation is perfect for surrounding a fire pit or creating a cozy corner in your garden. Curved benches can add a touch of elegance and make it easier for guests to talk during outdoor gatherings.
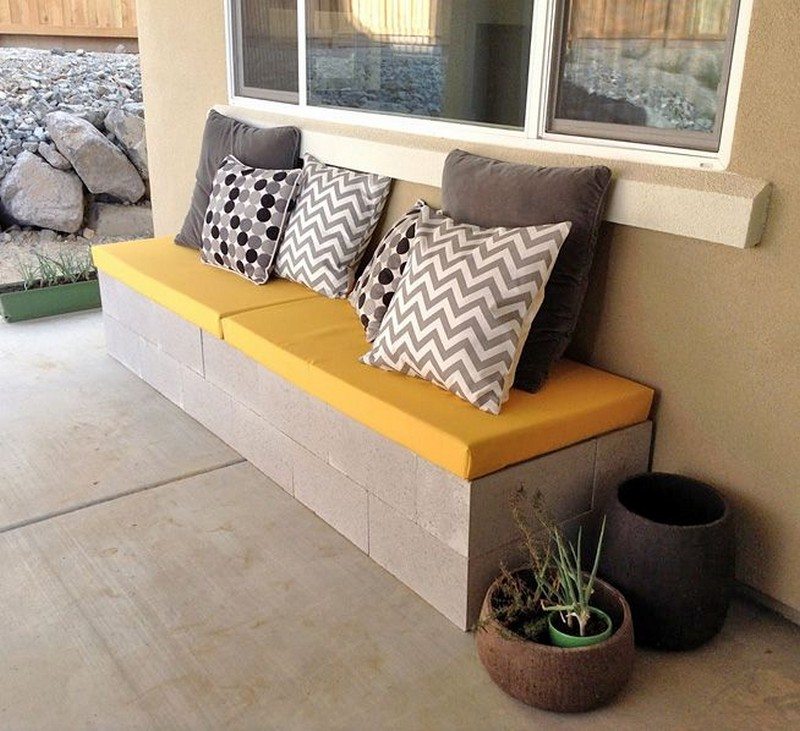
L-Shaped Corner Bench
Make the most of corner spaces with an L-shaped cinder block bench. This design variation is excellent for corner patios or garden nooks. It provides plenty of seating without taking up too much space.
The L-shape can also serve as a windbreak and help define the boundaries of an outdoor living area. Decorate with bright cushions and throw pillows to create a comfortable and inviting outdoor lounge area.
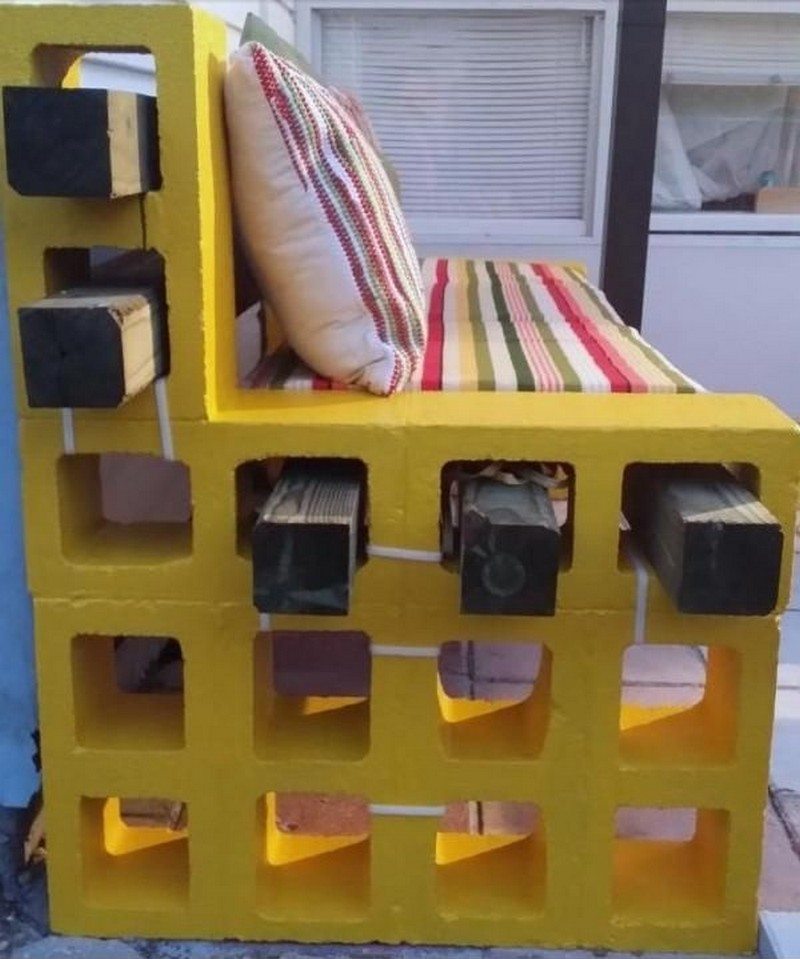
Multi-Level Bench
Consider building a multi-level cinder block outdoor bench for a more dynamic and functional piece. This design features different heights, providing seating and stepped surfaces that can also work as plant stands or side tables.
It is ideal for terraced gardens or spaces with sloping ground. It adds visual interest and usefulness to your outdoor setup.
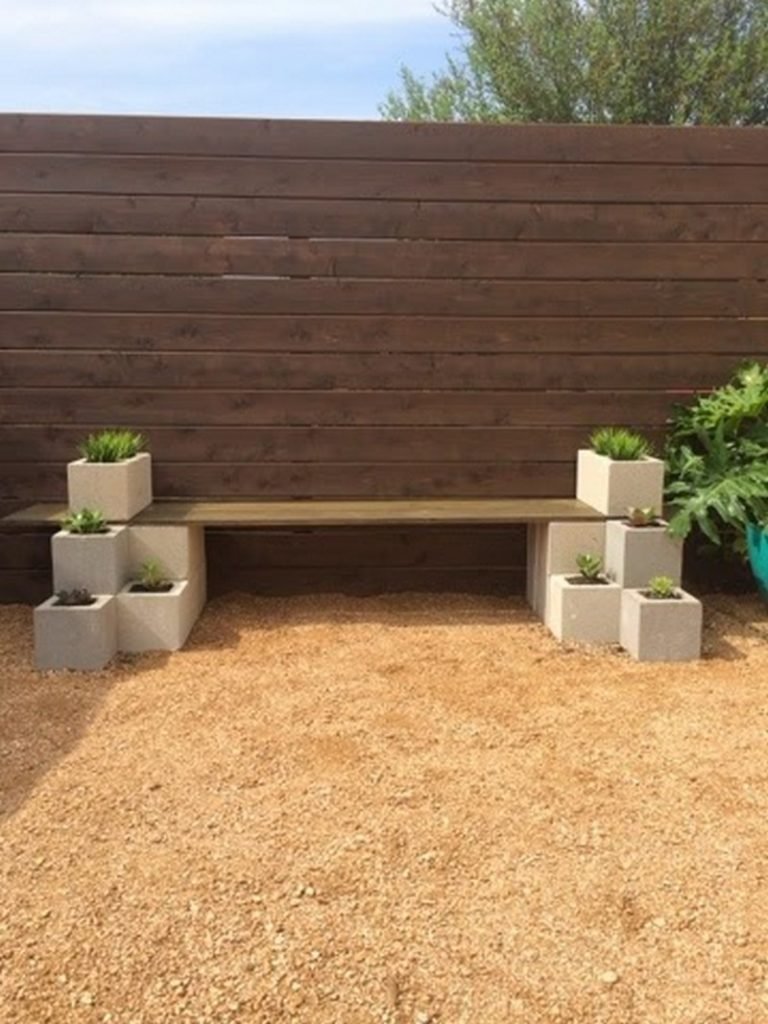
Bench with Integrated Planters
Add a touch of greenery to your cinder block bench by building in spaces for planters. Leave some blocks open or position them to hold potted plants.
This variation adds life to your seating area and lets you customize with seasonal flowers or herbs. It blends function with natural beauty.
Decorative Mosaic Bench
For those with a flair for creativity, adding a mosaic design to your cinder block outdoor bench can turn it into a work of art. Apply tiles, broken ceramics, or glass pieces to the sides of the cinder blocks using weatherproof adhesive.
This approach offers endless possibilities for customization. It lets you create a unique and eye-catching feature in your garden.
Modular Sectional Bench
Create a flexible seating solution with a modular sectional design. This concept involves building individual bench segments that can be rearranged to suit different occasions and spaces.
It is particularly useful for those who frequently change their outdoor layout or host events that require flexible seating arrangements.
See more versions of this cinder block bench project from the gallery below, and be inspired to make your own!


How do you integrate a cinder block bench into your landscaping?
Adding cinder block outdoor benches to your landscaping brings functional seating and improves the overall look of your outdoor space. These benches can serve as focal points, define areas within a garden, or provide a smooth transition between different outdoor zones.
You can thoughtfully add cinder block outdoor benches to your landscaping to create unified and inviting outdoor areas.
Choose Strategic Locations
The placement of your cinder block outdoor bench plays an important role in making it enjoyable and useful. The location should match the landscape and offer comfort and usefulness to those who use it.
For example, positioning your bench to face a garden allows guests and family members to admire your plants and flowers. This makes it a rewarding spot for both relaxation and reflection.
Similarly, a bench by a water feature, like a pond or fountain, can provide a calm backdrop. This improves the peace of your outdoor space.
Another thoughtful placement is under a tree, where the branches offer a cool, shaded spot from the sun. This is perfect for hot summer days. This makes the bench an inviting place to unwind and fits it naturally into the landscape.
You can also place a cinder block outdoor bench along a garden path. This turns it into a charming stop-off point, inviting people to pause and take in the beauty around them.
Each location choice should aim to balance looks with usefulness. Make sure your cinder block outdoor bench becomes a loved part of your garden.
Complement Garden Themes
Your cinder block outdoor bench should serve as an extension of your garden’s overall design theme. This creates a unified and visually appealing outdoor environment.
In modern garden settings, the bench can show the essence of contemporary design through clean lines and simple geometric shapes. Consider pairing uniform, sleek cinder blocks with smooth wood for the seating area to keep a simple and sophisticated look.
Adding cushions in bold, solid colors can highlight the modern look even more.
For gardens that have a rustic charm, your cinder block outdoor bench can contribute to this atmosphere through a more weathered and organic appearance. Achieving a weathered look can be as simple as applying a stain to the wood or choosing reclaimed timber that tells a story through its imperfections.
The rough texture of cinder blocks, especially when they are left unpainted or are lightly brushed with earth-toned colors, can blend easily with the rustic theme.
Adding elements like moss or placing the bench near natural stone features can further improve the rustic appeal. This makes your cinder block outdoor bench a harmonious addition to the garden’s overall feel.
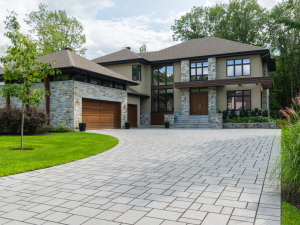
Incorporate into Hardscaping Elements
Combining your cinder block outdoor bench with the hardscaping elements of your garden not only improves the bench’s function but also raises the overall design of your outdoor space.
By thoughtfully aligning your bench with existing structures like walls, patios, or walkways, you can achieve a unified landscape design that appears both intentional and harmonious.
For instance, building your bench to align with the height of a nearby retaining wall provides additional seating and extends the wall’s visual line. This creates a more expansive feel to the space.
Similarly, using materials and colors for your cinder block outdoor bench that match or complement those found in your garden’s pathways or patio pavers can unify the different elements of your outdoor area.
This could mean selecting cinder blocks and wood that mirror the textures and colors of your hardscaping. This blends the bench smoothly into the landscape.
You might also consider positioning your bench to bridge two distinct areas of your garden, such as the transition from a stone patio to a grassy lawn. This effectively integrates it into the flow of the space and improves the overall user experience of the garden.
Use as a Boundary or Privacy Screen
A well-placed cinder block outdoor bench can easily combine function with good looks. It provides a comfortable seating option and a privacy feature in your garden.
Placing the bench along the edge of your outdoor space or marking off different areas within the garden acts as a subtle boundary marker. This divides the space without the need for walls or fences. This method creates “rooms” within your garden, offering a unique feel while contributing to a unified landscape design.
Improving the bench with a backdrop of tall grasses, thick bushes, or even a trellis covered with climbing vines boosts privacy. It also brings natural beauty directly into the seating area.
This living screen contrasts the solid structure of the cinder block outdoor bench, softening its appearance and blending it with the surrounding greenery.
Such plantings increase the sense of privacy and invite wildlife. This makes your garden a haven for birds and helpful insects. The result is a calm and private nook that encourages relaxation and thought, nestled within the natural embrace of your garden.
Create a Focal Point with Planters
Turning your cinder block outdoor bench into a bright focal point by adding planters offers a unique blend of function and good looks. This can be done effectively by using the natural design of cinder blocks.
Their hollow centers are perfect for holding soil and plants. This makes the bench a living piece of garden art. You can also place potted plants around or on the bench to improve its visual appeal and create a more flexible arrangement.
When selecting plants, aim for a mix that offers a variety of colors, textures, and scents. Bright, bold flowers can catch the eye and draw attention from across the garden. Plants with interesting textures add depth and interest up close.
Fragrant herbs and flowers enrich the bench’s surroundings. This makes sitting down a more immersive sensory experience. This method not only raises the bench’s status as a central feature in your garden but also encourages interaction. It invites guests to literally stop and smell the flowers.
Enhance with Lighting
Adding lighting to and around your cinder block outdoor bench can magically transform the space into an enchanting nighttime retreat.
Placing solar lights into the blocks can light up the bench from below. This creates a subtle and inviting glow that highlights the bench’s structure.
You can also drape string lights overhead or install ambient lighting nearby. This casts a warm, inviting light and improves the bench’s charm after dusk.
This lighting highlights the bench as a key garden feature and increases the area’s function. It allows the space to be enjoyed during the evening hours.
Blend with Softscaping
Merging your cinder block outdoor bench with the surrounding softscaping can create a harmonious balance between your garden’s hardscape and living elements.
Adding flowering plants, shrubs, or grass around the base of the bench can help to soften its appearance and tie it into the natural landscape.
Using creeping plants that can grow over and around the cinder blocks allows the bench to become part of the garden. This blurs the lines between man-made structure and natural growth.
This blending technique makes sure that the bench does not stand out as an isolated element. Instead, it appears as an intentional part of the garden’s design. It improves the bench’s visual appeal and invites visitors to sit and enjoy the smooth integration of hardscape and softscape.
By carefully selecting plants that complement the bench and the garden, you can create a peaceful and inviting nook. It feels like a natural extension of the outdoor space.
Conclusion
Building a cinder block outdoor bench is a practical and rewarding DIY project that enhances any garden or patio space. With just a few materials like cinder blocks, lumber, concrete adhesive, and basic tools, you can create a sturdy and attractive seating area that adds function and style to your outdoor environment.
If you liked this project, you will also like viewing these furniture ideas…
FAQ: Cinder Block Bench
- How do you address the slope of the ground when building a cinder block bench?
- Building a cinder block bench on uneven terrain requires site preparation for stability and comfort. First, level the ground using a spirit level and excavate the higher side as needed. Building a wood raised bed with gravel or sand for drainage and a compact foundation for stability is an alternative to leveling.
- What precautions should be taken when gluing the blocks together?
- Gluing chair blocks to the foundation requires considerations for stability and aesthetics. Before gluing, position the blocks with sideways holes and use 4×4 beams to evaluate seating level and balance. For stability and aesthetics, glue the narrow edges with Gorilla Glue or Titebond and place the blocks with their broader, more pleasing hole edges facing outward.
- How do you prime and paint cinder blocks properly?
- Clean and dry cinder blocks to eliminate dust and grime before priming and painting. Spray or brush on a primer to conceal pores and holes and let it dry. Once primed, apply two or three coats of durable acrylic exterior paint for even coverage and let the blocks dry before exposing them to the weather.
- What is the recommended drying time before using the finished bench?
- You should wait 24 hours before sitting on your new bench to check its stability and safety. Construction adhesive must cure and solidify throughout this time. If weight is applied before the adhesive dries, the blocks may move, weakening the bench.
- How do you assemble the seating and back posts for the bench?
- For 10–15 minutes, let the glue get sticky before assembling the cinder block bench seats and back posts. Choose the most beautiful side of the posts and carefully slide them into the holes, maintaining spacing even for balance. For comfort and design, add cushions and pillows to the bench after 24 hours of glue curing.