Last Updated on January 8, 2025 by teamobn
Are you looking to go green? Making a DIY compost bin lets you reuse food waste as a nutritional boost for your garden. Composting also helps you contribute to lowering landfill waste by lowering the amount of trash going towards them.
This article will guide you in making your compost bin to benefit your home garden. What is Composting, and Why DIY?
Contents
Understanding Composting
Composting turns waste into soil that’s rich in nutrients. It’s like nature’s way of recycling. When food scraps and yard waste break down, they become compost. This compost smells earthy and is great for plants and soil.
Tiny things like bacteria and fungi do the work. They break down organic waste into compost. This is simple science but important for gardens and farms.
Composting is also good for the planet. Organic waste in a landfill makes methane, adding carbon to the atmosphere. Composting keeps this waste out of landfills and reduces methane to prevent climate change.
The Value of DIY Composting
So, why should you consider constructing a compost bin rather than buying one or ignoring the option altogether? First and foremost, creating a DIY compost bin can be more economical than purchasing a pre-made unit.
Many commercially available compost bins come with a hefty price tag. In contrast, you can often build a DIY bin with materials you might already have around the house or can acquire at a minimal cost.
Secondly, a DIY approach allows you to customize the compost bin to your needs. Whether you have a small balcony or a large backyard, you can design a composting system that fits your space and lifestyle. Building something with your hands can be incredibly gratifying, adding a personal touch to your sustainability efforts.
Additionally, the DIY route offers educational value. The hands-on experience of collecting materials, assembling the bin, and managing the compost provides a practical education in sustainability. You’ll better understand the composting process and develop a deeper connection to your environmental impact.
Finally, by creating a composting system, you’re making a tangible commitment to sustainability. This can empower and inspire others in your community to take similar eco-friendly steps.
Composting is an environmentally responsible choice that offers numerous benefits. Opting for a DIY compost bin adds a layer of personalization, cost-saving, and education to the practice, making it a win-win situation for you and the planet.
Materials Needed
Getting the right materials is the first step in building your compost bin. This section will guide you through the essential items you’ll need. From structural materials to smaller components, each element serves a purpose.
Lumber or Wooden Planks
Wood is often the go-to material for a compost bin because of its natural look and durability. You’ll need untreated lumber or wooden planks to construct the main frame. Make sure the wood is untreated to avoid introducing chemicals into your compost.
Chicken Wire or Hardware Cloth
This material lines the inside of the bin to allow for ventilation while keeping the compost in place. Chicken wire is generally more affordable but may rust over time. Hardware cloth is more durable but can be pricier. Choose based on your needs and budget.
Screws and Nails
To hold your structure together, you’ll need screws and nails. Opt for rust-resistant types, like galvanized or stainless steel. Screws are preferable for areas with more weight, while nails are fine for less critical connections.
Corner Brackets
These add stability to your compost bin’s structure. They can be made of metal or heavy-duty plastic. While optional, corner brackets significantly enhance the durability of your compost bin.
Hinges and Latch
If you’re planning a compost bin with a lid or door, you’ll need hinges and a latch. These allow easy access to your compost and help keep out unwanted critters.
Paint or Wood Stain
While this is optional, adding a coat of paint or wood stain can give your compost bin a polished look. If you decide to go this route, choose products that are eco-friendly and suitable for outdoor use.
Measuring Tape and Pencil
Precision is crucial when building any structure, including a compost bin. A measuring tape and pencil will help you accurately measure and mark your materials before cutting or assembling.
Drill and Saw
Although technically tools, you’ll need a drill and saw for the assembly process. A drill is essential for creating holes for screws, and a saw is needed to cut your wood to the appropriate dimensions.
Get a high-grade circular saw to ensure an accurate and efficient cut of your wooden plank. One example is the SKIL circular saw with a laser guide to show you where you are cutting.
Your chosen materials set the stage for a successful composting journey. Ensuring you have all the necessary items will make the building process go smoothly. By selecting high-quality, durable materials, you invest in a compost bin that will serve you for years.
Steps to Build Your Compost
Building a compost bin is a fulfilling project that pays off in sustainability and eco-friendly living. Here’s a step-by-step guide to help you create your compost bin. Follow these headings to make your building process a breeze.
Consider the Location and Placement
Before you even begin the construction, you should carefully consider where your compost bin will be located. The ideal spot is easily accessible year-round, so you can add to it or collect compost regardless of the season.
Consider proximity to your garden, if you have one, as you’ll carry compost to and from this area. Also, ensure the location has good drainage to prevent your compost from waterlogging.
The best possible area for a compost bin is where you get a good mix of sun exposure and shade. Heat from the sun allows the organic materials to compost neatly, but too much of it could kill the microorganisms.
Cut the Wooden Planks
After you get your wood, measure it for your compost bin. Use a tape measure and pencil to mark where to cut. A circular saw makes this fast and easy, but a hand saw is good, too. Always wear safety gear like goggles and gloves.
Line up the planks to ensure they have the right measurements. You do not want planks with the wrong measurement while building your compost bin.
Prepare the Ground
The next step is to prep the base for your compost bin. Start by clearing away any debris like rocks, sticks, and leaves. Make sure the ground is levelled with a levelling tool.
Ensure the ground is flat so your compost bin will sit securely without wobbling. Some people like laying down a gravel layer for added drainage, but this is optional. What’s most important is creating a solid, level base that will support your compost bin effectively throughout its lifespan.
Assemble the Base
Constructing a solid base is the foundation of your compost bin, literally and figuratively. Start by laying out the wooden planks you’ve cut for the base on the prepared ground. Use your measuring tape and level to make sure everything lines up correctly.
Once everything is in place, secure the planks together using screws or nails. If you’re using screws, pre-drill the holes with your power drill to make the job easier and to prevent the wood from splitting.
Remember to wear your work gloves and safety goggles while working with tools. A strong base ensures that your compost bin will be stable and long-lasting.
Attach the Sides
With your base securely in place, it’s time to attach the sides to form the walls of your compost bin. Position your cut wooden planks vertically along the edges of the base. Make sure they’re evenly spaced and aligned before you start fastening them.
Using screws offers more stability, but nails can work too for less critical parts. For added durability, consider using corner brackets at the joints. This gives your compost bin extra support, making it more robust.
Once all sides are attached, double-check to ensure they are securely fastened and level. This step is crucial for your compost bin’s overall stability and functionality.
Install the Wire
After the base and sides are complete, it’s time to install the chicken wire or hardware cloth. This is a lining inside your compost bin and is crucial for ventilation. Cut your wire to match the dimensions of your compost bin’s sides.
A staple gun will help you connect the wires to the wooden planks you installed in the compost bin. Make sure the wire is taut and covers the entire area. If you don’t have a staple gun, some screws with a power drill will help you secure those wires onto your compost bin.
The wire allows for good airflow while keeping the compost contained, contributing to a faster composting process.
Add the Front Panel
If your compost bin design includes a front panel or door, it is time to install it. A front panel allows easy access to your compost, making adding materials or turning the compost as needed simpler.
First, measure and cut the wooden planks to fit the front of your compost bin. Attach hinges to the sides of these planks and then secure them to the existing structure. If your front panel is a door, adding a latch is essential to keep it securely closed. This helps prevent wind from blowing it open and keeps animals from getting into your compost.
Before you declare it done, open and close the front panel a few times to make sure it works smoothly and lines up well with the rest of the structure.
Paint or Stain the Wood
Adding a coat of paint or wood stain is optional, but it offers several benefits. Not only does it improve the appearance of your compost bin, but it can also help protect the wood from the elements, extending the life of your compost bin.
If you choose to paint or stain the wood, select eco-friendly and suitable products for outdoor use. This ensures that you’re not adding any harmful chemicals to your compost.
Apply the paint or stain evenly, covering all exposed areas of wood. Allow ample time for it to dry before you start using your compost bin. A well-applied coat can make your compost bin look more polished and help it blend in with your garden or outdoor space.
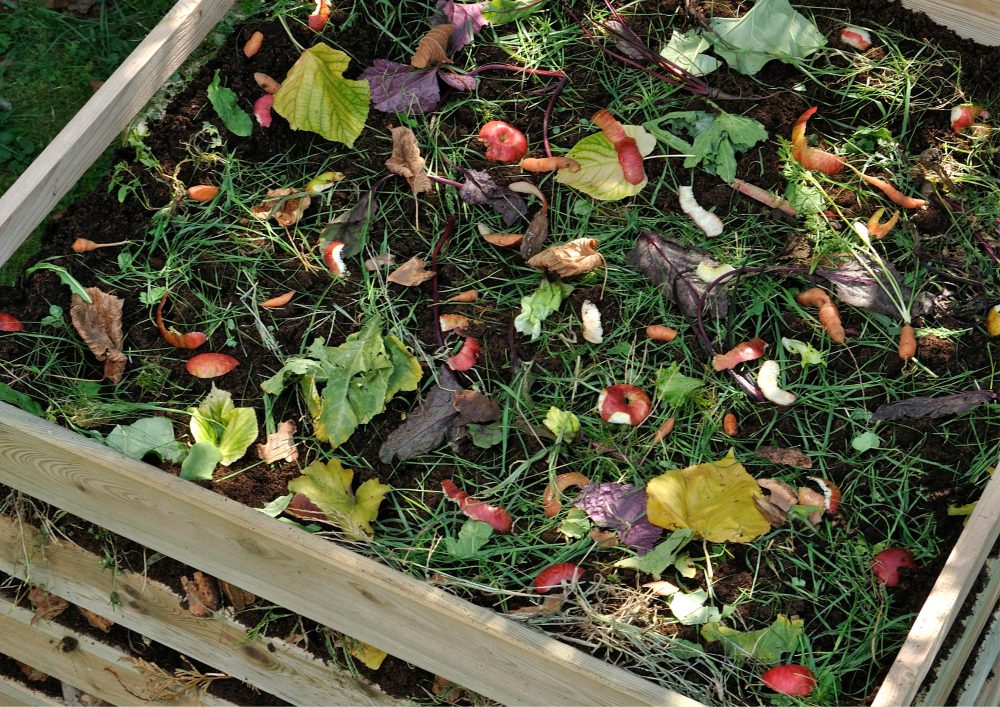
What to Compost
Composting is an actual art since a handful of organic wastes can turn into useful compost. A balanced mix of greens and browns will help speed decomposition and produce high-quality compost. Greens provide nitrogen, while browns supply carbon, both essential elements for compost.
Here’s a comprehensive guide on what you can and should compost to get the most out of your new DIY bin.
Greens for Your Compost
These materials are rich in nitrogen and help to speed up the composting process. They are usually wet and break down quickly. Examples include fruit and vegetable scraps, coffee grounds, tea bags, and fresh grass clippings. You can also add eggshells, although they are technically a neutral item. Just make sure to crush them before adding them to your compost pile. But be cautious with the amount, as too many greens can make your compost pile too wet and smelly.
Browns for Your Compost
Browns are materials that are rich in carbon. They balance out the wetness of the greens and help control odours. Examples of browns are dry leaves, straw, wood chips, and shredded newspaper. Cardboard and paper can also be composted but should be shredded into smaller pieces for quicker decomposition. Browns act as the “dry” component of your compost and are crucial for creating a balanced compost pile.
Things to Avoid
Not all organic materials should go into your compost pile. Avoid adding meat or dairy products, which can attract pests and cause bad odours. Similarly, oily foods and bones are not suitable for composting. Also, refrain from adding diseased plants, as the disease can spread to other plants when you use the compost. Pet wastes should generally be avoided, especially from predatory animals, due to the risk of transmitting parasites or diseases.
Quantity and Balance
Maintaining a good balance between greens and browns in your compost pile is essential. A good rule of thumb is to aim for a 50-50 mix, although some experts recommend a 30-70 ratio favouring browns. The balance isn’t just about weight but also about volume. If your compost pile starts to smell, you likely have too many greens and must add more browns to balance things out. On the flip side, add more greens if decomposition takes too long.
Extra Tips
While composting is generally straightforward, a few extra tips can help you maximize success. For one, chop or shred your compost materials into smaller pieces to speed up decomposition. You should also turn your compost pile regularly to aerate it, which helps accelerate the composting process. Also, maintaining moisture is essential. Your compost pile should be as wet as a wrung-out sponge; adjust water levels as needed.
Understanding what to compost and maintaining the right balance set the stage for a thriving compost pile. Your garden will thank you for the nutrient-rich soil conditioner you produce, and you’ll contribute to a more sustainable way of living.
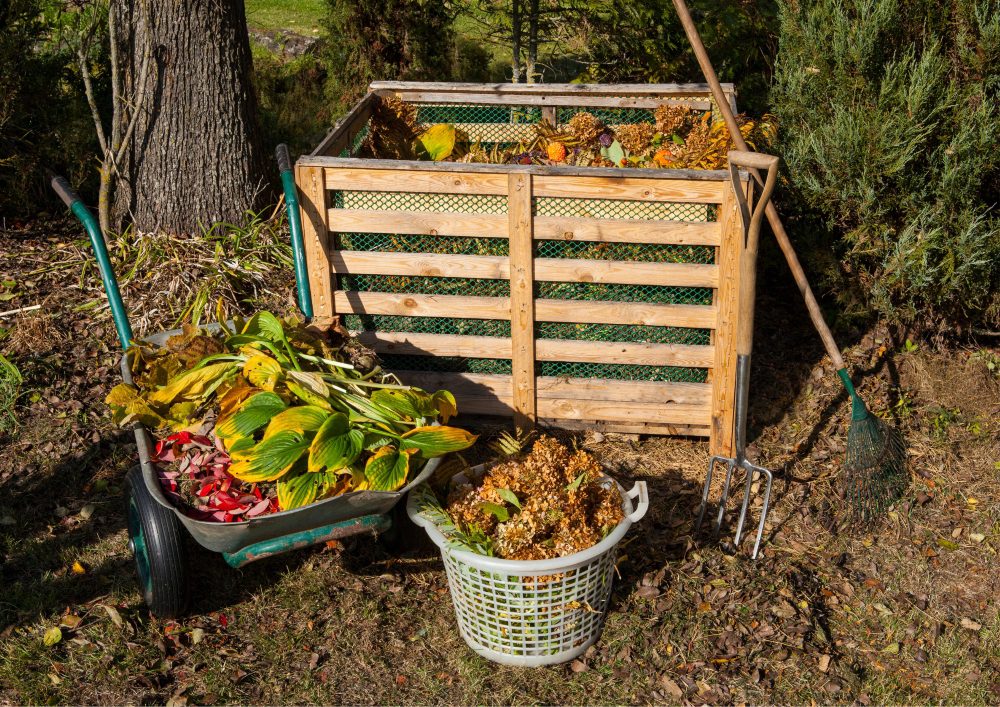
Maintaining Your Compost Bin
Once you’ve built your compost bin and started adding materials, ongoing maintenance is essential to keep the composting process efficient and odour-free. From balancing greens and browns to proper aeration, here’s your guide to keeping your DIY compost bin in top shape.
Regularly Turn Your Pile
Turning your pile regularly is one of the most crucial steps in compost maintenance. This aerates the compost, helping to speed up the decomposition process. Use a compost fork or shovel to mix the materials. Try to do this at least once a week. If your compost pile is too wet or starts to smell, turning it more frequently can help.
Monitor Moisture Levels
Moisture is vital for composting, but too much can lead to a smelly, ineffective pile. Your compost should have the dampness of a wrung-out sponge. During dry seasons, you may need to add water. In contrast, adding more browns like leaves or straw can balance it out if it’s too wet.
Keep an Eye on the Temperature
Temperature is an indicator of how well your composting process is going. A compost pile that’s working well will generate heat. If the pile isn’t heating up, it might need more greens or water. Conversely, it might require additional aeration or more browns if it’s too hot.
Check for Pests
A well-maintained compost pile is generally not attractive to pests. However, if you notice critters like rats or raccoons, it may be because you’ve added materials that shouldn’t be there, like meat or oily foods. Sticking to the compost-safe materials and ensuring your compost bin has no gaps or holes where animals can get in.
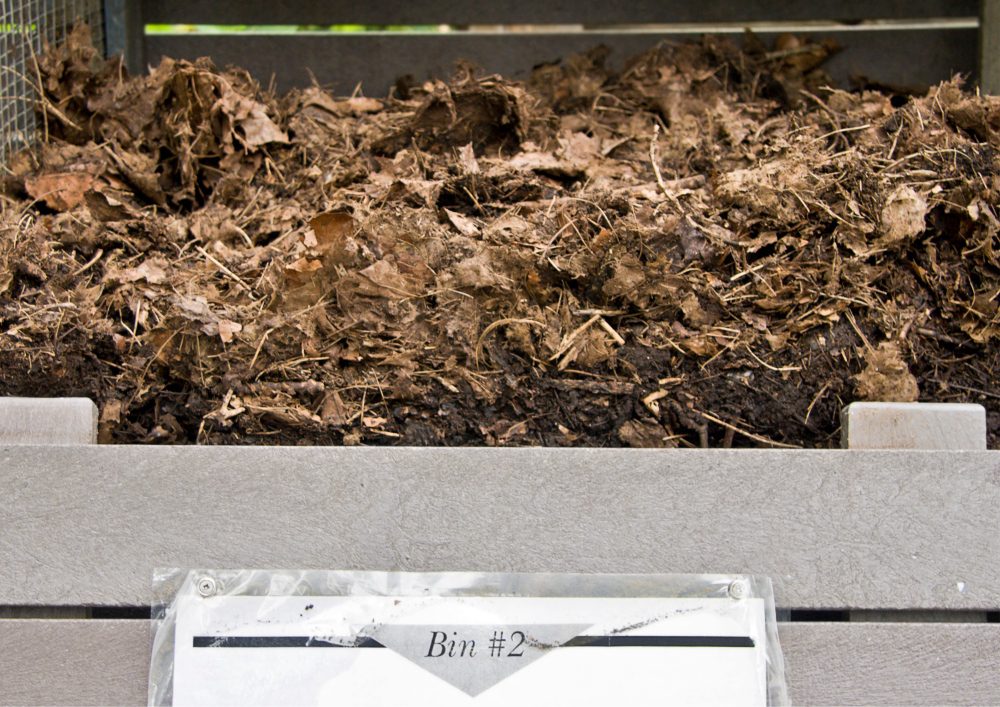
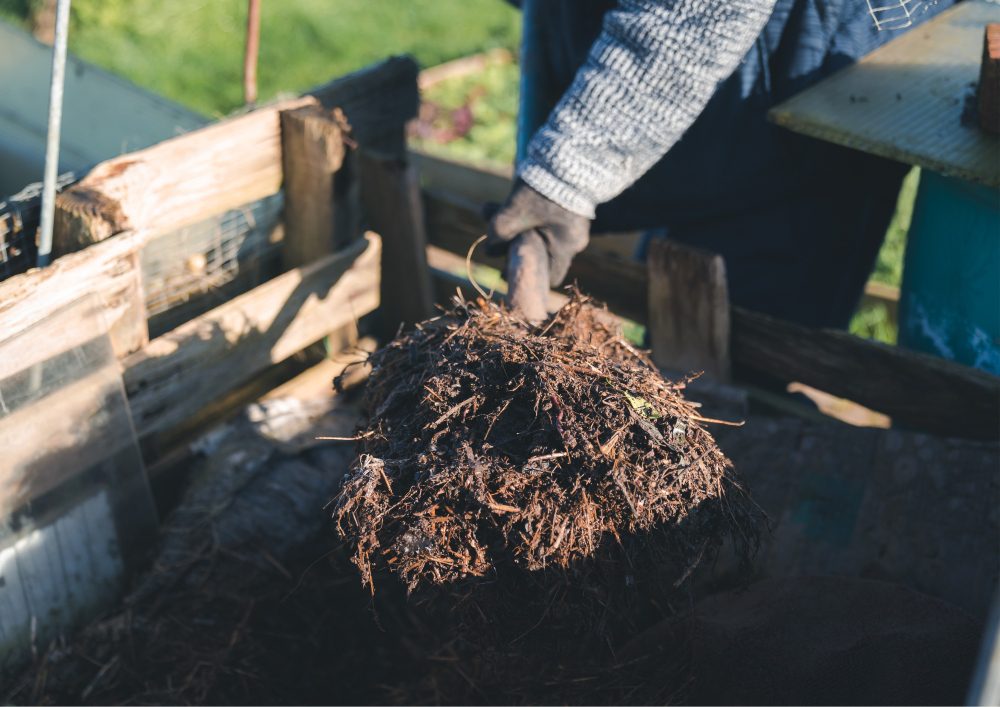
Harvest Your Compost
Over time, the bottom layer of your compost pile will transform into rich, dark soil. This is ready-to-use compost. Use a shovel to harvest this layer, leaving the layers above it intact for ongoing composting. The harvested compost is excellent for enhancing garden soil or as a mulch layer around plants.
Seasonal Considerations
Different seasons can affect your composting process. Winter, with its colder temperatures, may slow down composting. Conversely, the summer heat can dry out your pile or make it break down too quickly. Adjust your maintenance routine according to seasonal needs.
Troubleshooting Tips
Despite your best efforts, you might run into issues like bad odours, pests, or a pile that’s not decomposing. Most problems can be solved by adjusting the balance of greens and browns, improving aeration, or controlling moisture.
With these maintenance guidelines, your compost bin should run smoothly. Regular attention ensures you’ll get high-quality compost while minimizing problems like pests and odours. You’ll turn waste into a valuable resource and contribute to a more sustainable and eco-friendly lifestyle.
Conclusion
Creating and maintaining a DIY compost bin is an excellent way to contribute to a more sustainable lifestyle. It allows you to recycle kitchen and yard waste into valuable soil conditioners for your garden. With the right balance of materials and regular maintenance, you’ll have a functional compost bin that will serve you well for years.


