Last Updated on October 30, 2025 by teamobn
Solar energy is more accessible than ever, but installation costs can still add up for homeowners. Cutting costs is a priority for many solar enthusiasts, and building a DIY solar panel mount is a savvy way to install your panels on a budget. By making your own mounting system, you can save on hardware that typically makes up around 10% of a solar project’s cost.
In this guide, we’ll explain what solar panel mounts are and why they matter, provide a step-by-step walkthrough to build solar panel ground mounts yourself, share tips to boost your system’s efficiency, cover essential permitting and safety info, and even show how to mount solar panels on an RV roof. Let’s get started!
Contents
What Is a Solar Panel Mount and Why Does It Matter?
A solar panel mount (or racking system) is the framework that holds your solar panels in place at the proper angle and orientation. In simple terms, it’s the foundation that secures solar panels either on your roof or on the ground. Mounts are usually made of sturdy materials like aluminum or steel, designed to last for decades outdoors. They allow panels to be tilted toward the sun (often based on your latitude or seasons) to capture maximum sunlight and optimize energy production.
Solar panel mounts matter because they directly affect your system’s performance and safety. A well-designed mount ensures your panels face the right direction (usually true south in the northern hemisphere for best results) and at an optimal tilt angle, which can significantly boost solar conversion efficiency.
Additionally, the mount must withstand harsh weather conditions, such as strong winds, heavy rain, or snow, without budging. All solar mounting products (roof or ground) must meet strict structural guidelines to ensure durability and to prevent damage in high winds or storms.

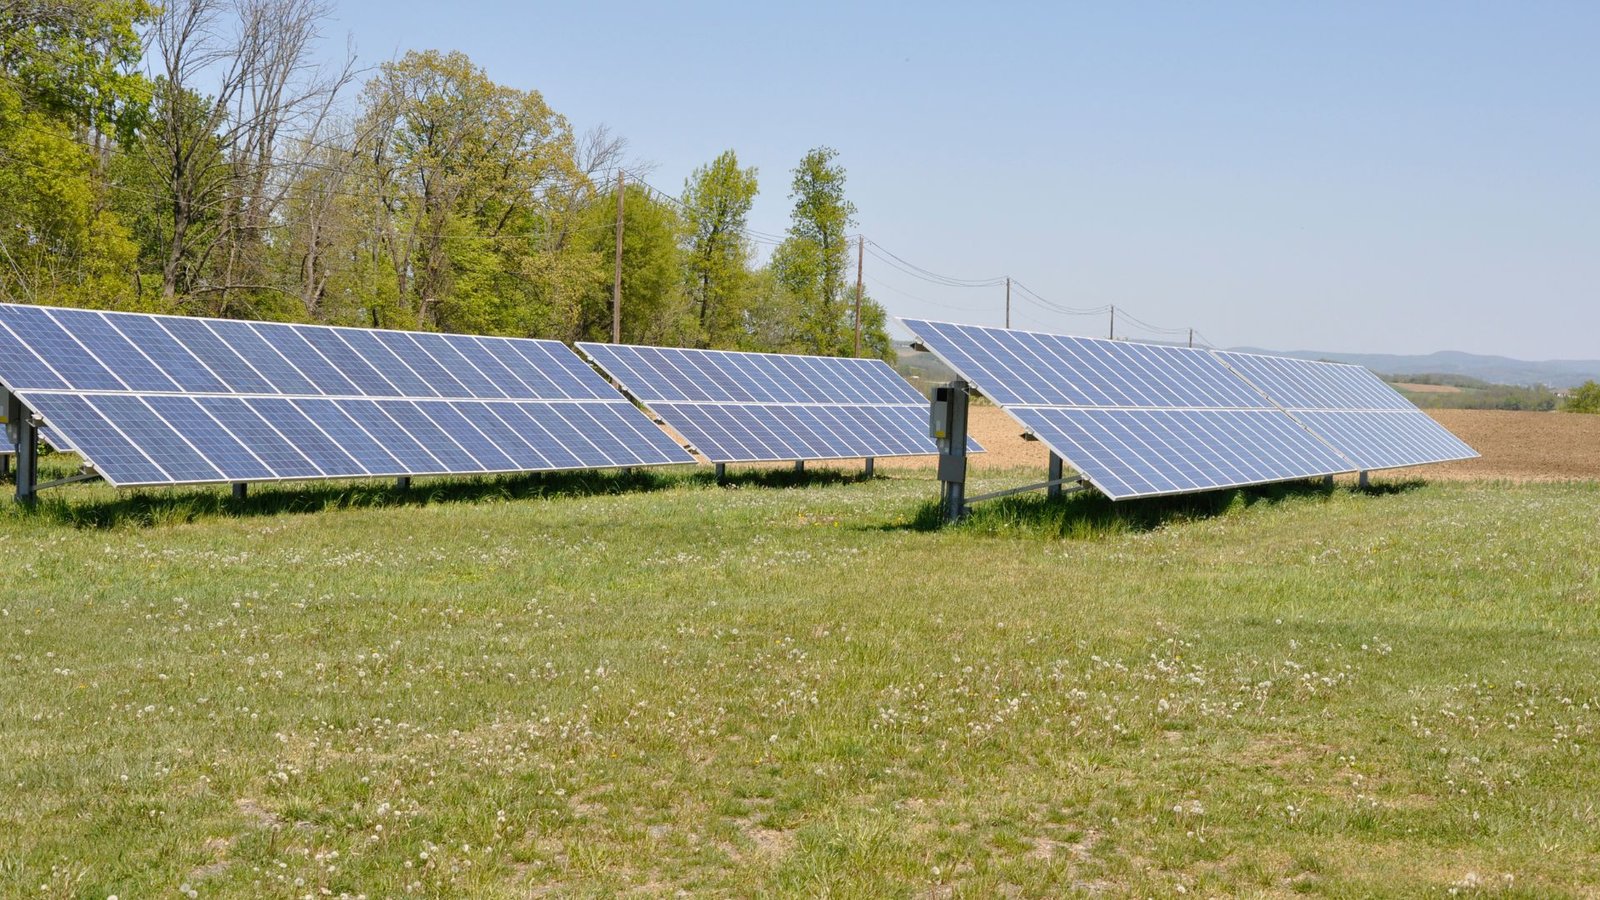
There are various styles of mounts to suit different needs. Roof mounts attach panels to your roof structure, while solar panel ground mounts sit on the land, independent of any building. Ground-mounted systems are popular for homeowners who have open space and want more control over panel placement. Ground mounts also make maintenance easier since you can access panels without climbing on a roof.
Another type of mounting to know about is a ballast mounting system. A solar panel ballast mounting system utilizes weight to secure the panels in place, rather than bolting them into the ground. For example, some ground arrays sit on concrete blocks or heavy frames—these ballasted mounts aren’t dug into the earth at all.
They simply rest on top of the soil (or a flat roof) and are held in place by the weight of the panels and added ballast. Ballasted ground mounts are popular in situations where you want to avoid drilling or disturbing the ground. The trade-off is that you must ensure there’s enough weight to resist wind uplift, and the structure might be bulkier to provide that stability.
How to Build a DIY Solar Panel Ground Mount (Step-by-Step Guide)
If you’re ready to roll up your sleeves, this section will guide you through building a basic ground-mounted solar panel rack. We’ll cover everything from planning and materials to assembly. By constructing your ground mount, you can tailor the design to your yard’s layout and save money on prefabricated racking. Just remember: even though it’s DIY, you should build as if an inspector is watching—sturdy construction and proper technique are key for a safe, long-lasting mount.
Tools and Materials Needed
- Solar panels (and their mounting brackets if provided)
- Mounting rails or strut channels – metal rails to which panels will be clamped
- Support structure – vertical posts and cross-beams (galvanized steel pipes or sturdy wooden posts plus steel angle or pipe)
- Concrete mix – for setting posts in the ground
- Hardware – stainless steel or galvanized bolts, screws, mid-clamps, end-clamps
- Grounding equipment – grounding lugs, copper wire, ground rod
- Wiring components – UV-resistant solar cables, conduit, junction boxes
- Tools: post hole digger or auger, shovel, tape measure, level, wrenches, socket set, power drill with bits, screwdriver, hammer, ladder or step stool, work gloves, safety glasses
(Adjust materials based on your chosen design, such as using pressure-treated lumber or metal pipes for longevity.)
Step-by-Step Assembly
- Choose the Ideal Location: Pick a spot with full sun, minimal shading, and relatively level ground. Ensure panels will face true south for best exposure and observe any local setback rules.
- Design and Measure the Layout: Plan your panel arrangement and mark post positions using stakes or spray paint. Keep rows aligned using a string line.
- Set Up the Foundation: Dig holes for vertical posts (typically 2–3 feet deep). Place posts, check for plumb, then pour concrete and let it cure. Angle posts if needed for tilt or brace as required.
- Build the Rack Frame: Attach horizontal beams across front and back posts at the correct height and tilt (often around 30°). Secure with brackets or U-bolts and verify alignment with a level.
- Attach Mounting Rails: Bolt or clamp rails to the frame matching your panel’s mounting hole pattern. Ensure rails are level and spaced correctly for the panels.
- Mount the Solar Panels: Lift panels onto the rails, align mounting holes, then fasten with end-clamps and mid-clamps. Torque to specifications and bond panels to rails for grounding.
- Wire Up and Finalize: Run cables through conduit to your inverter location. Secure wires, add grounding lugs, and complete connections per electrical code. Inspect all fasteners and wiring before energizing.
Tips for Optimizing Solar Conversion Efficiency
- Orient and Tilt for Maximum Sun: Aim panels toward the equator at an angle near your latitude. Adjustable tilt frames can boost seasonal output.
- Avoid Shading at All Costs: Even small shadows can drastically cut output. Trim foliage and space rows to prevent inter-row shading.
- Maintain Airflow: Leave a gap behind panels for cooling, as cooler panels perform better.
- Regular Cleaning and Maintenance: Hose off or gently scrub panels a few times a year and check for loose bolts after storms.
- Plan for Expansion: Build extra capacity into your mount (longer posts or space for more panels) to simplify future upgrades.
Permitting and Safety Considerations for Residential Solar Panel Mounting
Solar panel mounting is a rewarding DIY project that can slash your energy bills. Addressing permitting and safety up front ensures your installation is both legal and secure.
Permits and Codes
Most jurisdictions require both a building permit and an electrical permit before you begin. You will need to submit simple plans or diagrams showing your mounting structure and wiring layout. Inspectors review these to confirm compliance with structural standards and electrical safety codes. Pulling the right permits upfront prevents costly stop-work orders or fines later.
Setbacks and Zoning
Local zoning rules often dictate how close your ground-mounted array can be to property lines, fences, or roads. These setback requirements protect fire access, maintain sightlines, and respect neighbors’ space. Homeowner associations may impose additional guidelines on height, color, or screening. Verifying all setbacks and HOA rules before you dig helps avoid rework.
Structural Safety
Your mount must withstand the worst weather your area can throw at it—from wind gusts to heavy snow. Use sturdy materials such as galvanized steel or pressure-treated lumber, and anchor posts deeply in concrete footings.
Check every bolt and bracket for tightness, and consider locknuts or thread-locking washers to prevent loosening over time. A solidly built rack protects both your panels and your property.
Electrical Safety
All metal parts of your array—rails, frames, posts—must be properly grounded to protect against shock and lightning. Run a copper grounding conductor from the panels and rails down to a driven ground rod.
Follow local electrical codes for wire gauge, conduit use, and circuit protection. If you feel uncertain about any wiring step, hiring a licensed electrician for the final hookup is a smart investment.
Quality Components
Choosing UV-resistant, outdoor-rated hardware ensures long-term durability in sun, rain, and temperature swings. Opt for stainless steel or hot-dip galvanized bolts and clamps to prevent rust and corrosion.
Avoid generic zip ties; instead use solar-rated cable ties and sealants designed for rooftop and ground-level exposure. Investing in quality parts now reduces maintenance headaches later.
Protecting the Array
A simple fence or barrier around your ground-mounted panels deters children, pets, and wildlife from tampering with wiring or falling equipment. Keep at least a 3- to 5-foot clearance around the array for maintenance access and fire safety.
Remove brush, tall grass, and debris under and around the panels to lower fire risk and maintain airflow. Clear access also speeds up inspections.
Inspection and Testing
Once your mount and wiring are complete, schedule the required inspections without delay. Inspectors will check footing depths, framing integrity, grounding connections, and breaker sizing against your approved plans. After passing inspection, energize your system and verify output against expected performance. A final test run ensures everything works safely and efficiently before you call the project done.
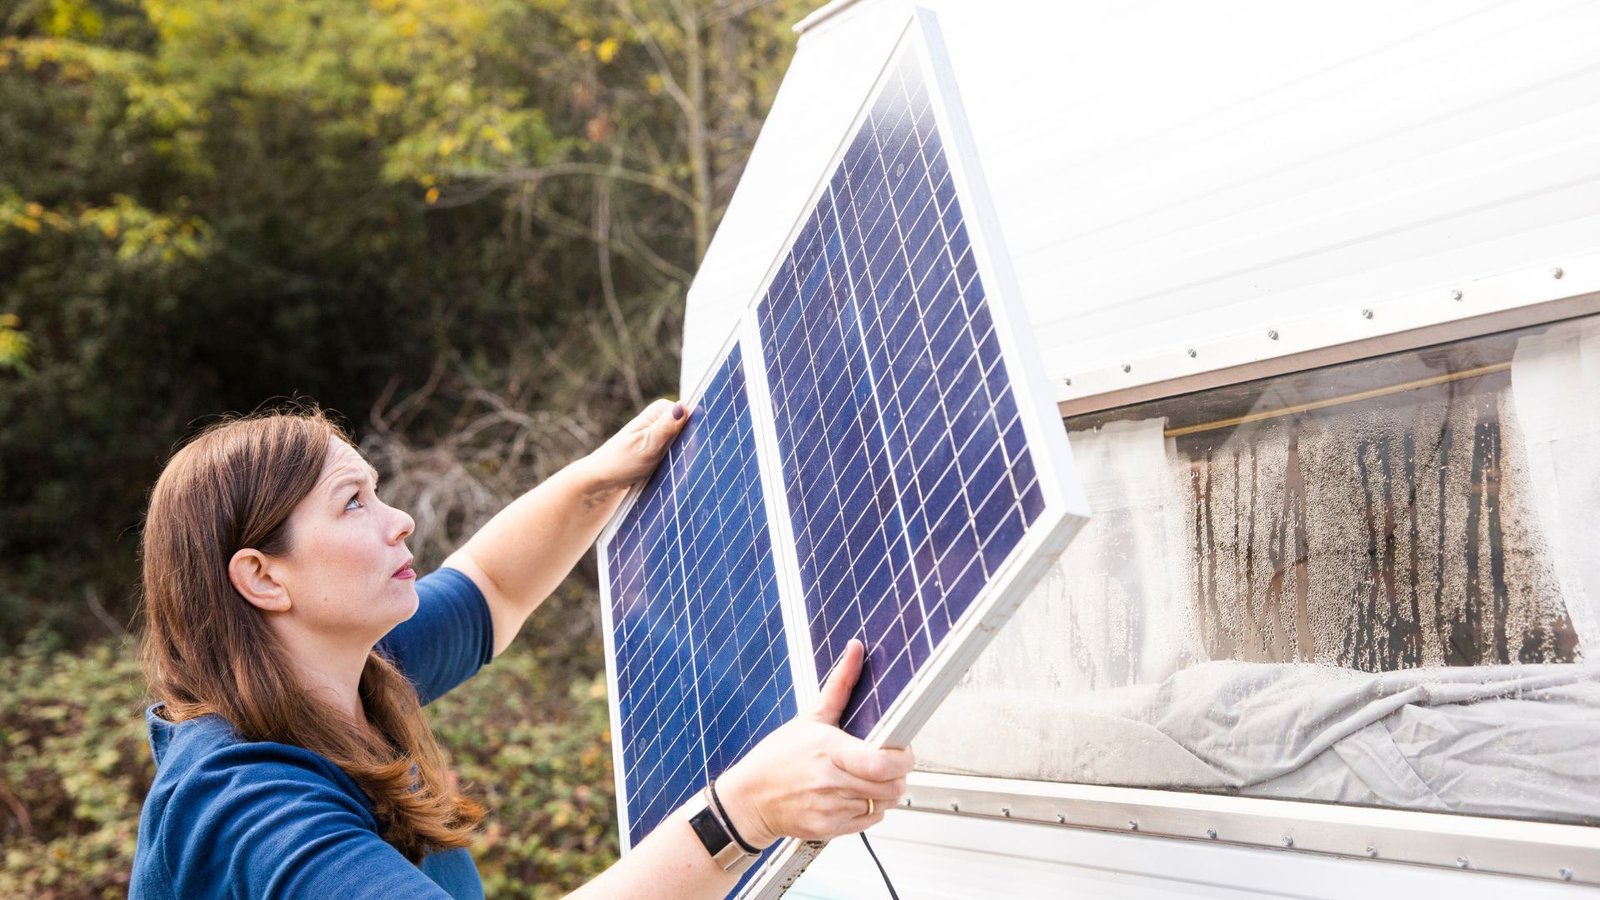
How to Mount Solar Panels on RV Roof
Mounting panels on an RV roof requires consideration for motion and a rooftop environment. Follow these steps for how to mount solar panels on RV roof:
Materials and Tools Needed
- Materials:
- Rigid solar panels or flexible solar panels
- L-brackets or Z-brackets (for rigid panels)
- Industrial adhesive or VHB tape (for flexible panels)
- Butyl tape
- RV-grade roof sealant (self-leveling lap sealant)
- Stainless steel screws and washers
- Waterproof cable gland
- UV-resistant cable ties
- Conduit for wiring
- Tools:
- Power drill with metal- and wood-drill bits
- Screwdriver or socket wrench set
- Caulking gun
- Tape measure and marker
- Ladder or stable platform
- Wire stripper and cutter
- Multimeter (for testing connections)
Steps:
- Choose Panels and Location: Select rigid or flexible panels, then dry-fit them on a flat, obstruction-free roof area.
- Attach Mounting Brackets: Bolt L-brackets or Z-brackets to rigid panels at mounting holes. For flexible panels, plan for adhesive only.
- Secure to Roof: Drill pilot holes through brackets into structural supports, seal holes with RV roof sealant, and fasten brackets with stainless steel screws.
- Use Adhesives for Extra Hold: Apply butyl tape or VHB tape under brackets for a waterproof gasket and added adhesion.
- Route Wires Safely: Use a waterproof gland for cable entry and conduit inside the RV. Secure cables with UV-rated ties.
- Consider Aerodynamics: Keep mounts low-profile, avoid high protrusions, and lock tilting arms flat before driving.
- Maintain on the Road: Inspect seals and hardware every few months. Reapply sealant annually to prevent leaks.
Conclusion: Time to Start Your DIY Solar Project
Building a DIY solar panel mount – whether ground-mounted for your home or rooftop on your RV – is a rewarding project that cuts costs and empowers you. You’ve learned what mounts are, how to build a sturdy ground rack, efficiency tips, permitting steps, and RV-specific mounting methods. Now grab your tools, secure your permits, and begin constructing your DIY solar panel mount. With careful planning and solid craftsmanship, you’ll soon enjoy clean, renewable energy powered by your own handiwork.
For more solar system guide, check out our article on maximizing your solar batteries!