Last Updated on July 23, 2024 by teamobn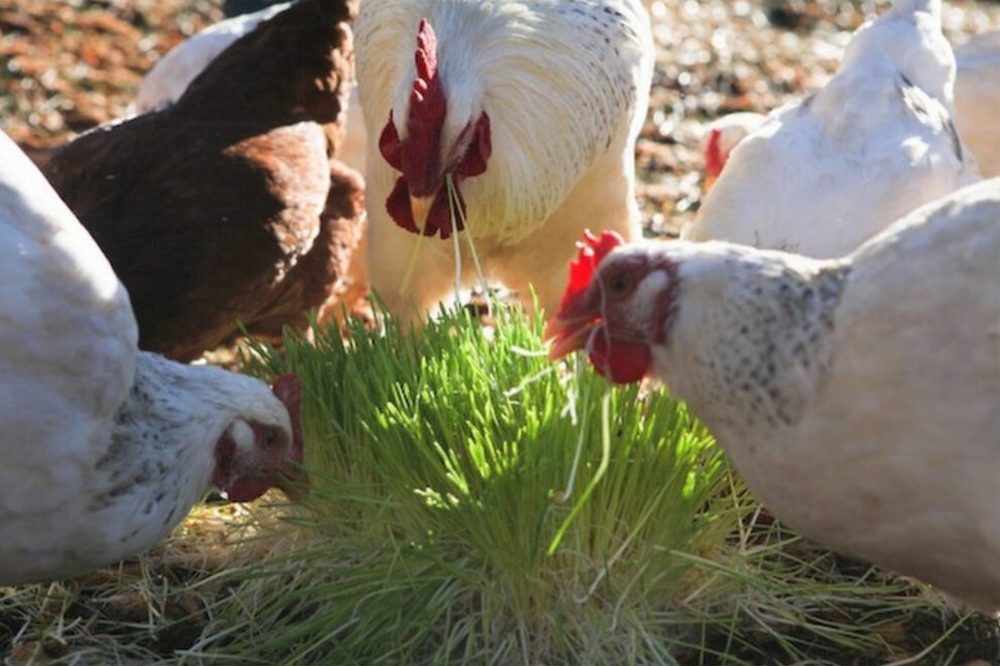
One sensible way to guarantee your chickens get organic, healthy food all year long is to grow chicken feed inside. This approach greatly reduces feed expenditures in addition to allowing you control over feed quality. This article will walk you through setting up your indoor fodder system, the best grains to use, and how to keep ideal growth conditions for rich, green sprouts your chickens will adore regardless of experience level.
Contents
Setting Up Your Indoor Chicken Fodder System
One great approach to give your chickens a consistent supply of fresh, nutrient-dense food is building an indoor fodder system. Just a few days with the correct arrangement will effectively produce lush green shoots from grains. This part will walk you through choosing the best spot, compiling the required tools, and the methodical process to have your indoor fodder system working.
Choosing the Right Location and Setup
The location of your indoor fodder system plays a crucial role in its success. You’ll need a space that:
- Has stable temperatures and is free from drastic fluctuations.
- Offers some control over light exposure, though artificial lights can be used if natural light isn’t sufficient.
- Is easy to clean, as hygiene is crucial to prevent mold and pests.
Garages, basements, or spare rooms are typically ideal choices due to their controlled environments.
Essential Equipment and Materials Needed
To start your indoor fodder system, you will need the following items:
- Trays: Shallow trays with drainage holes.
- Racks or Shelving: To hold the trays. Ensure they are sturdy and can handle the weight when the trays are full of wet grains and sprouts.
- Lighting: Fluorescent or LED grow lights if natural light is inadequate.
- Watering system: A simple sprinkler or mister to keep the grains moist.
- Thermometer and Hygrometer: To monitor temperature and humidity levels.
- Quality grains: Wheat, barley, or oats are popular choices.
Step-by-Step Setup Process
- Prepare your trays: Clean your trays thoroughly to prevent mold growth. Layer the bottom with a thin, even layer of seeds. Avoid overcrowding, as this can lead to mold and uneven growth.
- Soaking: Soak the grains in water for 8-12 hours to initiate germination, then drain and spread them on the trays.
- Position your trays: Place the trays on the racks or shelving system. If using grow lights, position them about 6 inches above the trays to provide sufficient light without overheating the sprouts.
- Daily care: Water the sprouts lightly but regularly to keep them moist. Avoid overwatering to prevent mold. Rotate the trays daily to ensure even light exposure and airflow around the grains.
- Monitor and adjust: Regularly check the temperature and humidity with your thermometer and hygrometer. Ideal growing conditions are typically around 60-70°F (15-21°C) with about 40-60% humidity.
Following these steps will create an optimal environment for growing chicken fodder indoors. This system enhances the diet of your chickens and promotes a sustainable approach to poultry feeding.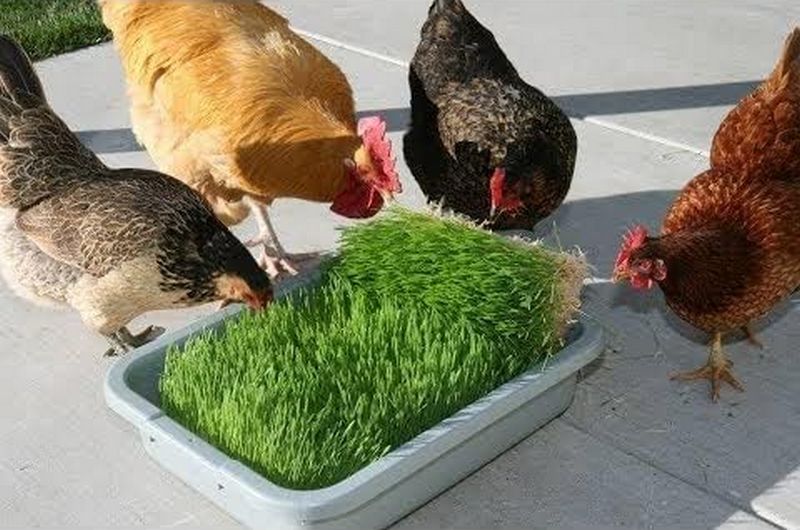
Selecting the Best Grains for Chicken Fodder
Maximizing the nutritional value of the feed and guaranteeing strong development and productivity depend on selecting appropriate grains for your indoor chicken feed system. Different grains have different advantages, hence it’s important to know which kinds fit your demands and how they affect your chickens’ health. The most efficient grains for chicken feed, their advantages, and advice on locating premium seeds are covered in this section.
Overview of Suitable Grains
The most commonly used grains for chicken fodder include:
- Wheat: One of the most often used crops for fodder systems is wheat, which is well-known for its fast development and great germination rate.
- Barley: Though it could need somewhat cooler circumstances than other grains, barley provides great nutritional content and is usually easy to grow.
- Oats: Though their germination rate is somewhat lower than that of wheat or barley, oats are prized for their great fiber count and positive benefits on digestive health.
Depending on your dietary objectives and chicken tastes, any one of these grains can be used either alone or in a combination. 
Benefits of Each Grain Type
- Wheat: high in protein and vital elements, can greatly improve chicken general health and output.
- .Barley: Rich in digestive-helping enzymes, barley sprouts enhance intestinal condition. Their anti-inflammatory actions are another well-known feature.
- Oats: Particularly high in beta-glucans, which boost immune system strength and control blood sugar levels, are oats. They also offer a decent supply of energy.
Tips for Sourcing Quality Seeds
- Buy certified seeds: Make sure the seeds are certified for sprouting and free of pesticides to reduce the possibility of toxins endangering your chickens.
- Bulk purchasing: To cut expenses, think about bulk purchases of seeds from reliable agricultural providers.
- Test germination rates: Test a little quantity of seeds for germination rate before committing to a big batch. This will enable you to evaluate the viability and quality of the seeds meant for use as feed.
Choosing the appropriate grains for your chicken feed system guarantees the sustainability and effectiveness of your feeding plan. It also improves the nutritional value of your chicken. Your indoor fodder system will optimize its effectiveness if you know the particular advantages of every grain and guarantee the quality of the seeds.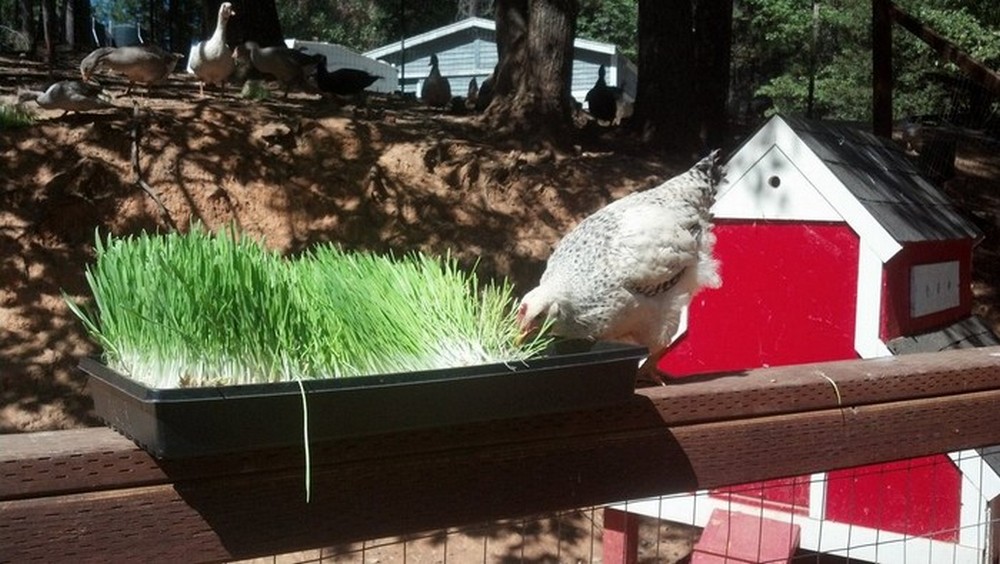
The Growing Process
Successfully growing chicken fodder indoors involves more than just planting seeds; it requires consistent care and attention to detail. This section will guide you through the daily maintenance routines, watering and lighting requirements, and the necessary climate control measures to ensure that your chicken fodder thrives. By understanding and implementing these steps, you can maximize the yield and quality of your chicken fodder, providing your chickens with nutritious and fresh feed.
Daily Maintenance Routines
Maintaining your chicken fodder system on a daily basis is critical for achieving optimal growth. Each day, inspect your trays for even seed distribution, signs of mold, or dry spots. Rotate the trays to ensure even light exposure and airflow, which are vital for uniform growth. Regularly cleaning your equipment and work area also prevents contamination and pest infestations, which are common challenges in growing chicken fodder indoors.
Watering Requirements
Water is essential for the growth of chicken fodder, but the amount and frequency can significantly impact the health of the sprouts. Water your chicken fodder lightly to maintain moisture without soaking the seeds, which can lead to fungal growth. A misting system can help provide a gentle, even distribution of water. Typically, watering twice a day—once in the morning and once in the evening—is sufficient to keep the fodder moist and promote healthy growth.
Lighting Requirements
Proper lighting is crucial for the growth of chicken fodder. If natural light is not sufficient, especially in winter months or in less exposed indoor settings, supplemental lighting such as fluorescent or LED grow lights is necessary. Position these lights about six inches above the chicken fodder to provide enough light without overheating. Aim for 12 to 16 hours of light per day to mimic natural daylight conditions, which helps encourage vigorous growth.
Temperature and Humidity Control
Optimal temperature and humidity are key to growing chicken fodder successfully. The ideal temperature range for chicken fodder is between 60-70°F (15-21°C), and the humidity should be maintained at 40-60%. Use a thermometer and hygrometer to monitor these conditions. Adjust your indoor environment using fans, heaters, or humidifiers to maintain these conditions, ensuring the rapid and healthy growth of chicken fodder.
These rules will help you to establish the perfect environment for indoor chicken fodder growth. Frequent attention to your fodder’s needs will produce a regular supply of fresh, green feed that will significantly improve the health and welfare of your chickens.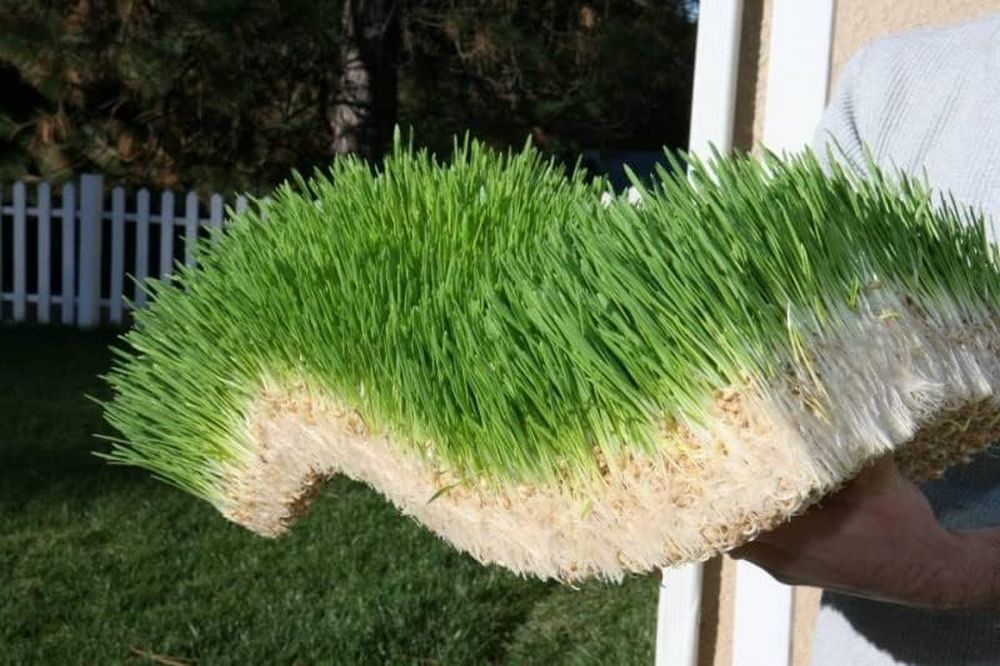
Harvesting and Feeding Your Fodder
Maximizing the nutritional value of your chicken fodder and ensuring your chickens get the most out of their new feed depend on careful timing and method of harvesting and feeding it. This section will walk you through the steps of effectively gathering your fodder and securely and successfully including it in your chicken diet.
When and How Should You Harvest Your Fodder?
Depending on the grain and growing conditions, the optimal time to gather your chicken fodder is when the sprouts are around 4 to 6 inches tall, usually 7 to 10 days after sowing. Harvest by simply cutting the mat of sprouts just above the root level with a sharp knife or scissors. Though beginning fresh is usually more hygienic, this method maintains the root mat, which can occasionally be used for a fresh batch of sprouts.
Getting Ready for Feeding the Fodder
After harvest, gently rinse the feed to eliminate any dirt and seed hulls. This guarantees your birds are eating safe and clean food. The fodder can be blended with other feed ingredients to provide a balanced diet or straight supplied to the hens after rinsing. Harvested fodder can also be kept fresh in the refrigerator for up to one week, ensuring it is available for use.
How Should Fodder Be Added to Your Chickens’ Meal Plan?
The health of your chickens depends on gradually introducing fresh feed. Start by gradually increasing the percentage over several days by first combining a tiny quantity of fodder with their normal feed. Allowing the chickens to gradually adapt to the new texture and nutrients helps to lower their digestive disturbance risk. Watch your chickens closely throughout this changeover phase to see any indicators of discomfort or indifference to the new meal.
Careful control of the feeding and harvesting techniques guarantees that your fodder stays a valuable and liked addition to your chicken diet. Along from improving their health, this fresh, nutrient-dense feed will help produce more vivid and active poultry.
Troubleshooting Common Issues
Even with careful planning and maintenance, you might encounter some challenges while growing chicken fodder indoors. Addressing these issues promptly can ensure your fodder remains healthy and continues to provide valuable nutrition to your chickens. This section outlines some common problems you might face, their possible causes, and practical solutions to keep your chicken fodder thriving.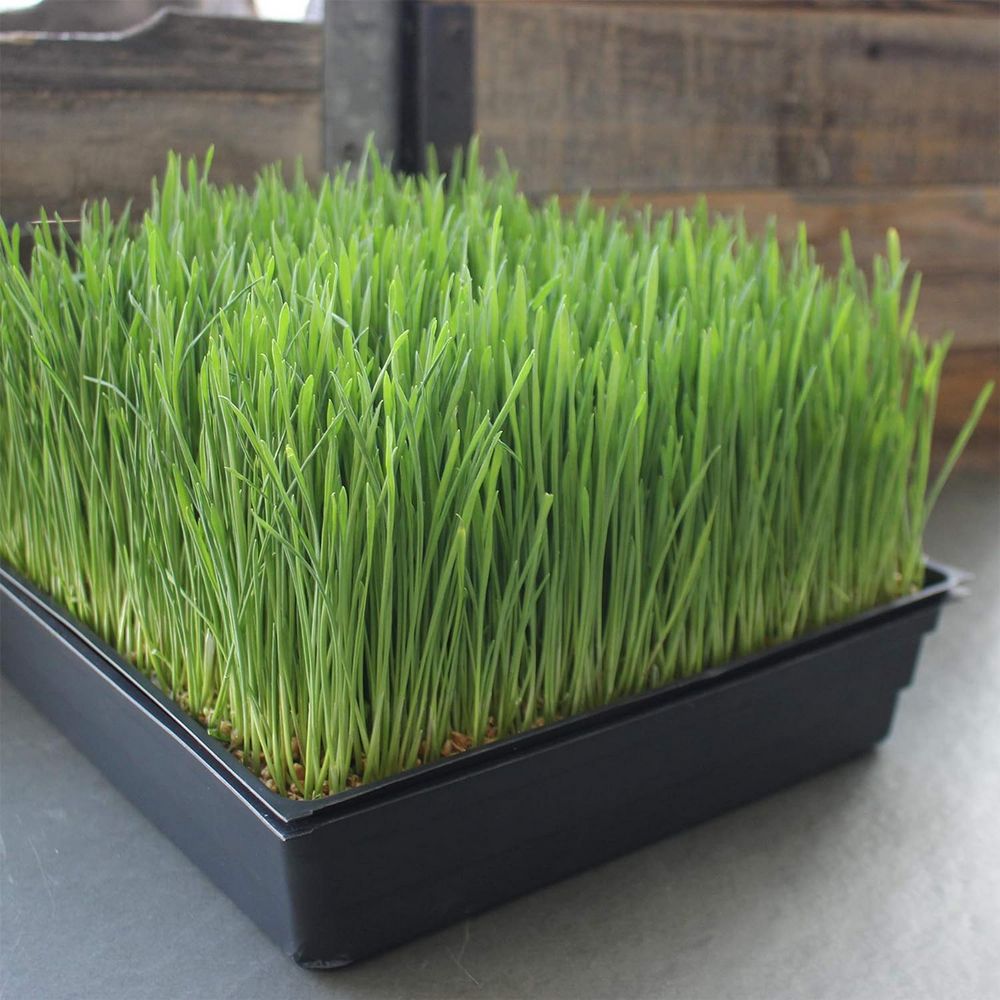
Mold and Mildew Prevention
Mold and mildew are common issues when growing chicken fodder, primarily due to excessive moisture and poor air circulation. To prevent these problems:
- Ensure your trays have proper drainage and are not oversaturated during watering.
- Improve air circulation around the fodder by using fans or ensuring adequate spacing between the trays.
- Regularly clean and sanitize all equipment and surfaces to remove mold spores and prevent recurrence.
Dealing with Slow Growth
If your chicken fodder is growing slower than expected, it could be due to inadequate light, suboptimal temperatures, or poor seed quality. To address slow growth:
- Verify that your lighting setup provides sufficient intensity and duration of light each day.
- Check the temperature and adjust heating or cooling measures to maintain the ideal range of 60-70°F (15-21°C).
- Test a new batch of seeds to ensure high germination rates, as old or low-quality seeds can significantly affect growth speed.
Rotating Trays for Even Growth
Uneven growth in fodder can result from inconsistent light exposure, which may cause some plants to thrive while others lag behind. To combat this:
- Regularly rotate the trays each day to ensure all parts of the fodder receive equal light, promoting uniform growth.
- Reposition your lighting setup if fixed, to distribute light more evenly across all trays.
- Consider using reflective materials around the trays to bounce light back onto the fodder from all angles, ensuring no area is left in shadow.
Organic Pest Control Methods
Pests can severely disrupt the growth of your fodder by damaging young sprouts or introducing diseases. To keep pests at bay:
- Apply neem oil: This natural pesticide deters a variety of pests without introducing harmful chemicals into your fodder. It’s safe for use around chickens and effective against common pests like aphids and mites.
- Introduce beneficial insects: Certain insects, such as ladybugs, can control pest populations naturally. Releasing these insects into your growing area can help maintain a balanced ecosystem.
- Maintain cleanliness: Regular cleaning of trays and the surrounding area reduces the likelihood of pest infestations and diseases spreading from old plant material or debris.
Adjusting Watering Schedules
Proper watering is critical for fodder growth but can lead to issues like mold or root rot if not managed correctly. To optimize your watering schedule:
- Monitor ambient humidity and temperature daily: Use a hygrometer to keep track of environmental conditions. Higher humidity may require less frequent watering to prevent excessive moisture.
- Set up a consistent watering routine: Water your fodder at the same times each day to maintain a routine that keeps the sprouts adequately moist but not waterlogged.
- Use misting systems for even watering: These systems distribute water evenly and gently across the fodder, reducing the risk of overwatering in certain areas.
You can maintain a healthy and productive environment for growing chicken fodder by effectively troubleshooting these common issues. Addressing problems quickly not only saves your current batch but also improves your technique for future cycles, ensuring your chickens always have access to fresh, nutritious fodder.
Benefits of Growing Chicken Fodder Indoors
Growing chicken fodder indoors offers several advantages that can benefit both your chickens and your overall farming operation. This controlled environment allows for year-round production, providing consistent, high-quality feed. Here, we explore the key benefits of this approach, emphasizing the nutritional, economic, and quality control aspects.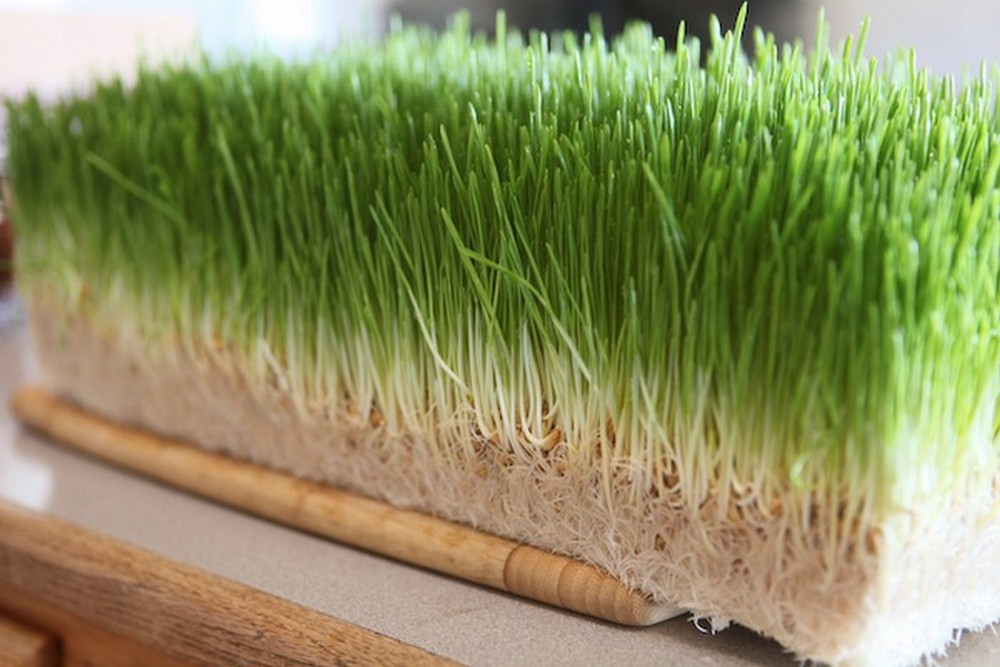
Nutritional Value of Fodder for Chickens
Chicken fodder, typically composed of sprouted grains, is packed with nutrients essential for the health and growth of poultry. This results in better eggs. These nutrients include:
- Increased enzyme activity, which aids in digestion and nutrient absorption.
- Higher levels of vitamins such as Vitamin E and B vitamins, which promote health and productivity.
- Essential amino acids and minerals, which are crucial for the development of strong, healthy chickens.
The fresh sprouts from an indoor fodder system ensure that your chickens are receiving live, enzyme-rich food, which can lead to improved overall health and reduced feed costs.
Cost-Effectiveness Compared to Traditional Feed
Indoor fodder systems can be highly cost-effective for several reasons:
- Reduced feed costs: Growing your own fodder can significantly reduce the amount you spend on commercial feeds.
- Less wastage: You grow and harvest what your chickens need, reducing the waste often associated with store-bought feed that may spoil or become contaminated.
- Low start-up and maintenance costs: Once established, fodder systems require minimal inputs other than seeds and water, making them an economical choice over the long term.
Control Over Feed Quality and Safety
Growing chicken fodder indoors gives you complete control over the quality and safety of the feed, which is a significant advantage because:
- You avoid the risk of contaminants such as pesticides and other chemicals often found in commercially produced feeds.
- You can ensure the freshness of the feed, which is not always possible with purchased feed.
- You can adapt or change the fodder mixture based on the specific nutritional needs of your chickens or to address any health issues.
By integrating an indoor chicken fodder system into your farming practices, you gain not just more control over your feed’s quality and cost but also enhance the health and productivity of your poultry. This method supports a sustainable, self-reliant approach to poultry farming, ensuring that your chickens have access to the best possible nutrition all year round.
Conclusion
Making an indoor chicken feed system is a satisfying approach to guaranteeing your chickens always have a consistent supply of fresh, nutrient-dense food. With basic tools and some regular upkeep, you can grow several grains, including wheat, barley, and oats, right in your house. This method not only cuts feeding expenses but also lets you control feed quality, therefore encouraging better and more productive fowl.