Last Updated on March 11, 2024 by teamobn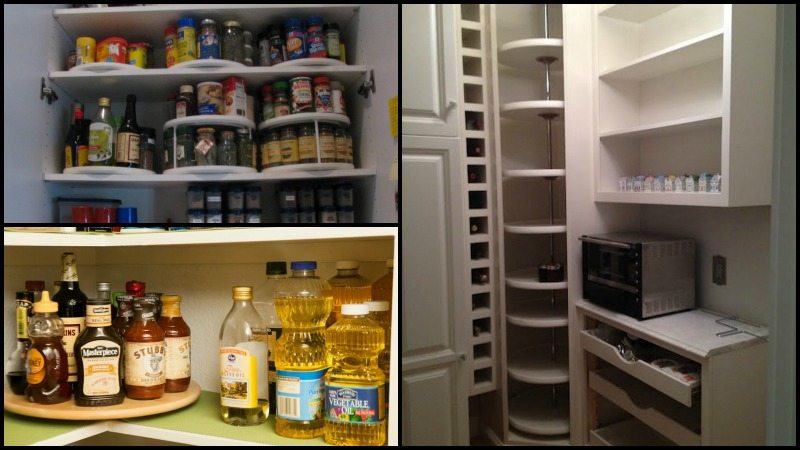
If you keep on pulling a bunch of stuff off your pantry shelves to reach or find items that you need, then this lazy Susan pantry storage might be the solution you’re looking for!
Messy kitchens not only look dirty, but they also make you easily lose your cooking utensils, food jars, cups, and supplies. One of the easiest ways to around this problem is to add a kitchen pantry storage that further improves storage and organization.
The Lazy Susan mechanism offers ease of access without disarranging everything on your shelves. The bigger your pantry, the harder it is to find what you need. This food storage solution definitely makes life in the pantry hassle-free.
Non-skid turntables are available in different sizes for you to choose from, depending on the size of your pantry. If you have leftover plywood, you can also use them to install a lazy Susan bearing.
Building a Lazy Susan Pantry Storage
Materials
or
- Plywood
- Lazy Susan Bearings
Tools
- Drill
- Measuring Tape
- Jigsaw (if needed)
Instructions
Step 1: Decide on the Size
First, determine the size of the Lazy Susan you need based on the space available in your pantry and the items you plan to store on it. If using plywood, measure and mark the desired diameter on your plywood sheet for either a 9-inch, 12-inch, or 18-inch turntable.
Step 2: Cut the Plywood (if applicable)
If you’re creating the turntable from plywood, use the jigsaw to carefully cut out the circle you’ve marked. Ensure the edges are smooth and even. If you’re using a pre-made turntable, you can skip this step.
Step 3: Prepare the Lazy Susan Bearing
Take the Lazy Susan bearing and place it at the center of the base where you plan to install the turntable. If using plywood, this will be on the bottom side of the plywood circle you’ve cut. Use the measuring tape to center the bearing accurately.
Step 4: Mark Drill Holes
With the bearing in place, use a marker to mark the drill holes onto the base or plywood. Ensure that the bearing is properly aligned and centered before marking.
Step 5: Drill the Holes
Remove the bearing and use the drill to make holes where you’ve marked. Be cautious to use a drill bit that matches the size of the screws you’ll be using to attach the bearing.
Step 6: Attach the Bearing
Place the bearing back over the holes, aligning it with the holes you’ve drilled. Use the drill and screws to securely attach the bearing to the base or plywood circle. Ensure it’s tightly fastened to prevent any wobbling.
Step 7: Attach the Turntable
If you’re using plywood, now is the time to attach the plywood circle to the top part of the bearing. This process will be similar to attaching the bearing to the base: align the top part of the bearing with the plywood, mark the drill holes, drill, and then screw the plywood onto the bearing. If using a pre-made turntable, it should come ready to be placed onto the bearing without further assembly.
Step 8: Test Your Lazy Susan
Place your new Lazy Susan in its designated spot in the pantry. Test the spin functionality to ensure it rotates smoothly without obstruction. If you encounter any stiffness or uneven movement, check to ensure all components are securely fastened and that the bearing is not obstructed.
Step 9: Organize Your Pantry Items
Once your Lazy Susan is installed and functioning smoothly, organize your pantry items on it. This is an excellent opportunity to declutter and categorize items for easy access.
Benefits of Lazy Susan Pantry Storage
Implementing a Lazy Susan pantry storage system can significantly enhance the functionality and organization of your kitchen. This ingenious solution revolves around convenience and accessibility, making it easier to find and reach items in your pantry.
Below, we explore the key benefits of integrating Lazy Susan pantry storage into your home.
Maximizes Space Utilization
One of the primary advantages of Lazy Susan pantry storage is its ability to maximize space utilization. By incorporating a rotating mechanism, it ensures that every inch of shelf space is utilized effectively.
This is particularly beneficial for corner cabinets or deep shelves where items tend to get lost or forgotten. With a Lazy Susan, these previously underutilized spaces become fully accessible, allowing you to store more items in the same footprint.
Enhances Accessibility
The rotating design of Lazy Susan pantry storage dramatically enhances accessibility. Instead of reaching deep into the back of a cabinet or shelf, you simply spin the Lazy Susan to bring items to the front.
This feature is especially helpful for individuals with mobility issues or those who find bending and stretching to access items challenging. Every pantry item is easily within reach, reducing the time and effort needed to find what you’re looking for.
Improves Organization
Lazy Susan pantry storage encourages better organization within your kitchen. By segmenting your storage space into dedicated zones on the turntable, you can categorize and group items together, such as spices, baking ingredients, or canned goods.
This systematic approach not only makes items easier to find but also helps keep your pantry looking neat and tidy. Moreover, the visibility provided by the Lazy Susan means you can quickly see what you have, preventing overbuying and reducing waste.
Reduces Clutter
Integrating Lazy Susan pantry storage helps reduce clutter by providing a designated spot for each item in your pantry. The revolving feature ensures that all items have their place and can be easily accessed without having to move other items out of the way.
This decluttering effect can make your pantry feel more spacious and organized, creating a more pleasant and efficient kitchen environment.
Versatile Storage Solution
The versatility of Lazy Susan pantry storage is another significant benefit. It can be used in various settings beyond the pantry, such as in cabinets for pots and pans, under the sink for cleaning supplies, or even on countertops for frequently used items.
The flexibility of the Lazy Susan system allows it to meet a wide range of storage needs, making it a valuable addition to any kitchen.
A lazy Susan pantry storage offers numerous benefits that can transform your kitchen experience. From maximizing space and enhancing accessibility to improving organization and reducing clutter, the advantages of incorporating a Lazy Susan into your pantry are clear. This versatile storage solution can make a significant difference in the functionality and efficiency of your kitchen, simplifying your daily routines and making cooking and meal preparation a breeze.
Click on any image to start the lightbox display. Use your Esc key to close the lightbox. You can also view the images as a slideshow if you prefer 😎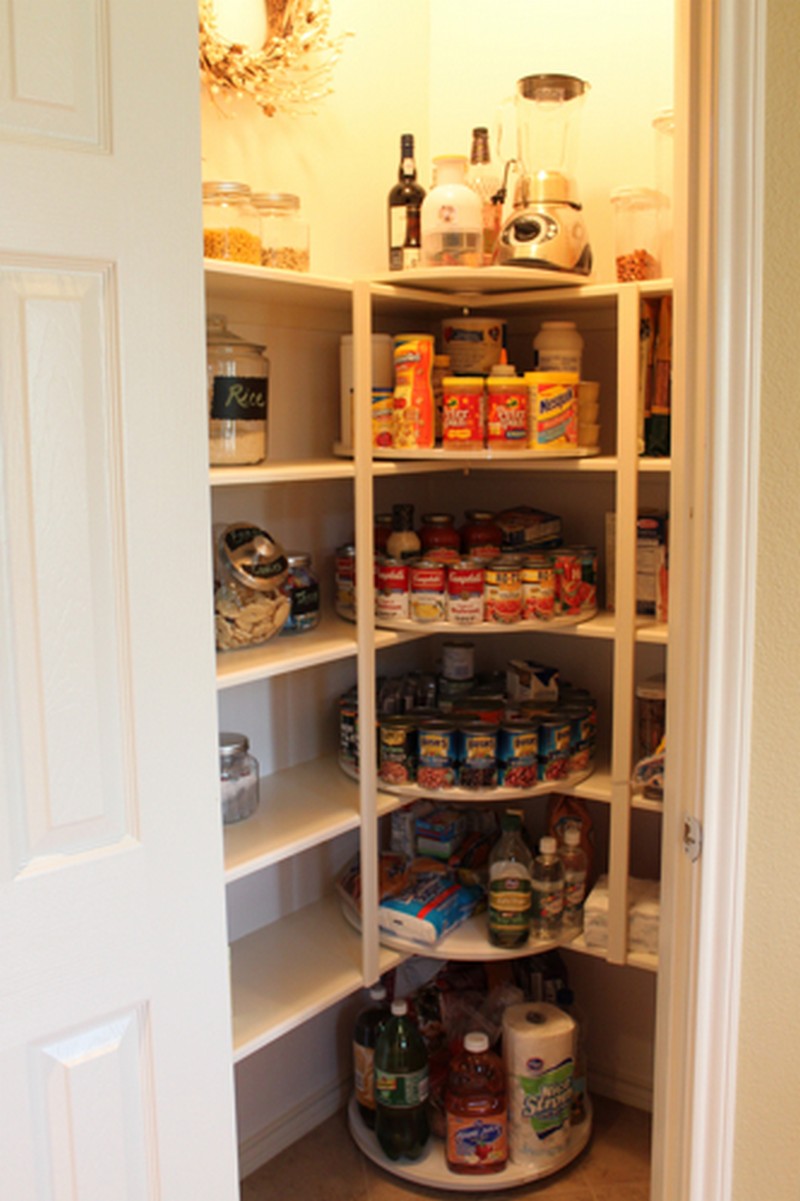
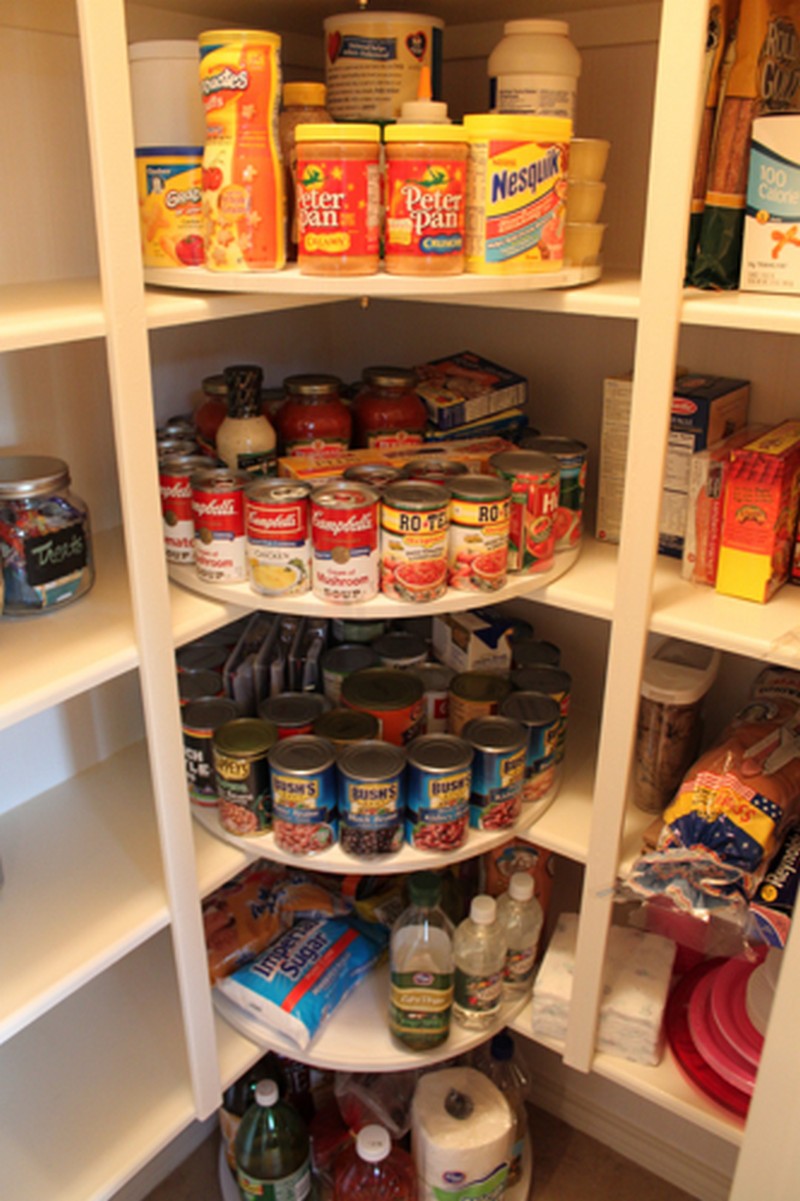
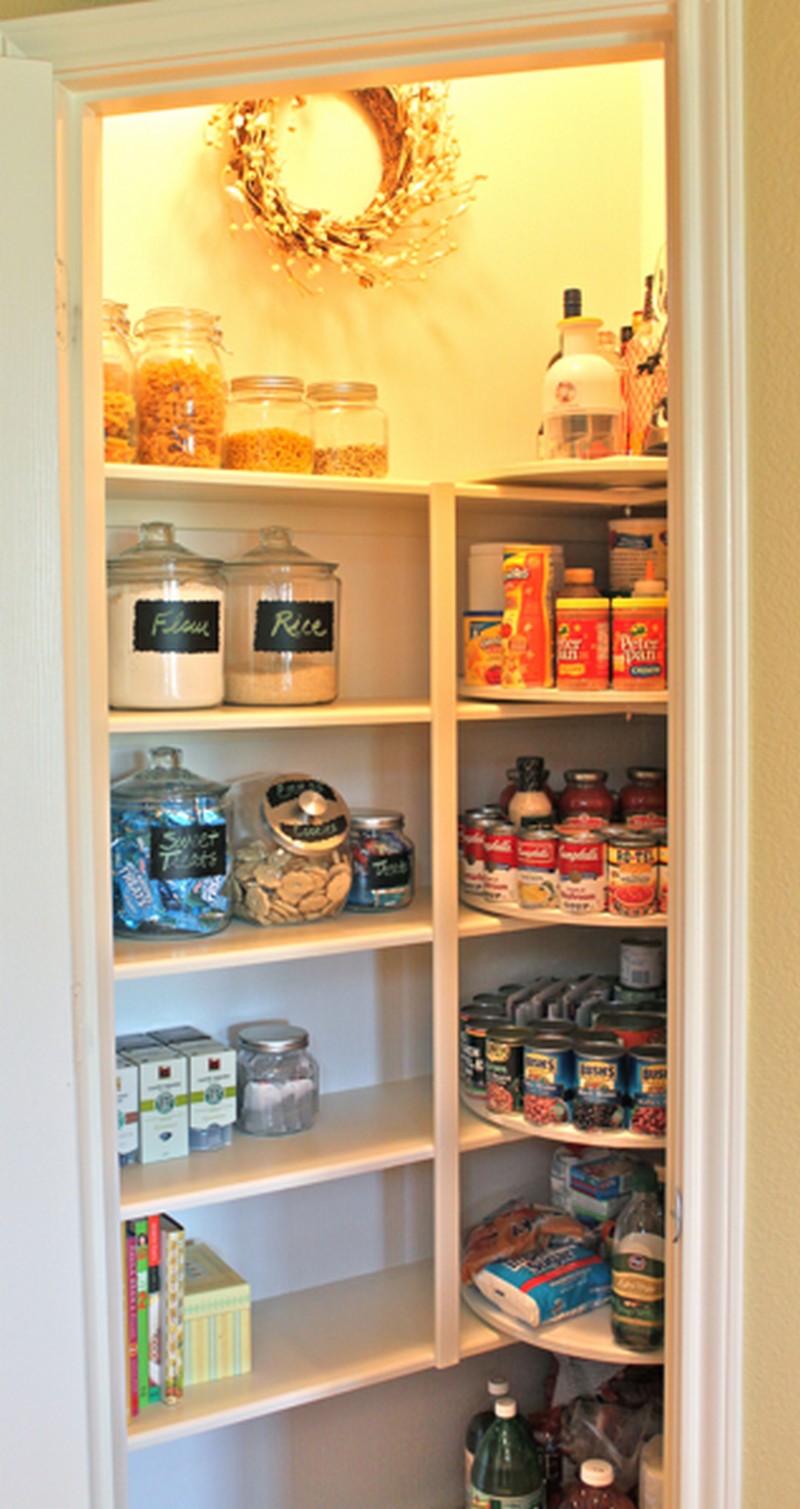
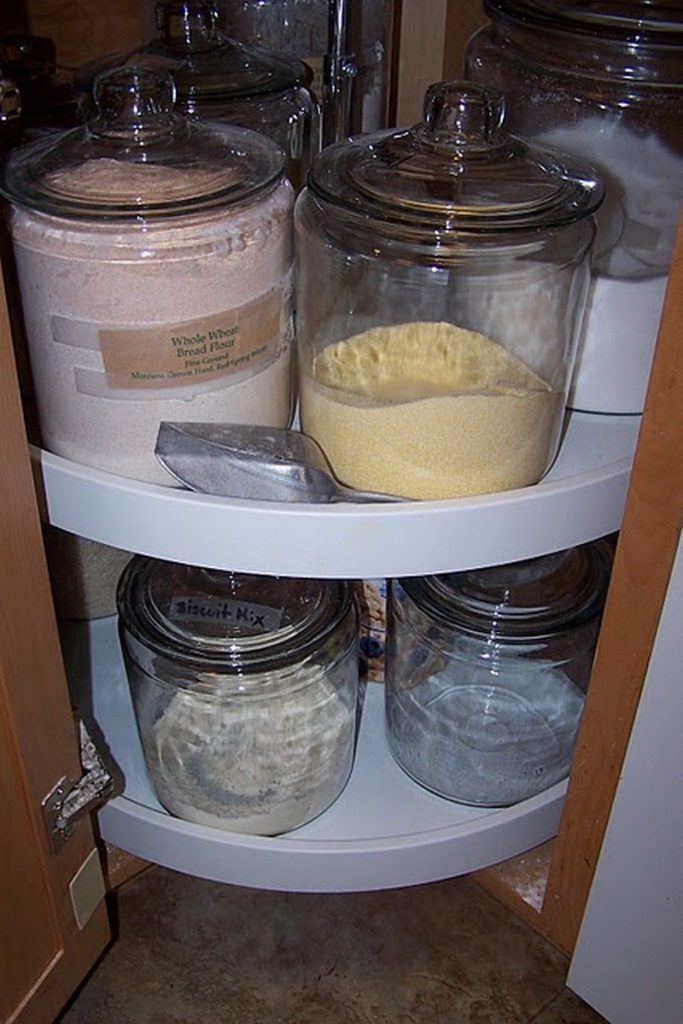
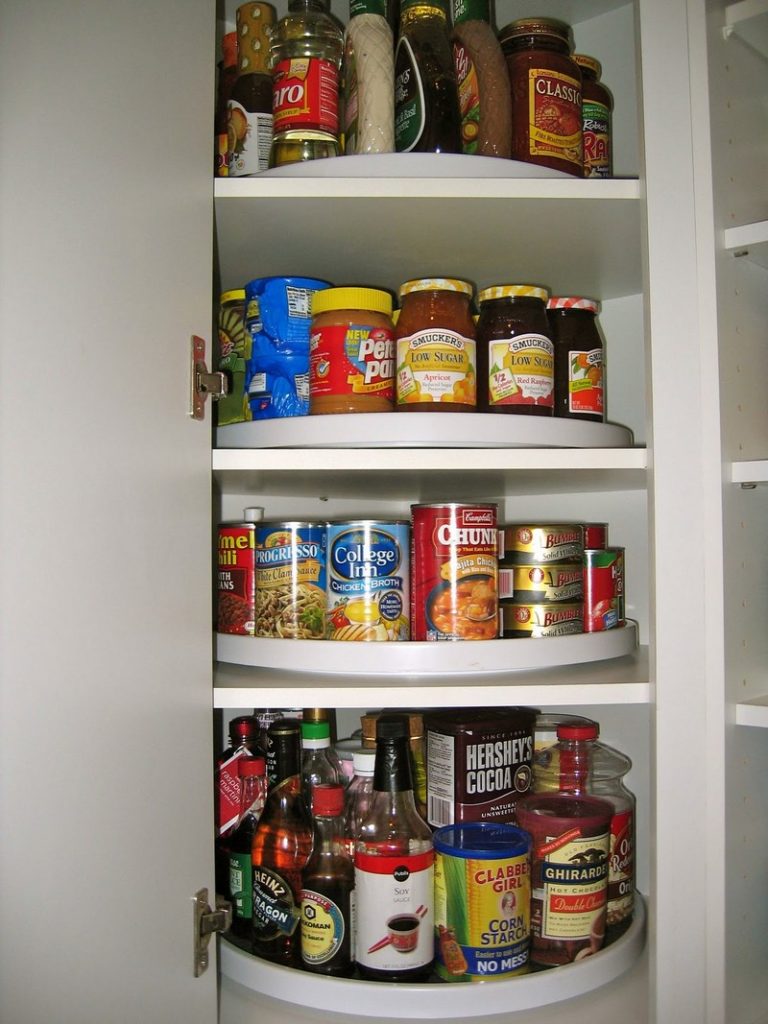
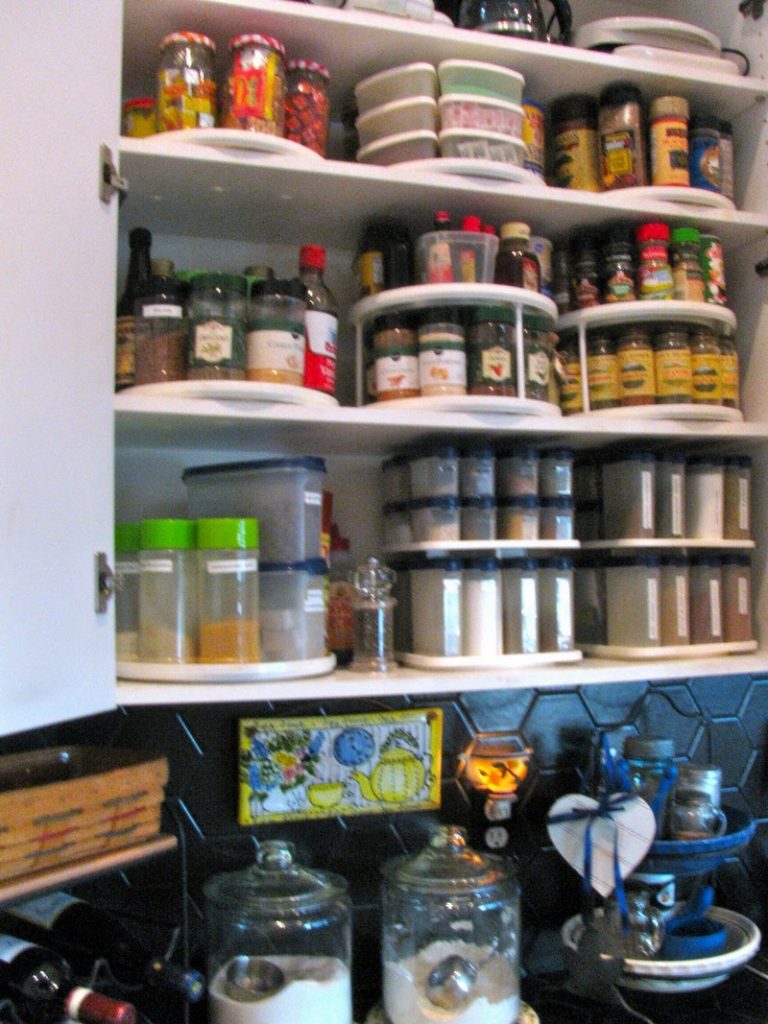
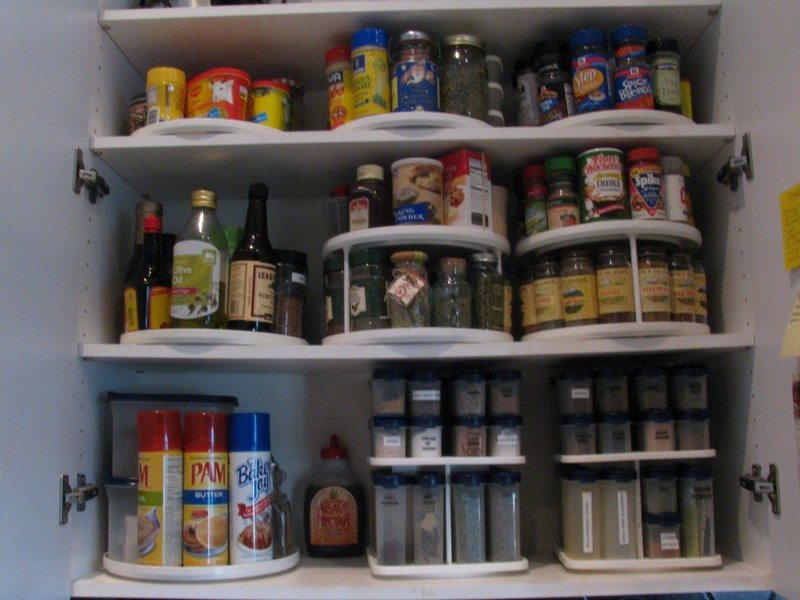
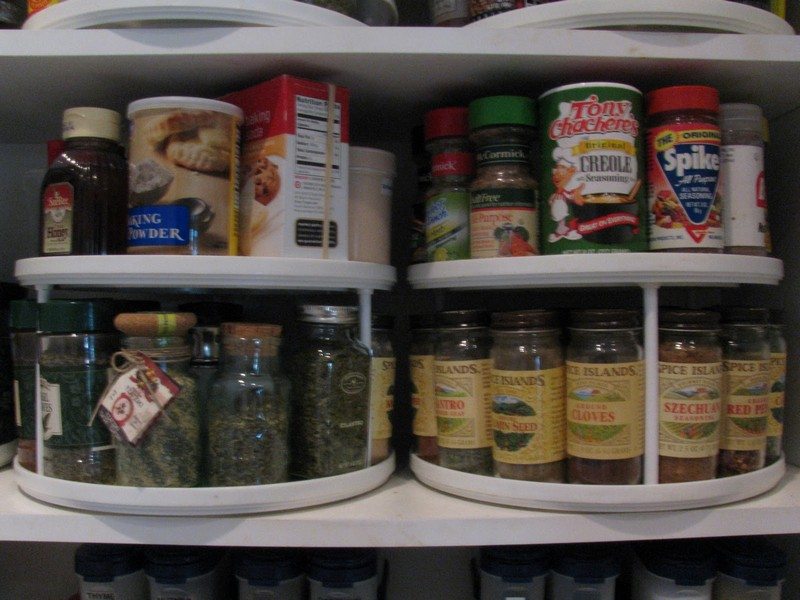
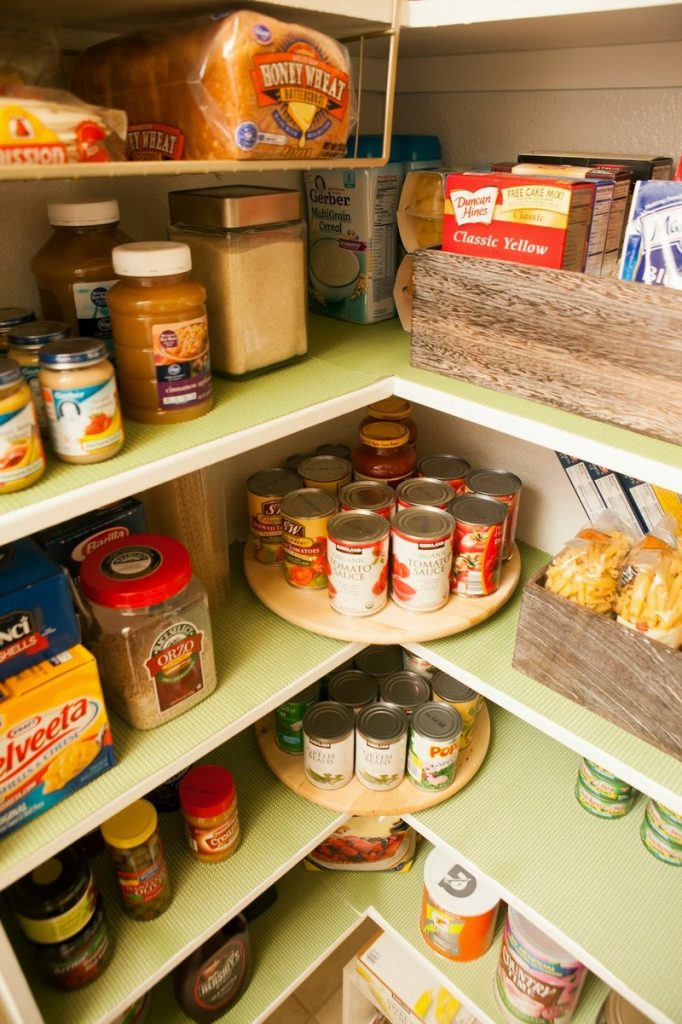

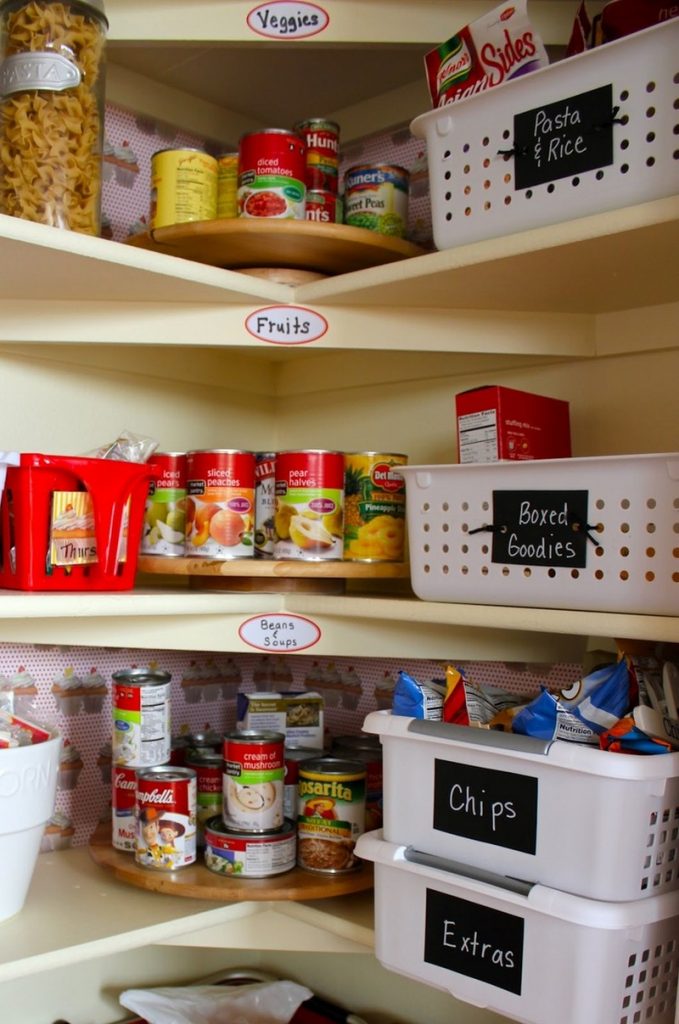
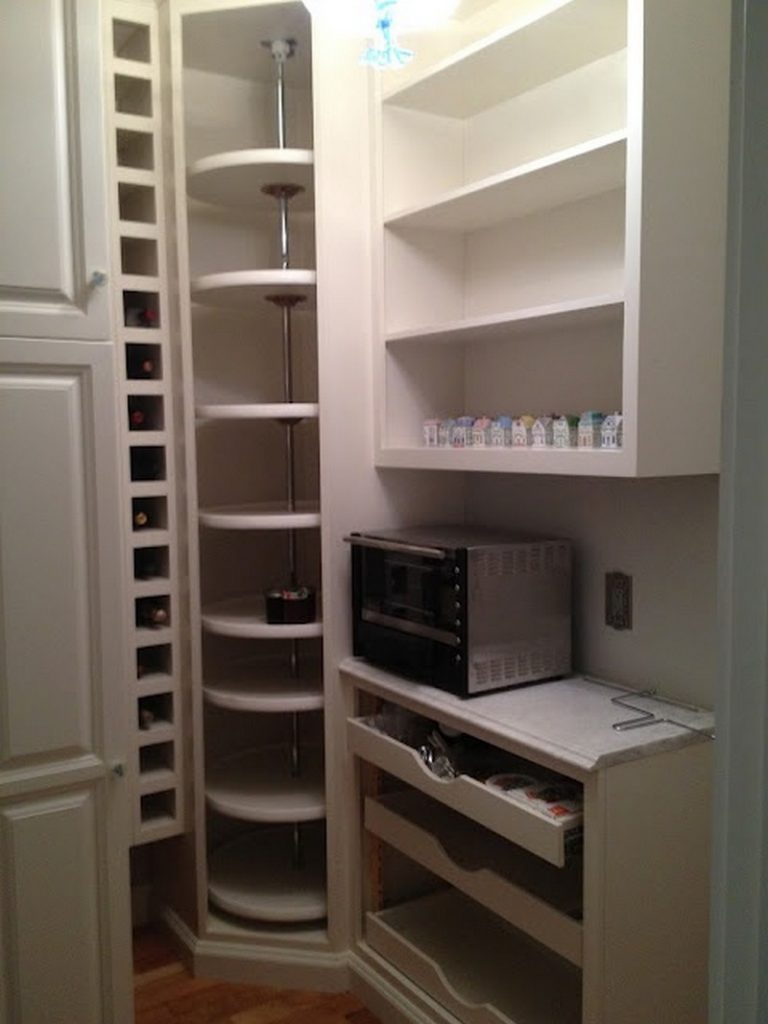
Designing Your Lazy Susan Pantry Storage
Designing your Lazy Susan pantry storage is a creative process that enhances the functionality and organization of your kitchen space. A well-designed Lazy Susan can transform your pantry, making it easy to access and retrieve items without the hassle of searching through cluttered shelves.
Below, we explore key considerations and steps for designing an effective Lazy Susan pantry storage system that meets your specific needs.
Assess Your Pantry Space
When integrating Lazy Susan pantry storage into your kitchen, the initial step is to thoroughly assess the available space within your pantry. This involves taking precise measurements of the depth, width, and height of the shelves or any designated area for the Lazy Susan installation. It’s also important to consider the types of items you aim to store on the Lazy Susan.
Take into consideration the spice jars, canned goods, or bulkier items you plan on storing. It will help you understand the dimensions and variety of your pantry items. This understanding will guide you in determining the most suitable size and quantity of Lazy Susans required.
This careful evaluation of your space and storage requirements is fundamental in creating a Lazy Susan pantry storage solution that enhances the efficiency and functionality of your pantry. It ensures that every inch of space is utilized effectively and every item is easily accessible.
Choose the Right Size
Selecting the correct size for your Lazy Susan pantry storage is crucial to its effectiveness in organizing and optimizing your pantry space. Lazy Susans are available in a variety of sizes, typically ranging from 9-inch, 12-inch, to 18-inch diameters, catering to different space requirements and storage needs.
For compact pantries or smaller cabinets, a 9-inch Lazy Susan may be perfectly adequate, efficiently storing smaller items while making the most of limited space. Conversely, for more spacious pantries, an 18-inch model can accommodate larger containers and bulkier items, providing ample storage without sacrificing accessibility.
For those with extensive pantry shelves, consider the strategic use of multiple Lazy Susans, each dedicated to different categories of pantry items. This approach not only maximizes space but also significantly enhances organization, allowing for specific sections to be allocated for spices, baking supplies, canned goods, and more.
By carefully choosing the right size and configuration of Lazy Susan pantry storage, you can dramatically improve the usability and orderliness of your pantry, making every cooking and meal preparation task more efficient and enjoyable.
Material Selection
The choice of material for your Lazy Susan pantry storage can influence both its appearance and durability. While pre-made turntables are commonly found in plastic or wood, those opting for a DIY approach with plywood have the flexibility to customize the finish.
Consider the weight of the items you plan to store and choose a material that can support them without sagging or breaking. For a cohesive look, select materials and finishes that complement your pantry’s or kitchen’s existing decor.
Incorporate Lazy Susan Bearings
At the core of every efficient Lazy Susan pantry storage system lies its bearing mechanism, the pivotal component that facilitates the seamless rotation of the turntable. It’s imperative to choose high-quality Lazy Susan bearings that are robust enough to support the weight of all the items you plan to store.
The bearing must be appropriately sized to match the diameter of your turntable, ensuring that it can rotate smoothly without any hindrance. The precision in selecting and installing these bearings is crucial for the Lazy Susan to operate flawlessly.
A smooth and effortless spin is essential for easy access to all your pantry items, making the bearing mechanism a vital consideration in the design and functionality of your Lazy Susan pantry storage. Proper installation and alignment of the bearings are paramount to avoid any jerky movements or instability, which could impact the user experience and the longevity of the Lazy Susan itself.
Customize for Your Needs
Customizing your Lazy Susan pantry storage is a strategic approach to achieving a highly organized and personalized pantry setup. By incorporating dividers or bins within your Lazy Susan, you can create designated sections for different types of items, significantly simplifying the task of locating what you need quickly. This customization can be particularly beneficial for organizing a variety of items such as spices, snacks, and baking ingredients, ensuring each has its designated spot.
For those dealing with taller pantry shelves, the innovative idea of stacking multiple Lazy Susans vertically can be a game-changer. This not only leverages vertical space effectively but also keeps all items within easy reach, making the most of the available pantry height.
Adding personal touches, such as labeling each section of the Lazy Susan, further enhances its functionality. Labels can guide users at a glance, making it even simpler to find items and maintain order within the pantry. These customizations make your Lazy Susan pantry storage not just a space-saving solution but a tailored organization system that caters specifically to your needs and preferences, elevating the overall efficiency and usability of your pantry.
Installation Considerations
When incorporating Lazy Susan pantry storage into your kitchen, planning the installation process with meticulous attention to detail is crucial for achieving the best results. One of the primary considerations is ensuring there is ample clearance both above and around the turntable.
This space is essential to prevent items from tipping over or becoming lodged between the Lazy Susan and the pantry walls, which could hinder its smooth rotation and accessibility. The convenience of reaching for spices, jars, or any pantry item without the hassle is a cornerstone of the Lazy Susan’s appeal, making clearance a vital factor.
For those opting for a built-in Lazy Susan pantry storage solution, the precision in measurements and alignment cannot be overstated. Before securing the Lazy Susan mechanism and platform in place, it’s imperative to double-check all measurements to ensure a perfect fit within the designated pantry space.
An accurate alignment guarantees that the Lazy Susan will operate smoothly, providing effortless access to pantry items with just a simple spin. This meticulous preparation helps avoid any future issues, such as uneven spinning or difficulty in accessing items, ensuring the Lazy Susan pantry storage becomes an integral, hassle-free part of your kitchen organization.
For a freestanding Lazy Susan pantry storage option, stability is key. It’s important to ensure that the Lazy Susan sits level on the pantry shelf to prevent any wobbling or instability during use.
An uneven Lazy Susan could lead to items sliding or falling off, detracting from its functionality and the overall organization of your pantry. Using a level to check the surface before placement can help achieve the necessary stability for a freestanding Lazy Susan, ensuring it remains a reliable and efficient storage solution.
When installing Lazy Susan pantry storage, careful planning and consideration of clearance, measurement accuracy, alignment, and stability are essential steps. These considerations ensure that the Lazy Susan not only enhances the aesthetic appeal of your pantry but also maximizes functionality, making every item easily accessible and efficiently stored. Whether you opt for a built-in or freestanding model, these installation tips will help you fully realize the benefits of adding a Lazy Susan to your pantry storage arsenal.
Designing your Lazy Susan pantry storage is an opportunity to create a more organized, accessible, and efficient kitchen space. By carefully considering the size, material, and customization options, you can design a Lazy Susan system that perfectly fits your pantry’s needs, making cooking and meal preparation a breeze.
FAQ on Building and Designing Lazy Susan Pantry Storage
What is a Lazy Susan pantry storage?
How do I choose the right size Lazy Susan for my pantry?
Can I build a Lazy Susan pantry storage myself?
How do I install Lazy Susan bearings?
How can I customize my Lazy Susan pantry storage?
Conclusion
Crafting a Lazy Susan pantry storage introduces an innovative and efficient method to maximize kitchen organization and accessibility. This dynamic storage solution ensures that every item is easily within reach, eliminating the hassle of searching through cluttered shelves. The benefits of integrating a Lazy Susan into your pantry are clear: improved space utilization, enhanced accessibility, and a more organized kitchen environment, making meal preparation a breeze.
If you liked this project, you will also like viewing these kitchen ideas…


