Last Updated on February 14, 2025 by teamobn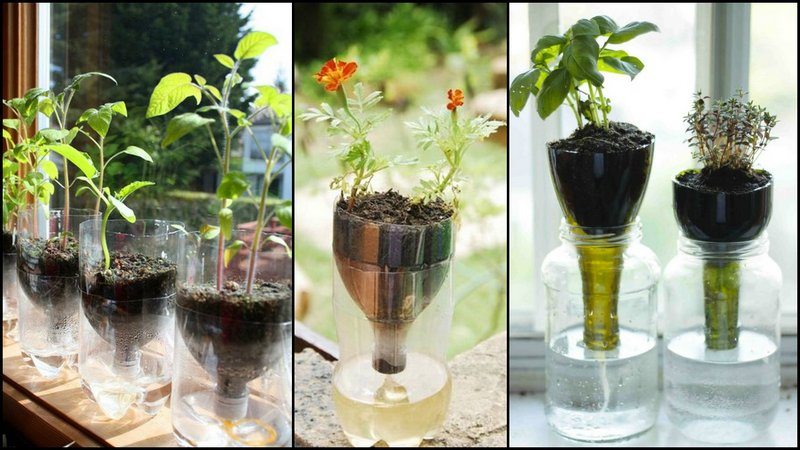
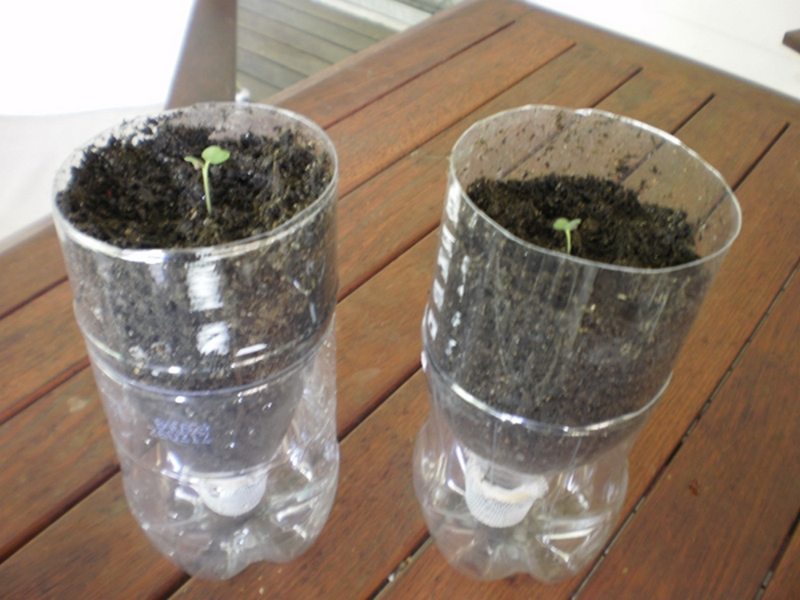
This simple idea is a great way to start seedlings without spending a cent. The pots are made from empty PET bottles that you’d usually put into the recycling bin. Instead of recycling, here’s a great way to upcycle those bottles!
If you’re new to growing your own produce, these seed starter pots help a lot. You can easily see when you need to replenish the water source, and because of this, you’re sure that your plants are watered with the right amount at the right time. It’s also much better to water from the bottom rather than the top since fungus and mildew can easily kill or weaken your seedlings if the moisture stays around too long.
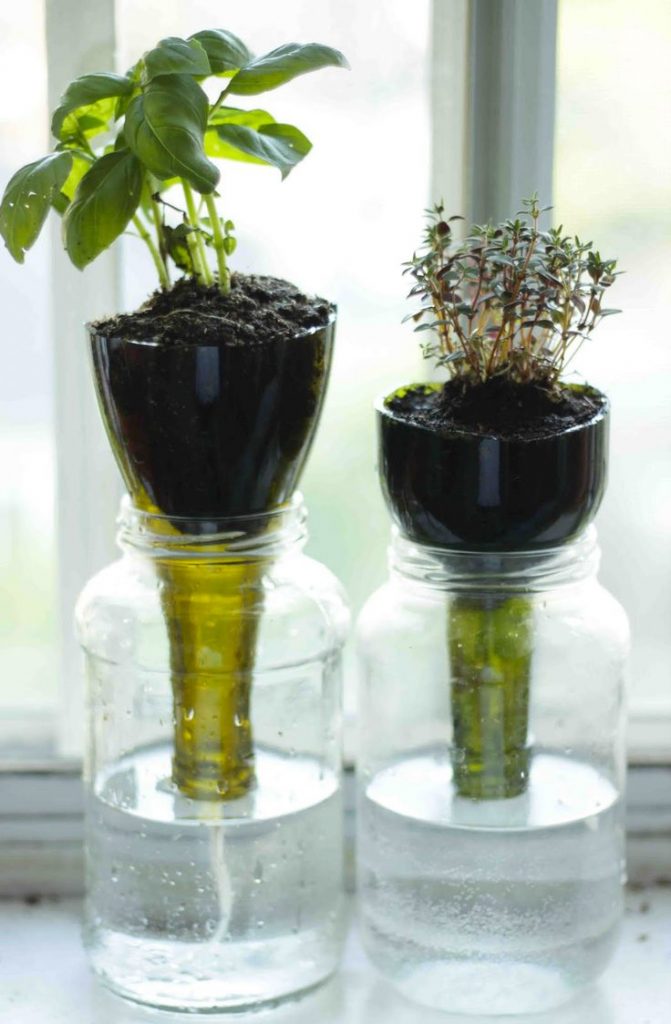
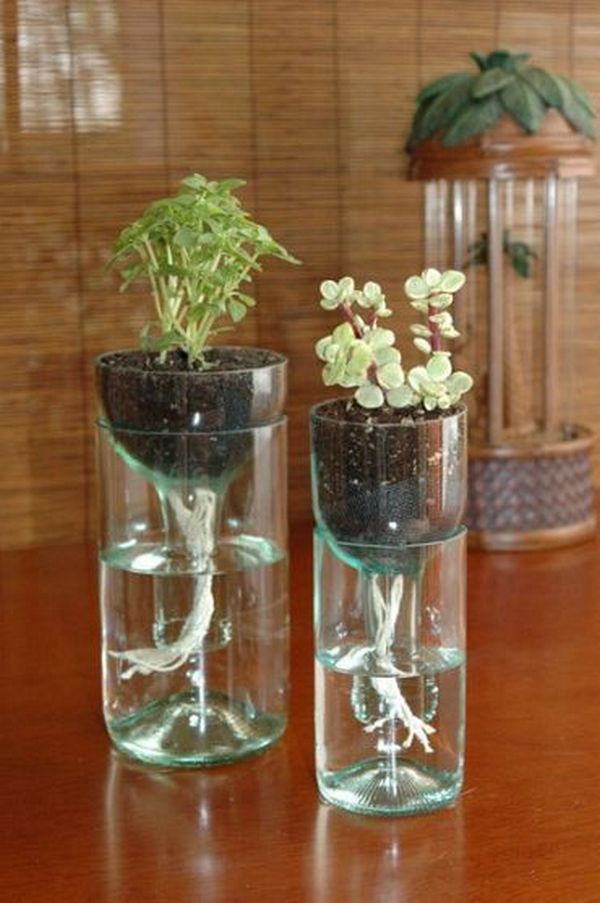
Don’t have plastic bottles to recycle? You can also use glass ones like wine or Gatorade bottles, or mason jars and anything that will fit those jars which are shaped like a funnel.
What we like even more about this DIY seed starter pot is that it would fit most window sills at home, especially in the kitchen. If you are in the mood to make beautiful, designed bottle planters it can also serve as your green indoor decoration.
Making Self-Watering Seed Starter Pots
There are a few things you need to make your own seed starter pots, such as 2-liter bottles, seeds, potting soil, thick string or yarn (cotton or poly seem to work well), a screwdriver, hammer, and a blade or scissors for cutting the bottles.
Materials:
- 2-litre Bottles
- Potting Soil
- Seeds
- Cotton String
- Block of Wood
Tools:
- Awl/Phillips Screwdriver
- Hammer
- Blade/Cutter
Steps:
- Gather the materials.
- Divide the bottle by cutting using the cutter blade.
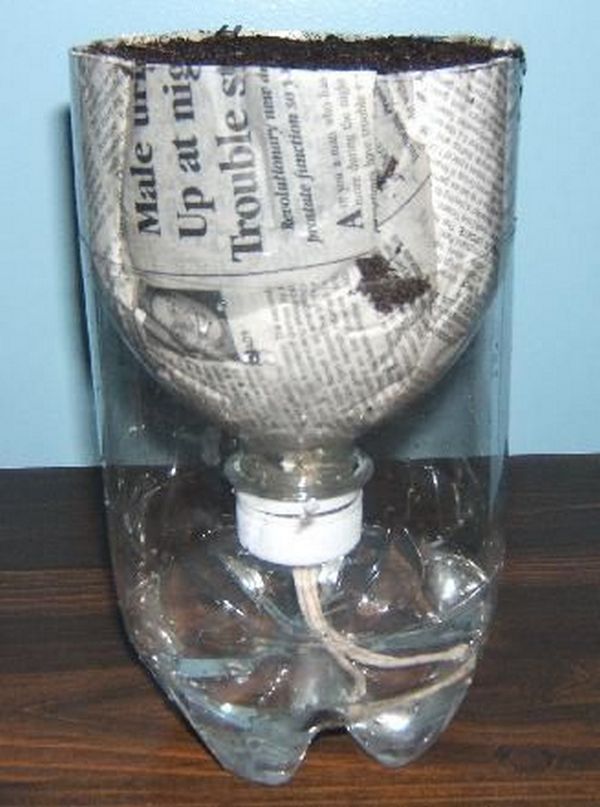
- To create a hole, the bottle cap needs to be punched in the center with a screwdriver and hammer.
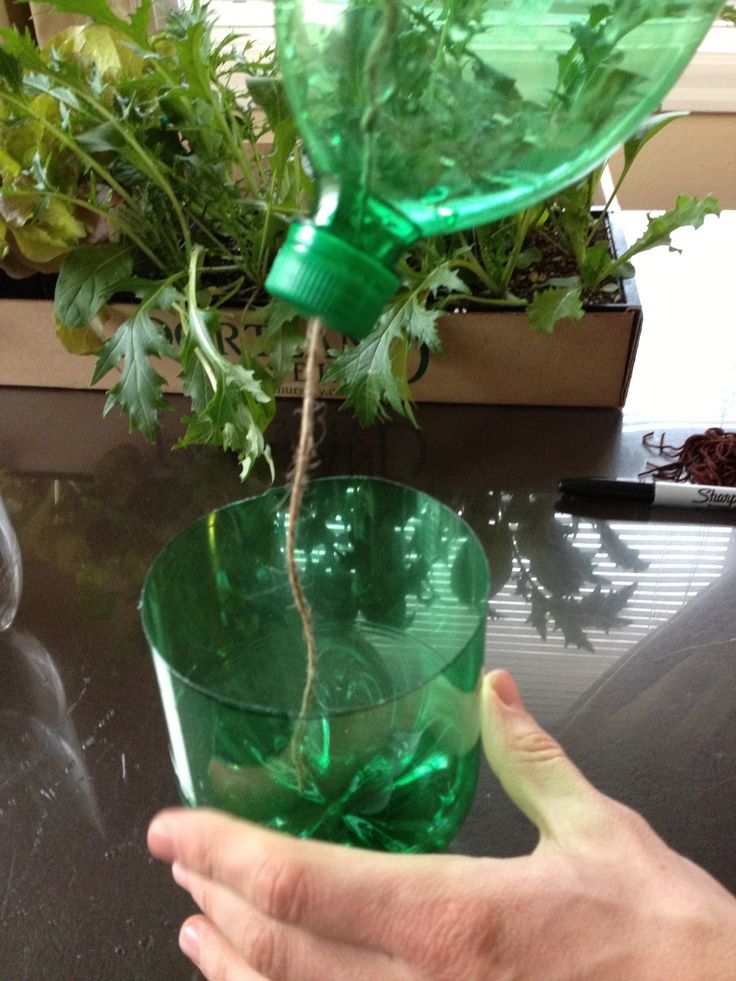
- Cut a 1-1.5-foot length of yarn, fold it twice, and make a loop at one end.
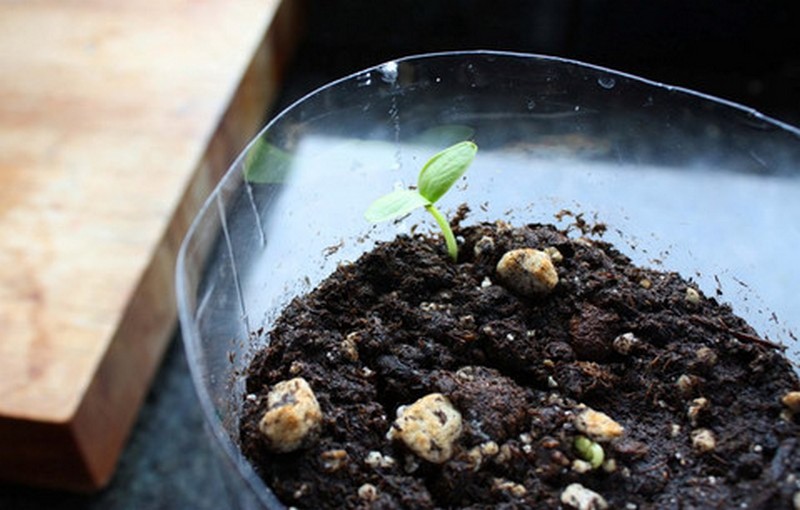
- Thread the yarn through the hole in the cap, and make sure the knot is inside the cap. The yarn will serve as the wick. Water will be soaked up from underneath the basin and into the soil using the wick. Soil moisture will be evenly regulated since only what the plant needs will be distributed.
- Return the cap back on the top of the bottle, then place the bottle cap inside the base.
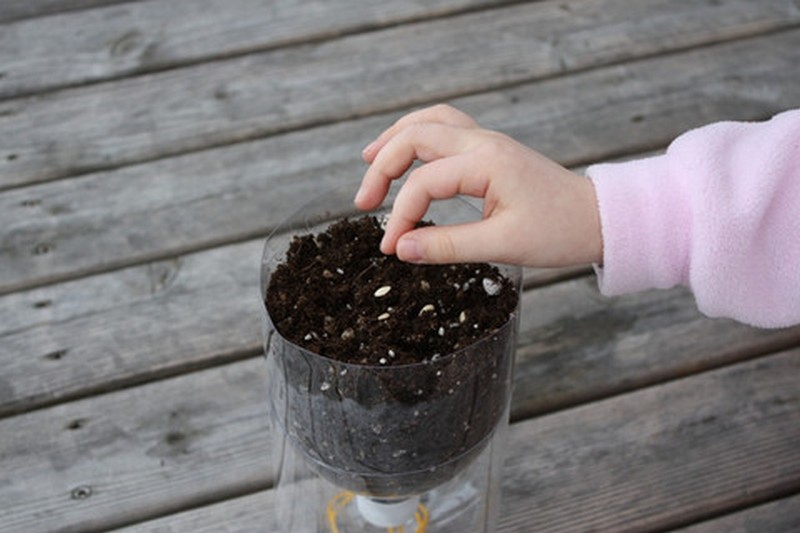
- Add the soil and the seed.
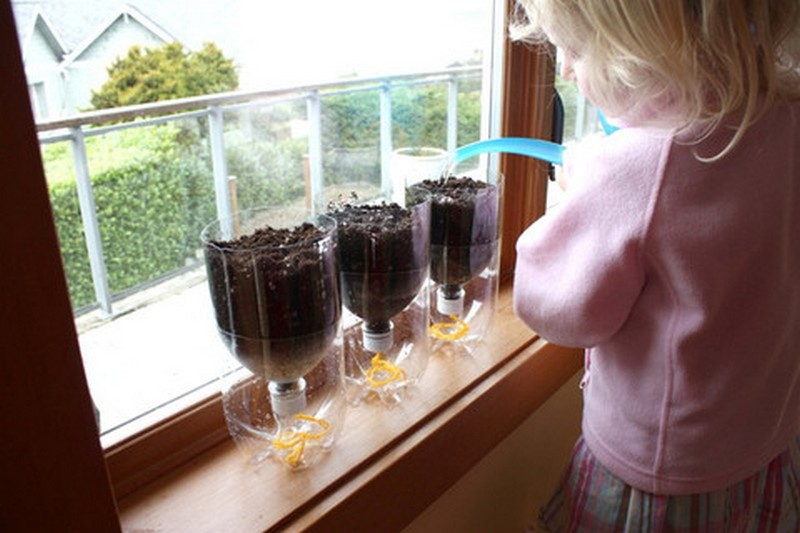
- On the first day, we will have to add water to the soil, to ensure even distribution of water. After that, we can just add water to the base whenever the water is all used by the plants. The water is used by the plants with the help of the yarn.
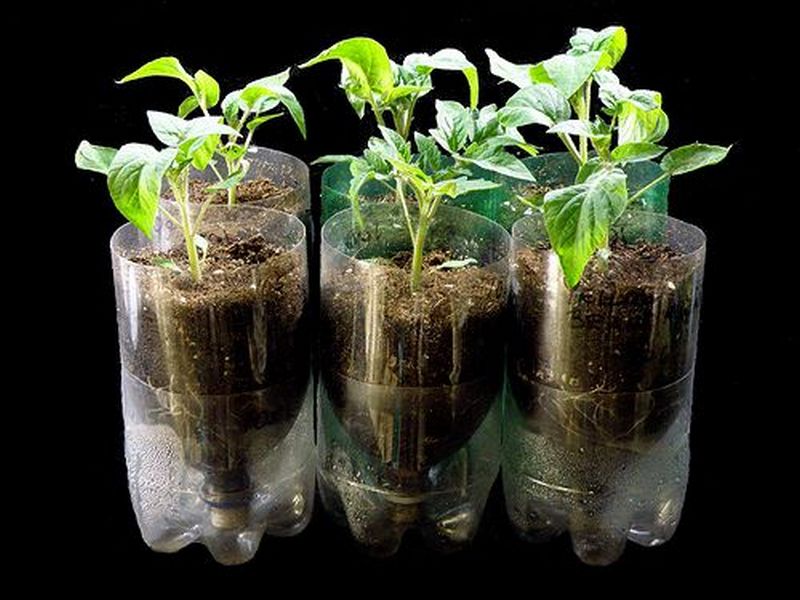
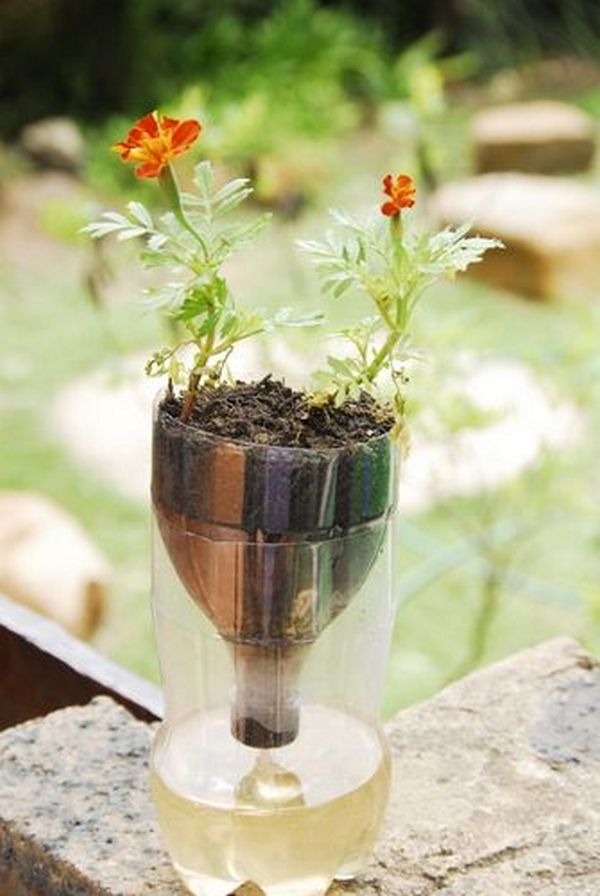
Below are incredible seed starter pot samples.
Click on any image to start the lightbox display. Use your Esc key to close the lightbox. You can also view the images as a slideshow if you prefer 😎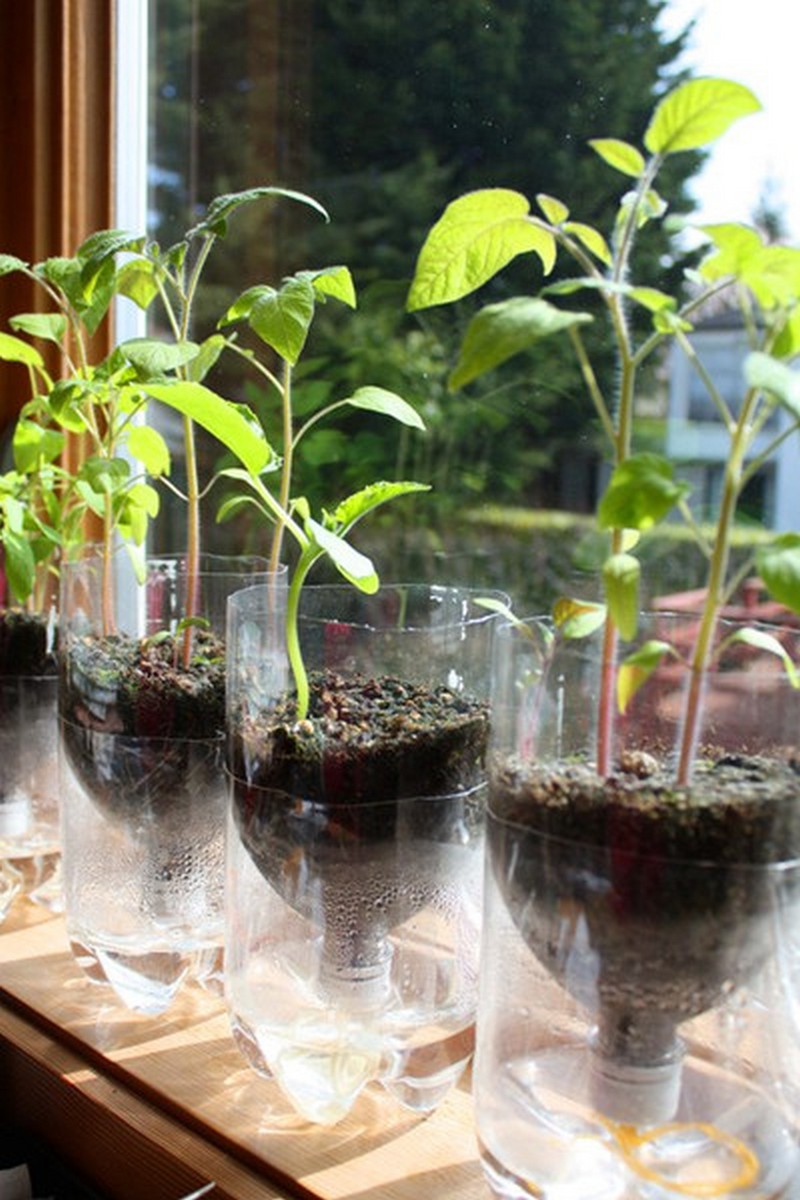

Best Plants to Grow in Self-Watering Seed Starters
A self-watering seed starter provides an ideal environment for seedlings by ensuring consistent moisture, reducing watering errors, and promoting strong root development. While many plants can benefit from this setup, some species thrive particularly well due to their moisture needs and growth habits. Choosing the right plants will help you maximize success and get the most out of your self-watering seed starter.
Herbs That Thrive in Self-Watering Seed Starters
Herbs are some of the best plants to start in a self-watering seed starter, especially if you want to grow fresh ingredients for cooking. Many herbs require consistent moisture during their early stages but prefer well-drained soil once they mature. A self-watering system provides just the right balance for strong initial growth. Some of the best herbs to start this way include:
- Basil – Needs steady moisture and warmth to germinate quickly.
- Parsley – Takes longer to sprout but benefits from consistent hydration.
- Cilantro – Prefers damp soil during early growth stages.
- Mint – Grows vigorously with regular moisture and spreads easily.
- Chives – Require a consistently moist environment for good root development.
Leafy Greens for a Steady Supply of Fresh Produce
Leafy greens are an excellent choice for self-watering systems since they grow quickly and require even moisture to prevent bitterness or premature bolting. Many salad greens and nutrient-rich vegetables flourish in a self-watering setup, including:
- Lettuce – Germinates fast and stays tender with consistent hydration.
- Spinach – Prefers cool, moist soil, making it a perfect fit.
- Kale – Needs even moisture for strong, healthy leaves.
- Swiss chard – Benefits from a steady water supply to develop vibrant, large leaves.
Vegetables That Benefit from a Controlled Moisture Supply
Certain vegetables are easier to start in a self-watering seed starter, as they require stable moisture levels for germination and early growth. These plants often struggle if the soil dries out too quickly, making them well-suited for this method:
- Tomatoes – Develop strong root systems and benefit from bottom watering.
- Peppers – Need warmth and steady moisture to sprout successfully.
- Eggplants – Require even hydration for optimal growth.
- Cucumbers – Thrive when given a consistent water supply from below.
Flowers That Flourish in Self-Watering Systems
Starting flowers from seed can be tricky if moisture fluctuates too much, but a self-watering seed starter helps create an ideal growing environment. Many ornamental flowers germinate best with steady hydration, such as:
- Marigolds – Grow quickly and benefit from consistent moisture in their early stages.
- Petunias – Prefer damp soil for germination but need good drainage later.
- Zinnias – Thrive in self-watering systems and transition well to garden beds.
- Impatiens – Require constant moisture for healthy sprouting.
Using a self-watering seed starter ensures that delicate seedlings get the hydration they need to develop strong roots and thrive. Whether you’re growing herbs, leafy greens, vegetables, or flowers, this system provides the perfect conditions for success.
Troubleshooting Common Issues
A self-watering seed starter makes germinating seeds easier by providing consistent moisture, but like any system, it can encounter issues. Problems such as mold, clogged wicks, or overwatering can affect seedling growth. Understanding these common issues and how to fix them will help keep your seedlings healthy and thriving in your self-watering seed starter.
Mold and Algae Growth
Excess moisture and stagnant water can lead to mold or algae forming on the soil’s surface or inside the water reservoir. This issue is common in humid environments or if the system doesn’t have proper airflow.
Solution:
- Reduce humidity by placing the seed starter in a well-ventilated area.
- Scrape off any visible mold or algae and allow the top layer of soil to dry slightly before adding more water.
- Use a thin layer of cinnamon on the soil—it has natural antifungal properties.
- Clean the water reservoir regularly to prevent algae buildup.
Clogged or Ineffective Wicking System
Drawing water up to the soil depends on the wick, which might get clogged with soil particles or lose efficacy if it is either too short or too thick. Should seedlings appear dry despite reservoir water, the wick could not be functioning as it should.
Solution:
- The wick should be totally submerged in water and reach far into the ground.
- Remove a blocked wick, rinse it well, then re-insert it.
- Use natural fiber wicks like cotton, which absorb water more efficiently.
- If the wick is too thick and restricting water flow, replace it with a thinner piece of yarn or fabric.
Overwatering and Waterlogged Soil
Although a self-watering seed beginning helps avoid underwatering, occasionally it causes too much moisture, which can lead to root rot or fungal problems. Usually this results from too much water supplied to the reservoir or from a too thick wick.
Solution:
- Check that the soil is damp but not soggy. If it’s too wet, let the top layer dry out before adding more water.
- Use a lighter potting mix with good aeration to help drainage.
- If the wick is too thick and soaking up too much water, switch to a thinner one.
- Remove standing water from the reservoir if it’s full for extended periods.
Seeds Not Germinating
If seeds fail to sprout, it could be due to old seeds, incorrect soil temperature, or excessive moisture.
Solution:
- Use fresh seeds and check their viability before planting.
- Make sure the seed starter is in a warm location, as many seeds require a consistent temperature to germinate.
- Keep the soil damp but not soaked—too much moisture can cause seeds to rot before they sprout.
Weak or Leggy Seedlings
Seedlings that are thin, tall, and weak often result from insufficient light, excessive warmth, or overly wet conditions.
Solution:
- Place the seed starter in a bright location or supplement with grow lights for at least 12-16 hours per day.
- Reduce warmth slightly if seedlings appear to be stretching too much.
- Ensure the water level is not too high, as excessive moisture can contribute to weak stems.
By addressing these common issues, your self-watering seed starter will provide the ideal growing conditions for strong, healthy seedlings. Regular monitoring and small adjustments can help prevent problems before they affect your plants.
Conclusion
Making a self-watering seed starter is a simple and cost-effective way to ensure your seedlings get the right amount of moisture for healthy growth. With just a few recycled materials and basic tools, you can create a low-maintenance system that promotes strong roots and prevents common watering mistakes. Whether you’re growing herbs, vegetables, or flowers, a self-watering seed starter provides an efficient and sustainable way to start your plants with ease.
If you liked this project, you will also like viewing these easy DIY projects…